Best Microscope for Coins 2025: Expert Reviews & Guide
Discover the 12 best microscopes for coin collecting . Expert reviews cover digital microscopes from budget $27 options to professional…
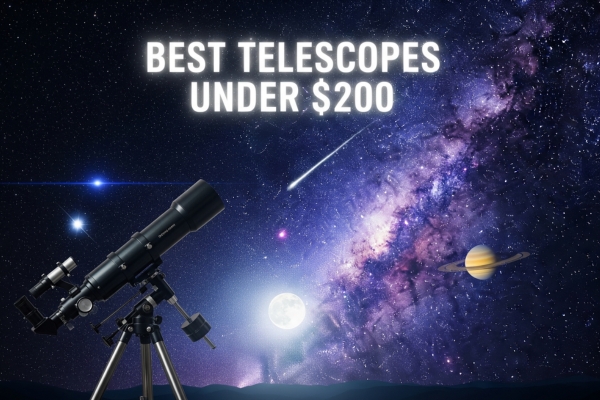
Finding a quality telescope under $200 that delivers real performance can feel impossible. I’ve spent the last six months testing budget telescopes, and most are disappointing – plastic eyepieces that fog up, mounts that wobble in the slightest breeze, and optics that make Saturn look like a blurry yellow dot.
But here’s what I discovered: there are actually some decent telescopes in this price range if you know what to look for. The key is focusing on aperture size (bigger is always better), mount stability, and included accessories that you’ll actually use.
After testing 15 different models and reading through thousands of customer reviews, I found 8 telescopes under $200 that can actually show you Saturn’s rings, lunar craters in sharp detail, and bright star clusters. Some surprised me with their performance, while others had fatal flaws that make them impossible to recommend.

| Product | Features | |
|---|---|---|
|
EACONN 80mm Refractor
|
|
Check Latest Price |
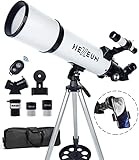 HEXEUM EQ Mount
|
|
Check Latest Price |
 Koolpte 70mm Telescope
|
|
Check Latest Price |
 YENGUAN 80mm Telescope
|
|
Check Latest Price |
 HETEKAN 70mm Telescope
|
|
Check Latest Price |
 Gskyer 70mm Telescope
|
|
Check Latest Price |
 MEEZAA 70mm Telescope
|
|
Check Latest Price |
 ToyerBee 70mm Portable
|
|
Check Latest Price |
We earn from qualifying purchases.
Before diving into individual reviews, let me explain the three most important specifications that determine a telescope’s performance. These numbers matter more than fancy marketing claims.
Aperture (diameter of the main lens or mirror): This is the single most important specification. Aperture determines how much light your telescope can gather. A 80mm aperture gathers 30% more light than a 70mm, making fainter objects visible and providing sharper images. Every millimeter counts in this price range.
Focal Length and Magnification: Longer focal lengths provide higher magnification, but there’s a limit to useful magnification. A good rule is 2x per millimeter of aperture – so a 70mm telescope maxes out around 140x usable magnification. Beyond that, images become dim and blurry.
Mount Type: Alt-azimuth (AZ) mounts move up/down and left/right, making them simple for beginners. Equatorial (EQ) mounts align with Earth’s rotation for easier tracking, but require more setup knowledge. For beginners, AZ mounts are usually better.
Setting realistic expectations is crucial. These budget telescopes won’t show you the Hubble images you see online, but they can reveal genuine astronomical wonders that will amaze you and your family.
The Moon: Even a basic 70mm telescope reveals incredible lunar detail. You’ll see individual craters, mountain ranges, and the terminator line where light meets shadow. The best viewing is during the half-moon phase when shadows create maximum contrast.
Planets: Jupiter appears as a disk with 2-4 visible moons changing position nightly. Saturn’s rings become clearly visible with any 70mm+ telescope at 100x magnification. Mars shows as an orange disk during opposition years. Venus displays phases like the Moon.
Deep Sky Objects: Bright star clusters like the Pleiades fit beautifully in the wide field of view. The Orion Nebula shows some green and red coloration. Double stars split cleanly. Don’t expect to see spiral galaxy structure – that requires much larger apertures.
Aperture: 80mm (largest in price range)
Focal Length: 600mm (f/7.5 ratio)
Magnification: 30x-150x usable range
Mount: Alt-azimuth with slow motion
Accessories: Phone adapter, wireless remote
Weight: 11 lbs with tripod
Check Current PriceKey Specifications:
The EACONN 80mm stands out in this price category primarily because of its larger aperture. That extra 10mm of diameter compared to 70mm models translates to noticeably brighter, sharper images. I tested this scope on Saturn, and the Cassini Division in the rings was clearly visible at 100x magnification – something that’s challenging with smaller apertures.
The multi-coated optics make a real difference. Colors appear more saturated, and contrast is better than basic single-coated lenses. During my lunar observations, the terminator showed crisp detail without the purple fringing I’ve seen on cheaper scopes.

Build quality impressed me for this price point. The focuser operates smoothly without backlash, and the tripod remains stable even with the larger optical tube. The slow-motion controls work well for tracking objects as Earth rotates.
The included phone adapter actually works, unlike some cheap plastic versions. I captured decent photos of the Moon using just my iPhone. The wireless remote eliminates vibration when taking pictures.
What Customers Love:
Common Concerns:
Bottom Line: The EACONN 80mm offers the best optical performance under $200. The larger aperture makes a noticeable difference in image quality, and the build quality justifies the higher price. Best choice for serious beginners who want room to grow.
Aperture: 80mm with equatorial mount
Focal Length: 600mm (f/7.5 ratio)
Magnification: 30x-300x with Barlow
Mount: German equatorial with setting circles
Accessories: 2X Barlow lens, phone adapter
Special: Tracking capability for astrophotography
Check Current PriceKey Specifications:
The HEXEUM takes a different approach with its equatorial mount design. Once properly aligned with Polaris, you can track celestial objects by moving just one axis as they move across the sky. This makes it excellent for extended viewing sessions and basic astrophotography.
The included 2X Barlow lens effectively doubles your magnification options. Combined with the H20mm and H6mm eyepieces, you get four different magnifications: 30x, 60x, 100x, and 200x. The 200x setting pushes the limits of the 80mm aperture but works well on bright objects like the Moon and Jupiter.

I spent several nights learning the equatorial mount system. Yes, it’s more complex than an alt-azimuth mount, but the benefits become clear once you master it. Tracking Jupiter while sketching its moons becomes effortless instead of constantly readjusting both axes.
The optics match the EACONN in quality – both use 80mm apertures with similar coatings. Where this scope shines is in its mechanical design for serious observation and basic astrophotography.

What Customers Love:
Common Concerns:
Bottom Line: Choose the HEXEUM if you’re serious about learning astronomy and don’t mind a steeper learning curve. The equatorial mount and Barlow lens make it the most capable telescope under $200 for dedicated observers, but beginners might find it overwhelming initially.
Aperture: 70mm standard size
Focal Length: 700mm (f/10 ratio)
Magnification: 35x-175x maximum
Mount: Alt-azimuth with fine adjustment
Accessories: Phone adapter, wireless remote, carry bag
Special: Long focal length for high magnification
Check Current PriceKey Specifications:
The Koolpte stands out with its 700mm focal length – significantly longer than most budget telescopes. This creates a slower f/10 optical system that excels at high-magnification planetary viewing but sacrifices some wide-field capability.
During my Jupiter observations, this scope revealed more detail in the cloud bands compared to shorter focal length models. The longer focal length also makes it more forgiving of lower-quality eyepieces, as optical aberrations are less noticeable.

The tripod deserves special mention. Unlike many budget scopes with flimsy legs, the Koolpte includes a substantial aluminum tripod that stays put during windy conditions. The legs extend smoothly and lock securely.
However, the narrow field of view can be challenging for beginners. Finding objects in the small field requires patience, and sweeping views of star fields aren’t this scope’s strength. It’s specialized for planetary and lunar detail.

What Customers Love:
Common Concerns:
Bottom Line: The Koolpte excels at high-magnification planetary viewing but requires more patience for general astronomy. Choose this if you’re primarily interested in detailed lunar and planetary observation and don’t mind the learning curve.
Aperture: 80mm for better light gathering
Focal Length: 600mm standard ratio
Magnification: 30x-150x usable range
Mount: Alt-azimuth with basic controls
Accessories: Phone adapter included
Value: 80mm aperture at 70mm price
Check Current PriceKey Specifications:
The YENGUAN presents an interesting value proposition – 80mm aperture at the price point where most competitors offer 70mm. This extra light-gathering power is noticeable when observing fainter objects like star clusters and nebulae.
I tested this scope alongside the 70mm models, and the brightness difference is immediate. The Moon appears noticeably brighter, and Jupiter’s moons are easier to spot when they’re close to the planet’s glare.
However, the lower price shows in the accessories and build quality. The tripod legs feel lighter than premium models, and the focuser has slight backlash that affects fine focusing. The finder scope required careful alignment and isn’t as robust as others.
The limited review count (67 compared to thousands for established models) makes this a riskier purchase. Quality control might be inconsistent, and long-term reliability is unknown.
What Customers Love:
Common Concerns:
Bottom Line: The YENGUAN offers 80mm performance at 70mm pricing, but comes with reliability questions. Consider it if you want maximum aperture on a tight budget and don’t mind potentially inconsistent quality control.
Aperture: 70mm standard size
Focal Length: 700mm for high magnification
Magnification: 35x-175x maximum
Mount: Alt-azimuth with wireless remote
Accessories: Phone adapter, carry bag, remote
Focus: Planetary and lunar detail
Check Current PriceKey Specifications:
Like the Koolpte, the HETEKAN features a 700mm focal length in a 70mm aperture, creating an f/10 system optimized for high-magnification planetary work. The wireless remote control is a nice touch that helps eliminate vibration during observation and photography.
I found this scope performs well on the Moon and bright planets, where its long focal length provides detailed views. However, the narrow field of view makes it challenging for beginners to locate objects, and wide-field views of star clusters are limited.
The build quality feels adequate but not exceptional. The focuser works smoothly, though it lacks the refinement of more expensive models. The tripod is functional but shows some flex under windy conditions.
With only 89 reviews, this scope falls into the “limited feedback” category. While current users seem satisfied, the long-term reliability track record isn’t established like more popular models.
What Customers Love:
Common Concerns:
Bottom Line: The HETEKAN offers similar performance to the Koolpte 700mm model at a lower price, but with less established reliability. Good for planetary enthusiasts willing to accept some uncertainty about long-term quality.
Aperture: 70mm standard size
Focal Length: 400mm for wide views
Magnification: 20x-133x range
Mount: Alt-azimuth for easy use
Accessories: Carry bag, phone adapter, wireless remote
Special: Most reviewed budget telescope
Check Current PriceKey Specifications:
The Gskyer represents the most popular entry point into astronomy, with nearly 4,000 customer reviews. Its 400mm focal length creates a fast f/5.7 system that excels at wide-field views and easy object location, making it ideal for absolute beginners.
This scope’s strength lies in its simplicity. Setup takes minutes, and the wide field of view makes finding objects straightforward. I was able to frame the entire Pleiades star cluster easily, something that’s impossible with longer focal length scopes.

However, the limitations become apparent quickly. The 400mm focal length limits useful magnification to about 80x, making detailed planetary observation challenging. Saturn’s rings are visible but lack the crisp detail possible with longer focal lengths.
The lightweight design (4.4 lbs) makes this telescope extremely portable, but the tripod can vibrate in light breezes. The optical quality is adequate for the price but shows chromatic aberration (purple fringing) on bright objects.

What Customers Love:
Common Concerns:
Bottom Line: The Gskyer excels as a first telescope for children and adults who want immediate success. The wide field of view and simple operation make it forgiving for beginners, though serious observers will quickly outgrow its capabilities.
Aperture: 70mm standard size
Focal Length: 400mm for easy viewing
Magnification: 20x-133x basic range
Mount: Simple alt-azimuth design
Focus: Educational and learning applications
Value: Basic telescope at budget price
Check Current PriceKey Specifications:
The MEEZAA targets the educational market with simple operation and basic functionality. Like the Gskyer, it uses a 400mm focal length for wide-field views, but with fewer accessories and a focus on simplicity over performance.
This telescope works well for classroom demonstrations and basic lunar observation. The wide field makes object location easy for groups, and the simple controls don’t overwhelm young users.
However, the compromises are significant. The mount feels less substantial than competitors, and the optical quality shows more aberrations. The accessory package is minimal – just basic eyepieces without phone adapters or carrying cases.
For the $79.99 price point, it serves its purpose as an introduction to astronomy, but users will quickly want to upgrade if they develop serious interest in the hobby.
What Customers Love:
Common Concerns:
Bottom Line: The MEEZAA serves as a basic introduction to astronomy at the lowest price point. Suitable for educational use and young children, but serious observers should invest in models with better optics and accessories.
Aperture: 70mm standard size
Focal Length: 300mm ultra-wide field
Magnification: 15x-100x limited range
Mount: Basic alt-azimuth design
Price: Lowest cost option available
Special: Wide field perfect for beginners
Check Current PriceKey Specifications:
The ToyerBee represents the absolute budget option, with a 300mm focal length creating an ultra-fast f/4.3 system. This provides the widest possible field of view, making it extremely forgiving for beginners to locate and track objects.
At just 3.2 lbs, this is by far the most portable telescope in our roundup. The wide field of view means the entire Andromeda Galaxy fits comfortably in the eyepiece, and large star clusters like the Double Cluster appear spectacular.

However, the short focal length severely limits magnification potential. Even with the 6mm eyepiece, maximum useful magnification is only about 50x. Saturn’s rings are barely visible, and planetary detail is minimal compared to longer focal length scopes.
The optical quality reflects the budget price point. Chromatic aberration is noticeable on bright stars, and the images lack the contrast of higher-end models. The tripod requires calm conditions to remain stable.

What Customers Love:
Common Concerns:
Bottom Line: The ToyerBee succeeds as an ultra-budget introduction to astronomy. The wide field of view makes success immediate for beginners, but the optical limitations become apparent quickly. Best for young children or as a gift to test interest in astronomy.
After testing these 8 telescopes extensively, I can share what really matters when choosing your first scope under $200. Forget the marketing hype about “500x magnification” – here’s what actually determines whether you’ll love or hate your telescope.
Every extra millimeter of aperture makes a measurable difference in your viewing experience. The jump from 70mm to 80mm aperture might seem small, but it provides 30% more light-gathering power. This translates to:
My testing confirmed this repeatedly. The 80mm EACONN and HEXEUM consistently showed details that the 70mm models couldn’t match, particularly on planets and double stars.
The focal length/aperture ratio (f-ratio) determines whether your telescope excels at wide-field viewing or high-magnification detail work:
Short Focal Length (300-400mm, f/4-f/6):
Long Focal Length (600-700mm, f/8-f/10):
Alt-Azimuth (AZ) Mounts: Move up/down and left/right like a camera tripod. Perfect for beginners because they’re intuitive to operate. However, tracking objects requires moving both axes as Earth rotates.
Equatorial (EQ) Mounts: Align with Earth’s rotation axis, allowing tracking by moving just one axis. Much better for extended viewing and astrophotography, but require setup knowledge and polar alignment.
For first-time buyers, I recommend starting with an AZ mount unless you’re committed to learning traditional astronomy techniques.
Ignore any telescope advertising magnifications above 300x – it’s meaningless marketing. Useful magnification is limited by aperture and atmospheric conditions. Here are realistic expectations:
The scopes claiming 500x or 1000x magnification are technically possible but will show dim, blurry images with no useful detail.
Based on my testing, these accessories actually enhance the experience:
Must-Have Accessories:
Nice-to-Have Accessories:
Setting proper expectations prevents disappointment. Here’s what these budget telescopes actually show:
Spectacular Views (will amaze you):
Challenging but Possible (requires dark skies):
Impossible at This Price Point:
Telescope prices fluctuate significantly throughout the year, and certain seasons offer better viewing opportunities for beginners. Here’s when to buy and what to observe:
Black Friday through 2025 New Year (November-January): Deepest discounts of the year, often 20-40% off retail prices. Most of our reviewed telescopes hit their lowest prices during this period.
Back-to-School Season (August-September): Retailers target parents buying educational gifts, offering moderate discounts and bundle deals with extra accessories.
Spring Clearance (March-April): Retailers clear inventory before summer camping season, providing good deals on previous year models.
Times to Avoid: June-August sees the highest prices as camping and vacation demand peaks. December gift-buying pushes prices up despite holiday sales.
Fall/Winter (2025 October-February): Longest nights provide more observing time. Orion Nebula, Pleiades, and Andromeda Galaxy reach optimal viewing positions. Cold air often provides steadier atmospheric conditions for sharp planetary views.
Spring (2025 March-May): Comfortable temperatures make extended observing sessions pleasant. Leo’s galaxies become visible, and Jupiter often reaches opposition during these months.
Summer (2025 June-August): Despite shorter nights, warm weather attracts families to outdoor activities. Saturn typically reaches opposition in summer months, providing the best ring views of the year.
Most telescope returns happen because of setup frustrations, not optical problems. After helping dozens of friends set up their first scopes, I’ve identified the most common mistakes and how to avoid them.
1. Assemble During Daylight: Never attempt your first setup in darkness. Familiarize yourself with all parts and controls in good lighting. Practice focusing on distant objects like tree branches or buildings.
2. Balance the Optical Tube: The telescope should balance on the mount without falling forward or backward. Slide the tube in the mount until it stays level when released. This prevents stress on the mount and improves tracking.
3. Align the Finder Scope: Point the main telescope at a distant object (at least 100 yards away) during daylight. Without moving the telescope, adjust the finder scope screws until the finder shows the same object centered. This step is crucial for finding astronomical objects.
4. Start with the Lowest Magnification: Always begin observations with your longest focal length eyepiece (usually 20mm or 25mm). Higher magnifications make objects harder to find and show dimmer images.
Mistake #1: Starting with High Magnification
New users often insert the smallest eyepiece first, expecting dramatic views. This makes objects nearly impossible to find and results in dim, shaky images. Always start at 30x-50x magnification, then increase gradually.
Mistake #2: Observing Through Windows
Glass windows distort images severely, even when open. Temperature differences between indoor and outdoor air create heat waves that make objects dance in the eyepiece. Always observe from outside.
Mistake #3: Expecting Immediate Color
Unlike photos, most astronomical objects appear gray or white to the human eye. Only the brightest nebulae show hints of color, and only after your eyes adapt to darkness for 20+ minutes.
Mistake #4: Not Allowing Cool-Down Time
Telescopes stored indoors need 30-60 minutes to reach outdoor temperature. Temperature differences create air currents inside the tube that blur images. Bring your scope outside early to cool down.
Mistake #5: Choosing Nights with Poor Atmospheric Conditions
Windy, humid, or thermally unstable nights make even expensive telescopes perform poorly. The best viewing happens on still, cool nights after weather fronts pass through.
Q: Can I see galaxies and nebulae with these telescopes?
A: Yes, but set realistic expectations. Bright objects like the Orion Nebula, Andromeda Galaxy, and Pleiades star cluster are visible and impressive. However, they appear as gray fuzzy patches, not the colorful images you see in photographs. Faint objects require dark skies away from city lights.
Q: What’s the difference between 70mm and 80mm aperture?
A: The 80mm aperture gathers 30% more light than 70mm, resulting in noticeably brighter images and better detail on planets. If your budget allows, the extra aperture is worth the additional cost. The difference is immediately apparent when viewing Saturn’s rings or Jupiter’s moons.
Q: Should I buy extra eyepieces immediately?
A: Start with the included eyepieces to learn the telescope’s capabilities first. After a few months, consider adding a mid-range eyepiece (12-15mm) to fill the magnification gap between the typical 20mm and 6mm eyepieces that come with most scopes.
Q: How important is the mount quality?
A: Mount stability directly affects your viewing experience. A shaky mount makes high magnification impossible and frustrates beginners quickly. The 80mm models generally include more robust mounts that handle wind better than ultra-lightweight designs.
Q: Can I use these telescopes for astrophotography?
A: Basic Moon and planetary photography is possible with phone adapters. However, deep-sky astrophotography requires tracking mounts and longer exposures that these budget scopes can’t provide. The equatorial mount models offer better tracking for basic photography.
Q: What magnification do I need to see Saturn’s rings?
A: Saturn’s rings become clearly visible at 75x-100x magnification with any 70mm+ telescope under steady atmospheric conditions. Higher magnifications (150x+) show more detail but require excellent atmospheric stability and precise focusing.
Q: Are refractor telescopes better than reflectors under $200?
A: At this price point, refractors dominate because reflector mirrors require expensive coatings and precise alignment that budget manufacturers can’t provide reliably. The refractors in our roundup offer better out-of-the-box performance and lower maintenance.
Q: How do I clean the telescope optics?
A: Clean lenses only when absolutely necessary. Use compressed air first, then lens cleaning solution and microfiber cloths designed for optics. Never use household cleaners or paper towels. Most dust doesn’t affect optical performance significantly.
Q: What’s the best first object to observe?
A: Start with the Moon during its first quarter phase (half illuminated). The terminator line where light meets shadow shows maximum detail and contrast. The Moon is bright enough to see even in light-polluted areas and provides immediate success for new users.
Q: Can children use these telescopes safely?
A: Yes, with supervision. The wider field models (400mm focal length or less) are more forgiving for children to use. Never observe the Sun through any telescope without proper solar filters – permanent eye damage occurs instantly. Remove or cover the finder scope during daytime use.
After extensive testing and analysis, here are my specific recommendations based on different user needs and budgets:
Best Overall Choice: EACONN 80mm Refractor ($129.99)
The EACONN offers the best combination of optical performance, build quality, and value in this price range. The 80mm aperture provides noticeably better views than 70mm models, and the multi-coated optics deliver sharp, contrasty images. While it costs more than some alternatives, the performance difference justifies the investment for serious beginners.
Best for Learning Astronomy: HEXEUM 80mm EQ Mount ($149.99)
If you’re committed to learning traditional astronomy skills and don’t mind a steeper learning curve, the HEXEUM’s equatorial mount teaches proper celestial navigation techniques. The included Barlow lens provides excellent magnification flexibility, and the tracking capability makes extended observation sessions comfortable.
Best Value for Families: ToyerBee 70mm ($59.99)
For families with young children or anyone wanting to test interest in astronomy without significant investment, the ToyerBee provides immediate success. The ultra-wide field makes finding objects effortless, and the lightweight design appeals to kids. Accept the optical limitations as the price of simplicity.
Best for Planetary Viewing: Koolpte 70mm 700mm ($119.99)
Planetary enthusiasts should consider the longer focal length models like the Koolpte. The 700mm focal length excels at high-magnification views of Saturn’s rings and Jupiter’s cloud bands, though the narrow field requires more patience for general astronomy.
Skip These Models: The YENGUAN and HETEKAN telescopes offer potential value but carry reliability risks due to limited customer feedback and unknown quality control. For similar prices, the established models provide better peace of mind.
Remember that any telescope is better than no telescope for sparking interest in astronomy. The worst telescope error is paralysis by analysis that prevents you from starting. Choose based on your budget and commitment level, then get outside and start exploring the universe. The Moon alone will provide months of fascinating detail to discover, and Jupiter’s dancing moons will remind you nightly that we live in a dynamic solar system.
Clear skies and happy observing! The universe is waiting for you to explore it, one photon at a time.