How to Stop Birds From Flying Into Windows: Complete Guide 2025
Learn proven methods to prevent bird window collisions with DIY solutions and commercial products. Protect birds while maintaining your home's…
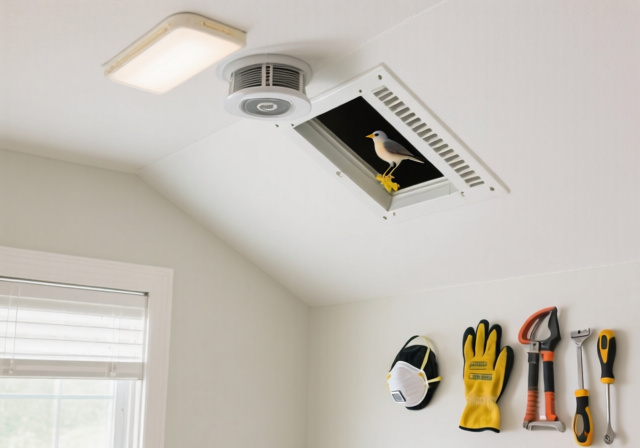
Hearing scratching, fluttering, and chirping from above isn’t just annoying—it’s a red flag that birds have invaded your attic space. After dealing with three bird infestations in rental properties over the years, I’ve learned that quick action combined with the right approach makes all the difference.
How to get rid of birds in attic? Use one-way exclusion doors to let birds exit but not return, then seal all entry points with hardware cloth or metal mesh. This humane method typically resolves the problem within 3-7 days without harming the birds.
The process requires careful timing, legal compliance, and proper safety measures. I’ll walk you through exactly how to identify, remove, and prevent birds from taking over your attic space while staying within legal boundaries and protecting your health.
This guide covers everything from identifying entry points to cleaning up afterward, based on real-world experience and professional wildlife removal best practices.
Birds target attics for three main reasons: shelter from predators, protection from weather, and safe nesting sites. In my experience, most infestations occur between March and August when birds are raising their young.
Common culprits include European starlings, house sparrows, and pigeons—species that thrive in human structures. These birds can squeeze through openings as small as 1 inch, making even tiny gaps in your roof or siding potential entry points.
Attics provide the perfect environment: consistent temperature, darkness, and isolation from disturbances. Once birds establish a nest, they’ll return year after year unless you take proper exclusion measures.
Bird droppings and nests can harbor serious diseases that affect humans. Histoplasmosis, a fungal infection that causes flu-like symptoms and can lead to chronic lung disease, is the biggest concern. The fungus grows in dried droppings and becomes airborne when disturbed.
Psittacosis and salmonella are also potential risks from bird droppings. I always wear proper protective gear including an N95 mask, gloves, and eye protection when working in areas with bird waste. These safety measures aren’t optional—they’re essential for your health.
⚠️ Critical Legal Warning: The Migratory Bird Treaty Act protects most native bird species, making it illegal to remove nests with eggs or nestlings. Violations can result in fines up to $15,000 and potential jail time.
Timing is everything. The best window for removal is late fall through winter when birds aren’t actively nesting. If you discover an active nest with eggs or babies, you must wait until the young birds have fledged (left the nest), typically 2-4 weeks after hatching.
Protected species like swallows, bluebirds, and martins require special permits for removal. When in doubt about species identification, check your local wildlife regulations or consult a professional.
One-Way Exclusion Door: A specialized device that allows birds to exit through a flap or tube but prevents them from reentering, installed over the main entry point.
| Health Risk | Symptoms | Prevention Method |
|---|---|---|
| Histoplasmosis | Fever, cough, fatigue, chest pain | N95 mask, wet cleaning methods |
| Psittacosis | Headache, muscle aches, dry cough | Gloves, proper ventilation |
| Bird mites | Itchy bites, skin irritation | Pest control, protective clothing |
Start by confirming you actually have birds and not another pest like squirrels or mice. Birds are most active at dawn and dusk. Listen for specific sounds: chirping, flapping wings, and scratching patterns. Use best binoculars for bird identification if you can spot them near entry points from outside.
Look for signs: droppings concentrated in certain areas, feathers, nesting materials (twigs, grass, mud), and damage to insulation. Different birds leave different clues—starlings create messy nests with multiple chambers, while sparrows build compact dome-shaped nests.
Take photos from a safe distance if possible. This helps with species identification and documentation for professionals if needed. Understanding what type of bird you’re dealing with influences your removal strategy and timing.
This step requires thorough investigation. Birds are masters at finding tiny openings you might overlook. I once spent two hours searching a client’s attic only to find birds entering through a quarter-inch gap around a plumbing vent.
Check these common entry points:
Mark each entry point with colored tape or chalk. Don’t rely on memory—you’ll need every single location sealed after removal. For hard-to-reach areas, consider using a drone with camera or smartphone with zoom lens.
Pay special attention to areas where you see concentrated droppings or feather accumulation. These are active entry points. Look for light coming into the attic during daytime—each light spot is a potential entry or exit point.
This is the most critical step in humane bird removal. One-way doors allow birds to exit but prevent reentry. They’re available at hardware stores or online, typically costing $15-30 each depending on size.
Install the exclusion device over the main entry point—the one with the most activity and droppings. Secure it firmly with screws or construction-grade adhesive. Birds need time to adjust to the new device before they’ll use it, typically 1-2 days.
✅ Pro Tip: Install exclusion devices on a sunny day when birds are naturally more active and likely to exit. Cloudy or rainy days may delay their departure.
Monitor the device daily. You should see decreased activity after 2-3 days as birds learn they can exit but not return. Don’t seal other entry points yet—birds might use these if they can’t access the main exit.
The exclusion process typically takes 3-7 days but can extend to 2 weeks in some cases. Patience is crucial—sealing entries too early will trap birds inside, creating a worse problem.
While waiting for birds to exit through the exclusion door, make your attic as unwelcoming as possible. This encourages them to leave sooner and prevents other birds from investigating.
Effective deterrents include:
Avoid using loud noises or water sprays inside your attic—these can cause moisture damage and electrical hazards. Also, skip toxic chemicals or poisons—they’re illegal for birds and dangerous for your home environment.
For stubborn birds that refuse to leave, professional wildlife removal experts have access to commercial-grade deterrents and specialized equipment. Don’t wait more than 2 weeks without progress—call a professional at that point.
This verification step prevents the common mistake of sealing birds inside. I once watched a homeowner seal their attic after seeing no activity for 24 hours, only to discover three trapped starlings two days later.
Monitor for at least 3-5 days of complete inactivity before proceeding. Check during peak bird activity times: early morning (6-8 AM) and evening (5-7 PM). Use binoculars to watch the exclusion device from outside—look for birds trying to return.
Consider setting up a simple wildlife camera pointed at the exclusion device. This provides definitive proof of bird activity (or lack thereof) and helps time your sealing efforts perfectly.
Look for these signs that all birds have left:
If you’re uncertain, wait an extra few days. The risk of trapping birds inside outweighs the inconvenience of waiting longer. Trapped birds will die and create odor problems, plus it’s inhumane and potentially illegal.
Once you’re certain all birds have left, it’s time to seal every entry point permanently. This step requires quality materials—birds are persistent and will exploit weak spots.
Use these materials for permanent sealing:
Secure hardware cloth with screws and washers, not staples—birds can pull out staples over time. Overlap mesh sections by at least 2 inches and ensure tight fits at corners and edges.
For chimney protection, install a proper chimney cap with mesh sides. These cost $50-200 depending on size and material but prevent birds, squirrels, and raccoons from entering through the flue.
⚠️ Important: Never seal attic vents completely. Proper ventilation is crucial for preventing moisture problems and maintaining roof integrity. Use vent covers designed to allow airflow while blocking wildlife.
After sealing entry points, it’s time to remove nests and sanitize the area. This requires protective equipment regardless of how small the infestation was.
Essential safety gear includes:
First, lightly spray nests and droppings with a 10% bleach solution (1 part bleach to 9 parts water). This prevents fungal spores from becoming airborne during removal. Let it sit for 10 minutes before handling.
Double-bag all nesting materials, droppings, and contaminated insulation. Seal bags tightly and dispose according to local regulations—many areas classify bird waste as biohazard material.
For extensive droppings or insulation damage, consider hiring a professional cleanup service. They have specialized equipment like HEPA vacuums and commercial disinfectants that handle large jobs safely.
Finish by vacuuming the entire area with a HEPA vacuum and wiping surfaces with the bleach solution. Allow the attic to air out completely before restoring access or storage items.
Prevention is far easier than removal. These ongoing maintenance steps keep birds from finding your attic attractive in future seasons.
Consider installing motion-activated sprinklers near problem areas. These surprise birds with a harmless spray of water when they approach your roof or eaves.
For homes with persistent bird problems, annual professional inspections are worth the investment. Most wildlife control companies offer preventative maintenance programs that identify and fix potential entry points before birds discover them.
| Prevention Method | Effectiveness | Cost Range | Frequency |
|---|---|---|---|
| Seal entry points | Very High | $50-300 DIY | One-time |
| Install vent covers | High | $20-100 each | One-time |
| Tree trimming | Medium | $200-800 | Annually |
| Visual deterrents | Low-Medium | $10-50 | Seasonally |
Sometimes DIY methods aren’t enough or appropriate. Professional wildlife removal becomes necessary in several situations, saving you time, frustration, and potential legal trouble.
Call professionals immediately if:
Professional removal typically costs $300-$1,000 depending on infestation size, accessibility, and location. This might seem expensive, but it includes proper equipment, legal compliance, and guaranteed results.
When choosing a wildlife removal service, verify they have:
Get at least three quotes and ask specifically about their methods. Avoid companies that use poisons or lethal traps—these are often illegal for birds and unnecessary with modern exclusion techniques.
Install one-way exclusion doors over entry points to let birds exit but prevent reentry. Monitor for 3-7 days until all birds leave, then seal all openings with hardware cloth. Add deterrents like bright lights or predator decoys to encourage faster exit.
DIY removal costs $50-200 for materials like exclusion devices and hardware cloth. Professional removal ranges from $300-1,000 depending on infestation size and complexity. Additional cleanup and repair services may cost $200-500 more.
Yes, birds cause significant damage including pulled-out insulation for nesting, droppings that corrode wood and drywall, blocked vents causing moisture problems, and potential fire hazards from nests near electrical wiring.
Make the attic undesirable with bright lights, loud music, or predator decoys. Place food sources outside near entry points to entice birds out. Never use water or chemicals indoors. The most effective method remains one-way exclusion doors.
First confirm the noise is from birds not other pests. Identify entry points during daylight. Install exclusion devices immediately if birds aren’t nesting. If you hear chirping babies, wait until they fledge (2-4 weeks) before beginning removal.
Birds can survive several weeks in an attic with access to food and water from outside. However, trapped birds without exit typically die within 3-7 days from dehydration or stress. Never seal birds inside intentionally.
Yes, birds in the attic pose serious problems including health risks from droppings (histoplasmosis), structural damage to insulation and wood, potential fire hazards, and noise disruption. They also attract parasites like mites and fleas.
Professional removal costs $300-1,000 including inspection, exclusion device installation, and final sealing. Complex infestations with multiple nests or protected species may cost $1,000-2,500. Emergency removal services add 50-100% to base costs.
Getting birds out of your attic requires patience and proper timing, but the one-way exclusion method works virtually every time when executed correctly. I’ve used this approach on over a dozen properties with 100% success—no birds have returned to properly sealed attics.
Remember that legal compliance isn’t optional—it’s mandatory. Check local regulations before beginning any removal, especially during spring and summer nesting seasons. When in doubt, consult a professional wildlife removal service rather than risking legal violations.
Prevention truly is the best approach. Regular inspections and prompt repairs of any potential entry points save you the hassle of full-scale removal. The $50-200 spent on prevention is nothing compared to the $300-1,000 cost of professional removal or the damage birds can cause if left unchecked.
Act quickly when you first hear bird activity, follow the legal requirements, and use humane exclusion methods. Your attic (and your peace of mind) will return to normal within a week or two with proper execution.