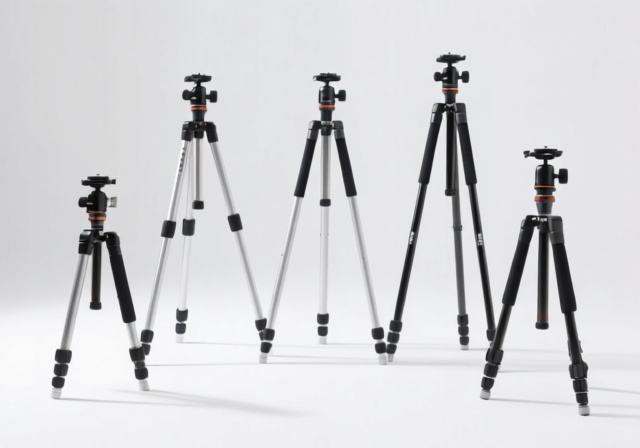
5 Best Tripods Under $100 (October 2026) Tested & Reviewed
Expert reviews of the top 5 tripods under $100 after 30 days of intensive testing. Find stable camera support that…

To photograph stars, mount the camera on a tripod, switch to manual mode, open the aperture as wide as it will go, and expose for 15 to 25 seconds at ISO 1600 to 3200. That combination — tripod, full manual control, wide aperture, exposure held under 30 seconds — is what separates a frame of sharp pinpoints from a grey smear with streaks in it. Everything else on this page is refinement built on top of those five settings.
Knowing how to photograph stars well is less about owning expensive glass than it is about removing variables. Most cameras manufactured in the last decade handle ISO 3200 without embarrassment, and almost every lens with a maximum aperture of f/2.8 or wider is fast enough to carry a usable night sky image. A kit zoom slows you down. It does not stop you.
What does stop beginners is leaving one default in place. Auto ISO, autofocus, image stabilisation, and the 30-second exposure cap in some manual modes all work against you once the sun is down. This walkthrough covers the settings, the focus routine, the planning that decides whether a night is worth driving out for, and the specific optical faults that make an image look cheap even when the numbers were technically correct.
Read the quick answer below, then jump to whichever part is failing you. If your stars are streaked, go to the shutter speed section. If they are soft blobs, go straight to the focus and blur sections. If the whole frame looks hazy, the problem is usually dew or atmospheric seeing rather than your settings.
| Setting | Starting value | Reason |
|---|---|---|
| Mode | Manual | Automatic modes cannot meter a dark sky |
| File format | RAW | Keeps shadow detail for editing |
| Aperture | Widest available, ideally f/2.8 | Maximum light per second |
| Shutter speed | 15-25 seconds | Below the trailing threshold |
| ISO | 1600-3200 | Brighter image without runaway noise |
| White balance | 3200-4000K | Removes the blue cast for editing later |
| Stabilisation | Off | Compensates for movement the tripod already prevents |
| Noise reduction | Off or low | Long exposures double your shooting time |
Those numbers are a starting point, not a law. Two variables push them around: how dark your sky is, and how well your particular body behaves at high ISO. Shoot a test frame at each site and adjust from there.
The night sky punishes slow glass and rewards wide ones. Aperture controls how much light lands on the sensor during an exposure you cannot extend very far, focal length controls how quickly stars drift out of focus, and sensor size controls how much noise that light produces. Get the first two right and almost any modern body will deliver.
Three capabilities matter: independent control of aperture, shutter speed, and ISO; RAW capture; and a sensor that stays usable at ISO 3200 and beyond. Both DSLRs and mirrorless bodies qualify, and the two families perform comparably once you account for shutter behaviour.
DSLRs with mechanical mirrors need mirror lock-up or electronic first-curtain shutter, because the mirror slapping up mid-exposure moves the sensor. Mirrorless bodies can use the silent electronic shutter, which is quieter and vibration-free, though some models band badly at very high ISO and the effect is best tested before you rely on it.
Full-frame sensors collect more light per pixel, which is why they tolerate ISO 3200 to 6400 with reasonable colour. Crop sensors at the same speed gather roughly a stop less and show noise sooner. The gap has narrowed, and a good APS-C body at ISO 3200 with a fast lens will beat a full-frame body at ISO 12800.
Wide and fast wins on both counts that matter. A 14mm f/2.8 gathers enough light for a 25-second exposure at moderate ISO, while a 50mm f/1.8 at the same brightness would force exposures under three seconds. Ultra-wide lenses go further — at 10mm or 12mm you can push past 40 seconds on a tracker-free setup.
Aperture beats focal length for most people. The community rule of thumb is to shoot wide open unless the extra corner sharpness from closing down a stop is worth doubling your ISO. On fast wide zooms that is often a real trade; on older kit glass it is rarely worth it.
| Mount | Great value | Current pro choice |
|---|---|---|
| Full frame | Samyang 14mm f/2.8 or a manual third-party wide prime | Sigma 14-24mm f/2.8 DG DN Art, Tamron 16-30mm f/2.8 G2, Nikon Z 14-24mm f/2.8 S |
| Crop sensor | Samyang 10mm f/2.8 or a similar manual prime | Tamron 11-20mm f/2.8, Sigma 10-18mm f/2.8 DC DN, Sony 11mm f/1.8 |
Manual-focus primes are worth a mention. A Samyang or a Helios on a Nikon F mount will produce sharper, cleaner night frames than many zoom lenses because the optics are simpler and the corners hold up better wide open. The cost is focusing, which you are doing manually anyway.
Stability is the single biggest separator between good frames and wasted ones. Rate a tripod for at least twice your total gear weight, keep the centre column collapsed, and in wind hang your bag from the centre hook rather than standing over the camera.
Carbon fibre dampens vibration better than aluminium and loses less weight, which matters when you are carrying kit to a field rather than driving to a car park. A solid ball head with a separate panning base and a dependable lock lets you compose precisely. Arca-Swiss style plates mean you can swap bodies in seconds without fumbling with screws in the dark.
You cannot press the shutter button during a star exposure without introducing shake. Three options solve it: the built-in 2-second or 10-second self timer, a wired or wireless remote release, or a built-in intervalometer that fires the shutter repeatedly on a timer.
Intervalometers matter more than beginners expect, because they are the foundation of star trail sequences and of stacking. One failure mode catches nearly everyone: if in-camera long-exposure noise reduction is left on, the camera dark-subtracts after every frame, and the resulting delay shows up as visible gaps between stacked frames. Switch long-exposure noise reduction off and control noise later in software.
Some cameras cap manual exposures at 30 seconds. Bulb mode lifts that ceiling for anyone planning long single exposures or trails, and it is available on most bodies and nearly every intervalometer app.
A star tracker is a motorised equatorial mount that rotates at the same rate as the earth, cancelling the drift that creates trails. Once you own one, the exposure ceiling stops being twenty seconds. A two-minute frame at ISO 800 records the same brightness as an eight-second frame at ISO 6400, and the noise difference is dramatic.
What a tracker unlocks: fainter deep sky targets, the ability to stack and average frames, cleaner foregrounds without light painting, and star fields that look like galaxy photographs rather than snapshots.
What it does not unlock: your first Milky Way photo. A tracker needs polar alignment accurate to a few arcminutes, and misalignment produces field rotation that no edit fully rescues. Buy a sturdy one for long lenses, keep it roughly level, and learn alignment before a clear night. Until then, a tripod plus stacking software gets you most of the way.
Most people searching this topic at this moment are holding a phone. That is not a compromise. Current iPhones and flagship Android handsets can record recognisable star fields, a lunar disc, and — on a very dark night near new moon — a rough outline of the Milky Way.
Night mode works by capturing several frames over a few seconds and merging them. That is why it must sit on a tripod or a wall and use the 10-second timer: any movement during the merge produces soft, doubled stars. Use a phone tripod with a clamp or a stack of books and a rubber band, and tap the screen to lock focus and exposure before stepping back.
Two settings decide whether the result is usable. Turn on ProRAW, which captures more tonal range than compressed output and survives aggressive editing in a way standard files do not. And drop exposure compensation a few stops, because phone night modes default to rendering a dark sky as a bright blue one. Underexposed, the stars stay round and coloured; overexposed, they bloom into discs.
On iPhone 16 and 17 series hardware, the native camera plus ProRAW and a steady mount covers most needs. Third-party apps add what the stock app hides: Halide and Obscura both give manual shutter, ISO, and focus control with a focus peaking overlay, plus RAW capture and the ability to shoot on a schedule.
Samsung users on S21, S23, and S24 hardware should look for Pro mode, sometimes labelled Expert mode, in the stock camera, which is often buried in the settings menu or a swipe of the mode dial. It exposes separate sliders for shutter speed, ISO, and white balance plus a focus peaking option, and stack mode on current models records time-lapse sequences automatically. Dedicated apps such as Camera FV-5 or the open-source options built around it offer the same controls with more detail.
Be honest about the ceiling. A phone cannot reach deep sky, and no app changes that — the sensor is simply too small to collect enough signal. A phone moon shot at maximum zoom beats a dedicated camera at default settings, though, so know which subject you are pointing at.
Automatic exposure fails at night because its metering has nothing to read. The meter sees a black frame, opens the shutter, opens it further, and hands you a grey sky with noise. Manual mode ends the guesswork by letting you choose all three exposure variables at once.
Shoot RAW. The highlight data in a night frame sits where shadows live on a daytime scene, and JPEG throws most of it away. Set white balance manually rather than leaving it automatic, because colour correction applied at capture costs you nothing later, while white balance left on auto can swing between frames in a sequence. Shoot a daylight frame at the same location to set the white balance once, then work from that value.
Turn off in-camera long-exposure noise reduction, turn off image stabilisation when the camera is on a tripod, and clear any exposure compensation left over from a daytime session. Then take one test frame and check the histogram before committing to a sequence.
Open the aperture to the widest setting your lens offers. Every stop you close down halves the light, which means doubling shutter speed (not possible without trails) or doubling ISO (more noise). For most fast wide zooms the corner penalty at full aperture is worth paying.
There is one exception worth testing: closing down a third of a stop to f/2.8 on a lens that struggles at f/1.8 often sharpens the corners dramatically, and the extra ISO it costs is well within what modern sensors handle. Test your specific lens at a dark site before you decide.
Earth turns about 15 degrees an hour, and the apparent drift of a star field across a wide lens is fast enough to see in a 20-second exposure. The 500 Rule is the quick way to find your ceiling: divide 500 by your focal length in millimetres. The result is a starting estimate, not a guarantee.
| Focal length | Full frame | APS-C crop sensor (1.5x) |
|---|---|---|
| 10mm | 50 seconds | 33 seconds |
| 14mm | 35 seconds | 23 seconds |
| 20mm | 25 seconds | 16 seconds |
| 24mm | 20 seconds | 13 seconds |
| 35mm | 14 seconds | 9 seconds |
The crop column assumes a 1.5x multiplier, so a 20mm lens on APS-C is treated as a 30mm lens: 500 divided by 30 gives 16.6 seconds. Most APS-C bodies use 1.5x or 1.6x, and Micro Four Thirds is 2x, so check your own sensor’s multiplier before trusting the table. Getting this wrong is the single most common reason beginners see trails at settings that should be safe.
The 500 Rule was invented for film and low-resolution sensors. It knows nothing about your pixel size, so on a 24-megapixel body it allows exposures long enough to trail. The NPF Rule adds two terms: aperture and pixel pitch.
The formula is (35 x aperture + 30 x pixel pitch) divided by focal length, where pixel pitch is expressed in micrometres. To get that number, divide the sensor’s physical area by its pixel count and take the square root.
A 24-megapixel full-frame sensor measures 36 x 24mm, which is 864 square millimetres. 864 divided by 24,000,000 pixels gives 0.000036 square millimetres per pixel, and the square root of that is 0.006mm, or 6.0 micrometres. So a 24mm f/2.8 lens on that body works out to (35 x 2.8 + 30 x 6.0) divided by 24, which is (98 + 180) divided by 24, which is 11.6 seconds. The 500 Rule would have said 20 seconds for the same lens. That difference is why a high-resolution body and a 15-year-old DSLR want different shutter speeds.
How the three methods relate: the 500 Rule is a fast rough estimate, the 400 Rule is a deliberately conservative quick estimate, and the NPF Rule is the only one that accounts for your actual sensor. Move through them in that order, and use an NPF calculator such as the one built into PhotoPills for any camera whose specification you are unsure of.
Start at ISO 1600 and move from there based on results rather than reputation. A dark site at Bortle 2 will often look clean at ISO 1600; a suburban sky at Bortle 6 may need ISO 6400 to show any stars at all.
Two pieces of folklore cause people to shoot underexposed frames full of noise. The first is that high ISO itself is the problem; the second is that you should never push beyond ISO 3200. Neither survives contact with a histogram. Underexposure amplifies noise far more than the equivalent ISO increase, and a slightly bright frame at ISO 6400 is usually cleaner than a dark frame at ISO 1600 lifted three stops in editing.
Expose to the right within reason: keep the histogram clear of the far left without pushing star cores into hard clipping. If the sky background sits at a quarter or a third of the way up the scale, you are in a healthy place.
Settings mistakes that spoil most beginner frames:
- Auto ISO left on, which changes brightness between frames and makes stacking impossible
- Image stabilisation left on with the camera on a tripod
- JPEG only, throwing away the highlight data that holds your stars
- Long-exposure noise reduction left on, which doubles exposure time
- The shutter button pressed by hand at the start of every exposure
- Crop factor ignored, so a 20mm APS-C shot uses 25 seconds instead of 16
Autofocus cannot lock onto a star. It searches for contrast, and a point of light in a black frame offers almost none until the beam lands on it, by which point the star has already drifted. Manual focus, done once and then left alone, is the whole technique.
Most lenses print an infinity symbol on the focus ring, and on many of them that mark is not true infinity. The focus scale is calibrated for daylight use and hyperfocal distance, so a lens focused exactly at the symbol can sit a few metres off at night. Rotate to the mark, then back off very slightly until stars look smallest.
Focus-by-wire lenses in mirrorless bodies give no tactile feedback, so the adjustment is harder than the manual procedure implies. Make small moves, and check with a magnified view rather than by eye. A Bahtinov mask costs almost nothing and turns focus adjustment into a visible pattern: the central diffraction spike lines up with the side spikes when focus is correct.
Pre-focusing in daylight, at the location you will shoot from, remains the most reliable method there is. Set the focal length you want, point at a distant object roughly fifteen metres away, focus, and do not touch the ring again.
Locking the ring matters more than it sounds. A loosely held focus ring drifting a fraction of a turn under its own friction in a cold night is a routinely reported cause of an entire session of soft frames. Make a separate mark for each focal length you use.
When pre-focusing is not possible, magnify live view and focus on the brightest thing available. The Moon works superbly, and bright stars and planets work well. Even though the Moon would be wildly overexposed in your actual star frame, it makes an excellent focusing target because it has edges rather than a single point.
Zoom to ten times or more, adjust until the point of light is at its smallest, and then check the corners. Wide lenses are usually sharpest in the centre, and if the edge stars are visibly larger, try f/4 and accept the extra ISO. Magnified focusing also lets you confirm the direction of any focus error before you waste the sequence.
Settings decide how good a frame can be. Location and timing decide whether you get the subject at all. A perfect f/2.8, 20-second, ISO 1600 setup in front of a Bortle 7 sky still produces a washed-out frame, and the same setup under a crescent moon pointed at the wrong part of the galaxy produces an empty one. Planning is where most of the value is.
The Bortle scale, developed by John Bortle, is the standard way to describe night sky darkness from Class 1 (a genuinely dark site) to Class 9 (inner city). Unlike a light pollution map’s colours, which change with the map theme you happen to load, the class number means the same thing everywhere. Aim for Class 4 or darker for general star work, and Class 3 or darker if you want the Milky Way core to carry real detail.
| Bortle class | What you can expect |
|---|---|
| 1-2 | Zodiacal light and gegenschein visible, airglow obvious, thousands of stars, Milky Way casts a shadow |
| 3 | Rural sky, some light domes on the horizon, Milky Way highly structured, faint nebulae in binoculars |
| 4 | Rural/suburban transition, Milky Way visible but washed out near the horizon, low surface brightness targets lost |
| 5 | Suburban sky, Milky Way faint or invisible in summer, light domes in several directions |
| 6 | Bright suburban sky, Milky Way not visible at all except overhead in the darkest months |
| 7 | Urban sky, entire sky has a greyish cast, only the brightest stars and planets |
| 8-9 | City sky, only the moon, planets, and a handful of first-magnitude stars |
Light pollution maps such as the one run by DarkSky International are the practical tool for reading that scale across a region. Treat their colour coding as a pointer to where to look and use the class to judge expectations. Most beginners who think their camera failed are shooting at Class 6 and blaming the sensor.
Be realistic about travel. A drive of 30 to 60 minutes often moves you from Class 6 to Class 4, and that single step does more for your images than any equipment upgrade. A Class 3 site within an hour usually beats a Class 2 site three hours away, because you will shoot the near one more often and learn from it.
The moon outweighs every artificial light source combined when it is up. Plan within a few days of new moon for star work, or deliberately schedule for a crescent or half moon when you want the foreground lit and the sky merely dim.
Within a single night, the darkest window runs from the end of astronomical twilight until astronomical dawn, and solar altitude matters more than the clock. A summer night at forty degrees north reaches true darkness near one in the morning; the same date in winter is dark by nine. Use an app rather than a habit to find that window.
Two atmospheric variables matter and beginners routinely confuse them. Transparency is how clear the air is — moisture, aerosols, and haze — and it sets the contrast between stars and the background sky. Seeing is how turbulent the air is, and it decides whether stars boil and shimmer. A night can be cloudless with terrible transparency, and a night with high thin cloud can have excellent seeing.
Light pollution is a third, separate thing. A hazy sky over a dark site kills contrast and looks washed out; a bright sky with steady air still shows you sharp stars. None of the three substitutes for the others.
The Milky Way core is well placed from April through October in the Northern Hemisphere, peaking in June and July when it climbs highest and stays up longest after dark. March is too early to rely on it, and by November it has set before astronomical darkness in most latitudes.
Aurora is a separate subject with its own forecast. The NOAA Space Weather Prediction Center and SpaceWeatherLive both publish a planetary K-index forecast three days out, and a Kp of 5 or higher is generally visible well away from city light. The sun is still in the elevated phase of the current solar maximum, so aurora activity remains unusually high and it is a good year to learn the technique.
Dew is the quiet enemy of a long night. As the lens cools to the dew point, moisture forms on the front element, and the resulting haze is often mistaken for bad seeing or a dirty sky. An anti-dew heater band, a dew blower, or a parked car’s heated windscreen area solves it for a few pounds or dollars.
Meteor showers give a calendar of nights worth keeping free. The Perseids peak in August, the Geminids in December, the Quadrantids in early January. A full moon during a peak year cuts the naked-eye rate considerably, but showers photograph well with anything that can record the sky, including a phone on a tripod.
Wide-field nightscapes are what most people mean, and everything earlier in this guide assumes one: 14mm to 24mm, 20 seconds, f/2.8, ISO 1600 to 3200, a foreground, and a dark site.
Star trails are the next step and use a completely different shutter strategy — longer exposures on purpose, with the frame pointed at the north celestial pole for circles or east or west for diagonals.
The moon needs a telephoto lens and a different mindset entirely, because it is bright enough to blow out under any star setting. The Looney 11 rule is the shortcut: divide 11 by your focal length in millimetres to get a shutter speed, so a 200mm lens gives roughly 1/2200s. Shoot RAW and bracket. A phone at maximum digital zoom will out-perform a camera left on its default settings, because the moon is the one subject a small sensor handles well.
Planets need a long lens and usually a tracker. Deep sky targets — nebulae, galaxies, clusters — need a tracker, longer focal lengths, and stacking, which is a genuinely different discipline. Aurora needs a fast lens, a high ISO, and short exposures, because the display changes faster than a 20-second frame can record.
PhotoPills does the most for the least: sun and moon times, moon illumination percentage, Milky Way position, an NPF shutter calculator, and an augmented-reality overlay that shows you exactly where the galactic core sits from your chosen spot.
Stellarium, free on desktop, gives you a true planetarium for any date and location, so you can scout a composition weeks ahead. Clear Outside and 7Timer forecast cloud, transparency, and seeing separately, which is exactly the distinction most general weather apps blur. Light Pollution Map and the DarkSky International site handle site selection. Startrails.de handles trail stack planning and preview. Astrobin is where experienced nightscape photographers publish locations with sky quality meter readings, which are the closest thing to a direct measurement of the sky in front of you.
A star field with no foreground is a record, not a photograph. Depth comes from something close and solid in the lower third, and the contrast between a lit rock and a galaxy behind it is what gives a viewer the scale of the sky.
Bare branches and dead trees make intricate patterns against a star field and cost nothing. Rock formations and ridgelines anchor a frame and imply permanence. Still water doubles the sky, and a puddle in the foreground of an otherwise dry field does the same job as a lake, provided the wind is not up.
Human structures carry their own storytelling: an old barn, a jetty, a chapel, a line of fence posts leading away from the camera. Watch for stray artificial light in the foreground, and check the frame from a short distance before you commit, because a single sodium lamp at the edge will pull the eye straight out of the picture.
The galactic core carries more colour and structure than the rest of the band, and it only rises high enough for a strong vertical composition between April and October. A vertical frame suits tall foregrounds and lets the band run corner to corner. A horizontal frame suits wide scenery and puts the core on a third-line with sky above it for context.
Wide-angle distortion is a tool here. Shooting at 14mm makes near ground look enormous and the sky sweep overhead, which reads as scale. Push interesting elements toward the edges deliberately, and remember that stars near the corners are where coma will show up if it does.
Light painting closes the gap between a bright sky and a black foreground. You illuminate the near ground with a torch during the exposure, briefly, in short bursts, and the camera records both the light you added and the stars behind it.
Restraint produces the believable results. If the foreground is brighter than the sky, you have used a torch rather than painted with one. Two or three short passes usually beats one long sweep.
Most disappointing night frames are diagnosed in under a minute once you know which symptom you are looking at. Stars that curve point to shutter speed. Stars that smear into short lines point to movement. Stars that are round but fat point to focus or atmosphere. Stars that flare into comets point to your lens, not your technique. Work through the symptom rather than adjusting settings at random.
If every star in the frame is a short arc of the same length, Earth did it. Recalculate with your actual sensor crop factor, then drop to the 400 Rule as a quick test, and if you are on a high-resolution body, use the NPF figure. A 24mm f/2.8 on a 24-megapixel full-frame body is an 11.6-second exposure, not 20.
If only the corners trail while the centre stays round, the frame is wide enough that drift differs across the sensor. A shorter exposure fixes it, and so does accepting a slightly tighter crop in editing.
If stars near the centre are sharp and the ones at the edge are streaked, movement is the more likely culprit than drift. Check for a tripod leg slowly sinking into soft ground, a ball head sagging under a heavy lens, wind, and mirror slap on a DSLR. Enable mirror lock-up, use a remote or the 2-second timer, and re-level the tripod with a longer exposure to test it.
Soft, oversized stars destroy a frame and no edit recovers them. Work through these causes in order.
Focus. If stars are round but too large everywhere in the frame, focus is wrong. Return to the focusing section and set it properly. If the focus ring drifted during the session, the fix is tape.
Back focus direction. The shape of the defect tells you which way to turn the ring. Stars stretched radially outward, with tails pointing away from the centre of the frame, mean the sensor is too far from the lens — the focus distance is effectively too long, so rotate towards the camera. Stars with tails curling inward towards the centre mean the opposite. This one diagnostic resolves most focus complaints in a single test frame.
Coma. Coma is a lens design fault, not a technique error. Stars near the edges grow teardrops or comet tails while the centre stays clean, and the effect is worst wide open. Closing down a third of a stop, or shifting the frame to use the sweet spot of the centre, usually resolves it. A field flattener solves it properly, and any software correction is a last resort that softens detail further.
Chromatic aberration. Colour fringes around bright stars, strongest at the frame edges, come from the lens failing to focus all colours at the same point. It appears more often on inexpensive fast zooms and on fast primes shot wide open. A small stop-down helps; profile correction in your raw processor removes what remains. It is a flaw in the file, not a focus problem, and no amount of refocusing will change it.
Seeing and transparency. Boiling, wobbling stars that cannot be made sharp at any setting are an atmospheric problem, and light pollution is not the cause. Jet-stream turbulence at altitude and local heat sources both produce it, and it changes by the minute. Low transparency has a different signature: stars are sharp but faint, with low contrast against a milky background. Rising humidity, distant haze, or a light dome that spreads further on humid nights all reduce contrast, and light pollution itself removes faint stars from the frame entirely. Dew is the third lookalike: a general veil with bright haloes around the brightest stars, which appears partway through the night as the lens cools.
No setting fixes any of these. A poor-seeing night is simply a poor-seeing night. Note what you learn about which sites deliver steady air and plan around it.
Short trailing is the problem. Long trailing is the whole point. A star trail image records the apparent rotation of the sky over one to three hours, and there are two reliable ways to build one.
The stacking method is more forgiving. Set the camera to the widest aperture, an ISO low enough to keep noise down, and a shutter speed around 30 seconds to 6 minutes. Shoot 200 or more frames over two to three hours with an intervalometer, with long-exposure noise reduction off so the frames run back to back. Stack them, discard the frames with satellite trails or aircraft, and blend the rest.
The single-exposure method uses Bulb mode for one continuous exposure of an hour or more. The advantages are a perfectly even trail with no frame gaps and no stacking artefacts. The disadvantages are unavoidable sensor noise, a very small chance of something crossing your frame, and a real risk of dew forming on the lens halfway through.
Orientation chooses the shape. Point at the north celestial pole and stars draw concentric circles around Polaris. Point east or west and they draw long parallel arcs that suit a wide scene. Many photographers shoot a circle looking north and a diagonal looking south from the same session, then composite the two.
Composing trails takes patience with the foreground. Come back at night, frame the composition, and leave the tripod marked so the dawn or dusk return trip lands in the same place. Process trails with Sequator, Starry Landscape Stacker, or Startrails.de, all of which handle alignment and blending automatically.
Noise in a night frame comes from two places: the sensor at high ISO, and the smallness of the signal you captured. The first is partly fixed by stacking. The second is entirely your own doing, and underexposure is the single most common cause of the grainy frames beginners post.
Stacking averages the random noise in several frames while the stars stay fixed in place, so eight frames remove roughly two-thirds of the luminance noise. DeepSkyStacker, Sequator, and Starry Landscape Stacker all do this on a laptop, and modern AI denoise tools in Lightroom handle the residue well. The condition is that every frame is identical apart from the noise, which is why auto ISO, long-exposure noise reduction, and a drifting focus all destroy the effect.
Open the RAW file in Lightroom, Capture One, or similar and start with the automatic corrections. Lens profile correction removes the vignetting and distortion that wide night lenses produce, and it gives you a clean, even base before any creative work. Apply the same profile to every frame in a sequence so a stack matches.
Light pollution shows up as an amber or grey wash, strongest near the horizon and in the direction of the nearest town. A graduated filter placed over the sky reduces it while leaving the foreground untouched, and most editors now apply it through a mask or gradient rather than a straight-line drag.
Star enhancement needs restraint. A small exposure lift and a touch of clarity separate the stars from the background, and nothing more. Push harder and you get the over-processed look that makes an image read as cheap — halos around every star, magenta sky, visible structure in what should be flat black.
Save noise reduction for last and mask it away from the stars, because luminance noise reduction at full strength will dissolve them. The usual order is colour correction, then masking, then a light luminance pass, then any final sharpening. Two or three sliders moved a modest amount beats a long list of extremes.
Use full manual mode with the widest aperture you have, ideally f/2.8, a shutter speed between 15 and 25 seconds, and ISO 1600 to 3200. Shoot RAW, turn image stabilisation off, and release the shutter with a 2-second timer or remote. Check a test frame histogram and adjust ISO upward only if the sky background sits too low.
The 400 Rule divides 400 by your focal length in millimetres to get a conservative maximum exposure before trailing, so a 20mm lens gives 20 seconds on full frame. It ranks between the other two methods: the 500 Rule is a quick rough estimate, the 400 Rule is a cautious quick estimate, and the NPF Rule is the only one that accounts for your sensor’s pixel pitch.
Switch to manual focus, activate live view, magnify to 10x or more, and focus on the brightest star or the moon until the point of light is at its smallest. Check the corners afterwards, since wide lenses are often soft at the edges. The alternative is to pre-focus during the day on a subject about fifteen metres away, then tape and lock the focus ring so it cannot drift.
Shoot within a few days of new moon, during the darkest window between astronomical twilight and dawn. Look for nights with low humidity, thin or no cloud, and steady air rather than merely a clear sky. Forecasting apps such as Clear Outside report transparency and seeing separately, which tells you far more about image quality than a standard cloud forecast.
Yes. Most kit zooms open to f/3.5 to f/5.6, so open the aperture fully, use the shortest focal length available, and accept a longer exposure because your crop factor applies. Raise ISO to 3200 or 6400 and shorten the shutter to match the 500 or NPF figure rather than trailing. A kit lens will produce noisier, slightly softer frames, but it is entirely capable of a recognisable star field.
Divide 500 by your effective focal length, meaning you must apply your crop factor first, then treat that as a ceiling rather than a target. On a high-resolution body, calculate with the NPF Rule instead, since it accounts for pixel pitch and returns shorter times. If only the corners trail, shorten the exposure rather than chasing a focus or stability problem.
Mount the phone on a tripod, use the 10-second timer so the frame does not shift during processing, tap to lock focus and exposure, and turn on ProRAW for much better editing latitude. Drop exposure compensation a few stops so stars stay round instead of blooming. Apps such as Halide and Obscura add manual shutter, ISO, and focus controls with focus peaking when the stock camera is not enough.
The NPF Rule is (35 x aperture + 30 x pixel pitch) divided by focal length, with pixel pitch in micrometres. A 24-megapixel full-frame sensor has a pixel pitch of about 6.0 micrometres, so a 24mm f/2.8 lens gives (35 x 2.8 + 30 x 6.0) divided by 24, which equals about 11.6 seconds, against 20 seconds from the 500 Rule. It matters most on high-resolution bodies.
That body is a 24-megapixel APS-C camera with a 1.6x crop factor, so a 20mm lens behaves like a 32mm one. Start at f/2.8, shutter speed 11 to 15 seconds, ISO 1600 to 3200, and RAW capture. Turn SteadyShot off, use the 2-second self timer, and switch off in-camera long-exposure noise reduction if you plan to stack frames.
Use the main camera lens rather than the ultra-wide one, since digital zoom on the telephoto crop of ProRAW keeps more lunar detail. Zoom in as far as the image stays sharp, set exposure compensation down slightly so the lunar surface does not blow out, and tap the moon to lock focus and exposure. Shoot RAW if you have it, and a tripod or braced elbows make a real difference.
On a dark night near new moon, yes, though only as a wide arc rather than a detailed core. Use Night mode or a manual app at the widest aperture, the 10-second timer, a tripod, and exposure compensation reduced by one to two stops. Expect a soft, processed-looking result with visible noise. Deep sky targets are out of reach on a phone sensor, and no app changes that.
No. A tripod with manual focus and the 500 or NPF rule covers wide-field nightscapes and the Milky Way, and stacking several frames reduces the noise that a tracker would otherwise solve. A tracker becomes worth buying when you want exposures longer than about 30 seconds, fainter targets, or star trails without a two-hour stacking session. It does require accurate polar alignment, which is a separate skill.
Comet-shaped stars, heavier at the edges of the frame than in the centre, point to coma, which is a lens design issue that gets worse when the aperture is fully open. Close down a third of a stop and compare, or compose so the best part of the field fills the frame. A field flattener fixes it properly. Colour fringes around the stars point instead to chromatic aberration, which profile correction usually handles.
Bortle Class 4 or darker is the practical target for star fields in general, and Class 3 or darker for a Milky Way core with visible structure and colour. At Class 5 the band appears but stays washed out near the horizon, and from Class 6 upward it disappears in summer. Read the class rather than a map’s colours, since the colour coding changes with the theme you load.
How to photograph stars comes down to a small set of decisions repeated until they become automatic. Manual mode, the widest aperture, an exposure under thirty seconds, an ISO that the histogram justifies, focus set before dark, and a location you checked against the Bortle scale. Everything else in this guide is a refinement of those choices.
The two natural next steps are a star tracker and star trails. A tracker extends your exposure ceiling from seconds to minutes and opens the faint deep sky targets; a trail sequence teaches you stacking, interval timing, and planning on a scale a single frame never does. Both build directly on what you have already set up.
Take the settings table, a charged battery, and the 2-second timer, and go out tonight. The first frame will not be the one you keep, and the tenth will be. The sky is not going anywhere, and it is only dark for a few hours at a time.

![Rifle Scope Parallax Adjustments: Complete Guide [cy]](https://revellphotography.com/wp-content/uploads/2026/09/featured-update-5315-1789865033761.jpg)