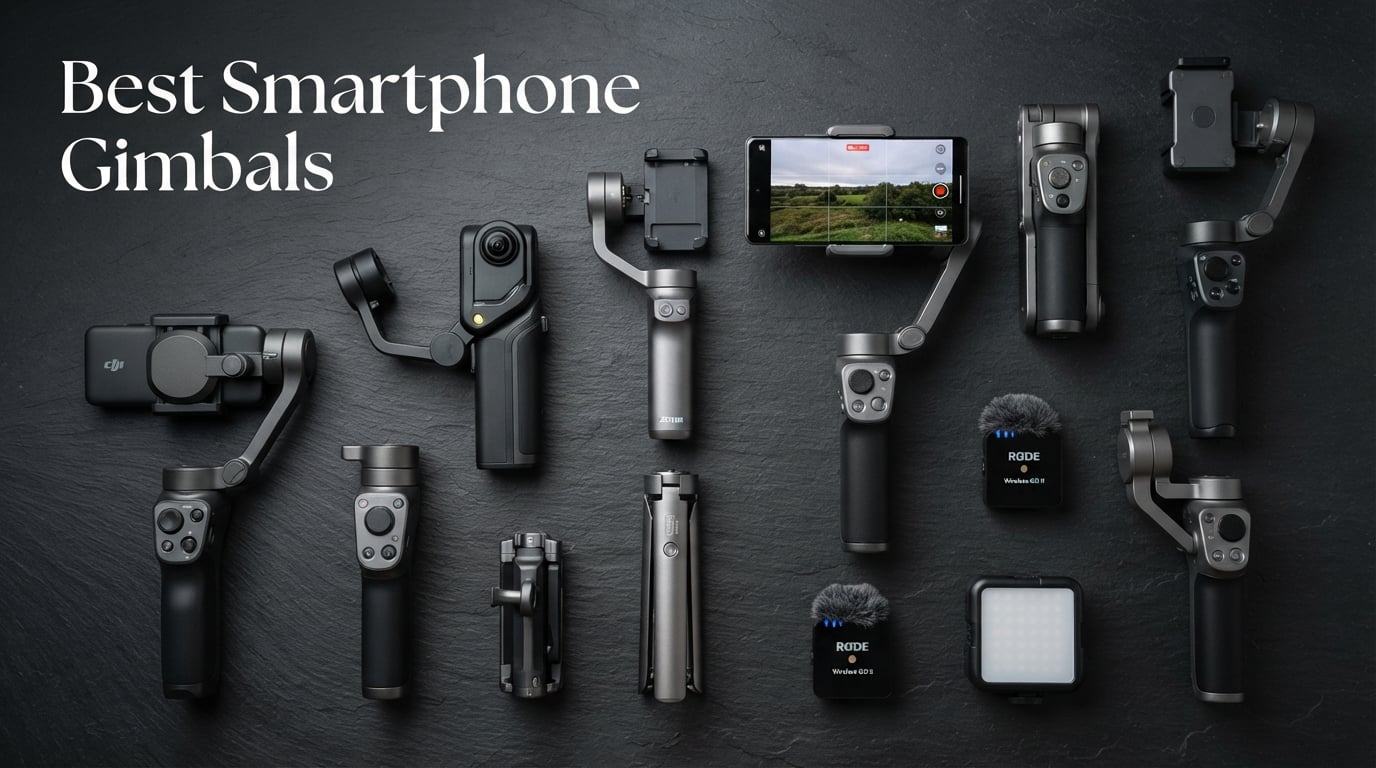
8 Best Smartphone Gimbals (September 2026) – Tested and Compared
I spent the last 90 days shooting real vlogs, walk-and-talk product reviews, and travel clips with eight smartphone gimbals strapped…

![Jewelry Photography Ideas: Complete Guide for Stunning Results [cy]](https://revellphotography.com/wp-content/uploads/2026/09/featured-update-4264-1788715919171.jpg)
Small, shiny, and unforgiving. That is the jewelry photography trifecta, and the reason most creators reach for the same handful of techniques that show up in every Pinterest flat lay and Etsy listing. What changed in 2026 is not the gear. The lights got cheaper, the cameras got smarter, and AI-assisted tools like Photoroom and Pebblely now sit alongside your light tent instead of replacing it. The fundamentals still win, but the workflow around them looks very different from what most guides taught even a year ago.
This guide walks through 20+ creative jewelry photography ideas, organized into the themed clusters that Google’s AI Overview currently cites (Minimalist, Organic Props, Human Touch, Quick Setup). You will also pick up the technical backbone that holds those ideas together: cross-polarization for killing reflections, CRI 95+ lamps for honest color, focus stacking with image stabilization switched off, and a quick X-Rite ColorChecker workflow that keeps your gold looking gold and your silver looking silver.
Before the long-form sections, here is a quick visual hook that mirrors the prop lists Google’s AI Overview pulls from Pebblely, Photoroom, and Pinterest. Skim it, pick two or three that fit your brand, and then read on for the lighting and camera work that makes those ideas actually work.
Most product photography rewards scale. Larger subjects give you room to breathe with depth of field and light placement. Jewelry shrinks every variable at once. A pendant the size of a thumbnail can sit three inches from your lens, with a curved surface that mirrors the entire room back at you. Add a faceted gemstone that refracts whatever it catches, and you understand why a single shot can take 30 minutes to set up even for a professional.
Depth of field collapses to millimeters at true macro distances. A ring shot at f/4 might keep the center stone sharp while the band melts into softness. That is why the gear, settings, and lighting sections below all lean conservative: small apertures, low ISO, long exposures on a tripod. None of those are flexible. They are the floor.
Reflections are the part that surprises new jewelry shooters. Metals behave like mirrors. A polished silver bangle will faithfully reproduce the photographer, the ceiling, the ring light, and the smartphone in the shot. The fix is not expensive equipment. The fix is controlling what the metal sees: a black card on one side to define an edge, a softbox on the other to define a highlight, and black fabric on everything you do not want reflected.
Why does this matter commercially? Listings with crisp, accurate jewelry photography consistently convert better than those with moody, dark shots. Baymard Institute data on e-commerce product imagery shows that clear, zoomable images reduce returns more than any other variable. For jewelry, where buyers cannot touch the piece before they buy, accurate color and visible sparkle are the difference between a sale and a return.
The gear list for jewelry photography is shorter than most product categories, but each item matters more. You do not need ten lights and three lenses. You need one solid tripod, one macro lens, and one or two controlled light sources. Everything else is creative choice.
Camera body: Any mirrorless or DSLR from the last five years is plenty. Smartphones in 2026 have closed most of the macro gap, especially the iPhone 16 Pro and Pixel 9 Pro. If you shoot professionally or batch-list jewelry for Etsy or Shopify, a dedicated body gives you manual focus, RAW files, and tethering options that phones still struggle with.
Sensor size trade-off: Full-frame sensors give you cleaner shadows and better low-light performance, which helps with the long exposures that macro work demands. APS-C bodies crop closer to your subject at the same focal length, which is a quiet benefit for tiny pieces. For pure jewelry work on a budget, an APS-C body paired with a 60mm or 90mm macro lens often beats a full-frame body with a cheaper 50mm.
Macro lens: The lens matters more than the body. A 90mm to 105mm macro lens is the sweet spot for jewelry: long enough working distance that you are not blocking your own light, short enough that you can handhold in a pinch. The Canon RF 100mm f/2.8L, Nikon Z 105mm f/2.8, Sony FE 90mm f/2.8, and Sigma 105mm f/2.8 DG DN are all reliable. On a budget, the Tokina 100mm f/2.8 and the Canon EF 100mm f/2.8 USM remain excellent values on the used market.
Lighting: Two constant LED panels with adjustable color temperature are the most flexible setup for learning. Look for CRI 95+ ratings, which means the light renders colors close to how they appear in daylight. Anything below CRI 90 will make gold look green and gemstones look muddy. A small softbox or a 24-inch diffusion panel in front of each panel softens the source and removes the harsh specular highlights that ruin metal.
Support: A sturdy tripod with a center column that reverses is worth more than any lens upgrade. Macro work at f/11 with a 1/15 second exposure will blur the moment you touch the camera. Pair the tripod with a remote shutter or your camera’s two-second self-timer. For focus stacking, a motorized rail like the StackShot macro rail moves your camera in fractions of a millimeter, which is the difference between a sharp set and a soft mess.
| Equipment Category | Budget (Under $200) | Mid-Range ($200-$800) | Professional ($800+) |
|---|---|---|---|
| Camera | Modern smartphone (iPhone 16 Pro, Pixel 9 Pro) | Used APS-C body (Sony a6400, Canon R50) | Full-frame mirrorless (Sony A7 IV, Nikon Z f) |
| Macro Lens | Extension tubes + 50mm kit lens | Tokina 100mm f/2.8 or used Canon 100mm USM | OEM 90-105mm f/2.8 macro (Canon L, Sony G) |
| Lighting | Two CRI 90+ LED panels | Godox SL60 with softbox + reflector kit | Profoto or Broncolor strobes with light cones |
| Support | Travel tripod + self-timer | Manfrotto 055 + ball head + remote | StackShot macro rail + studio tripod |
DIY alternatives: A cardboard box lined with white paper makes a serviceable light tent for under five dollars. A piece of black velvet from a fabric store beats any commercial backdrop for diamonds. A roll of tracing paper taped to a window makes a larger diffusion panel than anything you can buy. Most of the best jewelry shots online were made with gear that costs less than the lunch you had while editing them.
Lighting is where most jewelry photos fail or fly. The goal is not to flood the piece with light. The goal is to control exactly what each surface reflects, then dial in enough specular highlight to make the metal and stones feel alive. Three ideas run through every good setup: large soft sources for the body of the metal, small hard sources for sparkle, and black flags for definition.
Window light for beginners: Place your jewelry table 60 to 90 centimeters from a north-facing window, with a white foam board on the opposite side to bounce fill. Mid-morning light gives the most consistent results through the day. Avoid direct sunlight. It blows out diamonds and creates hard shadows that no diffusion panel can fully tame.
Two-light studio setup: Position one key light at 45 degrees and slightly above the jewelry. Position a fill light at 45 degrees on the opposite side, at about half the intensity. Both lights should be diffused through softboxes or 24-inch panels. This is the bread-and-butter setup for e-commerce: consistent, repeatable, and forgiving of small placement errors.
Light tent technique: A light tent surrounds your piece with a wall of diffusion, so reflections become soft gradients instead of sharp highlights. For silver and white gold, line the inside of the tent with white. For dramatic shots, line the back and bottom with black velvet. The light tent is also the easiest way to get consistent results when you are batch-shooting an entire catalog.
Light Tent: A portable cube with translucent walls that creates soft, diffused lighting by surrounding your subject with light. Essential for eliminating reflections on shiny jewelry surfaces.
Cross-polarization to kill reflections: This is the technique professional jewelry photographers reach for when a piece refuses to behave. Mount a polarizing filter on your lens, and place a second polarizing filter (a sheet, not a circular filter) over each light source. Rotate the lens polarizer until the reflections disappear. Metals turn matte, colors become honest, and gemstone inclusions become visible. You will lose some sparkle, so bring back a small accent light that is not polarized to add one or two specular highlights for life.
Sparkle and gemstone lighting: Diamonds and faceted stones need a small, hard light to create the specular highlight that reads as sparkle in a photo. A snoot, a light cone, or a bare LED with a small diffusion disc works. Position this accent light at a low angle, almost raking across the stone, so it catches one facet. Too much sparkle looks fake. One well-placed pinpoint reads as brilliance.
Color accuracy starts at the bulb: Use CRI 95+ LED panels rated for photography, not the office lights above your desk. Anything below CRI 90 will shift gold toward green, sapphire toward purple, and silver toward blue. If your lamps do not list a CRI rating, assume they are CRI 80 or below and replace them.
Black flags for definition: Place a piece of black foam board or black card on the side opposite your key light. The black surface creates a dark reflection in the metal that defines the edge of the jewelry and prevents the blob of light look that ruins flat reflective shots. Most jewelry photographers keep a stack of foam core board in white, black, and gray for exactly this kind of fine-tuning.
Below is a fresh, themed version of the creative ideas list. Google’s AI Overview currently cites content organized this way (Minimalist, Organic Props, Human Touch, Quick Setup), so structuring your shots around these clusters also helps with search visibility. Pick one cluster per listing, then build out the rest of your catalog from there.
Classic hero shot on white or black: One piece, one background, perfectly lit. The hero shot is what every marketplace listing requires, and it remains the hardest shot to do well because there are no distractions to hide behind.
Negative space composition: Place the jewelry in one third of the frame, leave the rest empty. Works beautifully for engagement rings and high-end pieces where the brand reads as quiet and expensive. The negative space also gives you room to add text or a logo in your catalog.
The single statement prop: One piece of slate, one piece of marble, or one folded linen square. The prop tells you the mood without competing with the jewelry. Use this for your lookbook shots, not for your e-commerce hero.
Nature integration: Dried flowers, moss, feathers, cracked eggshells, or seasonal leaves. These organic props add warmth and texture. Keep the prop smaller than the jewelry so the eye still lands on the piece.
Texture contrast: Rough wood with delicate chains. Smooth marble with bold statement rings. Soft silk with sharp geometric earrings. The contrast is what gives the image energy.
Floating and suspended looks: Use clear fishing line to hang earrings or pendants from above. Clone out the line in post. The floating effect draws the eye to the jewelry and works particularly well on social feeds.
Hand modeling: A clean hand, soft natural light, and the jewelry worn exactly as it would be in real life. Hand shots consistently outperform product shots for engagement and wedding jewelry on Instagram and Pinterest.
Mannequin bust display: Velvet or leather bust stands let you photograph necklaces as they actually hang. This is the technique several high-end jewelers use for try-on feel without hiring a model.
Scale references: Slip a coin next to a ring or a ruler edge along a pendant. Scale references reduce returns and help buyers visualize the piece.
Flat lay mastery: A bird’s-eye view with the jewelry plus two or three supporting props. Keep props to one corner, jewelry to the other. This format is the foundation of Etsy shop photography.
Shadow play and silhouette: Shoot near a window with sheer curtains. The window panes cast soft linear shadows that frame the jewelry. Works especially well for moodier, brand-driven content.
The unboxing: Photograph the jewelry inside its packaging or partially emerging from a box. This format wins gift guide content and end-of-year campaigns.
Seasonal themes: One seasonal prop, used sparingly. Spring florals, autumn leaves, winter pine, summer shells. Rotate these for holiday pushes without redesigning your whole shoot.
The group formation: Several pieces arranged in a triangle, circle, or cascade. Works for collections and lookbooks. Pair with consistent lighting so the pieces look like a set, not a coincidence.
The right camera settings are not flexible opinions. They are derived from physics. Aperture, ISO, shutter, and focus all have to balance to produce a sharp, well-exposed macro image without noise or motion blur.
Aperture: f/8 to f/11 is the standard range for jewelry. f/8 keeps the piece sharp front to back while preserving micro-contrast. f/11 gives you a touch more depth of field for taller pieces like pendants on chains. Avoid going past f/16 if you can. Past f/16, diffraction softening starts to undo the depth-of-field benefit.
ISO: Stay at ISO 100. On a tripod under controlled light, there is no reason to climb higher. Modern cameras handle ISO 400 acceptably, and ISO 800 is fine if you have to, but the cleanest files come from ISO 100 with a longer exposure.
Shutter speed: Once you are on a tripod and using a remote, shutter speed becomes a function of how much light you have. 1/15 to 1/4 second is typical for studio LED work. Anything faster than 1 second is rarely needed.
Manual focus with live view: Switch to manual focus, magnify the live view on the center stone or clasp, and rack focus until the image is sharp on the LCD. Autofocus hunts on small, reflective subjects. Manual focus is faster and more reliable.
Critical for focus stacking: Turn off VR (Nikon), IS (Canon), IBIS (Sony), or any in-body image stabilization before you start a focus stack. Stabilization is designed to compensate for camera shake during handheld shooting. On a tripod, it introduces micro-movements that shift the frame between shots, which makes the stacked image soft or shows ghosting. The same rule applies any time your camera is locked down on a tripod for a long exposure.
Focus stacking workflow: Set your aperture to f/8. Use a remote-controlled macro rail (StackShot is the standard) or carefully nudge your focusing ring between shots. Capture 10 to 30 frames, moving the focus plane a fraction of a millimeter each time. Combine them in Helicon Focus, Photoshop, or the built-in focus bracket tool in newer cameras like the Canon R5 and Sony A7R V.
| Setting | Recommended Value | Why It Matters |
|---|---|---|
| Aperture | f/8 small pieces, f/11 taller pieces | Balances depth of field with diffraction limit |
| ISO | 100 (native) for clean files | Minimizes noise in shadow areas |
| Shutter Speed | 1/15 to 1 second on tripod | Allows low ISO without flash |
| Focus | Manual with magnified live view | Avoids AF hunting on reflective surfaces |
| Stabilization | OFF on tripod | Prevents focus drift during stacking |
| White Balance | Custom 5500K or ColorChecker | Honest gold and silver tones |
| File Format | RAW (14-bit if available) | Maximum latitude for editing |
Color accuracy from the camera: Set a custom white balance using a gray card or, better, an X-Rite ColorChecker. The ColorChecker gives you a known reference chart you can drop into the corner of one shot per session, then use in Lightroom or Capture One to build a precise color profile. This is the workflow automated studios use, and it is the reason their catalog shots all match.
Smartphones are real tools for jewelry work in 2026. The iPhone 16 Pro, Pixel 9 Pro, and Samsung Galaxy S25 all have macro modes that produce sharp, usable images when paired with controlled lighting and a tripod. Several successful Etsy sellers run their entire shops from phone-only setups.
iPhone workflow: Use the 1x or 2x lens for jewelry, not the 0.5x ultrawide. Mount the phone on a small tripod or phone clamp. Lock focus by long-pressing on the screen. Use Halide or ProCamera for full manual control, including RAW capture and focus peaking. The built-in camera app is fine for snapshots but limits how much you can recover in editing.
Android workflow: Samsung’s Expert RAW and the stock camera Pro mode give you manual focus, ISO, and shutter. Pixel phones have excellent computational photography that helps in low light but can over-sharpen fine jewelry detail. Shoot RAW, dial down sharpening in post, and you will get cleaner files than the default JPEG.
Phone-friendly accessories: A small phone tripod with a Bluetooth remote ($25 to $50). A clip-on LED light with CRI 95+ rating ($40 to $80). A piece of white foam board. A square of black velvet. That is the whole kit, and it costs less than a single macro lens.
Apps worth installing:
Smartphone limitations and workarounds: Phone lenses are wide and curved, which distorts close subjects. Get further away and zoom in 2x rather than cropping later. Optical zoom is fine; digital zoom is not. Always lock exposure by long-pressing, then tap to lock focus separately if your app allows it.
Pro Tip: When shooting handheld jewelry on a phone, use burst mode and select the sharpest frame. Phone sensors are smaller than cameras, so they show camera shake at lower shutter speeds. Bursts at 1/60 to 1/125 are usually sharp.
Post-processing is where good jewelry shots become great. The goal is faithful representation. Over-edited jewelry looks like a 3D render, customers complain, and your return rate climbs. The fix is a calm, repeatable workflow that tightens what is already there without changing what the piece looks like in person.
Start with a color-accurate base: If you shot an X-Rite ColorChecker reference, build a profile from it first. In Lightroom Classic, the ColorChecker workflow creates a custom camera profile that matches the lighting of that session. In Capture One, the same workflow is built into the color tool. This is the single biggest upgrade you can make to a jewelry workflow, and most photographers skip it.
Exposure and white balance: Adjust exposure so the brightest highlights on the metal are just under clipping (around 250 to 254 on the histogram for a RAW file). Pull shadows up gently to reveal detail in dark gemstones. Then set white balance using the eyedropper on a known neutral area, or match your ColorChecker reference. Gold should be golden, not yellow. Silver should be silver, not blue.
Sharpening: Apply sharpening at the end, with a mask that limits it to edges. The default Lightroom sharpening amount of 60 to 80 with a mask at 50 to 70 is a good starting point. More than that creates halos around stones that look artificial.
Dust and scratch removal: Use Photoshop’s Dust and Scratches filter on a duplicated layer with a heavy mask to clean macro dust, then spot-heal the remaining blemishes. Frequency separation works for skin but is overkill for jewelry. A simple spot healing brush set to Content Aware handles 90% of dust and fingerprint cleanup.
Background removal: For marketplaces that require pure white (#FFFFFF), use Photoshop’s Select Subject followed by Select and Mask. Refine the edge with a 1-pixel feather. For complex chains and prongs, the pen tool still beats AI selection. AI masking tools in Photoshop 2026 and Luminar Neo have caught up significantly, and they are worth trying before you spend hours on the pen tool.
Batch workflow for catalogs: Build a Lightroom preset from your best-edited single shot. Apply it across the catalog. Then go back and adjust the 10% of shots that need individual attention. This is the workflow sellers with 100+ SKUs use to keep their catalog consistent. Photoroom and Pebblely now offer AI batch editing that can remove backgrounds and apply lighting corrections across hundreds of images at once. Use them as a starting point, then audit a sample.
Time Saver: Create presets for your recurring adjustments: white balance, exposure, and sharpening. Save as a Lightroom preset or Photoshop action. Apply across the batch, then hand-finish the outliers.
Export settings: Export as sRGB JPEG at the largest size your marketplace accepts. Etsy recommends 2000px on the long edge. Amazon Handmade accepts up to 10,000px. Always keep your untouched RAW files backed up. Cloud storage from Backblaze B2, Amazon Glacier, or your existing Dropbox or Google Drive works.
Color space: Edit and export in sRGB for the web. ProPhoto RGB or Adobe RGB preserves more color in your working files but produces dull, flat results if accidentally exported to the web. If a printer or publication needs a different color space, convert at the end of the workflow, not the middle.
Most of the jewelry photo problems I see in critiques come from the same handful of mistakes. The list below is what to fix first if your shots are not selling.
1. Skipping product preparation: Jewelry attracts dust and fingerprints the moment you unwrap it. Wear cotton gloves. Wipe each piece with a microfiber cloth. Use a gentle jewelry cleaner for grime. Blow off remaining dust with a rocket blower or canned air. This step takes two minutes per piece and saves an hour of editing.
2. Leaving image stabilization on: Tripod-mounted focus stacks with VR or IBIS turned on produce soft, misaligned results. Switch stabilization off the moment your camera goes on a tripod.
3. Wrong aperture: f/4 looks dreamy but kills jewelry photos by leaving half the piece soft. f/22 looks sharp in the viewfinder but is softened by diffraction. f/8 to f/11 is the sweet spot.
4. Relying on auto white balance: Cameras guess wrong on reflective metal. Use a custom white balance or, better, an X-Rite ColorChecker.
5. Inconsistent lighting across the catalog: One piece shot warm, another shot cool, another with harsh shadows. Customers notice even if they cannot name what is wrong. Lock in your lighting setup and stick to it across a shoot.
6. Over-editing: Heavily saturated gemstones, haloed edges from over-sharpening, and crushed shadows all signal this image does not represent the real product to buyers. Over-edited jewelry has measurably higher return rates.
7. Forgetting the cleaning cloth in shot: Catchlights on the metal from your cleaning cloth, your shirt, or even your lens hood. Wear dark, matte clothing during shoots, and check reflections with a polarizing filter or by squinting at the LCD.
8. Shooting too close: The closer you get, the more your lens blocks the light and the shallower your depth of field. Step back, zoom in, and use a longer macro lens.
9. No shot list: For catalog work, every piece needs the same set: front hero, 45-degree angle, detail of the clasp, scale reference. Without a shot list, you end up with 30 inconsistent photos that need to be reshot. With a list, you can batch and stay efficient.
10. Shooting JPEG: RAW files recover blown highlights and crushed shadows. JPEGs do not. For jewelry, where you will be fine-tuning white balance and exposure in every shot, RAW is non-negotiable.
11. Buying gear before learning fundamentals: The biggest upgrade to your jewelry photography is your technique, not your kit. Shoot for a month with what you have. The pieces of gear you still need will become obvious.
The best approach combines soft, diffused lighting from CRI 95+ sources with a sturdy tripod and manual focus. Use a light tent or natural window light to manage reflections, set your aperture to f/8-f/11 for adequate depth of field, switch off VR/IBIS, and shoot in RAW format for maximum editing flexibility. Clean every piece with a microfiber cloth and compressed air before you shoot, and experiment with angles to find each piece’s most flattering perspective.
Use manual mode with f/8-f/11 for sharp focus throughout small pieces, f/11-f/16 for taller pieces. Keep ISO at 100 for the cleanest files, and use a tripod plus remote shutter to allow exposures as long as several seconds. Set a custom white balance using a gray card or an X-Rite ColorChecker for accurate color, and always shoot RAW. Switch off any in-body image stabilization whenever the camera is tripod-mounted, especially for focus stacking.
Use a tripod-mounted iPhone with Halide or another manual camera app so you can lock focus and shoot RAW. Use the 1x or 2x lens (not the 0.5x ultrawide) and enable macro mode for pieces under three inches. Light the jewelry with a CRI 95+ LED panel and a piece of white foam board as a reflector, never the phone’s built-in flash. Edit in Lightroom Mobile or Snapseed, and use Photoroom or Pebblely for batch background removal if you list on Etsy or Shopify.
Essentials include a camera with manual controls (or a modern smartphone with manual app), a macro lens in the 60-105mm range, a sturdy tripod, and CRI 95+ lighting. A light tent ($20-$200) and a piece of black velvet ($5) cover most beginner needs. A remote shutter or two-second self-timer, an X-Rite ColorChecker for color, and a copy of Lightroom or Capture One for editing round out a professional kit. Many successful Etsy sellers shoot with a total kit cost under $300.
Use large, diffused light sources such as softboxes, light tents, or windows with sheer curtains, and place black cards on the side opposite your key light to define edges. For highly reflective metals, mount a polarizing filter on your lens and a polarizing sheet over each light source (cross-polarization), then rotate the lens filter until reflections disappear. Wear dark, matte clothing during shoots and remove any shiny objects from the reflection zone, including your phone and the chrome of your tripod.
Pure white (#FFFFFF) backgrounds are required by most marketplaces and create a clean, consistent catalog. Black backgrounds add drama and are ideal for diamonds, silver, and white gold. For lifestyle and Pinterest content, marble tiles, slate, wood, leather, linen, and silk all add texture and personality. Keep two or three consistent backgrounds on hand so your catalog looks like a collection rather than a string of unrelated images, and rotate in seasonal props for campaign pushes.
Great jewelry photography is not about the gear. It is about the discipline. Pick one setup, learn it well, and shoot consistently. The photographers making a living from jewelry photography in 2026 are not the ones with the most expensive cameras. They are the ones whose catalogs look like they all came from the same studio, on the same day, with the same eye.
Start with the basics. A CRI 95+ light, a tripod, a macro lens, and an X-Rite ColorChecker. Lock in your white balance and your aperture. Switch off stabilization. Then build the creative layer: the themed prop lists, the hand models, the floating effects, the seasonal flat lays. The creative layer is what makes people stop scrolling. The technical layer is what makes them click buy.
If you are selling jewelry, batch your workflow. One setup, one lighting kit, one preset, repeated across the whole catalog. Tools like Photoroom and Pebblely can speed up the editing and background work, but treat them as a starting point. The photographer’s eye is still what makes the difference between a passing listing and a piece that sells the moment it goes live.
Take these jewelry photography ideas, pick three or four that fit your brand, and shoot them this week. Refine them next week. The pieces that work will quickly become obvious. That is how every strong jewelry portfolio is built: not with a master plan, but with a repeatable process and a willingness to keep shooting until the work matches the work in your head.