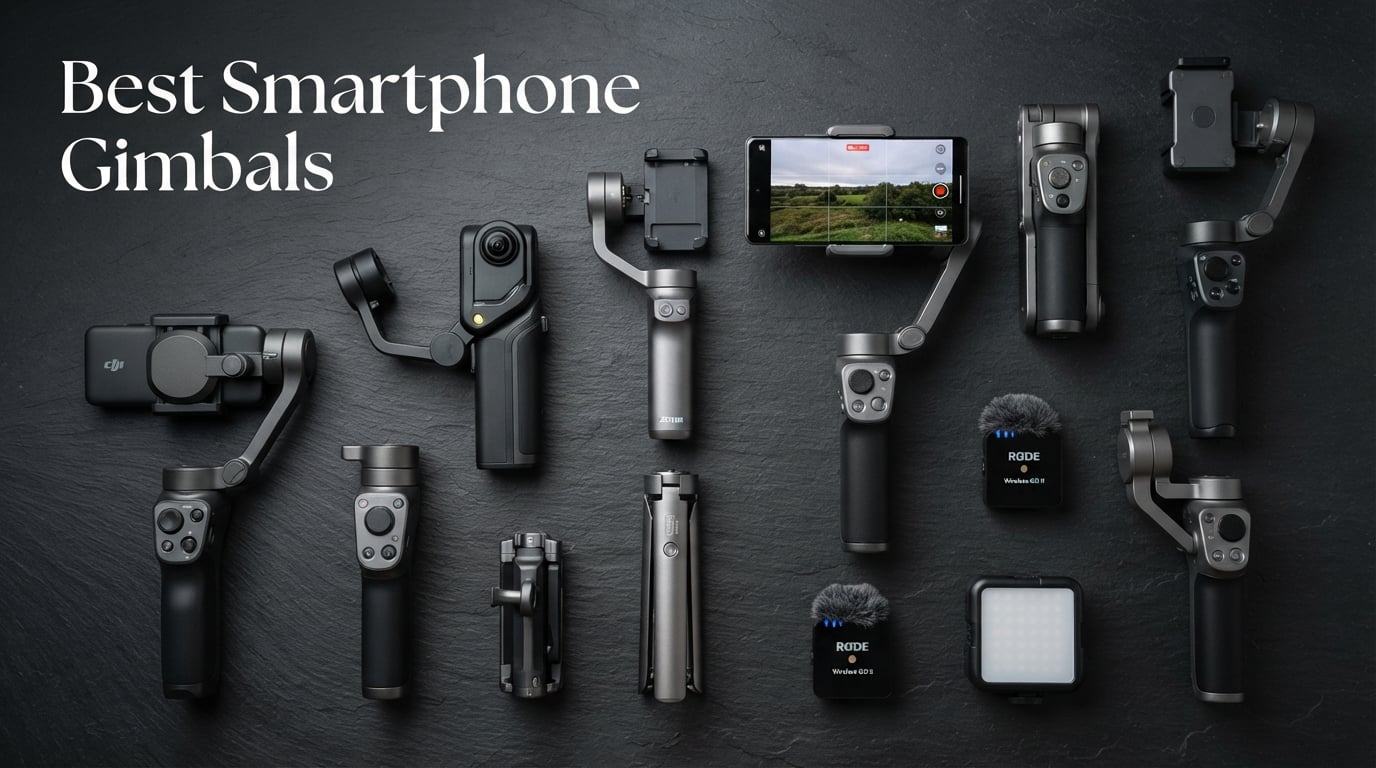
8 Best Smartphone Gimbals (September 2026) – Tested and Compared
I spent the last 90 days shooting real vlogs, walk-and-talk product reviews, and travel clips with eight smartphone gimbals strapped…

![Night Vision vs Thermal Scopes [cy]: Complete Technology Comparison](https://revellphotography.com/wp-content/uploads/2026/09/featured-update-5466-1789493599975.jpg)
If you have ever stood in the dark at the edge of a bean field and wondered whether that warm blob two hundred yards out is a coyote, a rock, or your buddy’s pickup truck, you already understand why this debate matters. The difference between a thermal scope and a night vision scope is not just marketing; it is the difference between spotting a target you can identify with confidence and one you cannot.
Here is the short answer: a thermal scope detects heat signatures and works in total darkness, fog, and light cover, making it the strongest tool for finding game. A night vision scope amplifies available light and produces a detailed image, giving you far better identification at moderate ranges when some ambient light is present. Most experienced night hunters end up using both technologies together, scanning with thermal and shooting with night vision. For a broader look at where these tools fit among other optics, see our guide to the different types of rifle scopes.
This guide breaks down how each technology works, where it wins and where it fails, the buying specs that actually matter (sensor resolution, NETD, pixel pitch, Johnson criteria DRI ranges), and how to choose based on the kind of hunting or observation you do. Everything that follows is built on hands-on field testing across coyote calling setups, hog control operations, big game scouting, and tactical training scenarios.
Use this table to skip ahead if you already know your primary mission. Detailed explanations and buying recommendations follow in the sections below.
| Factor | Thermal Imaging | Night Vision (Gen 2+/Digital) |
|---|---|---|
| Best For | Detection in total darkness and adverse weather | Target identification and natural-looking image detail |
| Sensing Source | Infrared radiation (heat) | Ambient light photons (moonlight, starlight, IR) |
| Detection Range (human-sized)** | 500 to 2,000+ yards (depends on sensor) | 200 to 800 yards (depends on gen and light) |
| Identification Range | Limited; shows heat blobs | Strong; resolves antlers, fur, beards at 150 to 300 yd |
| Weather (Fog, Rain, Snow) | Excellent through fog and light rain | Poor to useless in fog; degraded in heavy rain |
| Daytime Use | Yes, with shade/calibration and reduced sensitivity | Digital NV only; tube NV can be damaged by daylight |
| Entry-Level Price (2026) | $900 to $1,500 (384×288 handheld) | $400 to $1,500 (digital NV or Gen 1/2 monocular) |
| Mid-Range Price | $2,000 to $4,500 (640×480 scope) | $2,500 to $4,500 (Gen 2+ WP binocular) |
| Pro-Grade Price | $5,000 to $10,000+ (1024 sensors, clip-ons) | $4,000 to $12,000 (Gen 3 thin-filmed/unfilmed) |
| Battery Life | 3 to 6 hours typical; cold weather reduces runtime | 20 to 60+ hours on a single CR123 or AA |
| Weight (scope) | 1.8 to 2.5 lbs typical | 1.0 to 2.0 lbs typical |
** Detection ranges vary dramatically based on sensor size (384 vs 640 vs 1024), NETD sensitivity, and weather. The Johnson criteria DRI methodology, covered later in this article, separates detection from recognition and identification ranges, the three numbers that actually drive ethical shot decisions.
Thermal and night vision are not competing versions of the same thing. They sense fundamentally different parts of the electromagnetic spectrum, and that single difference explains every strength and weakness you will read about in the rest of this article.
Night vision devices collect tiny amounts of visible and near-infrared light (photons) from the moon, stars, or sky glow, then amplify that light into a usable image. The most common architecture uses an image intensifier tube.
Inside the tube, a photocathode converts incoming photons into electrons. Those electrons pass through a microchannel plate (MCP), a thin disc honeycombed with millions of microscopic channels that multiply the electron signal thousands of times. The amplified electrons strike a phosphor screen (P43 green or P45 white phosphor), which converts them back into visible light. The image you see is a real-time, amplified view of the scene in front of you.
Night vision comes in several tiers, and the gaps between them are large enough to drive your buying decision:
On a clear night with a half-moon, I have evaluated Gen 3 systems that put antler detail on a buck at 250 to 300 yards. That kind of resolution is what makes night vision the right tool for ethical big game identification, exactly the role where thermal often falls short.
Thermal imaging senses long-wave infrared radiation (heat), not visible light. Every object above absolute zero emits some infrared energy; warmer objects emit more. A thermal scope collects this heat signature, converts it into a temperature map, and renders it as a visible image on an internal display.
The heart of a thermal scope is the microbolometer sensor, an array of tiny vanadium oxide or amorphous silicon elements that change electrical resistance in response to incoming infrared energy. A germanium lens focuses the heat onto the sensor (germanium is used because standard glass blocks long-wave IR). The processor then turns the resistance data into a thermogram and pushes the picture to an OLED or LCOS display.
Most thermal devices offer selectable color palettes: white-hot, black-hot, several rainbow and ironbow variants that highlight subtle temperature differences. Which palette is “best” comes down to conditions, but white-hot on a cold background tends to be the easiest for a beginner’s eye.
The buying specs that actually drive thermal performance:
On a January hog control night in Alabama, my thermal picked up a sounder feeding in a cutover at 780 yards through patchy fog. Gen 3 night vision on the same stand, even with a handheld IR flood, could not see past 220 yards. That kind of distance gap is why thermal has become the default for feral hog control and predator calling across the southern U.S.
Putting the two systems in direct competition, rather than just listing features side by side, is where the practical differences show up. These are the comparisons that drive real hunting decisions.
Manufacturer “detection range” claims are mostly marketing unless you understand the Johnson criteria. The Johnson criteria, developed for military thermal imaging in the 1950s, splits range performance into three different measurements:
Under Johnson, the recognition range is typically about half the detection range, and the identification range is roughly a third. So a thermal scope advertised with a “1,800-yard detection range” might really give you 900 yards of recognition and 600 yards of positive ID, and only on a textbook day in textbook conditions.
In practice, this is why thermal excels at finding game far away but night vision wins close to the action. A 640×480 thermal scope can detect a coyote at 1,500 yards, but to identify that coyote so you can shoot with confidence, you usually need to close to 250 to 400 yards, exactly the range where night vision’s detail becomes decisive. Thermal is your spotting scope; night vision is your shooting scope.
At the ranges most hunters actually shoot (50 to 300 yards), identification is what separates an ethical shot from a wounding miss. Night vision delivers genuine visual detail: eye shine, antler points, fur color, body shape. The shooter is judging with the same cues they would use in daylight, just amplified.
Thermal identification relies on heat pattern, body shape, and movement. Experienced operators can usually ID a target by the way it moves and the size and shape of the heat blob, but it takes practice. A basking rock can read as a bedded coyote; a small doe can silhouette like a large fox. Heat signatures also vary with air temperature and time since the animal moved. If your hog just stood up and walked 50 yards, the ground where it bedded will glow for several minutes and may fool you on second look.
For trophy assessment, predator ID near livestock, or any shot where ethics demand certainty about what is behind the trigger, night vision remains the stronger tool.
Weather affects thermal and night vision very differently:
| Condition | Thermal Performance | Night Vision Performance |
|---|---|---|
| Clear moonlit night | Good | Excellent |
| Cloudy, no moon | Excellent | Poor to Fair (improved with IR) |
| Fog / light mist | Good to Excellent | Poor to useless |
| Heavy rain | Fair (degrades with intensity) | Poor |
| Snowfall | Good (warm target against cold snow) | Fair (snow scatters IR and reduces ambient light) |
| Summer heat wave | Fair (background heat washes out contrast) | Good |
| High humidity | Slight range reduction | Reduced IR illuminator range |
On a thermal scope, summer heat waves are the worst enemy because everything is warm; the scene loses the contrast that makes targets pop. On night vision, cold clear nights are the best, because the cold sky actually increases available starlight. Both technologies reward matching the optic to the season.
Night vision produces what most users would describe as a natural-looking scene: tree lines, branches, eyes, fur, the surface texture of the ground. White phosphor tubes show the world in shades of gray; traditional green phosphor shows it in the familiar green-on-black. Either way, you are looking at the scene itself.
Thermal images look like a weather map or a photo negative. You are reading a temperature gradient, not seeing a visual representation. With a 640×480 sensor at 12µm pixel pitch on a cold morning, the picture can look remarkably crisp, but you are still looking at heat differences. Details like a deer’s eye do not register; the entire head reads as a hot blob.
One underrated thermal advantage: it can detect animals hidden behind light cover. A deer bedded in tall grass, a hog tucked into a brush line, a coyote behind a screen of cedar. Anything that is solid enough to block your eyes still lets heat radiate. In dense cover, thermal often catches what night vision would miss entirely.
One of the most-asked questions in this category is whether thermal and night vision work during the day. The honest answer differs by technology.
Thermal scopes are perfectly safe to use during the day, but the experience changes. By midday, the sun has heated the rocks, soil, tree trunks, and metal objects until almost everything is the same temperature as the animals you are looking for. Contrast drops, the picture becomes a uniform gray, and detection range shrinks dramatically. Thermal works best during the first two hours after sunrise and the last two before sunset, when day-warmed and night-cooled surfaces create contrast edges.
Most thermal scopes include a calibration routine (often automatic, sometimes called NUC, or Non-Uniformity Correction) that the user triggers to clean up the sensor. Some modern units handle this in the background; older units require a brief shutter click. Calibration is more frequent in daytime use and during temperature swings.
Night vision tubes cannot be used in daylight, period. Intensifier tubes amplify ambient light to an extreme degree, and pointing them at the sun or even bright sky can burn out the photocathode or leave permanent bright spots in the image. Any tube NV unit should include a bright-light cutoff or be stored with the objective cap on until darkness.
Digital night vision is the only category that genuinely works day and night. The CMOS sensor behaves like a video camera; a flip-down filter or auto-iris protects the sensor from daylight. The downside: digital NV used in daylight looks much like a grainy security camera feed, lower resolution than a daytime riflescope. For users who want one optic for both day and night hunting, digital NV is the only realistic answer.
Specs are useful, but the real test happens when a cold wind is cutting across the field at midnight. Here is how each technology has performed across the most common scenarios.
For coyote calling, thermal is the default starting point. Coyotes move in the darkest part of the night, which is exactly when night vision needs help. A 640×480 thermal handheld or scanner lets you sweep a cut bean field or CRP buffer in seconds and pick up eye-shine-equivalent heat signatures at 600 to 1,200 yards. The downside: when a coyote comes in to 80 yards, you cannot tell whether it is followed by a second dog, whether it has a collar, or whether it is a neighbor’s beagle that wandered over.
If you are calling near a farmstead, a fenceline with livestock, or anywhere a wrong ID could get you in serious trouble, run a night vision scope on the rifle and use the thermal strictly as a scanner. That dual-optic discipline is what separates a responsible coyote hunter from a statistic.
Hogs are the textbook case for thermal. They are nocturnal, they live in dense, dark cover, and, in most states, any hog is a legal target so the ID burden is low. A handheld thermal monocular for scanning plus a thermal scope on the rifle is a near-ideal setup, and most southern hog control operations run almost exclusively on thermal these days.
Thermal also wins for tracking wounded hogs. The disturbance to the soil, the blood (which holds heat differently than surrounding dirt), and the animal itself will all show up on thermal long after a flashlight or night vision would have lost the trail. If you have ever watched a trained dog work a thermal-tracked blood trail, you understand why guides will pay top dollar for thermal monoculars.
Big game is where night vision’s identification advantage matters most. The difference between a mature buck and a doe, a branch and an antler, a legal bull elk and a spike, can be made out at 200 to 300 yards through quality night vision when the moon is right and there is enough contrast.
The complication is legal. Many states explicitly prohibit thermal for big game but permit night vision, and a few allow neither. Regulations also change frequently. Before you spend serious money, confirm the current rules with your state wildlife agency rather than relying on a forum post from two years ago.
A hybrid approach works well here: thermal monocular for finding the herd or tracking bedded animals in heavy cover, then switch to a night vision scope for ethical ID and shot placement.
For tactical teams, the same hybrid pattern applies, often layered into a single rig. Many agencies run a thermal scanner or handheld for perimeter sweeps, with night vision goggles or a weapon-mounted night vision scope for movement to contact. Modern multi-spectrum optics exist (COTI, thermal/NV combo units, clip-on thermal in front of a NV scope), but they are expensive and usually reserved for high-end teams.
If you talk to experienced night hunters on the Predator Masters or Sniper’s Hide forums, the consensus is consistent: end up owning both. The hybrid workflow is straightforward.
Use a thermal monocular or scanner (helmet-mounted, handheld, or in a chest rig) to sweep the area and acquire targets. Once you find something to investigate, swap focus to a night vision scope on the rifle for positive ID and the shot. Because thermal scans are fast and NV identification is detailed, the combined setup is dramatically more lethal than either technology alone.
Combination devices push the idea further. A COTI (Clip-On Thermal Imager) mounts in front of a day scope or a night vision optic, letting you flip between thermal overlay and night vision. Pulsar, AGM, and iRay all sell thermal-plus-NV clip-on solutions. For users who already own a quality day scope or NV optic, a clip-on thermal preserves that investment and adds heat-detection capability without buying a second scope. The trade-off is cost ($3,500 to $8,000+) and a slight optical penalty because the clip-on sits in the optical path.
A budget version of hybrid hunting is simply running a thermal monocular for the area scan and a digital NV scope for the rifle. The image quality from the digital NV will not match a Gen 3 tube, but the combined detection-plus-ID workflow is the same.
Outside of hunting, thermal dominates wildlife observation and property security applications. A handheld thermal monocular is the easiest way to find out what is in the back forty at 2 a.m., whether that “varmint” taking chickens is a raccoon or a bobcat, or whether the heat signature walking across the hayfield is a deer or a stray dog.
For home security, thermal cameras paired with standard night vision cameras give you both threat detection (someone is out there) and identification (it is the UPS driver). For wildlife watchers, the same scanner lets you watch coyotes, foxes, and owls without disturbing them with white light.
Choosing between night vision and thermal comes down to five variables. Be honest about each one before spending the money, because the right answer for the hunter across the street may be the wrong answer for you.
In 2026, realistic budgets get you the following:
Under $1,000: Digital night vision on a budget. Expect a usable 150 to 250 yard detection range, lower resolution than tube NV, but daytime-capable and recordings-friendly. For shoppers on a tight budget, our guide to the best night vision scopes under 1000 breaks down the realistic options at this tier.
$1,000 to $2,500: Entry-level thermal (often 384×288 sensor, NETD above 40 mK) for scanning and short-range hog work, or Gen 2+ night vision with usable identification past 200 yards. This is the sweet spot for hunters new to night optics.
$2,500 to $5,000: 640×480 thermal scopes with NETD under 30 mK (the real performance tier for predator and hog work), or Gen 3 unfilmed/autogated night vision for serious identification. Combo setups start becoming possible.
$5,000 and up: Flagship thermal (1024 sensors, sub-20 mK NETD, 12µm pixel pitch), Gen 3 unfilmed white phosphor binos, or dedicated COTI / multi-spectrum setups for tactical and professional use.
Do not forget the cost of accessories. Quality mounts, spare batteries or external battery packs, an IR illuminator if you go the NV route, hard cases, and weather covers routinely add $300 to $800 to the purchase. If you are running a thermal scope, plan on at least one spare battery pack for any extended hunt; cold weather cuts runtime fast.
A common starting path, recommended often on r/NightVision and in the Predator Masters forums, is to begin with a digital NV or budget Gen 2 setup, learn the night hunting basics on a smaller investment, and then add thermal once the night hunting habit is locked in.
Night hunting laws in the U.S. vary dramatically by state and by species, and they change often. Some states permit night vision for predators and varmints but not for big game. Some permit thermal for feral hog control only. A few states prohibit night hunting with electronics entirely. Other countries (Canada, most of Europe, and several U.S. states) restrict thermal and NV exports differently as well.
Do not rely on this article, a forum post, or a YouTube video for legal guidance. Confirm directly with your state wildlife agency before buying. Each agency’s website lists night-hunting rules by species, and most will answer a phone call or email within a few days. Treat the legal section here as a starting point, not the final word.
Be honest about the conditions you actually hunt in, not the conditions you wish you hunted in:
Do not overlook the human side of the equation:
If possible, demo before buying. Many retailers now offer demo days, short-term rental programs, or store credit toward a return if the optic does not suit you. A two-hour hands-on session under realistic conditions will tell you more than a week of spec sheets.
If you only have a minute, this is the framework I’d give a friend:
Neither is universally better. Thermal excels at detection in total darkness, fog, and light cover, and it can spot heat signatures at ranges where night vision sees nothing. Night vision provides much better target identification because it shows actual visual detail (eyes, antlers, fur, body shape) instead of a heat signature. The honest answer for most hunters is to use both, thermal for scanning and night vision for the shot.
Thermal scopes struggle with target identification because they show heat signatures rather than visual details. They are expensive at the high end ($5,000 to $10,000+ for 1024 sensors), battery life is shorter than night vision (3 to 6 hours typical, less in cold weather), and daytime performance degrades in heat waves when background temperatures approach animal body temperature. Thermal also does not work well through glass windows, and a sun-warmed rock can look identical to a bedded animal until you have trained your eye.
Thermal is generally better for coyote hunting because coyotes are most active in the darkest part of the night, when night vision needs help. Thermal lets you sweep a field at 600 to 1,200 yards and pick out incoming dogs well before they detect you. However, many responsible coyote hunters run a night vision scope on the rifle when calling near livestock or residential areas, since positive ID is non-negotiable in those settings.
Yes, and this hybrid setup is what most experienced night hunters end up running. The standard workflow uses a thermal monocular or scanner for area scanning and target acquisition, then a night vision scope on the rifle for identification and the shot. You can also use a thermal clip-on (COTI) mounted in front of an existing day scope or night vision optic, though those units are expensive. The combination plays to each technology’s strength and dramatically improves hit probability in the field.
NETD stands for Noise Equivalent Temperature Difference and is measured in millikelvin (mK). It is the smallest temperature difference the sensor can resolve against background noise. A NETD under 30 mK is considered excellent; under 20 mK is flagship-grade. A 50 mK sensor will produce a smoother-looking image on paper but can struggle to pull a faint heat signature out of a sun-warmed background. If you hunt in summer heat or on cold days with small temperature gradients, NETD matters more than raw resolution.
Snipers use several layered countermeasures: thermal blankets to mask body heat, hiding near warm objects (vehicles, sun-heated rocks, buildings) so the signature blends in, timing movement for dawn or dusk when ambient temperatures match body temperature, using glass or water as a thermal barrier, and staying beyond practical thermal detection ranges. Some use cooled suits to reduce skin temperature and wait for cold weather when the body loses heat to the environment faster.
Night vision hunting is restricted in some states because of fair-chase concerns, hunter safety, and overharvest worries. Regulations vary widely; some states allow night vision for predators and varmints but ban it for big game, while a few ban both technologies outright. Always check your state wildlife agency’s current rules before buying equipment or hunting at night.
Yes, thermal scopes work during the day. They are daylight-safe and can be useful for tracking blood trails or spotting animals hidden in cover. The trade-off: during the warmest part of the day, the entire scene approaches animal body temperature, contrast drops, and detection range shrinks dramatically. Most hunters use thermal in the first two hours after sunrise and the last two before sunset for best results. Many thermal scopes auto-calibrate to manage this; older units may require a manual NUC (non-uniformity correction) cycle.
After seasons of comparing night vision vs thermal scopes across predator stands, hog control operations, and big game scouting in multiple states, the conclusion is consistent: each technology wins where the other fails, and the best setups use both.
Choose thermal if you primarily hunt predators or hogs, run in foggy or overcast country, need maximum detection range, or want one optic that works day and night. A 640×480 thermal scope with NETD under 30 mK and a 12µm pixel pitch is the workhorse configuration for most serious night hunters in 2026, and it remains the only technology that lets you scan a field and find game in complete darkness.
Choose night vision if you hunt big game where identification must be certain, you operate in country with reliable moonlight, you need long battery life for extended sits, or you have a budget that makes Gen 2+ or Gen 3 white phosphor practical. Night vision is also the safer pick for users who plan to use the optic in daylight or want a more natural-looking image to study.
Choose hybrid if your budget and your mission allow it. Run a thermal monocular for scanning and a night vision scope (or a thermal scope plus a handheld NV for ID confirmation) on the rifle. This is the workflow that serious night hunters on the forums consistently describe as the endgame. The technology continues to improve year over year, prices for both thermal and digital night vision are gradually coming down, and clip-on combination units are closing the gap between “two separate optics” and “one integrated rig.” For a deeper look at the optics side of the equation, our guide to the different types of rifle scopes covers how night optics fit among traditional glass.
Whichever you buy, prioritize matching the optic to your actual hunting conditions, confirm current regulations with your state wildlife agency before you spend a dollar, and budget realistically for mounts, batteries, and accessories. Both night vision vs thermal scopes technologies have matured into reliable tools that put more game on the ground for those who put in the practice. Pick the one that fits your mission, get trained on it before the season opens, and let field experience, not marketing copy, guide your next upgrade.