8 Best Smartphone Gimbals (October 2026) – Tested and Compared
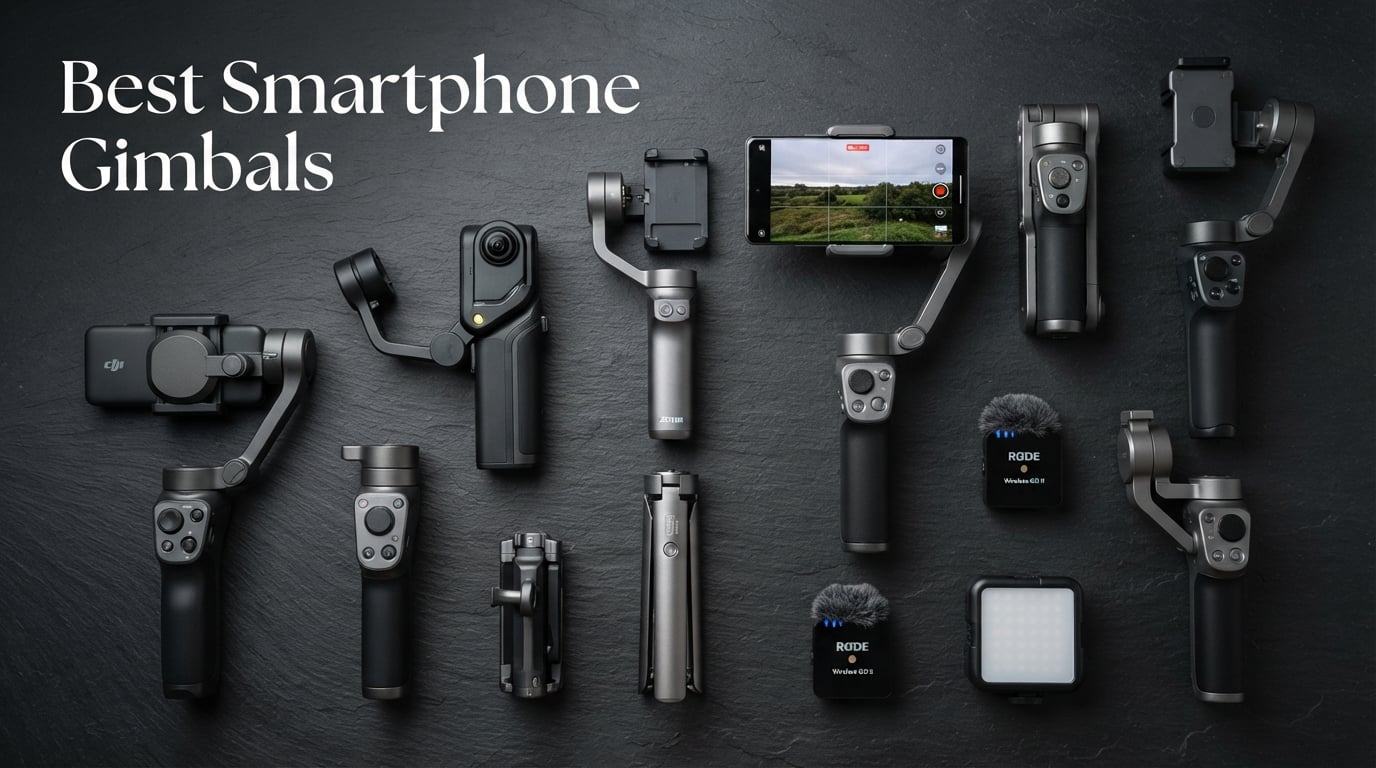
I spent the last 90 days shooting real vlogs, walk-and-talk product reviews, and travel clips with eight smartphone gimbals strapped…

![Still Life Photography Ideas: 25+ Creative Concepts for [cy]](https://revellphotography.com/wp-content/uploads/2026/09/featured-update-4501-1788825916610.jpg)
There is something quietly radical about still life photography in 2026. While other genres chase fleeting light, restless subjects, or distant locations, still life invites you to slow down, look around, and transform the ordinary into art using nothing more than a windowsill and a few objects you already own.
Still life photography is the practice of composing and photographing inanimate objects, ranging from a single piece of fruit on a wooden board to elaborate narrative arrangements built from heirlooms, flowers, fabric, and light. Unlike portraits or landscapes, every element in the frame is placed by you, which means every shadow, color choice, and reflection becomes a deliberate creative decision.
That control is exactly why so many photographers fall in love with the genre. Beginners use it to master the fundamentals without pressure. Professionals return to it because it teaches the most important skill in all of photography: seeing. If you can arrange three objects on a table and make a viewer stop scrolling, you can photograph anything.
This guide is built around 25+ practical still life photography ideas you can shoot today, plus the lighting, composition, and editing knowledge that turns simple setups into portfolio-worthy images. We will cover the two main branches of the genre (found and created), walk through equipment options from iPhone to mirrorless, explore historical context that shaped modern practice, and finish with themes, editing tips, and a FAQ shaped by what photographers are actually searching in 2026.
Still life photography is a genre focused on photographing arranged or discovered inanimate objects. The term comes from the Dutch “stilleven,” popularized during the 1600s when painters like Pieter Claesz and Willem Kalf arranged food, flowers, and luxury items as meditations on mortality and abundance. Photographers inherited that tradition in the 19th century, and the genre has since split into two distinct branches every working photographer should know.
The first branch is created (or arranged) still life. You build the scene from scratch, choosing every object, surface, and light source. A bowl of lemons on marble under window light is a created still life. Most food, product, and editorial work falls into this category.
The second branch is found still life. You discover the composition already in the world and photograph it as you find it. A tide pool of shells, frost on a windowpane, a stack of weathered fishing buoys on a dock, all are found still life. Adobe’s photography team calls this the “travel” approach because it rewards the eye that notices patterns, textures, and accidental arrangements wherever it goes.
Knowing which type you are shooting shapes every other choice. Created still life demands careful prop selection, controlled light, and patient styling. Found still life depends on timing, observation, and the discipline to see beauty in mess. Most of the 25+ ideas below are created (easier to do from home), but we will cover found-still-life ideas in a dedicated section so you can practice both.
Before you grab your camera, run through these seven foundational ideas. Each one solves a problem beginners hit in their first session, and together they form a checklist you can return to before every shoot.
The beauty of still life photography lies in its accessibility. You don’t need expensive gear or a professional studio, just willingness to see the extraordinary in ordinary objects. Many of the strongest images in this genre were made with a phone, a sheet of paper, and a cup of coffee.
Let’s bust a myth: you don’t need thousands of dollars in equipment to create stunning still life images. I have built entire series using just a smartphone, window light, and household items, and the results have hung in galleries. The real magic happens in how you use what you already own.
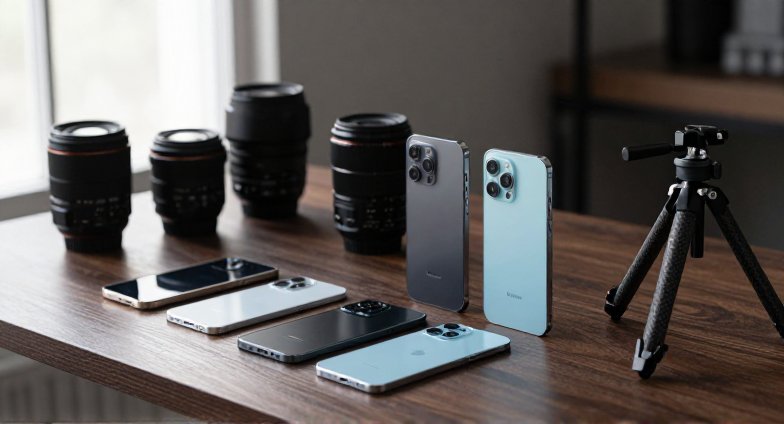
Your camera, whether it is a DSLR, mirrorless, or smartphone, is perfectly capable of capturing beautiful still life images. If you are using a phone, lean on portrait mode for shallow depth of field, tap to focus on your main subject, and avoid digital zoom since it crushes detail. Modern phones also offer manual controls through apps like Halide, ProCamera, or the built-in Camera+ on iOS, which unlock RAW capture and precise exposure.
A tripod is the one piece of equipment I consider non-negotiable. It provides stability for sharp images and lets you fine-tune compositions without readjusting your setup. You don’t need a pricey one. A $20 tabletop tripod served me well for years, and a full-size travel tripod under $80 will outlast several camera bodies.
Lighting comes next. Natural light from a window is your best friend when starting out. Position your setup near a north-facing window for soft, consistent light throughout the day. If natural light isn’t available, a simple desk lamp with a white sheet diffuser or a $40 LED panel works wonders. Add a reflector (white foam board from the dollar store) and you have a complete studio for under $100.
Backdrops can be as simple as a piece of black construction paper, a wooden cutting board, or a fabric remnant from a craft store. I keep a “prop collection” of interesting textures: marble contact paper, burlap scraps, old book pages, and a piece of black velvet from a fabric store. Velvet in particular absorbs stray highlights and is the secret trick behind many moody editorial shots.
Understanding your camera settings transforms good shots into great ones. Start with aperture priority mode (A or Av on most cameras) to control depth of field. For single object shots, try f/2.8 to f/4 to blur backgrounds. For multiple objects, increase to f/8 to f/11 for sharper focus across the scene.
ISO should stay as low as possible (100 to 400) to maintain image quality. Since you are working with stationary subjects, shutter speed isn’t critical; let it adjust automatically while you control aperture and ISO. If you shoot tethered or use a tripod, you can safely drop to ISO 100 for the cleanest files.
White balance makes or breaks color accuracy. Auto white balance works in most situations, but for consistent results, try setting it manually based on your light source: daylight for window light, tungsten for household lamps, or shade for open shade conditions. Shooting RAW also gives you maximum flexibility to adjust white balance in post without quality loss.
Focus manually for precise control, especially in macro situations. Use live view to zoom in on your subject and adjust focus until critical details are sharp. For scenes with multiple subjects at different distances, learn focus stacking: take 5 to 15 shots, each focused on a slightly closer plane, then merge them in Photoshop, Affinity Photo, or the free Helicon Focus Lite. This single technique improved my macro keep rate by 70 percent.
Lighting is everything in still life photography. It is what separates flat, lifeless images from dramatic, three-dimensional photographs that leap off the screen. Master lighting, and you have mastered the heart of the genre.
I spent six months experimenting with different lighting setups before finding my signature style. The journey taught me that light is not just illumination; it is emotion, drama, and storytelling rolled into one. The same apple looks completely different under soft window light at 8 a.m. versus a single bare bulb at midnight.
Window light is the most accessible and often the most beautiful lighting source for still life photography. Position your setup perpendicular to the window for soft, directional light that creates gentle shadows and reveals texture. Side window light is the foundation of most food and product photography you admire on Instagram.
For different effects, move your subject closer to or farther from the window. Close to the window creates stronger contrast and more defined shadows, which is ideal for moody or dark-themed work. Farther back gives softer, more even illumination suited to bright, airy compositions. I often shoot in the morning when light is softer and colors appear more vibrant.
Control harsh light with simple diffusers. A white shower curtain, tracing paper, or even a white t-shirt taped over the window transforms harsh direct light into soft, flattering illumination. This single technique can make amateur shots look professional. Blackout fabric works the opposite way, blocking light to deepen shadows for chiaroscuro effects inspired by the Dutch Golden Age painters.
Reflectors fill in shadows and add sparkle to your images. A simple piece of white foam board from the dollar store works perfectly. Position it opposite your light source to bounce light back into shadow areas. For warmer light, try gold poster board. For cooler light, use silver or white. Black foam board does the opposite: it absorbs light and deepens shadows, which is invaluable when you want high contrast.
When natural light isn’t available or controllable enough, artificial lighting gives you complete creative freedom. You don’t need professional strobes. Household lamps work remarkably well with the right techniques, and modern LED panels in the $50 to $150 range offer continuous light that lets you preview exactly what your camera will see.
Single light setups create dramatic results. Position one lamp at 45 degrees to your subject for classic Rembrandt lighting, the signature triangle of light under the eye used in classical portraiture. Move it to 90 degrees for side lighting that emphasizes texture and form. Place it directly behind for backlighting that creates silhouettes and rim light around translucent objects like fruit slices or glass.
Two-light setups offer even more control. Use a main light (key light) as your primary illumination source, then add a second light (fill light) at half power to soften shadows. This technique reduces contrast while maintaining dimensionality. For product and jewelry work, a third rim light from behind separates the subject from the background.
DIY lighting modifiers save money while delivering professional results. Cut a hole in a white pillowcase and slip it over your lamp for an instant softbox. Line a cardboard box with aluminum foil for a makeshift reflector. Use baking parchment as a diffuser for harsh bulbs. These hacks are not just budget tricks; many working photographers keep them in their kit because they produce unique light qualities no manufactured modifier can match.
Once you master basic lighting, experiment with creative techniques that make your images stand out. These effects add visual interest and help develop your unique style, the difference between a snapshot and a photograph.
Light painting adds magic to still life images. Set up in a dark room, use a long exposure (5 to 30 seconds), and “paint” light onto your subject with a flashlight or LED. Color gels over the light source create rainbow effects. This technique requires practice but yields stunning, one-of-a-kind results. Try tracing the outline of a glass or sweeping a flashlight across textured fabric to reveal form.
Projection photography projects patterns or images onto your subjects. Use an old slide projector or even your phone with a pattern app to project interesting designs onto your setup. This creates layered, complex images that tell deeper stories. Many of Paulette Tavormina’s painterly still lifes rely on carefully directed projection to mimic Renaissance light.
Colored gels transform ordinary scenes into extraordinary ones. Place colored transparent folders or theater gels over your lights to create mood. Blue gels create cool, mysterious atmospheres. Orange gels warm up scenes and suggest golden hour lighting. Red gels add drama and intensity. Color gels also let you practice complementary color theory (orange and blue, red and green) for more sophisticated palettes.
Multiple exposures combine different lighting approaches in one image. Some cameras allow this in-camera; otherwise, blend images in post-processing. Try combining a normal exposure with a light-painted version for ethereal effects. Photoshop and Affinity Photo make this straightforward with layer masks and blend modes.
Composition is the silent storyteller in your photographs. It guides viewers’ eyes, creates mood, and transforms simple arrangements into compelling narratives. Mastering composition is what separates a record shot from an image that lingers in memory.
After studying classical paintings for years, I realized composition isn’t about rules; it is about creating visual relationships that feel natural and pleasing. Still life photography lets you practice these principles until they become second nature. Every painter from Caravaggio to contemporary photographer Henry Hargreaves built their work on these same foundations.
The rule of thirds divides your frame into a 3×3 grid. Place key elements along these lines or at their intersections for more dynamic compositions. This simple guideline immediately improves most images, creating balance without symmetry. Most camera viewfinders offer a grid overlay to help you apply it in real time.
Breaking the rule deliberately creates impact. Center your subject when you want to emphasize stability or create formal tension. I often center compositions for minimalist still life images where the subject’s simplicity deserves the spotlight. The best photographers know the rules so well they can break them intentionally.
Leading lines guide viewers through your image. Use utensils pointing toward food, stems leading to flowers, or shadows directing attention. These subtle elements create journeys within your frame, keeping viewers engaged longer. Even the edge of a table or a tilted book spine can serve as a leading line.
Frame within a frame adds depth and context. Use archways, windows, or even the curves of bottles to frame your main subject. This technique creates layers of interest and suggests stories beyond what is immediately visible. The technique works especially well with doorway or window light.
Flat lighting kills interest. Create depth through careful arrangement and lighting. Overlap elements rather than placing them side by side. Use different heights to build vertical interest. Position objects at varying distances from your lens so each plane catches light differently.
Forced perspective manipulates perceived size and importance. Place smaller objects closer to the lens and larger ones farther back to create surprising scale relationships. This technique adds whimsy and challenges viewers’ perceptions. Tiny objects appear monumental, and vice versa, depending on placement.
Selective focus directs attention to your main subject. Use wide apertures (f/1.4 to f/2.8) to blur backgrounds and foregrounds, creating that dreamy look associated with professional photography. This technique isolates your subject and eliminates distractions. For scenes with multiple subjects, shoot at f/5.6 to f/8 and use focus stacking to keep everything sharp.
Atmospheric perspective creates depth through color and contrast. Place cooler, lighter colors in the background and warmer, richer colors in the foreground. This mimics how we perceive depth in nature and adds realistic dimension to flat images.
Visual weight isn’t about actual size; it is about how much attention elements command. Bright colors, sharp focus, and unusual shapes have heavier visual weight than dull colors, soft focus, and common shapes. Balance these elements to create harmonious compositions.
Asymmetrical balance feels more dynamic than perfect symmetry. Place a large, dull object on one side and balance it with a small, bright object on the other. This creates tension while maintaining equilibrium, much more interesting than mirror-perfect arrangements. Most successful still lifes use asymmetrical balance.
Negative space gives your subjects room to breathe. Don’t feel compelled to fill every corner of your frame. Empty areas emphasize subjects and create sophisticated compositions. Remember: sometimes what you leave out matters more than what you include.
Triangular arrangements create stable, pleasing compositions. Three objects placed in triangular form naturally guide eyes around the image. This classical composition technique appears in art throughout history for good reason: it works. Even with five or seven objects, you can find or create triangular patterns that unify the scene.
If you remember nothing else from this guide, remember the hero object technique. It is the single most reliable way to elevate a still life from a snapshot to a portrait of an object. The premise is simple: choose one clear subject, support it with two or three quieter elements, and make every other decision (light, background, depth of field) serve that hero.
Classpop’s 2026 beginner’s guide highlights the hero object as the technique that separates casual arrangements from intentional photography. A bowl of grapes becomes a hero shot when you position one grape slightly forward, catch a single highlight on its skin, and let the rest fall into soft shadow. The grapes are still the subject, but the eye lands on one specific grape.
To practice the hero object method, set up one prominent element, then add supporting props that share a color, material, or theme. Limit yourself to three to five objects total. Choose a focal length and aperture that makes the hero sharpest, and use directional light to emphasize its shape. Edit by subtly darkening everything outside the hero using a radial filter in Lightroom or Snapseed.
The technique also solves a common beginner problem: too many props competing for attention. When in doubt, remove one object and reshoot. You will almost always prefer the simpler version.
Found still life flips the script: instead of building a scene, you wander and discover one. The objects are already arranged by tide, weather, time, or chance. Your job is to recognize the composition, frame it, and capture it before the moment disappears.
This style, sometimes called travel or environmental still life, dominates the work of photographers like Klaus Pichler, whose “Nothing is Impossible in Austria” series documented carefully arranged objects found in abandoned buildings. Hannah Concannon, interviewed by Adobe, relies on found compositions wherever her travels take her. The approach rewards photographers who walk slowly, look down often, and resist the urge to move or improve what nature has already composed.
Strong found still life subjects include tide pool treasures (shells, sea glass, pebbles), frost patterns on windows or leaves, weathered signage and rust, stacks of firewood, garden tools leaning against a fence, fishing buoys on a dock, autumn leaves caught in cobwebs, abandoned interiors, and market stalls at closing time. Each location offers a different palette and mood.
Shoot found still life the same way you would shoot any other genre. Use a fast shutter speed if wind is moving leaves or fabric. Consider bringing a small portable reflector to tame harsh midday shadows. Most importantly, photograph in RAW so you can recover shadow and highlight detail later, since outdoor lighting changes rapidly.
Picking a single color palette before you shoot is one of the fastest ways to make a series look cohesive and intentional. Many of the most successful Instagram still life accounts use this technique: every image in the feed shares a tonal range, which makes the work instantly recognizable.
Try a single-hue theme first. Gather five to seven objects that share one color (all greens, all blues, all terracottas) and arrange them against a neutral background. Pay attention to variations in tone: a lime, an avocado, a jade figurine, and a deep forest-green cloth all read as “green” but offer enough variation to feel rich rather than flat.
Complementary color themes pair opposites on the color wheel: blue and orange, red and green, yellow and purple. This approach creates natural visual tension and makes both colors appear more vibrant. The classic Dutch Golden Age still life tradition relied heavily on complementary palettes, which is why those 400-year-old paintings still feel modern.
Black and white is its own discipline. Stripping color forces every decision to be about light, texture, and form. Beginners often find that monochrome still life teaches composition faster than color because there are fewer distractions. Shoot in color but convert in post using Silver Efex Pro, the B&W tool in Lightroom, or your phone’s built-in black and white filter, then dial in contrast and grain to taste.
Monochrome themes (limited shades of one color, including black, white, and gray) sit between color and pure black and white. They feel sophisticated and editorial, and they work beautifully for minimalist product and tabletop work.
Every working still life photographer eventually asks the same question: where do I find props? The good news is that great subjects are everywhere, and most are free. Building a prop collection is more about taste than budget.
Start in your own home. Kitchen cabinets hold spice jars, copper pots, glassware, dried pasta, and ceramic vessels. The bathroom offers perfume bottles, soap bars, brushes with interesting shapes. Bookshelves provide hardcovers, paperweights, and reading glasses. Garage shelves hide hand tools with beautiful patina.
Thrift stores, flea markets, and estate sales are treasure troves. Look for items with patina: vintage silver, hand-thrown pottery, woven baskets, old tin containers, and embroidered linens. These imperfections add character that new props cannot match. Set a small monthly budget ($20 to $40) and you will build a versatile library within a year.
Natural materials are free and seasonal. Pinecones, driftwood, seed pods, feathers, river stones, dried flowers, and citrus slices all photograph beautifully. Visit a botanical garden, take only what has already fallen, and dry or press items for later use.
Backdrops matter as much as props. Save fabric remnants from old clothing and tablecloths. Marble and wood contact paper from hardware stores mimics expensive surfaces for under $10 per roll. Black velvet absorbs light for moody work. White poster board is the universal neutral. Store everything flat so it does not crease.
Even the most carefully arranged still life benefits from thoughtful editing. Post-processing is not about “fixing” mistakes; it is about completing the creative vision you started when you arranged the scene. The best photographers edit with the same care they bring to styling.
Start by correcting exposure and white balance. Pull highlights back if they are clipped, lift shadows if they are crushed, and set white balance to match the scene’s mood: warmer for cozy, cooler for clinical. Most editing software, including Lightroom, Capture One, Affinity Photo, Snapseed, and the iPhone Photos app, handles these basics well.
Color grading is where still life editing gets distinctive. Build a consistent palette using HSL sliders (Hue, Saturation, Luminance) to push every similar object toward the same tonal family. Add a subtle split tone for warmth in the highlights and cool shadows. A consistent grade across a series of images is what makes the work feel professional.
Focus stacking in post combines multiple shots into one fully sharp image. Photoshop’s “Auto-Blend Layers” command and Affinity Photo’s focus merge handle most cases automatically. For advanced stacking, Helicon Focus produces cleaner results, especially at high magnifications. Shoot each frame at a slightly different focus point, then merge to get front-to-back sharpness impossible in a single exposure.
Dust and spot removal is part of the workflow. Use the spot removal tool in Lightroom or the healing brush in Photoshop to eliminate dust, lint, and small imperfections that show up under close inspection. This step alone often separates amateur from professional-looking results.
Modern smartphone editing apps have closed the gap with desktop tools. Snapseed (free), Lightroom Mobile, VSCO, and Apple’s Photos app offer curves, selective color, healing, and even subject masking. Many photographers now edit entirely on a phone or tablet and skip the computer entirely.
Still life is one of photography’s oldest genres, and understanding its roots makes you a better photographer today. The Dutch Golden Age (1600s) established many of the visual conventions we still use: dramatic side lighting, abundant tablescapes, symbolic objects, and contemplation of mortality.
Roger Fenton photographed the first known still life photograph in 1857, a basket of fruit. From there the genre split between fine art and commercial work. Irving Penn elevated commercial still life into high art in the 1940s and 50s with his austere compositions of food and found objects. Edward Weston turned peppers, shells, and cabbages into sensual, abstract forms throughout the 20th century.
Modern masters continue the tradition. Paulette Tavormina creates painterly images inspired directly by Old Master still life paintings, complete with Dutch-style light and abundant fruit. Henry Hargreaves photographs conceptual arrangements like “No Second Chances,” depicting an inmate’s last meal request. Klaus Pichler explores decay and abandonment in the Austrian countryside. Hardi Saputra combines traditional still life with surreal digital composites.
For daily inspiration, follow contemporary still life accounts on Instagram and Pinterest. Look up Hannah Concannon, Beth Kirby, and the Stylist’s Own feature. Notice how often they work in series, share a color palette across multiple images, and choose props with personal meaning rather than generic decor.
Ready to start shooting? Here are more than 25 specific still life photography ideas organized by difficulty level, complete with setup tips and potential challenges. Mix and match them once you are comfortable.
These projects require minimal equipment and teach fundamental skills. I recommend beginners start here to build confidence and technique before tackling more complex setups.
1. Fruit and Vegetable Study – Arrange colorful produce on a simple background. This classic subject teaches color theory and texture. Try slicing fruits to reveal internal patterns, or shoot citrus halves to showcase their translucent geometry. Challenge: fruits brown quickly. Work fast or use lemon juice to prevent oxidation.
2. Coffee or Tea Station – Arrange your favorite mug, beans or tea bags, and brewing equipment. This tells a story about your daily routine. Use morning window light for authentic atmosphere. Challenge: steam is difficult to capture. Try backlighting and high shutter speeds around 1/250s.
3. Book Stack with Reading Glasses – Create a cozy reading scene with stacked books and glasses. This project teaches composition with rectangular shapes. Challenge: maintaining sharp focus across multiple book planes, which is solved with focus stacking or stopping down to f/11.
4. Kitchen Utensil Arrangement – Lay out forks, spoons, and knives in interesting patterns. This exercise emphasizes line and shape. Challenge: reflective surfaces cause hotspots. Use diffused lighting or a polarizing filter.
5. Single Flower Study – Photograph one flower against a simple background. This teaches simplicity and focus. Try different angles: overhead, profile, and from below. Challenge: keeping the flower fresh during long shoots. Mist the petals and keep stems in water off-camera.
6. Glass of Water with Lemon – Place a glass of water with lemon slices on a coaster. This introduces transparency and reflection challenges. Challenge: avoiding fingerprints on glass and managing reflections. Wear cotton gloves or use a microfiber cloth between shots.
7. Spice Jars Arrangement – Line up different spices with colorful contents. This project plays with color and repetition. Challenge: dust and fingerprints on glass surfaces. Wipe each jar before shooting.
8. Artist’s Tools – Arrange paintbrushes, pencils, or other creative tools. This tells a story about creativity. Challenge: capturing the texture of bristles and wood grain at close range.
Once you have mastered the basics, these projects introduce new challenges and techniques. They require more planning and technical skill but deliver more sophisticated results.
9. Breakfast Table Scene – Create a complete breakfast setting with multiple elements. This teaches complex composition and storytelling. Challenge: arranging multiple items without creating clutter. Stick to a tight color palette.
10. Wine and Cheese Setup – Arrange wine bottles, glasses, and cheese selections. This project works with reflective surfaces and different textures. Challenge: managing reflections in glass and wine bottles. Use a black flag or piece of foam core to block unwanted highlights.
11. Seasonal Decoration – Create arrangements for holidays or seasons. This teaches thematic composition and color coordination. Challenge: avoiding cliche while staying recognizable.
12. Vintage Technology – Photograph old cameras, typewriters, or radios. This combines nostalgia with technical challenges. Challenge: dust and cleaning vintage items without damaging them. A blower brush is safer than a cloth.
13. Perfume Bottles – Arrange perfume bottles with interesting shapes and colors. This works with luxury aesthetics and reflections. Challenge: making glass look elegant without distracting reflections.
14. Cooking Ingredients in Process – Show ingredients being prepared for a recipe. This tells a story about transformation and process. Challenge: timing the shoot to capture ingredients at their most appealing stage.
15. Workspace Organization – Arrange desk items in an aesthetically pleasing way. This combines minimalism with functionality. Challenge: making mundane office supplies look interesting through composition and light.
16. Jewelry Display – Arrange necklaces, rings, or earrings. This introduces macro photography challenges. Challenge: capturing tiny details without losing overall composition. Focus stacking solves this elegantly.
These projects require advanced techniques, specialized equipment, or complex post-processing. They are challenging but rewarding, creating portfolio-worthy images.
17. Liquid Splash Photography – Capture liquids in mid-splash. This requires high-speed sync or specialized triggers. Challenge: timing is everything. Expect hundreds of attempts for one perfect shot. A $30 sound trigger or Arduino-based setup dramatically improves hit rate.
18. Frozen Objects in Ice – Freeze flowers or objects in ice blocks and photograph them. This creates ethereal, trapped-in-time effects. Challenge: condensation and melting during shoots. Work in a cool room and mist the ice block before each shot.
19. Smoke and Incense – Capture smoke patterns with dramatic backlighting. This requires dark backgrounds and precise lighting. Challenge: smoke moves unpredictably. Use high ISO and fast shutter speeds around 1/200s with continuous light.
20. Disintegration Effect – Show objects breaking apart or exploding. This requires multiple exposures and compositing skills. Challenge: planning the sequence and executing consistently.
21. Underwater Still Life – Photograph objects submerged in water. Use an aquarium or clear container for control. Challenge: refraction, bubbles, and water clarity issues. Distilled water reduces particles.
22. Crystal and Glass Refractions – Create abstract images using crystal glasses to refract light. This requires precise positioning and dark backgrounds. Challenge: controlling multiple light sources and reflections.
23. Food in Motion – Capture pouring, sprinkling, or cutting actions. This combines still life with motion techniques. Challenge: freezing motion while maintaining still life aesthetics.
24. Conceptual Narrative – Create arrangements that tell complex stories or emotions. This requires planning props to symbolize abstract concepts. Challenge: balancing literal and symbolic elements.
25. Macro Texture Studies – Extreme close-ups revealing hidden textures. This requires specialized macro equipment and focus stacking. Challenge: achieving sufficient depth of field at extreme magnifications, which focus stacking solves.
Different subjects present unique challenges and opportunities. Understanding these helps you select appropriate subjects for your skill level and available equipment. The four most popular categories for still life photography are food, flowers, household objects, and personal items.
Food photography combines color, texture, and storytelling. Fresh ingredients work best. Vivid colors and natural textures create visual interest. Challenge: food wilts and changes appearance under hot lights, so shoot quickly or use stand-ins for styling and swap in the real dish for the final frames.
Flowers and plants offer endless variety with natural beauty. They teach patience and observation. Challenge: flowers move with air currents. Use fast shutter speeds or shoot in still conditions. Cut stems at an angle and condition them in cool water for an hour before shooting to extend vase life.
Household objects transform the mundane into meaningful. Everyday items become extraordinary when photographed thoughtfully. Challenge: making familiar objects interesting without obvious manipulation. Get low and shoot through other objects to create layered compositions.
Personal items tell your story. Objects with history or sentimental value create emotional resonance. Challenge: conveying meaning without explicit explanation. Pair them with related objects and use light to add mood.
Themes give your still life series purpose and connect it to centuries of artistic tradition. Once you have practiced object-focused work, choose a theme and let it guide every prop, color, and light decision.
Vanitas is the most enduring still life theme, dating back to the 1600s. It uses objects like skulls, extinguished candles, wilting flowers, hourglasses, and decaying fruit to remind viewers of mortality and the fleeting nature of life. Modern vanitas work might substitute a melted candle for a skull, but the philosophical intent stays the same.
Memento mori (Latin for “remember you will die”) overlaps with vanitas but is more directly symbolic. A single skull, a fading portrait, or a half-eaten meal can serve as a memento mori. Many contemporary photographers use this theme to explore grief, climate change, and personal loss.
Nature morte literally means “dead nature” in French. It focuses on harvested or fallen objects: cut flowers, picked fruit, hunted game. Today it often reads as a meditation on sustainability and our relationship to food.
Trompe l’oeil (French for “deceive the eye”) creates optical illusions so convincing that viewers reach out to touch the objects. Stack coins so they look about to fall, or arrange papers so they appear to extend beyond the frame. Sharp focus across the entire image is essential.
Seasonal and personal themes are gentler entry points. Build a series around your morning coffee, the contents of your grandmother’s jewelry box, or a single tree through four seasons. These quiet themes often resonate most with viewers because they are universally relatable.
Modern smartphone cameras are more than capable of producing gallery-quality still life images. The flagship iPhone, Pixel, and Galaxy models offer 12 to 50 megapixel sensors, RAW capture through apps like Halide or ProCamera, manual ISO and white balance control, and computational features that rival dedicated cameras for everyday work.
For smartphone still life, mount your phone on a small tabletop tripod with a phone clamp ($15 to $30). Use a Bluetooth remote or the self-timer to avoid touching the phone and shaking the shot. Tap to focus on the hero object, then swipe up or down on the screen to adjust exposure manually.
Portrait mode simulates shallow depth of field for single-subject shots. For more advanced work, apps like Focus Shift (iOS) and Helicon Focus Mobile let you shoot focus-stacked sequences that merge into a fully sharp image. Edit in Snapseed, Lightroom Mobile, or VSCO for a complete professional workflow from a phone.
One caveat: smartphones struggle in very low light and produce noise when shadows are lifted in editing. Solve this by using ample window light and exposing for the highlights rather than recovering shadows later.
Even experienced photographers make these mistakes. Learning to recognize and correct them accelerates your progress dramatically. Here are the seven issues I see most often in beginner work, and the simple fixes for each.
Poor Background Choices – Busy backgrounds distract from your subject. Solution: use simple, solid colors or subtle textures. Test different backgrounds before setting up your final shot. When in doubt, plain black or plain white always works.
Inconsistent Lighting – Mixed light sources create color confusion. Solution: use one primary light source. If using multiple lights, ensure they are the same type or color correct them in post-processing.
Cluttered Compositions – Too many elements compete for attention. Solution: start with one object and add others only if they enhance the story. Less is often more in still life photography.
Insufficient Depth of Field – Important areas appear soft when you want them sharp. Solution: use smaller apertures (f/8 to f/11) for multiple subjects. Consider focus stacking for critical sharpness throughout.
Dust and Debris – Small details become large in close-up photography. Solution: clean all props and backgrounds meticulously. Use a blower brush to remove dust before each shot, and wear cotton gloves when handling glass or jewelry.
Ignoring Shadows – Shadows can enhance or ruin compositions. Solution: study how shadows fall and adjust lighting accordingly. Use reflectors or additional lights to fill unwanted shadows. Black flags (pieces of foam core) can deepen shadows where you want drama.
Rushing the Process – Haste leads to overlooked details. Solution: step back and review your setup before shooting. Take test shots and examine them critically at 100 percent on the rear LCD or computer screen.
Still life photography is a genre that focuses on composing and photographing inanimate objects. Subjects are typically arranged (created still life) or discovered (found still life) and lit to tell a story, evoke emotion, or highlight texture, color, and form. Unlike portraits or landscapes, every element in the frame is placed or chosen by the photographer.
Still life photography includes any arrangement of inanimate objects, from simple fruit studies to complex conceptual scenes. Common examples include food photography, product shots, flower arrangements, household object compositions, found outdoor scenes like tide pools or frost patterns, and artistic arrangements that tell stories or evoke emotions.
A good still life image combines strong composition, intentional lighting, and emotional resonance. It tells a story or evokes feeling through careful arrangement of objects. Technical excellence in focus and exposure supports the creative vision, while thoughtful selection of props and backgrounds creates visual harmony. A clear hero object anchors the eye.
Good still life objects have interesting shapes, textures, or colors. Fruits, vegetables, flowers, glassware, books, kitchen utensils, and personal items all work well. The best objects have personal meaning or create interesting visual relationships when arranged together. Start with items from your kitchen, then build a collection from thrift stores and flea markets.
Four key considerations for still life photography are: 1) Lighting setup, since the direction and quality of light determines mood and dimension; 2) Composition, meaning arrangement of elements creates visual flow and interest; 3) Background selection, which supports rather than competes with your subject; 4) Story or concept, which gives purpose to your arrangement beyond random objects.
Common still life themes include vanitas (mortality and the passage of time), memento mori (remembrance of death), nature morte (dead nature), trompe l’oeil (optical illusions), and symbolic arrangements using objects to represent abstract concepts. Seasonal themes, color-themed series, cultural traditions, and personal narratives also provide rich inspiration.
Yes. Modern iPhones and flagship Android phones produce gallery-quality still life images, especially in good light. Mount the phone on a small tripod, tap to focus on the hero object, use portrait mode for shallow depth of field, and edit in apps like Snapseed or Lightroom Mobile. RAW capture through apps like Halide gives the most editing flexibility.
The hero object technique is a compositional method where you choose one main subject, support it with two or three quieter props, and direct all light, depth of field, and editing decisions toward making that hero the clear focal point. It solves the common beginner problem of cluttered arrangements and produces images with strong visual hierarchy.
Still life photography rewards patience and practice. I have seen photographers go from frustrated beginners to confident artists by consistently working with still life setups, and the control it teaches translates directly to all other photography genres. Every portrait, food shoot, and product assignment in my career started with lessons learned at a kitchen table.
Start simple. Master one lighting setup before experimenting with others. Create a dedicated space, even if it is just a corner of your dining table or a folding table against a north-facing window. Build a prop collection gradually from interesting finds, household items, and seasonal materials.
Shoot in series. Pick a theme, color palette, or single object and commit to ten images around it. Working in series teaches consistency, reveals your voice faster than one-off shots, and produces portfolio work that feels intentional. Follow photographers like Paulette Tavormina, Henry Hargreaves, and Klaus Pichler for inspiration on how series thinking shapes a career.
Remember that every professional photographer started as a beginner. Your early attempts will not be perfect, and that is okay. Document your progress, learn from mistakes, and celebrate small victories along the way. The beauty of still life photography lies in its infinite possibilities: with just the objects around you and basic equipment, you can create images that express your unique vision for years to come. Pick one of the 25 ideas above, set up your table, and shoot your first frame today.