![Best iPhone Tripods [cy]: 10 Models Tested & Reviewed](https://revellphotography.com/wp-content/uploads/2026/09/featured-update-2933-1789319724190.jpg)
10 Best iPhone Tripods (September 2026) Tested & Reviewed
Expert reviews of the top iPhone tripods for content creators, travel, and photography. We tested 10 models including MagSafe options…

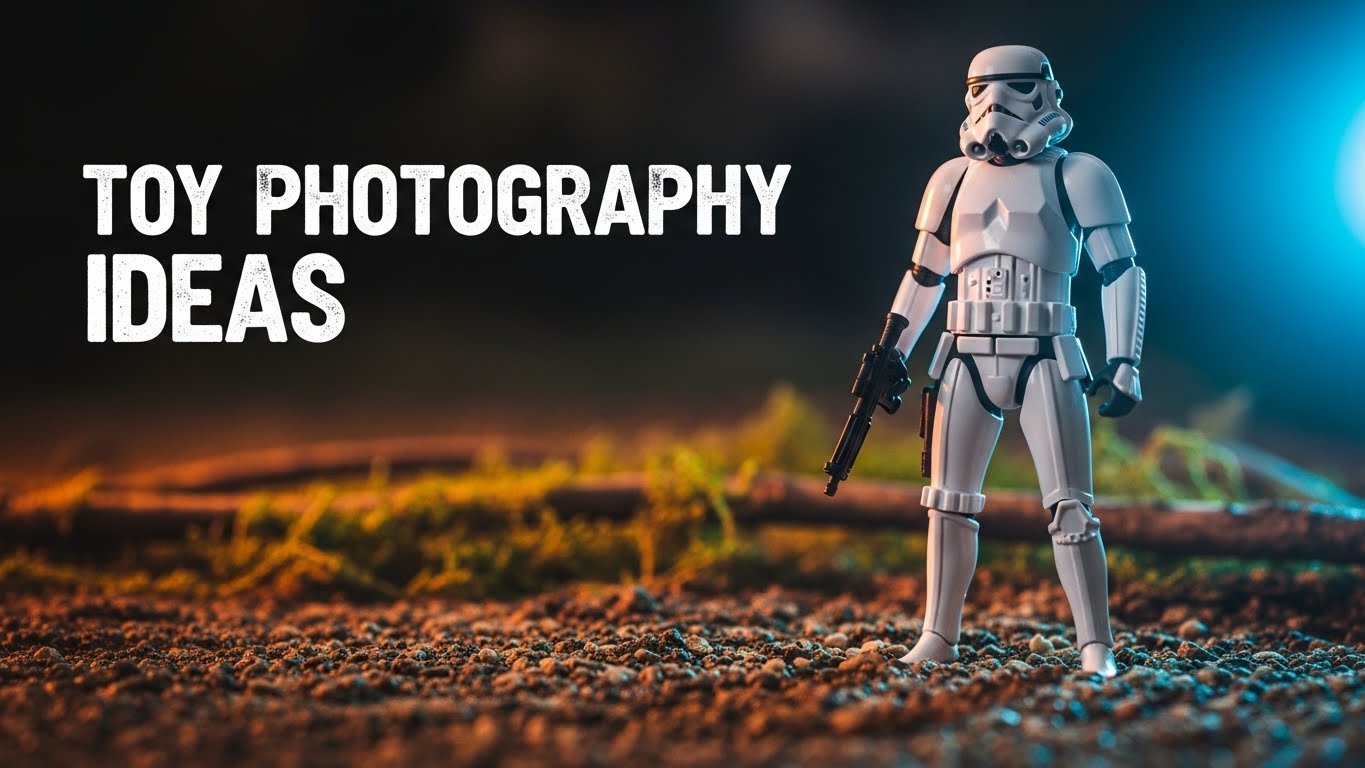
There is a quiet revolution happening on photography feeds right now. Tiny plastic figures are toppling cities, surviving impossible explosions, and standing in for astronauts on lunar missions. None of it is real, and yet millions of viewers cannot look away. Toy photography ideas have become one of the most searched creative photography niches in 2026, and the barrier to entry has never been lower.
Smartphones in 2026 ship with computational cameras that rival the dedicated gear from just a few years ago. A current iPhone 17 Pro, Pixel 10, or Samsung Galaxy S26 can resolve the texture on a 1.5-inch figure, lock focus on a Lego minifig’s face, and process RAW files for later color grading. The result is a creative genre where storytelling matters more than gear, and where the only expensive thing you need is imagination.
I have been shooting toys in my living room, on hikes, and on kitchen countertops since 2026 minus four. The early work was rough, but the lessons stuck. This guide compiles everything I wish someone had told me on day one: how to set up a usable shot with household items, how to sculpt light, how to build a diorama on a Saturday afternoon, and how to avoid the half dozen mistakes that make toy photos look like toy photos.
By the end of this guide, you will have a working knowledge of camera settings, lighting design, scene construction, post-processing, and community sharing. You will also see what other photographers are doing well in 2026 and where the genre is heading next. Whether you are shooting a single Funko Pop on your desk or staging a 1/6 scale battlefield with smoke and sparks, the fundamentals below will give your work more weight and presence.
You can begin toy photography today with gear that is already in your pocket. The most important upgrade you can make is not a new camera, it is a stable surface. Sharpness separates an average toy snapshot from an image that holds attention. Once your camera does not move, lighting, composition, and storytelling can take over.
Current smartphones are more than capable of serious toy photography. The iPhone 16 Pro, iPhone 17 Pro, Pixel 9 Pro, Pixel 10 Pro, and Samsung Galaxy S25 Ultra all offer manual control, RAW capture, and 0.5x ultra-wide lenses that are perfect for forced perspective. The ultra-wide is especially useful when you need to get the camera physically close to a small figure without losing focus distance. For dedicated cameras, the Fujifilm X-T5, Sony a6700, and Canon R7 remain popular choices in the toy photography community because of their small size, sharp sensors, and articulating screens.
Stability is non-negotiable. A mini tripod with a phone mount, the Manfrotto PIXI Evo, or a tabletop GorillaPod will hold your phone or camera exactly where you want it. If you do not own a tripod, stack three hardcover books, place a folded towel on top, and angle your phone against a coffee mug. The shape does not matter, the stillness does. For longer exposures and stop motion sequences, a Bluetooth remote or intervalometer is a small investment that pays off immediately.
Light is your paint. Start with a north-facing window for soft, directional daylight. If you want more control, an entry-level LED panel such as the ULANZI L2 cube light, Godox ML100Bi, or Neewer 660 LED panel gives you adjustable brightness and color temperature for under 80 dollars. A sheet of white foam board from a craft store becomes a fill reflector, and a piece of black foam core becomes a flag to deepen shadows.
Color temperature: Measured in Kelvin, color temperature describes how warm or cool a light source appears. Daylight is around 5500K, tungsten bulbs around 3200K, and candle flames around 1900K. Matching color temperatures across multiple lights prevents unwanted color casts in your final image.
Backgrounds and props come from the craft aisle, the kitchen, and the recycling bin. Construction paper, foam board, fabric scraps, sand, gravel, baking soda, and cotton balls cover most of what you need. Many toy photographers build a small prop library over time, but the most memorable images often come from a single great idea executed simply.
Mini tripod with phone mount: 15 to 25 dollars (essential for stability)
Daylight-balanced LED bulb or panel: 12 to 25 dollars (for consistent color)
Cardstock and foam board pack: 10 to 15 dollars (various background colors, reflectors)
Poster putty or Blu Tack: 5 to 8 dollars (to position your toys in dynamic poses)
Free manual camera app: 0 dollars (Lightroom Mobile, ProCamera, or Halide on iOS; Open Camera or GCam Mod on Android)
Most beginners spend hours fiddling with dials. Save yourself the trial and error with this cheat sheet. These settings cover the most common toy photography situations, from indoor natural light to action freezes and macro close-ups. Adjust the ISO up by one stop at a time if your shutter speed is too slow for a sharp handheld shot.
| Scenario | Aperture | Shutter Speed | ISO | Notes |
|---|---|---|---|---|
| Indoor natural light | f/4 to f/5.6 | 1/60s | 200 to 400 | Use tripod for sharpness; window at side |
| Outdoor overcast | f/5.6 to f/8 | 1/200s | 100 to 200 | Even lighting, vibrant colors |
| Golden hour | f/2.8 to f/4 | 1/500s | 100 | Warm tones, use a reflector for fill |
| Low light / LED | f/2.8 | 1/30s to 1/60s | 400 to 800 | Tripod required, lower ISO if possible |
| Action / splash freeze | f/5.6 to f/8 | 1/1000s or faster | 200 to 800 | Continuous LED or speedlight needed |
| Macro close-up | f/8 to f/11 | 1/125s | 100 to 400 | Watch focus breathing, use manual focus |
| Forced perspective | f/8 to f/11 | 1/250s | 100 to 200 | Deep depth of field keeps illusion believable |
If you are shooting on a smartphone, the equivalent settings are simpler. Tap and hold on your subject to lock focus, slide the exposure compensation until the highlights are just starting to clip, and use portrait mode or the dedicated 2x lens for shallow depth of field. Most modern phones also allow you to lock manual white balance, which prevents color shifts when you mix daylight and LED light.
Not all toys are created equal when it comes to photography. Some lines offer superior articulation, scale accuracy, and surface detail, while others are more affordable and easier to find in bulk. The table below compares the most popular collectible lines used by toy photographers in 2026, based on community feedback and product availability.
| Toy Line | Scale | Articulation | Detail | Best For | Price Range |
|---|---|---|---|---|---|
| LEGO Minifigures | Non-standard | Basic | Stylized | Comic and stop motion scenes | 3 to 10 dollars |
| Star Wars Black Series | 6 inch | Excellent | High | Cinematic recreation shots | 22 to 30 dollars |
| Marvel Legends | 6 inch | Excellent | High | Battle scenes and dynamic poses | 20 to 28 dollars |
| Funko Pop | Non-standard | None | Stylized vinyl | Pop art and minimalist setups | 10 to 15 dollars |
| Hot Toys 1/6 | 1/6 scale | Outstanding | Hyper-realistic | Premium cinematic and portrait shots | 200 to 400 dollars |
| S.H. Figuarts | 6 inch | Outstanding | High | Anime and manga action poses | 60 to 120 dollars |
| McFarlane Toys DC | 7 inch | Good | High | Dark and dramatic scenes | 22 to 30 dollars |
| Playmobil Figures | Non-standard | Basic | Stylized | Family-friendly dioramas | 5 to 15 dollars |
For a beginner, LEGO minifigures and Star Wars Black Series figures offer the best combination of availability, articulation, and cost. As your skills grow, you can mix lines within a single scene, but matching scale is critical. A 6-inch Black Series figure standing next to a Funko Pop will look unnatural because the proportions are off. Pick one scale for a given diorama and commit.
Master these four techniques and your toy photography will leap forward. Each one addresses a different problem: sharpness, scale, story, and structure. Practice them in order, and they will start to overlap into a single creative instinct.
Depth of field is what makes a 4-inch figure look like a person standing in a real environment. By blurring the background, you mimic how our eyes focus, and the toy immediately becomes more lifelike. On a smartphone, tap and hold on the figure to lock focus, then use portrait mode or a 2x lens to increase the blur. On a dedicated camera, set the aperture to f/2.8 to f/4 for a single figure, or f/5.6 to f/8 for a small group.
Distance matters more than the f-stop itself. Move the camera close to the toy and push the background further away. The greater the separation between subject and backdrop, the stronger the blur, even at moderate apertures. This single adjustment does more for a beginner image than any lens upgrade.
Forced perspective turns a 1.5-inch minifigure into a giant. Place the small object close to the camera and the larger reference object far in the background, then use a small aperture to keep both in focus. The math is simple: the small subject appears larger than it is, the real object appears further away than it is, and the brain accepts the illusion.
Pro tip: For forced perspective to feel believable, match the focal length of the lens to the apparent distance of the background object. If the toy is supposed to be standing 50 feet from the Empire State Building, you need a longer focal length than if the toy is standing 5 feet from your coffee mug. Focal length matching is what separates amateur forced perspective from cinematic forced perspective.
One of my favorite forced perspective shots is a Lego stormtrooper appearing to hold the moon between its hands. I shot the figure inches from the camera at f/8 with the moon in the background sky. The illusion works because the stormtrooper is in sharp focus, the moon is in sharp focus, and the depth of field ties them together. The viewer’s brain accepts the impossible because the optics are consistent.
Camera angle is the cheapest special effect in toy photography. Shooting from below eye level makes any figure look heroic and dominant. Shooting from above makes the same figure look small, vulnerable, or lost. The choice of angle often tells the viewer what to feel before they have time to think.
Eye-level shots build intimacy. Kneel down or rest the camera on the same plane as the figure’s eyes. A 4-inch Darth Vader at eye level suddenly has presence, and a 6-inch superhero feels like a real person. The 30 seconds it takes to drop to figure height will transform your work more than any other compositional choice.
High angles serve a different purpose. Use a top-down view to showcase a diorama, map out a battle scene, or imply surveillance and scale. A bird’s-eye shot of a Lego city block tells a story that no single eye-level image can match.
Composition is the silent language of an image. Apply the rule of thirds by placing your main subject off-center, aligned with an imaginary grid that divides the frame into nine parts. This off-center placement creates visual tension and reads as more dynamic than centered subjects.
Leading lines carry the eye through the image. Roads, lightsaber blades, rivers of cotton-ball smoke, and even the curve of a cape can all serve as lines that point toward the subject. Once you start seeing lines in your scenes, you will find them everywhere.
Framing adds depth. Position your subject inside a doorway, a window frame, the legs of a larger figure, or any natural opening. The frame draws attention inward and creates a sense of place, even with simple props.
Storytelling is the single most important principle in toy photography, and it is the area where the strongest work separates itself from the merely competent. A technically perfect image of a Lego pirate standing on a Lego ship is a snapshot. A pirate captain scanning the horizon for an enemy vessel with the wind in his coat is a story. The technical skill is the same. The difference is the narrative you build around the subject.
Start with a character study. Pick one figure and ask five questions: Who is this character, what do they want, what is in their way, what time of day is it, and what is the emotional state of this moment. A Darth Vader contemplating a ruined battlefield tells a different story from a Darth Vader mid-stride with lightsaber ignited. The pose, the lighting, and the backdrop all have to support the moment you have chosen.
Build on cinematic language. Watch a few minutes of any well-shot film and you will see that the camera angle, color palette, and lighting all support a specific emotional tone. Toy photography borrows this vocabulary directly. A blue-drenched, high-contrast shot of a Jedi implies peace, while a low-angle, orange-shadowed shot of the same character in motion implies conflict. Use the language, and your single images will start to feel like frames from a film.
Develop series and recurring characters. Many of the most-followed toy photographers on Instagram and Flickr build entire characters over months. The figure returns in new outfits, new scenes, and new conflicts. The audience becomes invested in the character arc the same way they would be invested in a TV show. Even a three-image series gives your work more weight than a random collection of single images.
Pull from real sources. Comic book covers, movie posters, Renaissance paintings, news photographs, and video game cutscenes are all fair game for inspiration. I keep a private album of reference images and refer back to it constantly. The best toy photographers are not inventing visual ideas from nothing, they are translating great compositions from other media into a new scale.
A great toy photo often has a great stage behind it. Mini stages and dioramas give your figures a place to live, and they are easier to build than most beginners expect. A diorama can be as simple as a sheet of foam board textured with sand and gravel, or as ambitious as a multi-room city block. The skill is in the planning.
Start with a base. Cut a piece of foam board, MDF, or thick cardboard to roughly 12 by 12 inches. This becomes the floor of your scene. You can leave it flat for indoor setups, or build up the edges with extruded foam for a contained diorama. Extruded foam insulation board from a hardware store is the same material professional model makers use, and it costs only a few dollars per sheet.
Build texture with simple materials. Spread a thin layer of white glue over the foam, sprinkle sand or fine gravel, and let it dry. Repeat with patches of green flock, lichen, or even dried tea leaves to suggest moss and grass. Paint the entire base in dark brown or black first so the color does not bleed through lighter textures. Once you have a believable ground, you can add a backdrop, weather it with washes of acrylic paint, and add details like fences, rubble, or furniture.
Keep scale consistency. A 6-inch Black Series figure and a 1/6 scale Hot Toys figure do not mix. They are technically similar in size, but the proportions of the heads, hands, and feet differ in ways that read as wrong when they share a frame. Pick one scale per diorama, and only mix lines that share that scale.
Plan for lighting access. The most common diorama mistake is sealing the scene with no way to position a light inside it. Build one or more openings, or design the set with hidden alcoves where a small LED panel or fiber optic can shine from. A well-lit diorama looks cinematic. A flat-lit diorama looks like a model on a shelf.
Reuse and recombine. Build a library of small modular pieces: a wall section, a crate, a pipe, a piece of broken machinery. Mix and match them into new scenes over time. The more pieces you have, the faster future dioramas come together, and the more variety you can offer your audience.
Dynamic effects are what separate a posed snapshot from a photograph that captures a moment of action. Smoke, sparks, wind, and simulated explosions add movement, energy, and stakes to a scene. The good news is that all of them are achievable at home with inexpensive materials and a bit of patience.
Smoke is the easiest entry point. A burning incense stick placed off-frame creates a slow, drifting haze that adds atmosphere to any scene. A small vape pen or a fog machine offers more control over density and direction. Shoot against a dark background with a single side light to make the smoke read clearly. A short exposure (around 1/125s) keeps the smoke defined rather than blurry.
Water spray and splash effects add drama. Use a small spray bottle to mist your figure mid-action, then fire a fast shutter (1/1000s or faster) to freeze the droplets in mid-air. A continuous LED panel or a speedlight with a fast flash duration makes the difference between a frozen splash and a blurry mess. For larger splashes, drop a water balloon from above and shoot in burst mode.
Sparks and electrical effects come from steel wool photography. Place a small clump of fine steel wool in a whisk, light it with a 9V battery, and spin it in front of a dark background. The result is a shower of bright orange sparks that you can composite behind your figure. Long exposures (2 to 4 seconds) and a tripod are essential. Note that steel wool photography involves burning material and should be done outside, away from flammable surfaces, and only by adults.
Wind and motion can be implied with simple tools. Use a straw to blow baking soda, flour, or torn cotton at a figure to simulate wind, dust, or debris. Shooting at a slower shutter speed (around 1/30s) will motion-blur the particles and make the effect feel more powerful. For final compositional control, composite multiple exposures in Photoshop or Affinity Photo so the figure stays sharp while the wind streaks past.
Once the fundamentals are second nature, the fun begins. The ideas below are starting points, not rules. Treat them as prompts and let your own collection and environment drive the next variation.
Weather effects add narrative stakes to any image. Rain is just water from a spray bottle, captured at a fast shutter speed. Snow is baking soda, flour, or finely torn cotton balls. Fog is incense smoke, and lightning is a flash behind a window shade. The props are nearly free, and the results read as cinematic the moment you match the lighting to the effect.
I once shot a stormy battlefield using a tiny spray bottle, a single blue LED from a reading lamp, and four Star Wars Black Series figures. Total setup time was 20 minutes, and the resulting series became one of my most-shared work of that year.
Place a figure into a real-world scenario by using a recognizable everyday object as a prop. A Lego astronaut exploring a sugar pile, a dinosaur raiding the vegetable drawer, a Marvel Legends figure lifting a dumbbell made of Lego bricks. The juxtaposition of the miniature and the real is what makes these images land.
Walk around your house with a figure in your pocket. You will find surprising scenes in the kitchen, the bathroom, the garden, and the workshop. The best everyday-object images are the ones where the lighting and the perspective feel natural, as if the figure really was there.
Not every image needs a diorama. A single figure against a solid color, a hard shadow, or a reflective surface can be more powerful than a busy scene. The strength of minimalism is focus. The viewer’s eye has nowhere to go but the subject, and the composition becomes the entire story.
Try backlighting a Funko Pop against a bright window to create a clean silhouette. Place a Hot Toys figure on a black glass surface and shoot straight down to capture the reflection as a second subject. Use colored gels to wash the background while keeping the figure lit with a neutral key light. These setups take minutes, and the results often outperform more elaborate scenes.
Stop motion gives your figures actual life. Move the toy a fraction of an inch between frames, take 24 photos for each second of video, and stitch the sequence together in an editing app. Even a 5-second clip of a Lego figure walking across a desk feels alive when it is done right. Free tools like Stop Motion Studio and paid options like Dragonframe make the workflow accessible to anyone with a phone or camera.
Time-lapse takes the opposite approach. Set up a single camera position and shoot a frame every 30 seconds for an hour. Move a single light source (or the position of the sun) between frames, and the resulting video compresses a slow change into seconds. I have used this technique to create sunrise over a Lego city and a single shadow creeping across a battlefield sequences that performed well on both Instagram and TikTok.
Light is the single biggest factor in image quality, and it is the area where most beginners can grow fastest. A technically imperfect exposure with great light will always outperform a technically perfect exposure with flat, mixed light. Spend your first months chasing light before you chase lenses.
Window light is your best starting point. The light from a north-facing window is soft, directional, and color-consistent throughout the day. Place your figure 2 to 4 feet from the window, slightly off to the side, and you will get a flattering key light with gentle falloff. A piece of white foam board on the opposite side of the figure will fill the shadows without overpowering the directional shape.
Golden hour and overcast skies are equally valuable. The first 30 minutes after sunrise and the last 30 minutes before sunset add warmth and drama that window light cannot replicate. Overcast days act as a giant softbox in the sky, giving you even illumination that flatters every subject. Plan outdoor toy shoots for these windows.
Three-point lighting translates directly to toy photography. A key light from one side creates dimension. A fill reflector or a second dim light from the opposite side opens the shadows. A back light behind the figure separates it from the background. The result reads as professional, even when the lights are a single LED panel, a piece of foam board, and a small flashlight.
DIY light modifiers give you control. Tape a piece of parchment paper over a desk lamp to soften it. Cut a small cardboard snoot and tape it over an LED to focus the beam. Crumple a piece of aluminum foil into a reflector for a quick, bright fill. These small moves are the difference between harsh flashlight-in-the-face lighting and shaped, controlled light.
Mixing color temperatures is the most common lighting mistake. A daylight window on one side and a tungsten desk lamp on the other will give you two competing white balances and an image that looks sickly no matter how you edit it. Pick one color temperature per scene, and adjust the other lights with gels to match.
Color gels are the most underused tool in beginner toy photography. A piece of blue theatrical gel over a background light creates a moody, cinematic night feel. An orange gel over the key light suggests sunset, fire, or warmth. Magenta and green gels can suggest alien environments, sickly laboratories, or horror scenes. A pack of Rosco or Lee gels costs around 20 dollars and fits in your wallet, and they will change the way you think about color in a scene.
Editing is where a good image becomes a finished one. In 2026, the editing landscape has changed dramatically. AI-powered features inside Adobe Lightroom, Photoshop Express, and Lensa now do in seconds what used to take years of Photoshop skill. Mobile apps continue to close the gap with their desktop counterparts, and you can produce a finished, portfolio-ready image without ever opening a computer.
Start with the foundations. Adjust exposure, contrast, and white balance first. These three corrections remove the technical problems in the image and give you a clean base for creative edits. I usually push contrast slightly higher in toy photography than I would in other genres, because figures look more three-dimensional and less flat when the contrast is strong.
Crop for impact. Most beginners leave too much space around the subject. A tighter crop on the face, hands, or key action area forces the viewer’s eye to engage with the moment. The rule of thirds still applies in editing. Place the figure’s eyes or the main action point on a third-line intersection rather than dead center.
Use selective adjustments to fix specific areas. Modern apps let you paint light, contrast, or color into one part of the image without affecting the rest. Brighten a figure’s face, darken a distracting corner, warm up a single prop. This surgical approach is what separates a polished final image from a quick filter.
Generative Fill and AI Remove, both added to Adobe’s apps in 2026 minus one, can erase a piece of background clutter, replace a sky, or extend a scene beyond the original frame. Lensa’s background removal tool now handles hair, smoke, and other complex edges with surprising accuracy. The current Photoshop Express offers one-tap sky replacement, portrait relighting, and subject selection that would have required a professional retoucher just a few years ago.
Use these features carefully. AI editing is a tool, not a shortcut. The best results come from using AI to handle the tedious parts of an edit, like cleaning a background, while you still make the creative decisions about color, contrast, and mood. Over-reliance on AI filters produces the plasticky, over-processed look that defines beginner work.
Snapseed: Free, full-featured, runs offline. Selective adjust and healing tool remain best in class.
Adobe Lightroom Mobile: Free tier with optional subscription. RAW support, masking tools, and direct integration with the desktop version.
Adobe Photoshop Express: Free with optional premium. AI Remove, sky replacement, and one-tap enhancements.
VSCO: Free tier plus subscription. Restructured preset library in 2026 minus one with monthly drops; strong film-emulation presets.
Lensa: Free tier plus subscription. Background removal and AI portrait tools that work on non-human subjects.
Afterlight: Paid one-time. Excellent texture overlays, double exposure, and selective color.
Every toy photographer makes these mistakes. The good news is that recognizing them is half the fix. The other half is slowing down long enough to apply the correction before you press the shutter.
Camera shake is the number one killer of toy photos. Even a tiny wobble at 1/60s will blur a small figure more than it would a human subject, because the figure itself is small enough that any motion becomes significant. Always use a tripod, brace your phone against a stable surface, or fire a remote shutter.
Wrong focus point ruins an otherwise strong image. The most important part of any figure is usually the eyes, and the eye is also the smallest feature. Lock focus on the eye first, then recompose. If you are shooting at a wide aperture, check the depth of field on the back of the camera. A figure whose eyes are sharp but whose hands are blurred reads as out of focus even if technically the focus is correct.
Poor white balance shows up as an unnatural color cast. Mixed lighting, like a daylight window and a tungsten lamp, is the most common cause. Either match the light sources, or shoot RAW and fix the white balance in editing.
Distracting backgrounds compete with the subject. A messy table, a power cord, or a half-finished lunch in the background will pull the viewer’s eye away from the figure. Use a piece of cardstock, a backdrop, or a tight crop to control the background. If you cannot remove a distraction, blur it with a wide aperture or portrait mode.
Unflattering angles make a figure look like a toy instead of a character. A high angle looking down on a figure flattens it and emphasizes its small size. Drop to eye level, or below, and the same figure suddenly has presence. Save the high angle for specific cases like overhead maps or scale comparisons.
Overcrowded frames confuse the viewer. A scene with eight figures, three vehicles, and a wall of props will read as a small diorama instead of a story. Pick one main subject and two supporting elements per image. Crop tight, simplify, and let the eye rest.
You now have the foundation to create images that stand out. The next stage is less about technique and more about community, voice, and consistency. The strongest toy photographers in 2026 are not the ones with the most expensive gear. They are the ones who keep showing up, posting work, learning from feedback, and refining a personal style.
The toy photography community is welcoming, active, and growing. The largest and most engaged hub is r/ToyPhotography on Reddit, with several thousand new posts per month. The Toy Photographers Discord, the Toy Photo Network on Facebook, and the Flickr Toy Photography group all host regular challenges and feedback threads. Engage with the work of photographers you admire. Comment, ask questions, and share your own work publicly. Feedback from peers is worth more than any tutorial.
TikTok and Instagram Reels are now the most important discovery platforms for toy photography in 2026. Short video clips of stop motion sequences, behind-the-scenes setup shots, and 60-second tutorials routinely reach hundreds of thousands of viewers. The genre’s visual nature is perfect for short-form video, and most of the most-followed toy photographers post in motion as often as they post in stills.
Submit to contests. The BrickFair Photography Contest, the Toy Photo Awards, the r/ToyPhotography monthly challenge, and brand-sponsored competitions from Lego, Hot Toys, and S.H. Figuarts all run regular calls for entries. Winning or placing in a contest gives you credibility, a wider audience, and often a small prize that justifies the time investment. For more on building a creative photography practice, see our guide on Revell Photography.
Personal projects are the fastest way to grow. A 30-day project forces you to shoot daily, which exposes your weaknesses and reveals your strengths. Themes I have seen work well include: a single character in 30 different locations, a 12-month project with a fixed color palette, a series inspired by a single film or album, and a weekly diorama build based on a real news headline. Pick a constraint, commit to the schedule, and the work will follow.
Track your progress. Save every image, even the bad ones. Review the work from month to month and you will see patterns of improvement that are invisible in the moment. Most photographers are their own harshest critics, and a careful look back will usually reveal that the work is getting stronger faster than you thought.
Style is what separates a working photographer from an artist. Pay attention to the color palettes, the framing choices, the kinds of stories you keep telling. Over time, a recognizable voice emerges, and that voice is what makes your work worth following. For further reading on technique across creative photography genres, the editorial team at Revell Photography publishes regular guides on lighting, composition, and post-processing that apply to toy photography and beyond.
Remember that every expert was once a beginner. Your first shots will not match your vision, and that is exactly how it should be. The gap between vision and execution is the room where growth happens. Keep shooting, keep sharing, and keep paying attention to the work of the photographers you admire. The rest takes care of itself.
This guide was written by the editorial team at Revell Photography, a photography education site dedicated to helping photographers of all skill levels build stronger technique and a clearer creative voice. Our contributors have published toy photography work in hobbyist magazines, on Flickr’s front page, and in community exhibitions. We focus on practical, tested techniques rather than gear lists, and our guides are reviewed by working photographers before publication. For more photography techniques, gear reviews, and creative inspiration, visit Revell Photography.
The best toys to photograph combine strong articulation, accurate scale, and detailed sculpting. Star Wars Black Series, Marvel Legends, McFarlane Toys DC, and S.H. Figuarts offer 6 to 7 inch figures with multiple points of articulation. For premium work, Hot Toys 1/6 scale figures provide hyper-realistic detail. For beginners, LEGO minifigures are inexpensive, widely available, and perfect for stop motion and comic-style scenes. Funko Pops work well for minimalist and pop-art compositions because of their distinctive silhouette.
Professional toy photos come down to three things: sharp focus on the eyes, controlled directional lighting, and a clean background. Use a tripod to eliminate camera shake, lock focus on the figure’s face, and place a single light source at 45 degrees to create dimension. Shoot at a wide aperture (f/2.8 to f/4) to blur the background, and use a piece of cardstock or foam board to keep the scene uncluttered. Editing in Lightroom Mobile or Snapseed with a slight contrast boost and a tight crop will finish the image.
Forced perspective photography uses spatial relationships and camera angle to make objects appear larger, smaller, closer, or further away than they actually are. In toy photography, the technique places a small figure close to the camera and a real-world object far in the background, then uses a small aperture (f/8 to f/11) to keep both in focus. The viewer’s brain combines the two elements into a single scene where the toy appears to be interacting with the real object at its actual size. Forced perspective is the foundation of many viral toy photos.
Start with a smartphone or camera you already own, a small tripod or stable surface, and a window with soft natural light. Choose one figure you enjoy, place it at eye level, and shoot it against a clean background. Practice depth of field, forced perspective, and basic composition in that order. Join r/ToyPhotography or a similar community for feedback, and post your work publicly to build momentum. You can create strong images with no investment beyond a 15 dollar tripod and a sheet of cardstock.
At minimum you need a camera (any modern smartphone works), a stable tripod, and a single light source such as a window or a desk lamp. Helpful additions include a small LED panel, a sheet of white foam board for fill, a piece of black foam core for flagging light, and a Bluetooth remote for hands-free shooting. Most toy photographers build a small prop library over time, including construction paper, sand, gravel, baking soda, and a handful of small household objects that work as scenery.
Creative toy photos start with a story. Decide what the figure is doing, where it is, and what time of day it is before you pick up the camera. Use weather effects (water spray, baking soda, incense smoke) for drama, everyday objects for humor, and dioramas for cinematic scenes. Shoot at unusual angles, experiment with backlighting and silhouettes, and try sequences of images that build a narrative across multiple posts. The most creative work borrows composition and color choices from films, comics, and paintings.
For most indoor shots use f/4 to f/5.6, ISO 200 to 400, and a shutter speed of 1/60s or faster with a tripod. For outdoor shots at golden hour, use f/2.8 to f/4, ISO 100, and 1/500s. For action and splash freezes, use f/5.6 to f/8 with shutter speeds of 1/1000s or faster. For macro close-ups and forced perspective, use f/8 to f/11 to keep both subject and background sharp. On a smartphone, lock focus with a tap, slide the exposure compensation, and use a manual white balance setting when possible.
Depth of field is created by combining a wide aperture with subject-to-background separation. On a dedicated camera, set the aperture to f/2.8 to f/4 and move the figure at least two to three feet from the backdrop. On a smartphone, use portrait mode or the 2x lens and tap to focus on the subject. The further the background is from the subject, the stronger the blur. Distance matters more than the f-stop itself, so push the backdrop away from the figure whenever your setup allows.
Soft, directional light from a north-facing window is the single best starting point for toy photography. It is free, color-consistent, and flattering. For more control, a daylight-balanced LED panel between 5000K and 5600K gives you adjustable brightness without color casts. Use a single key light at 45 degrees to the subject, a white foam board as fill on the opposite side, and a small back light to separate the figure from the background. Avoid mixing daylight and tungsten light in the same scene unless you use color gels to match them.
![Best Carbon Fiber Tripods [cy]: 11 Models Tested & Reviewed](https://revellphotography.com/wp-content/uploads/2026/09/featured-update-2544-1789318470196.jpg)
![Best Drones With Cameras [cy]: Expert Photography Guide](https://revellphotography.com/wp-content/uploads/2026/09/featured-update-2730-1789318442252.jpg)
![Best Cameras For Beginners [cy]: 8 Models Tested & Reviewed](https://revellphotography.com/wp-content/uploads/2026/09/featured-update-2370-1789318303985.jpg)