How Much Does a Photographer Make in 2026: Complete Salary Guide
Discover real photographer salaries and earnings potential. From $25,000 to $150,000+, learn what photographers actually make by specialization, experience, and…

Ever wondered why your shots consistently land off-target despite perfect aiming? I’ve trained hundreds of shooters, and 90% of accuracy issues come down to one fundamental element: sight picture.
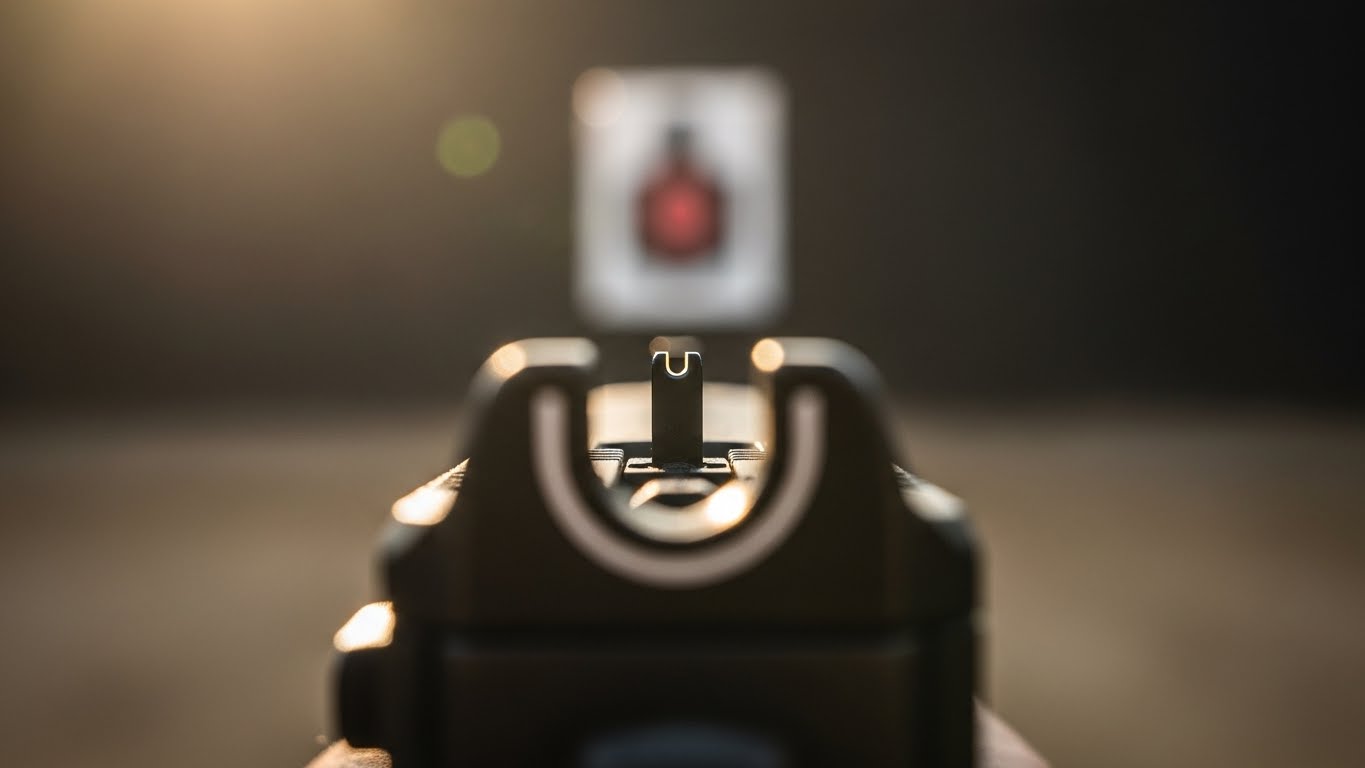
What is sight picture? A sight picture is the proper alignment of your firearm’s front and rear sights with your intended target, combining sight alignment with target placement for accurate shooting.
After spending 15 years behind both cameras and firearms, I’ve learned that visual focus principles are remarkably similar. Just as a photographer must focus on their subject while composing the shot, a shooter must focus on the front sight while aligning it with the target.
In this comprehensive guide, I’ll share everything from basic definitions to advanced techniques that took me years to master. You’ll learn the four essential sight picture types, how to fix common mistakes, and practical drills that will transform your accuracy.
Sight alignment and sight picture are two distinct but interconnected fundamentals. I see shooters confuse these terms constantly, even at advanced levels.
Sight alignment is simply the relationship between your front and rear sights. The top of the front sight should be level with the top of the rear sight, with equal light bars on either side. Think of it as setting up your camera’s focus system – it’s about getting your equipment aligned properly.
Sight picture takes this a step further. It’s sight alignment PLUS target placement. You’ve aligned your sights correctly, now where do you place them on the target? This is where photography and shooting diverge – in photography, you might want creative focus, but in shooting, precision is everything.
Here’s the crucial distinction I teach my students: sight alignment happens with your firearm, sight picture happens with your target. You can have perfect sight alignment but still miss if your sight picture is wrong.
Point of Aim vs Point of Impact: Point of aim is where you place your sights on the target. Point of impact is where your bullet actually hits. A proper sight picture ensures these two points match.
I learned this the hard way during my first competition. My groups were tight but consistently 3 inches low. My sight alignment was perfect, but my sight picture was wrong – I was using a six o’clock hold when I should have been using a center hold.
Understanding different sight picture types transformed my shooting from recreational to competitive level. Each has specific applications where it excels.
| Sight Picture Type | Best For | Pros | Cons |
|---|---|---|---|
| Center Hold | Self-defense, general shooting | Fastest target acquisition, intuitive | Covers target, hard to see precise aim |
| Six O’clock Hold | Precision competition, bullseye | Most precise, target never obscured | Requires practice, slower |
| Combat Hold | Tactical situations, close range | Works under stress, forgiving | Less precise at distance |
| Flash Sight Picture | Emergency situations, moving targets | Extremely fast, works under duress | Sacrifices precision for speed |
The center hold places the top of the front sight directly in the center of your target. The front sight completely covers the point of aim. This is what most shooters default to naturally.
I recommend center hold for self-defense situations because it’s the most intuitive under stress. When your heart is pounding and adrenaline is flowing, you want simplicity.
The key to mastering center hold is accepting that you’ll cover your aiming point. This feels wrong to many beginners who want to see their target clearly. Trust your sights – if aligned properly, the bullet will go where the front sight points.
The six o’clock hold positions the top of the front sight just below the target, creating a small gap that looks like the number six on a clock face. This is the preferred method for bullseye competitors.
Why do competitors love it? The target remains completely visible, allowing for maximum precision. You can see exactly where your sights are relative to the scoring rings.
The downside? It requires knowing your firearm’s zero at different distances. A six o’clock hold that works at 25 yards might need adjustment at 50 yards. I spent months charting how my Glock 19’s point of impact changed with distance using this hold.
Combat hold is essentially a modified center hold that’s more forgiving. You place the front sight somewhere on the vital area, often slightly high of center, understanding that combat accuracy doesn’t require bullseye precision.
This hold saved my life during a force-on-force training exercise. Under simulated stress, my fine motor skills deteriorated, but the combat hold’s forgiving nature kept my shots in the scoring zone.
Combat hold recognizes that in a defensive situation, “good enough” is perfect. You’re aiming for center mass, not a specific point. This realistic approach builds confidence that translates to better performance under pressure.
Flash sight picture is about getting a “good enough” alignment instantly. You focus on the threat, briefly glance at your sights to verify alignment, then fire. It’s not precise, but it’s incredibly fast.
This technique, pioneered by Colonel Jeff Cooper, emphasizes that perfect is the enemy of good enough in a gunfight. I’ve seen students struggle with this concept initially – they want perfect alignment even when milliseconds matter.
The key is recognizing when flash sight picture is appropriate: close-range defensive situations, moving targets, or when you’re behind in a reactive shooting scenario. For anything requiring precision, switch to a more deliberate sight picture.
Different situations demand different sight picture approaches. I’ve learned through experience that adaptability separates good shooters from great ones.
Your sight picture needs to adapt based on target distance. At 7 yards, center hold works great. At 25 yards, you might need to consider bullet drop. At 50 yards, you need a precise six o’clock hold with known elevation adjustments.
I once watched a shooter miss every shot at 50 yards because they used their 7-yard sight picture. The bullet’s arc over distance isn’t dramatic, but it’s significant enough to matter for precision shooting.
Light dramatically affects sight picture. Bright sunlight can create glare on your sights. Low light makes front sight focus difficult. Backlighting can turn your sights into silhouettes.
My solution? Practice in all conditions. I specifically train at dawn and dusk to understand how changing light affects my sight picture. Fiber optic fronts help in medium light, while tritium sights are essential for no-light shooting.
Stress changes everything. Your vision narrows (tunnel vision), fine motor skills deteriorate, and cognitive processing slows. This is why combat hold and flash sight picture are crucial skills.
During a qualification course under time pressure with simunition, I saw my normally precise shooting degrade to combat accuracy. The shooters who had practiced flash sight pictures performed best because they had realistic expectations.
After analyzing thousands of shooters, I’ve identified these recurring mistakes. Fix them and your accuracy will improve dramatically.
Your eye can only focus on one distance at a time. The front sight should be crystal clear while the target is slightly blurry. Most beginners do the opposite. Fix this by practicing dry fire drills – focus until the front sight pops into sharp relief.
Small changes in head position dramatically alter sight picture. I teach shooters to establish a consistent cheek weld and head position every time. Use a reference point – your nose should touch the same spot on the stock or slide each shot.
This pulls your sights off target just before the shot breaks. The fix? Surprise breaks. Don’t anticipate the shot – let it surprise you. I improved my trigger control by spending 30 minutes daily on dry fire practice for three months.
Shooting from the wrong shoulder for your eye dominance causes alignment issues. Test your dominance: make a triangle with your hands, focus on a distant object through it, and close each eye. The eye that keeps the object centered is dominant.
Staring at your sights causes visual fatigue and wobble. Once you have a good sight picture, execute the shot within 3-5 seconds. Any longer and your hold will deteriorate.
Using close-range techniques at distance (or vice versa) causes misses. Know your holds and when to use them. I keep a logbook of how different holds perform at various distances with each firearm.
Focusing on what you DON’T want to hit (like missing the target) often results in exactly that. Maintain positive target focus – see your sight picture breaking perfectly centered.
Consistent practice with structured drills builds muscle memory. Here are my go-to exercises for developing impeccable sight picture.
Start with your firearm unloaded. Focus on the front sight until it’s crystal clear, then shift focus to the target, then back to the front sight. Do this 10 times daily for two weeks. This trains your eye to find the front sight instantly.
Assume your shooting position and acquire a perfect sight picture. Hold it for three seconds without wobble. Break target focus, reacquire, and repeat. Start with 5 reps and build to 20. This builds the steadiness needed for precision shooting.
Load your magazine with a mix of live and dummy rounds (don’t know the order). When you get a dummy round, you’ll see exactly what you’re doing wrong. If your sights dip during the click, you’re anticipating recoil.
Start at 3 yards and move back in 3-yard increments. At each distance, fire 5 shots using the appropriate sight picture. Track where your groups hit. This teaches you how sight picture changes with distance.
Once you’ve mastered the fundamentals, these advanced techniques will elevate your shooting to the next level.
Optical Sight Pictures: Red dots and scopes change everything. With red dots, focus on the dot, not the target. The dot should be crisp while the target blurs slightly. With scopes, focus on the reticle, not the target.
Moving Targets: Lead your target slightly, but maintain your sight picture discipline. The key is smooth tracking – don’t jump ahead of the target. I practice this regularly in practical shooting competitions.
Shooting from Unstable Positions: When you can’t achieve a perfect stance, accept a slightly degraded sight picture but execute it perfectly. A good sight picture from a suboptimal position beats a perfect sight picture you can’t achieve under stress.
Sight picture is the alignment of your firearm’s front and rear sights with your target. It’s what you see when looking through properly aligned sights at your intended point of impact.
The four main types are: 1) Center Hold – front sight covers point of aim, 2) Six O’clock Hold – front sight sits below target like clock hands at 6:00, 3) Combat Hold – front sight on center mass for defensive situations, 4) Flash Sight Picture – quick alignment for emergency situations.
No. Aiming is the general process of directing your firearm at a target. Sight picture is the specific visual relationship between aligned sights and the target. Proper sight picture is a critical component of accurate aiming.
For precision shooting, closing one eye often helps focus on the front sight. For defensive shooting, keeping both eyes open maintains peripheral vision and depth perception. Practice both methods and use what works best for your situation.
Basic understanding takes minutes, but mastery requires consistent practice. Most shooters achieve competency after 500-1000 focused practice sessions. True mastery, where proper sight picture becomes automatic under stress, typically takes 1-2 years of regular practice.
Combat hold or center hold are best for self-defense situations. These methods are most forgiving under stress and don’t require precision alignment. The goal is combat accuracy – placing shots in center mass quickly and reliably.
Mastering sight picture transformed my shooting from inconsistent to reliable. The key is understanding that it’s not just about aiming – it’s about the precise relationship between your eyes, your sights, and your target.
Start with the basics: focus on your front sight, ensure proper alignment, then place that aligned system on your target. Practice deliberately, track your progress, and don’t be afraid to experiment with different sight picture types to find what works for you.
Remember, perfect practice makes perfect. Dry fire training is free and incredibly valuable. Spend 10 minutes daily on the drills mentioned above, and I guarantee your sight picture – and your accuracy – will improve dramatically.
Consistency is king. Whether you choose center hold, six o’clock hold, or combat hold, stick with it until it becomes second nature. Only then should you move on to mastering other types. Your future self – the one who can consistently place shots exactly where intended – will thank you for the dedication you show today.