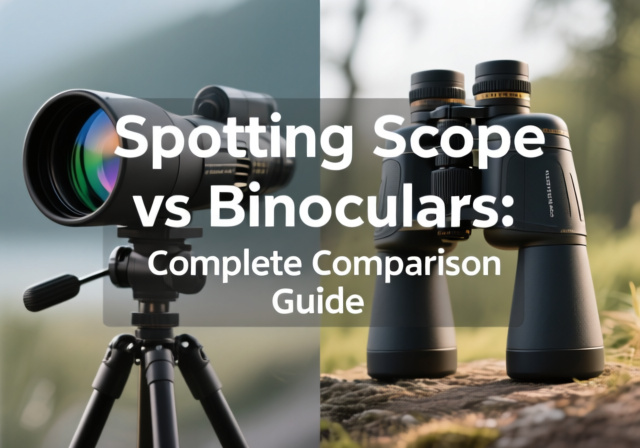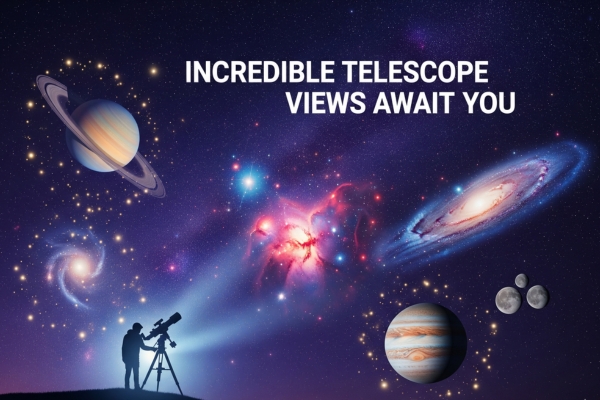
What Can You See With a Telescope? Complete Guide 2025
Learn exactly what you can see with a telescope, from stunning lunar craters to distant galaxies. Set realistic expectations while…
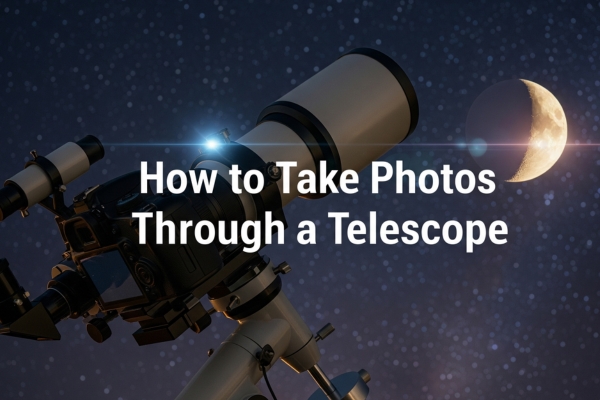
Standing beneath a star-filled sky with your telescope revealing distant worlds is magical. But what if you could capture these celestial wonders to share and treasure forever? The good news is that taking photos through a telescope is easier than you might think, whether you’re using a smartphone or professional camera.
You can photograph through any telescope using three main methods: afocal photography (holding a camera to the eyepiece), prime focus (attaching a DSLR directly), or eyepiece projection (for extreme magnification). Each method offers different advantages, from free smartphone shots to professional deep-sky images that rival observatory photos.
This comprehensive guide covers everything from basic smartphone adapters to advanced DSLR setups, optimal camera settings for different celestial objects, and step-by-step instructions for each photography method. Whether you want to capture lunar craters tonight or eventually photograph distant galaxies, you’ll find the exact techniques and equipment needed for your astrophotography journey.
The world of telescope photography offers three distinct approaches, each suited to different equipment and experience levels. Understanding these methods helps you choose the right technique for your goals and available gear.
Afocal photography is the simplest way to start capturing celestial objects through your telescope. This method involves positioning your camera or smartphone at the telescope’s eyepiece, allowing the eyepiece to magnify the image before your camera captures it. No equipment modifications are needed, making it perfect for beginners.
This technique works with any camera, from smartphones to point-and-shoot models, and even DSLRs with their lenses attached. The telescope and camera remain separate units, which means you can switch between visual observing and photography instantly. Many amateur astronomers achieve stunning Moon photos using nothing more than steady hands and patience.
The main challenge with afocal photography is alignment – getting your camera lens perfectly centered with the eyepiece takes practice. However, modern smartphone adapters have made this process much easier, turning what was once a frustrating experience into a reliable method for telescope photography.
Prime focus photography transforms your telescope into a powerful telephoto lens for your camera. By removing both the camera lens and telescope eyepiece, you connect them directly using specialized adapters. This method is ideal for astrophotography with DSLR and telescope combinations, offering superior image quality and light-gathering capability.
This technique requires a camera with removable lenses, making DSLRs and mirrorless cameras the perfect choice. The resulting setup provides the full light-gathering power of your telescope’s primary mirror or lens, crucial for capturing faint deep-sky objects like nebulae and galaxies.
While more complex than afocal photography, prime focus offers significant advantages. You’ll achieve sharper images, better color reproduction, and the ability to use your camera’s full sensor. This method forms the foundation of serious astrophotography and opens the door to capturing objects invisible to the naked eye.
Eyepiece projection takes telescope photography to extreme magnifications, perfect for capturing fine lunar details or planetary features. This method places a telescope eyepiece between the camera and telescope, projecting a magnified image onto the camera sensor. It’s the most specialized technique but yields incredible close-up results.
This approach excels when photographing small, bright targets that benefit from extra magnification. Lunar craters, Saturn’s rings, and Jupiter’s cloud bands become dramatically detailed through eyepiece projection. The technique requires additional adapters and careful balance adjustments due to the extended optical train.
While challenging for beginners, eyepiece projection rewards patience with stunning high-magnification images impossible to achieve through other methods. Professional lunar photographers often use this technique to capture crater details that rival space telescope imagery.
Choosing the right equipment for attaching camera to telescope setups depends on your camera type and photography goals. From budget-friendly smartphone adapters to professional camera mounts, each option offers unique advantages for different skill levels and budgets.
Modern smartphones have revolutionized telescope photography, making it accessible to everyone. The key to success lies in choosing the right adapter to secure your phone at the eyepiece. Universal smartphone adapters range from $20 to $60 and accommodate most phone models and telescope eyepieces.
For those on a tight budget, DIY solutions work surprisingly well. Clear tape or masking tape can temporarily secure lightweight phones to the eyepiece, though this requires patience and steady hands. A more stable alternative involves using a standard camera tripod positioned to hold your phone at the eyepiece.
When selecting a smartphone adapter, look for these features:
Professional results require proper telescope with DSLR camera mount equipment. The essential components are a T-ring specific to your camera brand and a T-adapter that matches your telescope’s focuser. Together, these create a secure connection for prime focus photography.
T-rings are camera-specific and cost around $15-25, designed for brands like Canon, Nikon, Sony, and others. The T-adapter varies by telescope type but typically costs $25-35. This modest $50 investment unlocks the full potential of your DSLR for astrophotography. Some telescopes, particularly those with telescope with Canon camera mount options, may include these adapters.
For eyepiece projection, you’ll need an additional projection adapter that holds an eyepiece between the camera and telescope. These specialized adapters cost $40-70 but enable extreme magnification photography. When choosing between telescope brands, consider their camera adapter availability and compatibility.
Dedicated astronomy cameras represent the pinnacle of telescope photography technology. These purpose-built devices connect directly to your telescope and computer via USB, offering features impossible with standard cameras. Cooling systems reduce sensor noise, while specialized chips maximize sensitivity to faint celestial light.
Entry-level astronomy cameras start around $300, while professional models can exceed $3,000. Key advantages include:
These cameras excel at capturing faint deep-sky objects but require a laptop and additional software. They’re best suited for serious astrophotographers ready to invest in a complete imaging system. Many include camera mount for Celestron telescope compatibility and other major brands.
Successfully attaching DSLR camera to telescope or smartphone requires careful alignment and the right technique. Each camera type has specific mounting procedures that, when followed correctly, ensure stable and perfectly aligned photography setups.
Begin by selecting an eyepiece with a long focal length (20-25mm) for easier alignment and wider field of view. Insert the eyepiece into your telescope’s focuser and secure it firmly. Point your telescope at a bright target like the Moon for initial setup and focusing.
Step-by-Step Universal Adapter Method:
Alternative DIY Methods:
Pro tip: Enable your phone’s grid lines to help center the circular telescope image. Some photographers find success using photography techniques from traditional camera work adapted to smartphone astrophotography.
Prime focus photography with a telescope with camera attachment for DSLRs requires removing both the camera lens and telescope eyepiece. This direct connection provides maximum light transmission and image quality. The process varies slightly between refractors and reflectors but follows these general steps.
Installation Process:
Achieving focus requires patience since you’re now looking through the camera viewfinder or LCD screen. Start with a bright object and use your telescope’s focuser to achieve sharp focus. Many astrophotographers recommend using live view mode at maximum magnification for precise focusing.
Eyepiece projection adds an extra component between your camera and telescope, creating a more complex but rewarding setup. This method requires a projection adapter that holds both an eyepiece and your camera, extending the optical path significantly.
Balance becomes critical with eyepiece projection due to the extended setup. Before attaching your camera:
The projection adapter typically includes a sliding mechanism to vary the distance between eyepiece and camera, allowing magnification adjustment. Start with the eyepiece close to the camera for lower magnification, then gradually increase the distance for more extreme close-ups of lunar or planetary features.
Mastering camera settings is crucial for capturing sharp, properly exposed images through your telescope. Each type of celestial object requires specific settings to reveal maximum detail while avoiding common pitfalls like overexposure or motion blur.
The Moon’s brightness often surprises beginning astrophotographers, leading to washed-out, featureless images. Manual camera control is essential for lunar photography, as automatic modes will overexpose this brilliant target. Start with these proven settings and adjust based on your results.
| Moon Phase | ISO | Shutter Speed | Aperture (if applicable) |
|---|---|---|---|
| Crescent | 100 | 1/60s | f/8-f/11 |
| Quarter | 100 | 1/125s | f/8-f/11 |
| Full | 50-100 | 1/250s | f/11 |
Focus using live view at 10x magnification, targeting the lunar terminator (shadow line) where contrast is highest. The NASA Lunar Photography Guide recommends shooting in RAW format for maximum processing flexibility. Take multiple shots at different exposures to ensure at least one perfect capture.
Remember that atmospheric conditions significantly affect image quality. Shoot when the Moon is highest in the sky for best results, avoiding the turbulent air near the horizon.
Planetary imaging differs fundamentally from other astrophotography, relying on video capture rather than single exposures. This technique, called “lucky imaging,” captures thousands of frames to overcome atmospheric turbulence. Modern planetary imagers achieve stunning results using relatively modest equipment.
For video capture, use these starting settings:
Focus critically on planetary features like Jupiter’s cloud bands or Saturn’s Cassini Division. The best planetary images come from stacking hundreds or thousands of video frames using free software like RegiStax or AutoStakkert, selecting only the sharpest moments when Earth’s atmosphere steadies.
Deep sky photography through a telescope with camera mount requires longer exposures to collect enough light from faint objects. Unlike planetary imaging, single long exposures or multiple shorter ones reveal nebulae, galaxies, and star clusters invisible to the eye.
Exposure Guidelines Without Tracking:
With Tracking Mount:
Dark frames (lens cap on, same settings) help remove sensor noise during processing. The Sky & Telescope Deep Sky Imaging Guide provides comprehensive processing workflows for beginners.
Matching celestial targets to your equipment capabilities ensures rewarding results from your first session. Not every object suits every telescope or mounting system, so understanding these relationships saves frustration and accelerates your learning curve.
Manual telescopes and alt-azimuth mounts limit you to bright objects that tolerate short exposures. The Moon reigns supreme for beginning astrophotographers, offering endless detail and forgiving exposure requirements. Its brightness allows sharp images even with basic smartphones or cameras.
The Sun presents another excellent untracked target, but only with proper solar filters designed for telescopes. Never observe or photograph the Sun without appropriate protection. White-light solar filters reveal sunspots, while specialized hydrogen-alpha filters show dramatic solar prominences and flares.
Bright planets work well for video capture without tracking:
Smaller telescopes and camera lenses excel at wide-field astrophotography, capturing large celestial objects that wouldn’t fit in bigger telescope fields of view. These instruments, especially when paired with a telescope with DSLR camera mount, reveal stunning wide-angle views of the night sky.
Prime Wide-Field Targets:
These objects benefit from the wider field of view that smaller telescopes provide. Many astrophotographers specifically use small refractors or camera lenses for these sprawling targets that larger telescopes can only capture in sections.
Motorized tracking opens the universe of faint deep-sky objects. With proper polar alignment and tracking, exposure times extend from seconds to minutes, revealing objects completely invisible through the eyepiece. This equipment investment transforms your imaging capabilities dramatically.
Deep Sky Targets by Difficulty:
Beginner (30-60 second exposures):
Intermediate (2-5 minute exposures):
Advanced (10+ minute exposures):
When planning travel with telescopes, consider portable tracking mounts that enable deep-sky photography from dark-sky locations away from city lights.
Every astrophotographer encounters similar challenges when learning telescope photography. Understanding these common issues and their solutions helps you troubleshoot problems quickly and improve your results with each session.
Camera shake ruins more telescope photos than any other factor. Even tiny vibrations magnify through the telescope’s long focal length, creating blurred stars and soft planetary details. Fortunately, several techniques effectively eliminate these vibrations.
For DSLR users, mirror lock-up proves essential. This feature lifts the mirror before exposure, letting vibrations settle before the shutter opens. Access this setting through your camera’s custom functions menu. Combine mirror lock-up with a 2-second timer delay for maximum stability.
Vibration Reduction Techniques:
Overexposure particularly plagues Moon photography, where automatic camera settings drastically overestimate required exposure times. The Moon’s surface reflects sunlight directly, making it far brighter than the dark sky suggests. Understanding manual exposure control prevents washed-out, featureless lunar images.
Check your camera’s histogram after each shot – properly exposed Moon photos show the histogram peak in the middle third, not pushed against the right edge. If overexposed, reduce ISO, increase shutter speed, or both. Some photographers use neutral density filters for additional control.
Modern cameras’ “highlight warning” (blinkies) immediately shows overexposed areas. Enable this feature to spot problems instantly. Remember that slight underexposure recovers better than overexposure during processing, so err on the darker side when uncertain.
Focus challenges frustrate beginners more than any other aspect of astrophotography. Unlike daytime photography, autofocus fails completely on stars and planets. Manual focus through a dim viewfinder or small LCD screen tests patience and technique equally.
Focus Techniques for Sharp Images:
For smartphones, tap the Moon’s terminator or bright crater to trigger focus. Some apps offer manual focus override for better control. DSLR users should switch to manual focus mode immediately – autofocus will hunt endlessly in darkness.
Not all telescopes excel at photography. Understanding how different telescope designs affect imaging helps you choose equipment wisely or optimize what you already own. Consider these factors when selecting a telescope for photography versus visual observation.
Refractor telescopes traditionally dominate astrophotography due to their simple, maintenance-free design. Quality refractors deliver sharp, high-contrast images without the central obstruction found in reflector designs. Modern apochromatic (APO) refractors correct color fringing for stunning photographic results.
Reflector telescopes offer more aperture per dollar but require precise collimation for sharp images. Newtonian reflectors need coma correctors for edge-to-edge sharpness, while Ritchey-Chrétien designs provide better photographic performance. Their open tubes make them susceptible to air currents and dew.
Compound telescopes (Schmidt-Cassegrain, Maksutov-Cassegrain) provide long focal lengths in compact packages. While excellent for planetary imaging, their slow focal ratios (f/10 or higher) challenge deep-sky photography. Focal reducers help but add complexity and potential optical issues.
The mount matters more than the telescope for serious astrophotography. While visual observers tolerate shaky mounts, photography demands rock-solid stability. The general rule allocates 50-60% of your total budget to the mount – advice that seems extreme until you experience a quality mount’s transformation of your imaging.
Mount Types and Capabilities:
Payload capacity critically affects performance. Choose mounts rated for at least 1.5x your total equipment weight for visual use, or 2x for photography. This headroom ensures smooth tracking and reduces periodic error that creates trailed stars.
Raw telescope photos rarely inspire without proper processing. Unlike daytime photography where images look good straight from camera, astrophotos require processing to reveal hidden detail and color. Understanding basic and advanced processing techniques transforms mediocre captures into stunning celestial portraits.
Every astrophoto benefits from fundamental adjustments that enhance detail and correct common issues. Start with these essential steps that apply to any image processing software, from free options like GIMP to professional tools like Adobe Photoshop.
Essential Processing Steps:
Moon photos often need orientation correction since telescopes may show inverted or mirrored views. Compare your image to online references and flip/rotate as needed. Many beginners don’t realize their lunar photos are upside-down until someone points it out!
Stacking multiple images revolutionizes astrophotography by improving signal-to-noise ratio dramatically. This technique combines numerous short exposures into one clean, detailed image that surpasses what any single shot could achieve. Free software makes this powerful technique accessible to everyone.
The principle is simple: random noise appears differently in each frame while real celestial details remain constant. Stacking software aligns and averages multiple frames, reinforcing real signal while canceling random noise. Even stacking 10-20 images shows dramatic improvement.
Popular Free Stacking Software:
Ready to capture your first telescope photo? This checklist ensures success whether you’re using a smartphone or DSLR. The Moon makes the perfect first target – bright, detailed, and forgiving of minor mistakes.
For Smartphone Photography: □ Telescope set up and aligned □ 20-25mm eyepiece installed □ Smartphone adapter or tape ready □ Camera app with manual controls (if available) □ Lens cleaning cloth □ Stable observing position
For DSLR Photography: □ T-ring for your camera brand □ T-adapter for your telescope □ Camera battery fully charged □ Memory card with space □ Remote shutter or timer enabled □ Flashlight with red filter
| Target | Method | ISO | Shutter | Notes |
|---|---|---|---|---|
| Moon | Smartphone | Auto | Auto | Tap to focus on terminator |
| Moon | DSLR | 100 | 1/125s | Manual mode essential |
| Planets | Video | 800-1600 | 1/30-1/60s | Stack frames later |
| Bright DSO | DSLR | 1600 | 30s | Requires tracking |
“I can’t see anything through my camera”
“Everything is blurry”
“The Moon is too bright/white”
Professional photography tips from NASA’s astronomy picture archives can inspire your next targets after mastering the Moon.
Once you’ve mastered basic telescope photography, advanced techniques dramatically improve image quality and expand your target options. These methods require additional investment but deliver professional-quality results that justify the expense and learning curve.
Filters transform astrophotography by blocking unwanted light or enhancing specific wavelengths. Light pollution filters prove essential for urban astronomers, while specialized narrowband filters reveal hidden nebula structures invisible in regular photographs. Understanding filter types and applications opens new imaging possibilities.
Essential Filter Types:
Narrowband filters work particularly well with telescope with camera attachment setups for emission nebulae. These filters transmit only specific wavelengths where nebulae emit light, dramatically improving contrast even from light-polluted locations. Many city-based astrophotographers achieve stunning results impossible without filters.
Successful astrophotography requires careful planning beyond simply pointing at the sky. Modern apps and websites predict weather, seeing conditions, and target visibility, maximizing your chances for quality images. Planning prevents wasted nights and frustration from poor conditions or inappropriate targets.
Essential Planning Tools:
Consider these planning factors:
Astrophotography involves unique safety challenges, from solar observation dangers to equipment protection. Understanding and following safety protocols protects both you and your expensive equipment from preventable damage.
Solar photography demands extreme caution – permanent eye damage or blindness occurs instantly from unfiltered telescope viewing. Never look through any telescope pointed at the Sun without proper solar filters. This warning extends to cameras, where focused sunlight can destroy sensors immediately.
Solar Safety Rules:
Safe solar filters reduce sunlight by 99.999%, revealing sunspots and solar granulation. White-light filters cost $50-150 and fit over your telescope’s front opening. More expensive hydrogen-alpha filters show dramatic prominences and surface details for dedicated solar observers.
Yes, you can photograph through virtually any telescope, though some designs work better than others. Even basic telescopes allow Moon photography using smartphones. Quality optics and stable mounts improve results, but don’t let equipment limitations stop you from starting with what you have.
No, expensive cameras aren’t necessary for beginning telescope photography. Smartphones capture impressive Moon photos and bright planets through any telescope. Even older DSLRs work excellently for deep-sky imaging when paired with proper adapters and techniques. Start simple and upgrade based on experience.
For astrophotography with DSLR and telescope combinations, 80-102mm apochromatic refractors offer the best versatility. These telescopes provide sharp images, moderate focal lengths suitable for many targets, and compatibility with standard camera adapters. Brands like William Optics, Sky-Watcher, and Explore Scientific offer excellent options.
Star trails result from Earth’s rotation during long exposures. Without tracking, use the “500 rule”: divide 500 by your telescope’s focal length to find maximum exposure time in seconds. For example, a 1000mm telescope allows 0.5-second exposures. Tracking mounts eliminate this limitation entirely.
The Moon is by far the easiest target for telescope photography. Its brightness allows short exposures with any camera, eliminating tracking requirements. The Moon offers endless detail, changes nightly, and provides instant gratification for beginners learning camera settings and focusing techniques.
Taking photos through a telescope opens an incredible world of celestial photography, from simple smartphone Moon shots to professional deep-sky images. You’ve learned three distinct methods – afocal, prime focus, and eyepiece projection – each offering unique advantages for different equipment and targets.
Whether using basic smartphone adapters or sophisticated telescope with DSLR camera mount systems, the key is starting with appropriate targets and gradually building skills. Tonight’s crescent Moon provides the perfect first subject, requiring only your existing telescope and camera to capture stunning crater details.
Your astrophotography journey begins with that first photo, progressing naturally from lunar snapshots to planetary imaging and eventually deep-sky wonders. Modern equipment makes this progression easier than ever, with quality results possible at every budget level.
Pick up your camera or smartphone tonight, point your telescope at the Moon, and capture your first celestial photograph. Join the growing community of amateur astrophotographers sharing the universe’s beauty – one photo at a time.