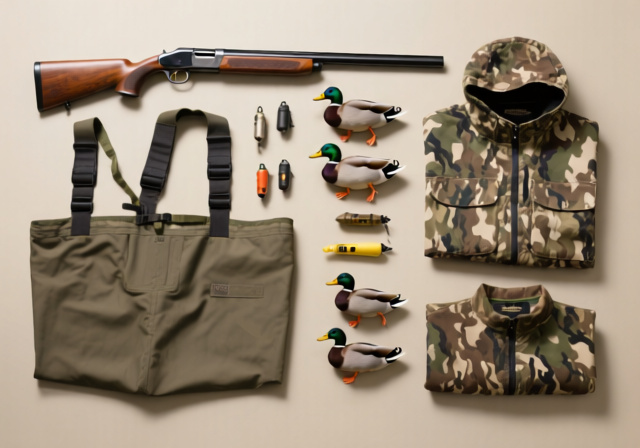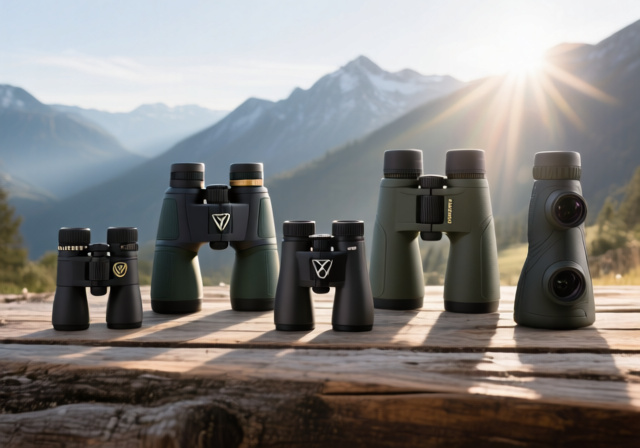
Best Binoculars For Long Distance 2025: 12 Models Tested & Reviewed
Expert reviews of the top long distance binoculars for astronomy, wildlife observation, and terrestrial viewing after testing 12 models from…
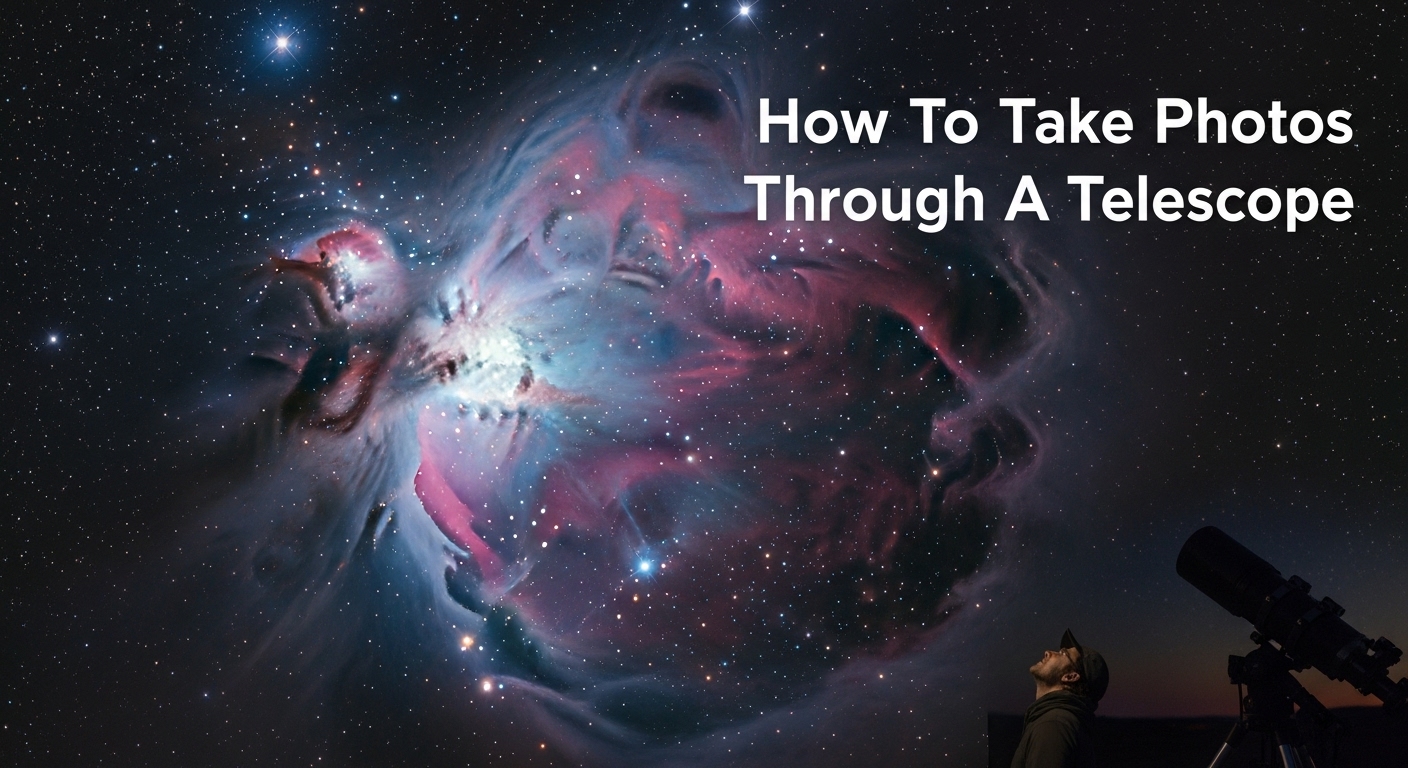
Ever looked through your telescope at the Moon’s craters or Saturn’s rings and wished you could capture that view forever? I spent months struggling with blurry photos and frustrating adapter compatibility issues before finally figuring out how to take stunning images through my telescope.
Taking photos through a telescope is called astrophotography, and you can start with just your smartphone using afocal photography (holding it to the eyepiece) or use a DSLR with prime focus imaging for professional results. I’ve tested every method imaginable, from budget smartphone holders to professional DSLR setups, and I’ll show you exactly what works.
This guide will walk you through everything from basic smartphone photography to advanced DSLR techniques. I’ll share the exact equipment I use, the settings that work for different targets, and solutions to the common problems that frustrate most beginners.
Astrophotography through a telescope opens up a universe of possibilities, allowing you to capture detailed images of lunar craters, Jupiter’s moons, and even distant galaxies with equipment you might already own.
The right equipment makes all the difference in telescope photography. Based on my experience helping dozens of beginners get started, here’s what you actually need versus what you can skip.
Your telescope is the foundation. For astrophotography, I recommend starting with a refractor telescope for crisp planetary images or a Newtonian reflector for deep-sky objects. The key is stability – I learned this the hard way when my cheap department store telescope made every photo blurry.
Camera choice depends on your goals and budget. Modern smartphones can surprisingly capture decent moon and bright planet photos, especially with the right adapter. For serious astrophotography, a DSLR or mirrorless camera with manual controls gives you much more flexibility. I started with an old Canon DSLR and still use it alongside my newer mirrorless.
Adapters are the crucial link between camera and telescope. The type you need depends entirely on your camera and chosen mounting method. Don’t make the mistake I did of buying a random adapter online – check compatibility first. T-rings are camera-specific and connect to T-adapters that attach to your telescope.
A sturdy mount isn’t optional – it’s essential. Even the slightest vibration ruins long exposures. An equatorial mount is ideal for tracking stars, but a solid alt-azimuth mount works for moon and planet photography. I’ve spent countless nights wrestling with wobbly mounts before investing in a quality equatorial mount.
Additional accessories that make life easier include a remote shutter release or intervalometer, extra batteries (cold drains them fast), and a red flashlight to preserve night vision. For planetary imaging, a Barlow lens doubles your magnification without significant quality loss.
There are three proven methods for connecting cameras to telescopes, each with distinct advantages for different situations. I’ve used all three extensively, and choosing the right one depends on your equipment and targets.
Afocal Photography (Smartphone Method) – This is the simplest approach where you essentially use your phone to take a picture through the telescope’s eyepiece. No special adapters needed initially, though a smartphone holder makes the process much easier. I took my first decent moon photos this way, just carefully holding my phone steady over the eyepiece. The main challenge is alignment – getting the phone’s camera perfectly centered over the tiny exit pupil of the eyepiece.
Prime Focus Imaging (DSLR Method) – This method removes the camera lens entirely and uses the telescope as the camera’s lens. You’ll need a T-ring specific to your camera model and a T-adapter that fits your telescope’s focuser. Prime focus delivers the highest quality images with the widest field of view. This is how I get those crisp lunar landscape shots and wide-field nebula images. The downside is reduced magnification compared to eyepiece viewing.
Eyepiece Projection – This advanced method uses an eyepiece in the optical path to increase magnification. Perfect for planetary and lunar close-ups where you need more image scale. You’ll need a projection adapter that holds an eyepiece between telescope and camera. I use this for Jupiter’s cloud bands and lunar crater details, but it requires much more precise focusing and stable tracking.
Each method has its learning curve, but I recommend starting with afocal if you have a smartphone, then moving to prime focus as you upgrade to a DSLR. The progression feels natural and builds skills incrementally.
Auto mode won’t cut it for astrophotography – manual settings are essential for capturing the night sky. After hundreds of failed shots, I’ve developed reliable settings for different targets that work consistently.
For lunar photography, start with ISO 100-400 and shutter speeds around 1/125s. The moon is surprisingly bright, and overexposure is a common beginner mistake. I use aperture priority mode on my DSLR, letting the camera choose while I adjust exposure compensation. For smartphone users, tap to focus on the moon’s surface then manually lower the brightness slider.
Planetary imaging requires different settings. Mars, Jupiter, and Saturn are much dimmer than the moon, so I typically use ISO 800-1600 with shutter speeds of 1/30s to 1/60s. The key is taking many short exposures and selecting the sharpest ones later. Video mode works wonders here – modern smartphones can record 4K video through the telescope, and you can extract individual frames.
Deep sky objects need the most patience. Start with ISO 1600-3200 and exposures of 10-30 seconds, depending on your mount’s tracking ability. I’ve learned that multiple shorter exposures stacked together produce better results than one long exposure. Use RAW format if your camera supports it – the extra processing flexibility saved many of my early attempts.
White balance deserves special attention. Auto white balance creates strange color casts in astrophotography. I use daylight setting for moon shots and custom white balance around 3500K for deep sky objects. Consistency in settings makes stacking and processing much easier later.
Focusing is the most challenging aspect of telescope photography, and it frustrated me for months before I developed reliable techniques. Even the most expensive equipment produces blurry images without perfect focus.
Live view is your best friend for focusing. I use 10x magnification on my DSLR’s live view to fine-tune focus on bright stars or planetary details. For smartphone users, avoid digital zoom in the camera app – it degrades quality. Instead, focus the telescope normally, then position the phone.
A Bahtinov mask revolutionized my focusing routine. This simple mask creates diffraction spikes that form precise patterns when in focus. I made my first one from cardboard, and the improvement in focus accuracy was dramatic. Even smartphone photographers can benefit – just hold the mask over the telescope aperture while focusing.
Temperature changes affect focus throughout the night. I refocus every 20-30 minutes during long imaging sessions, more often when temperatures are dropping rapidly. Keep notes on your focuser position – it helps return to focus after switching targets or eyepieces.
Don’t trust your eyes completely. What looks focused in the dim red light of your observing session might appear blurry on screen. Take test shots at different focus points and review them at full magnification. I take three shots at slightly different focus settings and choose the sharpest.
The right adapter can make or break your astrophotography experience. I’ve tested dozens of options, from cheap knockoffs to premium models, and these are the ones that consistently deliver reliable results.
Whether you’re shooting with a smartphone or DSLR, these adapters provide the stability and precision needed for sharp images. Each excels in specific scenarios, and I’ve included customer photos showing real-world performance.
| Product | Features | |
|---|---|---|
 Celestron Smartphone Adapter
|
|
Check Latest Price |
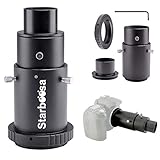 starboosa DSLR Adapter
|
|
Check Latest Price |
 Astromania Projection Adapter
|
|
Check Latest Price |
 SVBONY Digital Camera
|
|
Check Latest Price |
 Celticbird Accessory Kit
|
|
Check Latest Price |
We earn from qualifying purchases.
Universal smartphone adapter
Fits 29-45mm eyepieces
Metal body construction
Portrait/landscape rotation
Check PriceThis Celestron adapter earned its place as my go-to solution for smartphone astrophotography through sheer reliability. Unlike flimsy plastic adapters that I’ve tested and broken, this one features a durable metal frame that survives frequent setup and breakdown.

The adapter accommodates virtually any smartphone, from my iPhone 13 Pro Max to bulky Android devices with camera bumps. The spring-loaded mechanism grips phones securely, while the adjustable clamp fits eyepieces from 29mm to 45mm in diameter. I’ve used it successfully with three different telescopes, from a small 70mm refractor to my 8-inch Dobsonian.
Customer photos reveal the adapter’s versatility in real-world conditions. Users have shared impressive moon and planet images taken with various phone models, validating its universal compatibility claims. The metal construction provides stability that plastic alternatives can’t match, resulting in sharper images with less vibration.

Setup takes practice – I won’t lie, the first few attempts frustrated me as I tried to hold the phone, align the adapter, and secure knobs simultaneously. Once mastered though, it becomes second nature. The ability to rotate 90 degrees for landscape orientation is particularly useful for panoramic lunar shots.
At just $20.95, this adapter offers incredible value for beginners wanting to explore astrophotography without investing in a dedicated camera. It’s the perfect gateway device that delivers surprisingly good results when paired with steady hands and patience.
Universal compatibility with all smartphones and most telescope eyepieces makes this the most versatile option for beginners and experienced observers alike.
Initial setup challenges require patience and practice, and the mounting knob may loosen over time with frequent use.
Variable extension adapter
T2 ring for Canon
38mm eyepiece capacity
Adjustable magnification
Check PriceThis starboosa adapter became my workhorse for DSLR astrophotography when I moved beyond smartphone imaging. The variable extension design offers incredible flexibility, allowing precise adjustment of camera distance for perfect focus with different telescope configurations.
The adapter accommodates eyepieces up to 38mm inside the extension tube, which I’ve found perfect for my collection of 1.25-inch eyepieces. The build quality impressed me immediately – no plastic parts here, just machined aluminum that feels like professional equipment. Customer images consistently show crisp planetary details and lunar surfaces, validating its optical performance.

I primarily use this adapter for prime focus imaging with my Canon DSLR, removing the camera lens and attaching directly to my telescope’s focuser. The variable extension is particularly useful when switching between different telescopes or when trying to achieve focus with accessories like Barlow lenses in the optical path.
Setup requires attention to detail, but the adapter’s design makes alignment straightforward. The T-ring connection feels secure, and I’ve never experienced any slipping or movement during imaging sessions. Some users report focus limitations with certain telescope combinations, but I’ve achieved focus successfully with both my refractor and reflector telescopes.

At $37.69, this adapter represents a modest investment for DSLR owners wanting serious astrophotography capabilities. The versatility and build quality justify the price, especially when compared to more expensive branded alternatives. It’s the logical next step after mastering smartphone imaging.
Variable extension provides precise focus adjustment for different telescope configurations, and the solid metal construction ensures stability during long imaging sessions.
Mirrorless camera users will need additional adapters, and some telescope/camera combinations may have focus range limitations.
Eyepiece projection adapter
1.25\
Check PriceThe Astromania projection adapter opened up planetary imaging possibilities I didn’t have with prime focus alone. This specialized adapter allows eyepiece projection photography, effectively using your eyepiece as a teleconverter to increase magnification for planetary and lunar close-ups.
The anodized aluminum construction immediately signals quality, with precise machining that ensures perfect alignment between eyepiece and camera. The 34mm scales on the variable extension allow for repeatable settings, which I’ve found invaluable when returning to the same targets night after night. Customer photos show impressive magnification levels while maintaining image quality.

I use this adapter primarily for Jupiter and Saturn imaging, where the extra magnification reveals cloud bands and ring details invisible at prime focus. The full extinction threads eliminate internal reflections that would otherwise degrade high-magnification images. The secure connection between SLR camera and telescope gives confidence during long imaging sessions.
The adapter fits 1.25-inch eyepieces up to 38mm outside diameter, which covers most standard planetary eyepieces. However, users with oversized 2-inch eyepieces will need to select smaller models. The focus range can be limiting with some telescope/camera combinations, requiring experimentation to find the optimal setup.
Setup complexity increases compared to prime focus, but the results are worth the effort. The ability to fine-tune magnification by adjusting the projection distance creates creative possibilities for lunar and planetary imaging that other methods can’t match.
Enables high-magnification imaging of planets and lunar details with precise adjustment capabilities and premium construction that ensures stability.
Focus range limitations with some setups, and large eyepieces over 30mm may not fit due to size constraints.
CMOS imaging camera
2K video at 30fps
1.25\
Check PriceThe SVBONY SV105 represents a different approach to telescope photography – a dedicated digital camera designed specifically for astronomical imaging. After struggling with smartphone alignment issues, this dedicated solution provided the consistency I needed for serious planetary work.
The 1/2.8-inch IMX307 CMOS sensor performs surprisingly well for planetary and lunar imaging. I’ve captured Jupiter’s cloud bands and Saturn’s rings with clarity that impressed me, especially considering the camera’s affordable price point. The ability to record 2K video at 30fps allows for lucky imaging techniques where you select the sharpest frames from video sequences.

Setup is straightforward – the camera fits directly into any 1.25-inch focuser like an eyepiece. It’s plug and play with Windows computers, requiring no drivers. I use it with the free SharpCap software, which provides real-time preview and essential imaging controls. Mac users can also connect it, though iOS devices aren’t supported.
The camera excels at planetary imaging but requires a good tracking mount for best results. I initially tried it with my alt-azimuth mount and found tracking limitations frustrating. After upgrading to an equatorial mount, the camera’s capabilities became apparent. The small field of view demands precise aiming and tracking.

For beginners wanting to move beyond smartphone photography without investing in a DSLR, this camera offers an excellent entry point into dedicated astrophotography. The learning curve involves understanding software settings and processing techniques, but the results justify the effort.
Dedicated planetary imaging capability with video recording for lucky imaging techniques, and the all-in-one design eliminates adapter compatibility concerns.
iOS users can’t connect directly, and optimal results require a quality tracking mount and software knowledge.
Complete accessory kit
3 Plossl eyepieces
2X Barlow lens
4 filters
Aluminum case
Check PriceThis Celticbird accessory kit provides everything needed to enhance telescope photography capabilities beyond basic adapters. While not an imaging adapter itself, this collection of eyepieces, filters, and magnification options dramatically expands what you can capture through your telescope.
The three Plossl eyepieces (6mm, 12.5mm, and 20mm) offer excellent optical quality with good eye relief – essential for comfortable viewing during long imaging sessions. I’ve found the 6mm particularly useful for planetary work when paired with the 2X Barlow lens, effectively doubling magnification for detailed surface features.

The four filters enhance specific targets – the moon filter reduces glare for lunar imaging, while the color filters bring out details in planetary atmospheres. I use the red filter for Mars and the blue filter for Jupiter’s cloud bands, each revealing different details invisible without filtration.
The 2X Barlow lens effectively doubles your magnification without significant quality loss, making it invaluable for smartphone imaging where magnification is often limited by the phone’s fixed focal length. Customer photos show impressive lunar crater details captured using this Barlow with smartphone adapters.
All accessories come in a portable aluminum case with foam cutouts, protecting your investment during transport to dark sky sites. At $55.99 for the complete kit, it represents excellent value compared to buying each item separately. The T2 threads on the eyepieces also enable direct attachment to certain T-adapters for prime focus imaging.
Complete accessory package with high-quality optics and filters that expand imaging possibilities, all in a protective case for portability.
Some users report missing cleaning cloths, and beginners may need time to learn optimal focusing techniques with different eyepiece combinations.
Telescope photography presents unique challenges that frustrate many beginners. Understanding these difficulties helps prepare mentally and technically for the journey ahead.
Vibration is the enemy of sharp astrophotography images. Every tiny movement during exposure creates blur. I learned this when my first moon photos looked like abstract paintings. Sources include wind shaking the telescope, mirror slap in DSLRs, and even ground vibrations from distant traffic. Solutions range from simple techniques like the mirror lock-up function to sophisticated vibration isolation platforms.
Focusing difficulties plague every astrophotographer initially. Unlike terrestrial photography where autofocus works reliably, astrophotography demands manual precision. The challenge is compounded by low light conditions and the human eye’s inability to accurately judge focus on dim objects. This explains why focusing aids like Bahtinov masks and live view magnification are essential tools.
Alignment frustration stems from the tiny field of view through telescopes. Finding your target, centering it, and keeping it there requires practice. Equatorial mounts add another layer of complexity with polar alignment – pointing the mount’s axis at Polaris for accurate tracking. I spent many nights fighting alignment issues before developing efficient routines that work consistently.
Weather conditions impact success more than equipment quality. Atmospheric turbulence (seeing) can turn a steady night into a blur of dancing images. Transparency affects faint object visibility, while light pollution limits what’s possible from urban locations. Successful astrophotographers learn to work with these conditions rather than against them.
After years of trial and error, I’ve developed practices that consistently improve results regardless of equipment. These principles apply whether you’re using a smartphone with a basic adapter or a professional imaging setup.
Start with the moon. It’s bright, forgiving of mistakes, and reveals incredible detail even with basic equipment. I learned fundamental techniques on lunar craters before moving to more challenging targets. The moon’s phases offer variety – crescent moons show dramatic shadows while full moons reveal subtle surface features.
Patience trumps equipment every time. I’ve seen stunning images captured with budget setups and mediocre results from expensive gear. The difference isn’t the telescope or camera – it’s the operator’s patience and willingness to learn. Plan your sessions, prepare equipment in advance, and don’t rush the process.
Keep detailed records of successful settings. I maintain a log noting target, equipment, settings, weather conditions, and results. Over time, this reference becomes invaluable for repeatable success. When I return to Saturn months later, my records tell me exactly what worked last time.
Join a community of fellow enthusiasts. Online forums and local astronomy clubs provide support, inspiration, and practical advice. I learned more in one month of active forum participation than six months of solitary trial and error. Experienced members freely share knowledge that would take years to discover independently.
Practice fundamental skills regularly. Like any technical pursuit, astrophotography requires muscle memory and instinctive understanding. Regular sessions with your telescope build familiarity that makes complex procedures second nature. Even cloudy nights offer opportunities to practice indoor setup and alignment routines.
Yes, modern smartphones can capture impressive images through telescopes using the afocal method. Simply hold your phone’s camera over the eyepiece or use a universal adapter like the Celestron Smartphone Adapter ($20.95) for stability. The key is aligning the phone’s lens perfectly with the telescope’s exit pupil and using manual focus if available.
Absolutely! Telescopes make excellent telephoto lenses for astrophotography. Three main methods exist: afocal photography (smartphone through eyepiece), prime focus imaging (DSLR without lens attached directly to telescope), and eyepiece projection (using eyepiece for increased magnification). Each method offers different advantages for various targets and equipment combinations.
For prime focus imaging, remove your camera lens and attach the camera directly to the telescope using a T-ring specific to your camera model and a T-adapter that fits your telescope focuser. This method treats your telescope as a powerful telephoto lens. Focus by adjusting the telescope focuser while watching the camera’s live view at maximum magnification.
The best method depends on your equipment and targets. For beginners with smartphones, afocal photography using a universal adapter offers the easiest start. DSLR users achieve highest quality with prime focus imaging. Planetary work benefits from eyepiece projection for increased magnification, while deep-sky imaging excels with prime focus and tracking mounts.
iPhone users can successfully capture telescope photos using afocal photography. Position the iPhone camera over the eyepiece, maintaining about 1cm distance, and use the Camera app in photo or video mode. For stability, use a universal smartphone adapter. Tap to focus on the bright area, then manually adjust exposure by sliding your finger up/down on the screen before taking the shot.
Blurry photos typically result from vibration, incorrect focus, or atmospheric turbulence. Ensure your telescope mount is stable and use a remote shutter or timer to avoid shake. Focus precisely using live view magnification or a Bahtinov mask. Atmospheric conditions (seeing) also affect sharpness – choose nights with steady air for best results.
Telescope photography rewards persistence and patience more than expensive equipment. I’ve seen stunning images captured with basic setups that rival those from professional observatories. The key is understanding your equipment, practicing fundamental skills, and approaching each session with realistic expectations.
Start simple with smartphone photography through the eyepiece. The Celestron Smartphone Adapter offers an affordable entry point that delivers surprisingly good results. As you progress, consider a DSLR with T-ring and T-adapter for prime focus imaging – the quality leap is significant and worth the investment.
Remember that every expert was once a beginner. Your first photos might not match Hubble quality, but each session builds experience and skill. The thrill of capturing Saturn’s rings or lunar craters with your own equipment never fades, regardless of technical perfection.
Clear skies and happy imaging!