10 Best Prime Day Tripod Sales (July 2026): Top Deals on Camera Supports
Prime Day is one of the best times of the year to score a quality tripod at a fraction of…
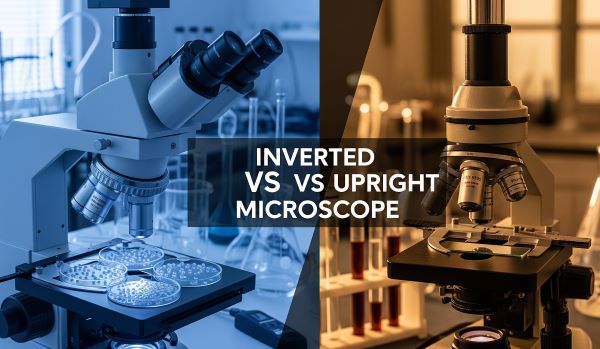
The world of microscopy has evolved dramatically since Anton van Leeuwenhoek first peered into the microbial world in the 17th century. Today, researchers and technicians face a fundamental choice that shapes every experiment: should you select an inverted vs upright microscope for your work? This decision influences not just image quality, but the entire rhythm of laboratory workflow, the types of samples you can examine, and ultimately, the discoveries you can make.
If you have ever watched a cell divide in real-time, tracked protein movement within a living organism, or inspected an industrial component without destroying it, you have likely benefited from the unique design of an inverted microscope. Conversely, if you have ever prepared a histological slide, studied stained tissue sections, or taught students the fundamentals of microscopy, you probably worked with an upright system. Understanding the core differences between these two microscope types has become essential knowledge for anyone working in biological sciences, materials research, or quality control environments.
The distinction between inverted and upright microscopy extends far beyond simple orientation. It affects sample preparation time, imaging resolution, environmental control capabilities, and even the ergonomic experience of extended microscopy sessions. Many laboratories maintain both types to address different imaging needs, while others must choose one configuration based on their primary research focus.
This updated guide for 2026 examines the fundamental differences between inverted and upright microscope designs, explores their respective strengths and limitations, and provides practical frameworks to help you select the right instrument for your specific applications. Whether you are establishing a new laboratory, upgrading existing equipment, or simply seeking to understand the tools used in microscopy facilities around the world, this comprehensive comparison will illuminate your path forward.
The primary distinction between inverted and upright microscopes lies in the arrangement of their optical components relative to the specimen stage. This seemingly simple difference creates fundamentally different user experiences, sample handling requirements, and imaging capabilities that make each configuration optimal for specific application areas.
The upright compound microscope represents the traditional design that has dominated laboratories for centuries. In this configuration, the objective lenses sit above the stage, pointing directly downward toward specimens placed on slides or other flat substrates. The illumination system, including the light source and condenser assembly, occupies the space beneath the stage, directing light upward through the specimen.
The mechanical structure consists of a stable base supporting the optical column, which houses the focusing mechanisms and turret-mounted objectives. Users place specimens on a flat stage with mechanical controls for precise X-Y positioning. The entire optical path travels vertically from illumination source through specimen to objectives and into the eyepieces or camera system.
Standard objective configurations typically range from 4X to 100X magnification, with oil immersion lenses at the high end achieving numerical apertures exceeding 1.4. The condenser positioned immediately below the specimen focuses light into a tight cone, enabling optimal illumination for high-resolution imaging. This arrangement has remained remarkably consistent since the development of modern compound microscopes in the 19th century.
An inverted microscope flips the traditional design upside down, quite literally. The objectives sit beneath the stage, pointing upward to view specimens from below. The light source and condenser assembly mount above the stage, directing illumination downward through the specimen. This arrangement creates a distinctive appearance that immediately identifies these instruments in laboratory settings.
The stage design reflects the inverted configuration, typically featuring a flat, open surface rather than a recessed well. This accommodates various culture vessels including petri dishes, flasks, multi-well plates, and specialized chambers for live cell imaging. The open architecture above the specimen provides convenient access for manipulating samples, exchanging growth media, or integrating additional equipment.
Objectives in inverted systems require longer working distances to accommodate vessel walls and allow room for manipulation. These specialized lenses typically offer working distances of 0.5mm to 10mm depending on vessel material and design. The increased distance from specimen to objective necessarily affects numerical aperture characteristics, creating inherent optical trade-offs compared to upright designs that we will explore in detail.
The architectural differences between upright vs inverted microscopy setups translate directly into practical operational characteristics that influence purchasing decisions and laboratory workflows:
| Feature | Upright Microscope | Inverted Microscope |
|---|---|---|
| Objective Position | Above specimen | Below specimen |
| Light Path Direction | Bottom to top | Top to bottom |
| Sample Containers | Slides and coverslips | Petri dishes, flasks, plates |
| Working Space Above | Limited clearance | Open and accessible |
| Optimal Specimen Type | Fixed, thin specimens | Live cells, thick samples |
The physical arrangement of optical components creates distinct performance characteristics that researchers must understand when selecting instrumentation. These structural differences manifest most clearly in optical path geometry, resolution potential, and compatibility with various imaging techniques.
Upright microscope designs create a short, direct optical pathway from condenser to objective. This proximity allows the condenser to focus light into a tight, high-angle cone that optimally fills the objective aperture. The resulting illumination profile maximizes the numerical aperture of the entire system, enabling superior resolution for demanding imaging applications.
Inverted systems face inherent challenges due to the geometry of their optical path. The condenser must sit above the specimen, often at considerable distance to accommodate vessel height variations. This longer working distance reduces the maximum achievable condenser numerical aperture, typically limiting it to 0.3-0.55 compared to 0.9-1.25 in upright configurations. The implications for resolution and image quality become significant at high magnifications.
Understanding these optical path differences helps explain why upright vs inverted microscopy configurations excel in different applications. The shorter path in upright designs provides inherent advantages for techniques requiring maximum resolution, while the inverted configuration prioritizes sample accessibility and live cell viability.
Working distance represents the clearance between the objective lens front element and the specimen surface. This parameter proves critical for both practical sample handling and achievable resolution. The numerical aperture of a microscope objective directly correlates with its working distance, creating fundamental trade-offs that influence instrument selection.
Upright microscope objectives can achieve extremely short working distances measured in fractions of a millimeter. High-power oil immersion objectives (60X and 100X) typically work at distances under 0.2mm from the coverslip, enabling numerical apertures up to 1.4. This proximity allows the objective to capture light at high angles, achieving diffraction-limited resolution approaching 200 nanometers laterally.
Inverted microscope objectives must accommodate vessel bottoms, media layers, and space for manipulation. Glass bottom dishes typically provide 0.5mm to 2mm of working distance, while plastic vessels may require 10mm or more. These increased distances necessarily reduce numerical apertures, with inverted objectives rarely exceeding 1.3 even with oil immersion. The practical impact means inverted systems cannot match the ultimate resolution potential of upright configurations at high magnifications.
The numerical aperture of your microscope objective directly determines the finest detail resolvable according to the Abbe diffraction limit. Higher numerical aperture values translate directly to better resolving power, making this specification one of the most important factors for high-resolution imaging applications. For critical work involving subcellular structures or fine morphological details, the numerical aperture limitations of inverted microscopes may prove consequential.
The condenser is often overlooked in purchasing decisions, yet it fundamentally limits system performance regardless of objective quality. Even the finest objective lens cannot achieve its theoretical resolution if the condenser fails to provide adequately concentrated illumination. This truth manifests differently in upright and inverted designs.
| Specification | Upright Condenser | Inverted Condenser |
|---|---|---|
| Typical Working Distance | Approximately 1mm | Up to 72mm |
| Numerical Aperture Range | 0.9 – 1.25 | 0.3 – 0.55 |
| Resolution Potential | Excellent | Limited by design |
| Vessel Compatibility | Fixed thickness | Highly flexible |
Upright microscope condensers achieve high numerical apertures by positioning extremely close to specimens. Standardized slide thickness (approximately 1mm) ensures consistent illumination geometry. Abbe condensers, Achromat-Aplanat condensers, and specialized dark-field condensers all perform optimally in this constrained configuration.
Inverted microscopes require condensers that can accommodate variable vessel heights and work at extended distances. While this flexibility enables observation of specimens in their native containers, it inherently sacrifices numerical aperture. The practical result is that high-magnification inverted imaging (above 40X) often produces images with compromised resolution compared to upright alternatives. This limitation proves particularly relevant for fluorescence microscopy applications requiring maximum signal collection efficiency.
Application requirements ultimately drive microscope selection in most laboratory settings. While both configurations can technically image many specimen types, optimal results require matching instrument design to imaging goals. Understanding these application specializations helps researchers and purchasing managers make informed decisions.
The inverted microscope has become indispensable in modern cell biology laboratories, particularly for applications involving living cells and tissue cultures. The configuration aligns naturally with how cells grow in culture vessels, allowing observation from below as cells adhere to and spread across vessel bottoms. This arrangement enables researchers to monitor cell health, behavior, and response to experimental manipulations without disturbing cultures.
An inverted microscope for cell culture work offers several distinct advantages. The open design above the specimen permits easy access for manipulating cells, exchanging growth media, and performing procedures like microinjection or patch clamping. Environmental chambers maintaining temperature, humidity, and CO2 levels can be readily integrated without compromising optical access. Time-lapse experiments tracking cellular processes over hours or days benefit enormously from the ability to maintain cells in optimal conditions throughout imaging sessions.
Common applications benefiting from inverted configurations include cell culture monitoring and documentation, transfection efficiency assessment, microinjection procedures for introducing materials into cells, IVF and embryo manipulation, and live cell fluorescence imaging. The capacity to observe cells within standard culture vessels without transfer to slides preserves sterile conditions and eliminates artifacts from specimen preparation.
Materials science, manufacturing quality control, and failure analysis increasingly rely on inverted microscopy for examining large, opaque, or complex specimens. The stage capacity of inverted systems (often exceeding 30kg) accommodates industrial components that would be impossible to image on traditional upright stages limited to a few kilograms. This capability transforms inspection workflows by enabling direct examination of production parts without sectioning or destructive sampling.
Metallurgical laboratories favor inverted configurations for examining polished metal surfaces, observing fracture surfaces, and assessing microstructure in large samples. The ability to place engine components, welded joints, or electronic assemblies directly on the microscope stage streamlines quality assurance procedures. Sample preparation requirements diminish substantially when specimens can be examined intact rather than requiring mounting and polishing of representative sections.
Throughput advantages prove significant in high-volume inspection environments. Research demonstrates that inverted microscope workflows enable sample changes approximately four times faster than upright configurations. Parfocal objectives maintain focus across magnification changes, while the open stage design allows rapid specimen exchange. These efficiency gains translate directly to reduced inspection costs and faster production feedback loops.
Educational institutions worldwide continue to rely primarily on upright microscopes for teaching laboratories. The versatility of these instruments accommodates diverse specimens from prepared slides showing histological tissues to wet mounts revealing microscopic pond organisms. Students can examine everything from blood cell morphology to botanical cell structures using the same microscope with appropriate objective selection.
The traditional design also supports a wide range of documentation techniques including photomicrography and digital imaging. Standard slide formats simplify workflow and enable use of automated scanning systems for high-throughput analysis. Fixed tissue sections, blood smears, cytology preparations, and other clinically relevant specimens all image optimally with upright configurations.
Research applications demanding maximum resolution, particularly involving stained tissue sections, consistently favor upright systems. The superior condenser design enables advanced contrast techniques including differential interference contrast (DIC), phase contrast, and high-resolution phase contrast microscopy. These capabilities prove essential for morphological studies requiring visualization of fine structural details in prepared specimens.
Certain imaging modalities show distinct preferences for specific microscope configurations based on their fundamental requirements. Matching technique to instrument significantly impacts achievable results and experimental success rates.
| Application | Preferred Configuration | Primary Reason |
|---|---|---|
| Live cell time-lapse imaging | Inverted | Superior sample accessibility and environmental control |
| Histology and tissue sections | Upright | Maximum resolution and contrast options |
| Materials testing and inspection | Inverted | Large sample capacity and rapid throughput |
| Teaching laboratories | Upright | Versatility and lower cost |
| Confocal imaging | Both suitable | Depends primarily on sample type |
| Epifluorescence microscopy | Both suitable | Technique works with both configurations |
Inverted microscopes offer compelling advantages that justify their higher cost in appropriate applications. Understanding these benefits helps laboratories make informed investment decisions and maximizes the value derived from these specialized instruments.
The capacity to accommodate large, heavy specimens distinguishes inverted microscopes from their upright counterparts. While upright systems typically limit samples to 80mm height and approximately 3kg mass, inverted configurations routinely handle specimens up to 30kg and can examine samples of considerable dimensions without sectioning or destructive preparation.
This capacity transforms possibilities across numerous fields. Entire circuit boards, geological samples, metal components, and biological specimens too large for slide preparation can be examined directly. Non-destructive testing preserves sample integrity for subsequent analysis or archival purposes. The ability to examine specimens in their native state often reveals information lost through traditional sectioning procedures.
The open stage design eliminates height restrictions that constrain upright microscopy. Tall objects that would be impossible to fit beneath fixed objectives become readily accessible on inverted systems. This flexibility extends to various container types from simple petri dishes to complex bioreactor observation chambers, accommodating experimental setups that would be impractical or impossible with traditional designs.
Workflow efficiency represents a significant practical advantage for laboratories processing numerous samples. Studies comparing inverted vs upright microscopy workflows demonstrate that inverted configurations enable sample changes up to four times faster. This efficiency gain compounds substantially in high-throughput environments processing hundreds of specimens daily.
Parfocal objectives maintain focus across magnification changes, eliminating time-consuming refocusing when switching between magnification levels. Specimens simply require placement on the stage and initial focusing, after which changing objectives does not disrupt the focal plane. This feature proves particularly valuable when surveying samples at low magnification before examining regions of interest at higher power.
Maximizing inverted microscope efficiency involves several practical strategies. Pre-organizing samples in examination order eliminates downtime between specimens. Standardized vessels ensure consistent focal plane positions across multiple samples. Quick-release sample holders accelerate exchange, while maintaining clean vessel bottoms prevents imaging delays from focus disruption. Creating templates for multi-well plate navigation further streamlines automated acquisition workflows.
Inverted microscopes excel at maintaining sterile conditions during extended live cell observation sessions. The objective lenses remain positioned below specimens, never contacting samples, culture media, or sterile surfaces. This separation prevents cross-contamination between specimens and eliminates a potential failure point for aseptic techniques.
Researchers can perform lengthy time-lapse experiments without compromising sterility. Environmental chambers providing precise temperature and CO2 control integrate seamlessly with inverted designs while maintaining full optical access. Cells remain in their optimal growth environment throughout imaging sessions, enabling authentic observation of cellular behavior unperturbed by environmental fluctuations.
The sterility advantage extends to manipulation procedures. Microinjection, patch clamping, and other techniques requiring access to individual cells benefit from the open geometry above specimens. Researchers can manipulate samples from above while continuously monitoring through objectives safely positioned below, maintaining sterile field integrity throughout experimental procedures.
An often overlooked advantage of inverted microscopy involves the intuitive correspondence between stage movement and image motion. When users move the stage left, the image shifts left in the field of view. This natural correlation matches typical hand-eye coordination expectations, reducing cognitive load during extended microscopy sessions.
Traditional upright microscopes present a reversed view due to image inversion from the optical system. Moving the stage left produces rightward image motion, requiring mental adjustment that slows target location and can cause confusion during manipulation tasks. This reversal particularly challenges new users and complicates procedures requiring precise positioning based on visual feedback.
Modern inverted systems like the Leica DMi8 address this issue through design that aligns stage and image motion. Users report faster target location, reduced operator fatigue, and more precise positioning during extended sessions. These ergonomic benefits contribute meaningfully to productivity in laboratories performing routine screening or lengthy observation experiments.
Despite the specialized capabilities of inverted designs, upright microscopes retain significant advantages that ensure their continued widespread use. These benefits explain why upright configurations remain the dominant choice in educational settings and many research applications.
Affordability represents the most immediate advantage of upright microscopy systems. Quality educational microscopes begin around $300-500, while comparable inverted configurations typically cost several thousand dollars minimum. This price differential makes upright instruments accessible for teaching laboratories, startup research groups, and individual enthusiasts exploring microscopy without major capital investment.
The lower entry cost enables institutions to equip multiple workstations, supporting hands-on student training that would be impractical at inverted system price points. Multiple students can work simultaneously with upright microscopes, maximizing laboratory utilization and student engagement with microscopy techniques.
Maintenance costs also favor upright designs. Simpler construction requires less specialized service, and replacement parts cost substantially less than long working distance objectives or specialized inverted components. Ongoing operational expenses remain lower, contributing to favorable total cost of ownership over instrument lifetime.
For applications demanding maximum resolution, upright microscopes remain unmatched by inverted alternatives. The close condenser-to-specimen spacing enables numerical apertures approaching the theoretical maximum for visible light optics. Oil immersion objectives at 100X magnification routinely achieve numerical apertures of 1.3-1.4, approaching the practical limits of optical resolution.
This resolution advantage proves critical for techniques requiring visualization of fine structural details. Oil immersion microscopy at 100X, high-resolution differential interference contrast imaging, precise morphological measurements, and subcellular structure visualization all benefit from the superior optical performance of upright configurations. Researchers studying intracellular organization, fine needle biopsies, or other applications requiring discrimination of closely spaced structures consistently choose upright systems.
According to optical resolution principles, the combination of high numerical aperture objectives and optimized condensers in upright systems achieves lateral resolution of approximately 200 nanometers. Inverted systems at equivalent magnifications typically produce images with noticeably less detail due to numerical aperture limitations in both objectives and condensers. While this difference may not matter for low-magnification surveys, it becomes consequential for demanding high-resolution applications.
Many upright microscopes can function as low-power stereoscopic or dissecting microscopes by utilizing appropriate objective combinations and illumination arrangements. This dual functionality provides exceptional value for facilities requiring both high-power compound microscopy and lower-power stereoscopic observation capabilities.
Users can transition from examining stained slides at high magnification to dissecting or manipulating specimens at low power without changing instruments. This versatility particularly benefits teaching laboratories where students explore various specimen types and techniques using limited equipment budgets. Specimen manipulation, surface inspection of opaque objects, forensic evidence examination, and quality control of electronic components all suit the upright viewing geometry.
The top-down viewing angle of upright microscopes naturally accommodates reflected light illumination for examining surface details on opaque specimens. This capability extends the utility of upright systems into material science and industrial inspection applications without requiring specialized equipment purchases.
Upright microscopes excel when imaging fixed, stained specimens mounted on slides. The optimized optical path and high-resolution condensers reveal fine structural details that may be obscured or lost with inverted configurations. Histological sections, blood smears, cytology preparations, and botanically prepared slides all benefit from upright imaging.
Standardized slide formats simplify workflow and enable use of automated scanning systems for high-throughput analysis. The fixed geometry of slide-mounted specimens ensures consistent focus and illumination across entire specimens, facilitating digital pathology workflows and large-scale screening applications. The ability to archive stained slides allows retrospective analysis and second opinions long after original examination.
Facilities primarily focused on fixed specimen analysis should strongly consider upright systems. While inverted microscopes can technically image slides using special holders, the compromised optical path and limited condenser performance reduce achievable resolution. For applications where image quality directly impacts diagnostic or research accuracy, the upright configuration provides superior results.
While inverted microscopes offer remarkable advantages for specific applications, they also carry inherent limitations that researchers must consider. Understanding these disadvantages helps prevent inappropriate equipment selection and ensures realistic expectations for inverted microscopy workflows.
The most commonly cited inverted microscope disadvantages include higher initial cost, limited resolution at high magnifications, increased instrument footprint, and constraints on certain imaging techniques. These trade-offs reflect the fundamental physics of optical design and cannot be overcome through engineering improvements alone.
Inverted microscopes typically cost two to five times more than comparable upright systems. This differential reflects specialized components including long working distance objectives, flexible condenser systems, and robust stage mechanisms designed for heavy loads. Budget constraints often force laboratories to prioritize between inverted capability and other equipment needs.
Beyond purchase price, inverted systems often require more expensive accessories. Specialized vessels (glass bottom dishes, culture chambers) cost more than standard slides. Environmental control systems for live cell imaging add further expense. These incremental costs compound, making inverted microscopy a more significant financial commitment than initial pricing suggests.
The long working distances required for inverted microscopy inherently limit numerical aperture. While upright objectives can achieve numerical apertures exceeding 1.4, inverted objectives rarely exceed 1.3 even with oil immersion. This limitation manifests as reduced resolution, particularly evident above 40X magnification.
For applications requiring maximum detail discrimination, this resolution gap may prove consequential. Researchers studying fine intracellular structures, conducting morphometric analyses requiring precise boundary identification, or imaging closely spaced features may find inverted resolution inadequate. The practical impact depends on specific application requirements but should factor prominently in instrument selection.
The condenser limitations discussed earlier represent a fundamental disadvantage of inverted systems. With numerical apertures limited to approximately 0.3-0.55, inverted condensers cannot provide the illumination quality achievable with upright configurations. High-resolution techniques requiring optimal Köhler illumination may produce substandard results on inverted platforms.
Fluorescence microscopy particularly suffers from condenser limitations. Signal collection efficiency depends partly on excitation light intensity and optical geometry. Inverted systems may require higher illumination intensities to achieve comparable fluorescence signal, potentially increasing phototoxicity and photobleaching in live cell experiments.
Sample preparation differences between microscope types significantly impact laboratory workflow, time investment, and experimental design. These practical considerations often influence instrument selection as heavily as pure optical performance factors.
Inverted microscopy dramatically simplifies sample handling for many applications. Living cells require essentially no preparation beyond routine culture maintenance. Specimens simply transfer from incubator to microscope stage for immediate observation. This workflow eliminates slide preparation steps, reduces artifacts from mounting procedures, and preserves sample viability for subsequent culture or analysis.
Material samples for inverted examination often need only surface preparation on the observation side. The specimen can remain intact without embedding, sectioning, or complex mounting procedures. Large industrial components move directly from production lines to microscope stage, enabling real-time quality control feedback that would be impossible with destructive sectioning approaches.
Typical inverted microscopy preparation involves cleaning the observation surface if needed, placing the sample on the stage, and focusing to begin observation. Even multi-step procedures like fixing and staining can often proceed in the culture vessel itself, eliminating transfer steps that risk sample loss or contamination. This simplicity represents one of the most compelling practical advantages of inverted systems.
Upright microscopy generally requires more extensive sample preparation. Specimens must fit between slide and coverslip, limiting practical thickness to approximately 0.1-0.2mm for optimal imaging. Biological samples typically undergo fixation, dehydration, embedding, sectioning, and staining procedures that may span hours to days from collection to final observation.
Even simple wet mounts require careful coverslip technique to avoid air bubbles and ensure uniform thickness. Inconsistent mounting introduces focus drift, thickness variations, and imaging artifacts that compromise quantitative analysis. Technical skill requirements for proper slide preparation exceed those needed for inverted vessel-based imaging.
Material samples for upright examination require sectioning and resin mounting to achieve parallel surfaces needed for transmitted light imaging. Both surfaces must be ground and polished to optical quality, demanding specialized equipment and training. The preparation time and destructive nature of sectioning may prove unacceptable for valuable or limited specimens.
Preparation requirements translate directly to time and resource investments that compound substantially in high-throughput environments:
| Preparation Aspect | Inverted Microscope | Upright Microscope |
|---|---|---|
| Time per sample | 0-5 minutes | 30 minutes to 2 days |
| Consumable costs | Minimal | $2-10 per slide |
| Technical skill needed | Basic | Moderate to advanced |
| Sample preservation | Intact for reuse | Usually destroyed |
For facilities processing 100 samples daily, inverted microscopy workflows save approximately 3-4 hours of preparation time. These savings multiply across year-long operations, potentially recovering the cost differential between microscope configurations through labor efficiency alone. The ability to examine specimens without destruction also preserves samples for alternative analyses or archival purposes.
Selecting between microscope configurations requires systematic evaluation of multiple factors aligned with your specific research or application needs. This structured approach ensures your investment serves current requirements while accommodating reasonable future expansion.
Use this decision framework to systematically evaluate your requirements. Rate each factor as critical, important, or minor based on your specific needs:
IF your primary work involves:
// LIVE CELL IMAGING
if (sample_type === “living_cells” || sample_type === “cell_culture”) {
CHOOSE_INVERTED();
// Benefits: observation without removal, sterility maintenance, environmental control
}
// FIXED SPECIMEN ANALYSIS
if (specimen_state === “fixed” && preparation === “slides”) {
CHOOSE_UPRIGHT();
// Benefits: superior resolution, optimized condenser, established workflows
}
// LARGE/HEAVY SAMPLES
if (sample_weight > 5 || sample_size === “large”) {
CHOOSE_INVERTED();
// Benefits: 30kg+ capacity, no sectioning required, non-destructive
}
// HIGH-RESOLUTION REQUIREMENTS
if (magnification > 40 && resolution_requirement === “critical”) {
CHOOSE_UPRIGHT();
// Benefits: NA up to 1.4, diffraction-limited imaging, superior condensers
}
// BUDGET-CONSTRAINED PURCHASE
if (budget < 2000) {
CHOOSE_UPRIGHT();
// Benefits: lower entry cost, minimal accessories, established training resources
}
// ENVIRONMENTAL CONTROL NEEDS
if (temperature_control === “required” || CO2_control === “required”) {
CHOOSE_INVERTED();
// Benefits: stage-top incubators, open design, integrated chamber options
}
Modern microscopy increasingly relies on environmental control accessories that maintain specimens in optimal conditions during observation. These capabilities prove essential for live cell imaging and extended observation sessions where environmental fluctuations compromise experimental validity.
Stage-top incubators provide precise temperature control (typically 37 degrees Celsius for mammalian cells), humidity maintenance, and CO2 regulation (usually 5% for standard cell culture conditions). These chambers mount directly on microscope stages, creating stable observation environments that extend viable imaging sessions from minutes to days. Inverted microscopes accommodate these accessories naturally due to their open geometry above specimens.
Upright microscope environmental control proves more challenging due to the constrained geometry above the stage. While some manufacturers offer specialized chambers, the working space limitations often restrict environmental control options. This constraint represents a significant limitation for upright systems in live cell imaging applications requiring extended observation periods.
Other accessory considerations include motorized XY stages for automated scanning and tile acquisition, focus-lock systems that compensate for thermal drift during long sessions, camera options ranging from basic CMOS to specialized sCMOS and EMCCD sensors for low-light applications, and illumination systems including LED, halogen, and metal halide options with different spectral characteristics. Selecting accessories compatible with your chosen platform ensures seamless integration and optimal performance.
Initial purchase price frequently drives purchasing decisions, but total cost of ownership provides the complete financial picture. Upright microscopes offer lower entry costs but may require greater consumable expenses and preparation time that accumulate substantially over operational lifetime.
Consider these financial factors when evaluating configurations: initial microscope investment, ongoing consumable expenses (slides, stains, embedding media), sample preparation labor costs, potential revenue enhancement from faster throughput, and maintenance/service contract costs. For facilities processing numerous samples, inverted microscopes often provide superior return on investment despite higher initial costs through time savings and consumable reduction.
Your typical specimen characteristics largely determine optimal configuration. Catalog current and anticipated sample types, noting size, weight, preparation requirements, and observation conditions. Living cells in culture favor inverted configurations, while fixed tissue sections on slides require upright optics. Large industrial samples demand inverted capacity, and prepared slide collections almost exclusively utilize upright microscopy.
Different imaging modalities show varying compatibility with microscope configurations. Advanced techniques often require specific optical arrangements that favor particular designs. High-resolution techniques generally demand upright configurations, while live cell imaging requiring environmental control strongly favors inverted systems.
Physical constraints influence configuration selection. Inverted microscopes typically require larger laboratory footprints but offer superior ergonomics for extended use. Consider integration with existing equipment including incubators, micromanipulators, and imaging systems. Some accessories work exclusively with specific configurations, potentially limiting future expansion options.
Understanding common pitfalls helps ensure your microscope investment delivers expected results. These mistakes frequently stem from incomplete requirements analysis or misunderstanding technical specifications that appear similar between configurations.
Overlooking condenser specifications for high-magnification work represents a critical error. Many buyers focus exclusively on objective quality while ignoring condenser limitations. Inverted systems particularly suffer from condenser constraints, with numerical apertures limited to approximately 0.3-0.55 compared to 0.9-1.25 in upright configurations. High-resolution work demands attention to entire optical chain, not just objective specifications.
Ignoring long-term throughput requirements leads to workflow bottlenecks. Facilities frequently underestimate sample volume growth, selecting configurations that become inadequate within months. Calculate realistic throughput projections including seasonal variations and potential expansion. The four-fold efficiency advantage of inverted systems for appropriate samples prevents future capacity constraints.
Not considering integration requirements creates compatibility issues. Microscopes rarely operate in isolation; they must interface with cameras, incubators, manipulators, and analysis software. Verify accessory compatibility before purchase. Some microinjection systems function exclusively with inverted configurations, while certain scanning stages require upright designs.
Underestimating training requirements delays productive use. Inverted microscopes, despite their advantages, require different techniques than traditional upright systems. Budget time and resources for comprehensive training, including designation of super-users who can troubleshoot issues and train others across your team.
These common questions address frequent concerns from researchers selecting between microscope configurations:
Cell culture applications favor inverted microscopes because cultured cells naturally settle and adhere to vessel bottoms. The inverted design allows observation without disturbing sterile conditions or removing vessels from incubators. The open space above samples accommodates CO2 control systems, temperature regulation, and perfusion apparatus. Researchers can manipulate samples, exchange media, or perform procedures while maintaining continuous observation. The design also prevents objective contamination since lenses remain safely below culture vessels.
Both microscope types can achieve similar magnification ranges, typically 40X to 1000X. However, practical resolution differs due to condenser limitations in inverted systems. Upright microscopes achieve true high-resolution imaging at maximum magnifications due to high numerical aperture condensers. Inverted microscopes may reach 1000X magnification but with reduced resolution above 400X. The fluorescence microscope magnification range remains similar between configurations as fluorescence depends primarily on objective specifications.
Yes, inverted microscopes can observe prepared slides, though this requires special holders or chambers. However, the long working distance objectives and condensers limit resolution compared to upright systems. For optimal slide imaging, upright microscopes remain superior due to their optimized optical path. The close condenser spacing and high numerical aperture objectives reveal fine details in stained specimens. Facilities primarily working with slides should choose upright systems unless live cell capabilities justify the compromise.
Epifluorescence illumination works similarly in both configurations, using the objective as both illuminator and light collector. The key differences lie in sample accessibility and environmental control options. Inverted fluorescence microscopes excel for live cell applications, accommodating perfusion chambers and environmental controls. Upright systems offer simpler light paths and potentially better collection efficiency for fixed samples. The choice between configurations for fluorescence depends more on sample type than optical considerations.
Fluorescence microscopy typically operates between 10X and 100X magnification, with 20X-60X most common for cellular imaging. Higher magnifications require oil immersion objectives with high numerical apertures. Practical magnification limits depend on fluorophore brightness and phototoxicity concerns rather than microscope configuration. Both inverted and upright systems support the full range of fluorescence objectives. Resolution in fluorescence follows the same principles as transmitted light, with upright systems offering slight advantages at maximum magnifications.
The main disadvantages of inverted microscopes include higher cost (typically 2-5x more than upright systems), limited resolution at high magnifications due to numerical aperture constraints, larger instrument footprint requiring more laboratory space, and condenser limitations that reduce illumination quality. Inverted objectives have longer working distances which necessarily sacrifice numerical aperture, typically maxing out around 1.3 compared to 1.4+ achievable with upright oil immersion objectives. Condenser numerical apertures in inverted systems (0.3-0.55) cannot match upright condensers (0.9-1.25), limiting resolution particularly for high-magnification fluorescence applications.
The choice between inverted and upright microscopes ultimately depends on your specific application requirements, sample types, and workflow priorities. Neither configuration is universally superior; each excels in particular domains while carrying inherent limitations that make them suboptimal for other applications.
Upright microscopes remain the ideal choice for educational settings, fixed specimen imaging, and applications requiring maximum resolution. Their affordability and versatility make them excellent general-purpose instruments that serve diverse microscopy needs without specialized infrastructure requirements. The lower entry cost, simpler maintenance, and extensive accessory ecosystems ensure continued relevance across many laboratory contexts.
Inverted microscopes justify their higher cost through superior efficiency for live cell culture work, large sample accommodation, and high-throughput inspection workflows. The time savings from simplified sample preparation, the unique capability to observe living cells in native culture conditions, and the efficiency advantages for processing numerous samples often provide rapid return on investment for appropriately matched applications.
Consider your primary applications carefully when evaluating upright vs inverted microscopy configurations. Cellular biology work strongly favors inverted designs, while histology, teaching, and high-resolution fixed specimen analysis benefit from upright configurations. Many laboratories ultimately maintain both types to address diverse imaging needs across their research portfolios.
Use the decision framework provided to systematically evaluate your requirements against instrument capabilities. Remember that the best microscope is one that matches your specific applications, not necessarily the most expensive or feature-rich option available. Investing time in thorough requirements analysis before purchase prevents costly decisions and ensures your microscopy capabilities support rather than constrain your research ambitions.