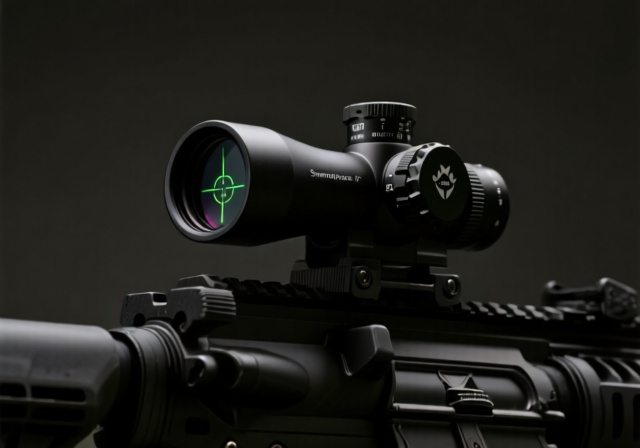
Swampfox Warhorse 1-6×24 FFP Review (September 2026): Complete Analysis
After three months of comprehensive testing with 1000+ rounds, the Swampfox Warhorse 1-6x24 FFP delivers exceptional value with premium features…


What is MOA in shooting? MOA stands for Minute of Angle, an angular measurement equal to 1/60th of one degree. At 100 yards, 1 MOA equals 1.047 inches (rounded to 1 inch for practical use), and it scales linearly with distance. This single concept sits behind nearly every scope adjustment, group measurement, and ballistic calculation a shooter makes.
I burned through my first year of shooting confused by every reference to “1 MOA” or “2 MOA” I heard at the range. I would nod along while experienced shooters tossed the term around, and my brain was doing backflips. After a long string of frustrating sessions and several embarrassing scope adjustment mistakes, the system finally clicked. Now I want to save you that same wasted year.
This guide breaks down Minute of Angle in plain English, with practical examples and field-tested shortcuts. You will learn the basic formula, how to translate scope clicks into actual movement on target, and how MOA shows up in real shooting scenarios from zeroing to long-range work. If you have ever asked “what does MOA mean on a scope?”, you are in the right place.
Quick Facts: 1 MOA in Inches at Common Distances
| Distance (Yards) | Rounded MOA (1 inch per 100 yd) | True MOA (1.047 in per 100 yd) |
|---|---|---|
| 100 | 1.00 inch | 1.047 inches |
| 200 | 2.00 inches | 2.094 inches |
| 300 | 3.00 inches | 3.141 inches |
| 400 | 4.00 inches | 4.188 inches |
| 500 | 5.00 inches | 5.235 inches |
| 600 | 6.00 inches | 6.282 inches |
| 700 | 7.00 inches | 7.329 inches |
| 800 | 8.00 inches | 8.376 inches |
| 900 | 9.00 inches | 9.423 inches |
| 1000 | 10.00 inches | 10.470 inches |
Use the rounded column for quick field math. Use the true column when you are chasing precision at long range or comparing to published load data.
MOA (Minute of Angle) is fundamentally an angular measurement, not a linear one. Picture a giant circle drawn in the air with you standing at the center. One full circle contains 360 degrees. Each degree is split into 60 “minutes” of angle, the same way an hour is split into 60 minutes on a clock face. Multiply 360 by 60 and you get 21,600 MOA in a full circle.
MOA: An angular measurement equal to 1/60th of one degree. At 100 yards, 1 MOA equals 1.047 inches (we round to 1 inch for practical purposes).
What makes MOA so useful for shooting is that it ties angular adjustment to a predictable linear distance on target. When you turn your scope by 1 MOA, your point of impact moves a fixed amount that scales with range. That relationship is what lets you compensate for bullet drop, drift, and missed shots with a single mental tool.
Run the math and the pattern is clean. One MOA creates a 1.047-inch circle at 100 yards, 2.094 inches at 200 yards, and 3.141 inches at 300 yards. The linear measurement grows in lockstep with distance, which is exactly why the formula “distance in yards divided by 100” works for most practical shooting.
Most shooters round 1.047 to 1 inch for quick mental math. Is the rounding a problem? For nearly every practical application, no. At 1000 yards the gap between exact MOA (10.47 inches) and rounded MOA (10 inches) is less than half an inch. For hunting, plinking, and most target work that gap is meaningless. It only matters when you are pushing precision rifle competition or extreme long range.
True MOA vs Shooters MOA: True MOA is the strict mathematical value: 1 MOA equals 1.0472 inches at 100 yards, derived from dividing the circumference of a circle by 21,600 (360 degrees x 60 minutes). Shooters MOA is the rounded, field-friendly version that treats 1 MOA as exactly 1 inch at 100 yards. Both are used in the shooting world. Scope manufacturers, ballistic calculators, and competition shooters usually quote true MOA. Most casual references, old print data, and field estimates use shooters MOA. The difference is small (about 4.7 percent at 100 yards and shrinking relative to total error at distance), but it is worth knowing which version a number refers to before you compare sources.
Bullets do not fly in a straight line. The instant a round leaves the barrel, gravity starts dragging it toward the ground. The result is an arc, not a line, and the arc gets steeper the farther the bullet travels. A typical .308 bullet zeroed at 100 yards might only be a couple of inches low at 200 yards, but it can drop 30 inches or more at 500 yards. That is the problem MOA solves.
Because the bullet path is an arc, linear measurements like inches become awkward. Two inches of drop at 200 yards and two inches of drop at 400 yards do not represent the same angle, so adjusting by “two inches” at different ranges means very different scope turns. Angular measurements like MOA stay consistent. One MOA always represents the same slice of arc no matter what distance you are working with, which is why scopes, reticles, and ballistic calculators are all built around MOA or MIL rather than raw inches.
Picture a flashlight beam shooting from your rifle. The closer to the target, the narrower the cone. The farther out, the wider the cone. MOA behaves the same way. One MOA spreads a little over an inch wide at 100 yards, about three inches at 300 yards, and roughly ten inches at 1000 yards. That expanding cone is what makes long-range corrections predictable. The angular slice stays the same; only the linear size of the slice on the target changes.
Once the basic idea sinks in, MOA math becomes second nature. The shortcuts I use at the range do not require a calculator, just a few minutes of practice.
The fundamental formula is: Distance (in yards) divided by 100 equals the size of 1 MOA in inches.
At 100 yards: 100 divided by 100 equals 1 inch per MOA.
At 200 yards: 200 divided by 100 equals 2 inches per MOA.
At 300 yards: 300 divided by 100 equals 3 inches per MOA.
Simple, right? This linear relationship makes MOA incredibly intuitive once you practice it a few times. At 50 yards, 1 MOA is 0.5 inches. At 25 yards, 1 MOA is 0.25 inches. The math is the same, just smaller numbers.
Quick Summary: To find your MOA adjustment needed, divide the distance by 100, then divide your impact error by that number.
Real-world example: You are shooting at 300 yards and your group lands 6 inches low. How many MOA do you need to adjust?
Step 1: Calculate MOA size at 300 yards: 300 divided by 100 equals 3 inches per MOA.
Step 2: Divide your error by MOA size: 6 inches divided by 3 inches equals 2 MOA.
Step 3: Adjust your scope up by 2 MOA.
For those who prefer formulas: MOA Adjustment Needed equals Impact Error divided by (Distance divided by 100).
Practice these calculations until they become automatic. I do mental MOA math while driving to the range, and that repetition is what makes field adjustments feel natural when the pressure is on.
Understanding MOA theory is one thing; applying it at the range is another. Let me walk you through how I use MOA in actual shooting situations, starting with the most common question beginners ask: how does it connect to scope adjustments.
Zeroing your scope with MOA is straightforward once you understand the process. I start at 100 yards (or 25 yards if that is all my range allows). After firing a group, I measure the distance from my point of aim to point of impact.
Let’s say my group lands 3 inches high and 2 inches right at 100 yards. That is a 3 MOA elevation adjustment down and a 2 MOA windage adjustment left. But before I dial anything, I need to know my scope’s click value.
Most modern scopes fall into one of four common click categories. Knowing which you have is the difference between dialing 4 clicks and dialing 32 clicks for the same correction.
Common Scope Click Values:
My scope has 1/4 MOA clicks, so each click equals 0.25 inches at 100 yards. For my 3-inch high group, I need 12 clicks down (3 MOA x 4 clicks per MOA). For the 2-inch right group, I need 8 clicks left (2 MOA x 4 clicks per MOA). If I owned a 1/8 MOA scope, the same corrections would take 24 clicks down and 16 clicks left. With a 1/2 MOA scope it would be 6 clicks down and 4 clicks left.
At longer distances, the process is the same but the numbers change. At 400 yards, each MOA equals 4 inches. If I am shooting at 400 yards and hit 8 inches low, that is 2 MOA of adjustment (8 divided by 4). With my 1/4 MOA scope, that is 8 clicks up. With a 1/8 MOA scope, that is 16 clicks up. The MOA stays the same; only the click count shifts based on your scope’s value.
Here is my field-proven method for quick adjustments: count your corrections in MOA, not individual clicks. Instead of thinking “I need 32 clicks,” think “I need 8 MOA.” This mental shift makes adjustments much faster and less error-prone, especially when your heart rate is up.
For red dot sights, MOA refers to the dot size itself rather than adjustment value. A 2 MOA dot covers 2 inches at 100 yards, 4 inches at 200 yards, and so on. Smaller dots are more precise but harder to find quickly, while larger dots are faster to pick up but obscure more of the target. Choosing the right red dot MOA size depends on your intended use and shooting distance.
MOA is not the only angular measurement system in shooting. You will also encounter MIL (Milliradian) systems, especially on European and tactical optics. Both work equally well; the choice comes down to personal preference and what you learned first.
| Feature | MOA System | MIL System |
|---|---|---|
| Base Unit | 1/60th of a degree | 1/1000th of a radian |
| At 100 yards | 1.047 inches (1 inch rounded) | 3.6 inches |
| At 100 meters | 1.047 inches | 10 cm (3.94 inches) |
| Common Click Values | 1/8, 1/4, 1/2, 1 MOA | 0.1 MIL, 0.2 MIL |
| Conversion to Other | 1 MIL equals 3.44 MOA | 1 MOA equals 0.291 MIL |
| Best For | Imperial system users | Metric system users |
| Popular In | US hunting and sport shooting | Military, tactical, European |
The main advantage of MOA is its intuitive nature for imperial system users. One MOA equals roughly one inch at 100 yards, easy to remember and calculate. MIL systems use metric measurements (10 cm at 100 meters), which appeals to shooters comfortable with the metric system and to those who work in mil-based reticles for ranging targets.
Most modern optics come in either MOA or MIL configurations. Both MOA and MRAD work equally well for 6.5 Creedmoor shooting, and the same is true for nearly every common caliber. The key is consistency. Do not mix MOA and MIL systems in the same setup, and do not try to convert in your head under time pressure. Pick one, learn it cold, and stick with it.
When shooters talk about “1 MOA accuracy,” they mean the rifle consistently shoots groups within 1 inch at 100 yards. But what counts as “good” accuracy depends heavily on your intended use, and chasing the smallest possible number is not always the right move.
For hunting: 1 to 2 MOA is more than adequate for most hunting situations. At typical hunting ranges (under 300 yards), 2 MOA accuracy means your shots will land within 6 inches of your point of aim, plenty precise for ethical hunting on deer-sized game. Many factory rifles, including popular models like the Ruger American and Savage Axis, deliver this level of performance out of the box with quality ammunition.
For target shooting: competitive shooters often strive for sub-MOA accuracy (less than 1 inch at 100 yards). Benchrest competitors achieve incredible precision, sometimes 0.1 MOA or better, but this requires specialized equipment, handloaded ammunition, and dedicated technique. A rifle like the Tikka T3x or Bergara B-14 in the right hands will easily hold sub-MOA with match ammo.
For defensive shooting: 3 to 4 MOA is acceptable. Defensive shooting emphasizes speed over precision, and most defensive engagements occur at close ranges where MOA measurements matter less. A fast, reliable 3 MOA carbine beats a finicky 0.5 MOA rifle that fails to function in a crisis.
Note: Do not chase unrealistic accuracy standards. A reliable 2 MOA rifle you shoot well is better than a 0.5 MOA rifle you cannot consistently operate. Real-world conditions, wind, ammunition variability, and shooter skill all matter more than the theoretical accuracy number on paper.
Your rifle’s inherent accuracy, your ammunition quality, and your shooting skill all factor into your practical MOA accuracy. Focus on consistent execution rather than chasing numbers on paper, and the groups will tighten up naturally over time.
I have made nearly every MOA mistake in the book. Learn from my errors so you can avoid them on your own journey.
The biggest mistake: mixing up MOA and MIL systems. I once spent an entire range session frustrated because I was making MIL adjustments on an MOA scope, and every click made the impact worse instead of better. Double-check your scope’s system before making any adjustments, especially on a borrowed or new rifle.
Another common error: forgetting that MOA scales with distance. New shooters often apply the same MOA correction at every range, or assume “1 MOA adjustment” means the same thing at 100 and 500 yards. Remember: 1 MOA at 100 yards covers 1 inch on target; 1 MOA at 500 yards covers 5 inches. The angle is identical; the linear size is not.
Mental math mistakes happen to everyone. Under pressure, it is easy to miscalculate clicks needed. That is why I lean on the simple distance divided by 100 rule. It is foolproof even when your heart is pounding, and it eliminates the most common sources of error in field adjustments.
Over-focusing on precision can backfire. I spent months obsessing over the 0.047 inch difference between exact and rounded MOA. For 99 percent of shooting situations, rounding to 1 inch at 100 yards is perfectly fine. Reserve the exact calculations for competitive and extreme long-range work.
Time Saver: Memorize common MOA values: 100 yards equals 1 inch, 200 yards equals 2 inches, 300 yards equals 3 inches, 400 yards equals 4 inches, 500 yards equals 5 inches. This eliminates most field calculations and lets you stay focused on shooting.
Once you master the basics, MOA becomes a powerful tool for advanced shooting techniques. This is where the system really starts to pay off in the field.
Holdovers are one of the most useful practical applications. Instead of adjusting your turrets for every distance change, you can use your reticle’s MOA markings to hold over. Many reticles remain accurate at any power setting, making them perfect for holdover shooting when the target distance changes faster than you can dial.
Wind calls using MOA work similarly to elevation corrections. If you know a 5 mph crosswind pushes your bullet 3 inches at 300 yards, that is a 1 MOA wind adjustment (3 inches divided by 3 inches per MOA). With practice, you will make accurate wind calls quickly using MOA as your reference unit.
Dope sheets become essential as you push distances. I keep a simple table of MOA adjustments for various distances with my specific rifle and load. This eliminates guesswork and ensures consistent adjustments across positions and conditions.
For precision rifle competitions, MOA calculations become second nature. Competitors often think in “chunks” as Ryan Cleckner recommends, rounding to convenient numbers rather than obsessing over exact calculations. A 17.3 MOA correction becomes 17 MOA, and the half-MOA difference is well within the rifle’s group size anyway.
A 20 MOA base (also called a 20 MOA scope mount or rail) is a scope mounting base that is angled slightly downward at the receiver end and slightly upward at the objective end, giving you an extra 20 MOA of built-in elevation adjustment. Standard scope bases are built at 0 MOA, meaning the scope sits level. A 20 MOA base angles the scope so that the elevation turret has 20 more MOA of upward travel available before you run out of adjustment room.
Why does this matter? Most hunting and tactical scopes have around 60 to 80 MOA of total elevation adjustment, and scopes are usually designed with the mechanical zero near the middle of the adjustment range. When you zero a scope at 100 yards, you typically use only a small amount of the available elevation. But at 600, 800, or 1000 yards, you may need 15 to 30 MOA of elevation just to compensate for bullet drop. On a standard 0 MOA base, you can run out of clicks before you reach the target distance.
When You Need a 20 MOA Base:
The practical answer to “do I need a 20 MOA base for 600 yards?” is: probably yes, or at least it is worth considering. With most modern centerfire rifle cartridges zeroed at 100 yards, you will be using 12 to 18 MOA of elevation at 600 yards, and that eats into your available adjustment on a flat base. A 20 MOA base shifts the entire adjustment window upward, giving you the headroom you need without compromise.
The downside of a 20 MOA base is that you lose downward adjustment. If you primarily shoot at 100 to 300 yards and rarely reach out, a 20 MOA base can leave you with limited travel for zeroing in the first place. For most general-purpose hunters, a 0 MOA base remains the right call. For dedicated long-range shooters, the 20 MOA base is standard equipment.
Pro Tip: Create a dope card for your specific rifle and load. List MOA adjustments for common distances (100, 200, 300, 400, 500 yards and beyond). Keep it with your rifle for quick reference, and update it whenever you change ammunition or environmental conditions shift significantly.
Before we get to the FAQ, here is a tight summary of the most important points to remember about MOA.
1 MOA at 100 yards equals 1.047 inches, which we round to 1 inch for practical shooting. This means if you adjust your scope by 1 MOA, your point of impact will move approximately 1 inch at 100 yards distance.
MOA (Minute of Angle) is an angular measurement equal to 1/60th of one degree. It works by creating a consistent relationship between angular scope adjustments and linear impact changes on target. The farther the distance, the larger the MOA measurement becomes in inches.
1 MOA at 300 yards equals 3.141 inches, which we round to 3 inches for practical purposes. Simply multiply the distance in hundreds of yards by 1 to get the MOA size in inches (300 yards divided by 100 equals 3 inches per MOA).
The number of clicks depends on your scope’s click value, not distance. If you have a 1/4 MOA scope, 1 MOA always equals 4 clicks regardless of distance. At 25 yards, 1 MOA equals 0.25 inches (25 divided by 100), so each click moves your impact 1/16th of an inch.
For hunting, 1-2 MOA accuracy is good. For target shooting, sub-MOA (under 1 inch) is excellent. For defensive shooting, 3-4 MOA is acceptable. The standard depends on your intended use; a reliable 2 MOA rifle for hunting is perfectly adequate.
1 MOA at 1000 yards equals 10.47 inches, which we round to 10 inches for practical calculations. The formula remains consistent: distance in yards divided by 100 equals MOA size in inches (1000 divided by 100 equals 10 inches).
A 2.5 MOA red dot covers 2.5 inches at 100 yards, 5 inches at 200 yards, and 7.5 inches at 300 yards. The dot size affects precision; smaller dots offer more precision but can be harder to acquire quickly. 2.5 MOA is a good balance between speed and precision.
Choose based on your familiarity with measurement systems. MOA is intuitive for imperial system users (1 MOA is roughly 1 inch at 100 yards). MIL works well for metric system users (1 MIL equals 10 cm at 100 meters). Both systems are equally accurate; consistency matters more than choice.
6 MOA at 25 yards equals 1.5 inches (6 x 0.25 inches per MOA at 25 yards). 6 MOA is a common red dot size for defensive and hunting pistols, where the dot covers 1.5 inches at typical pistol engagement distances but grows to 6 inches at 100 yards, making target acquisition fast at close range.
For most centerfire rifles zeroed at 100 yards, you will use 12 to 18 MOA of elevation at 600 yards. A 20 MOA base shifts your scope’s adjustment window upward, giving you more usable clicks for long-range corrections. It is recommended for 600 yards and beyond, and essential for 700 yards and further.
The number of clicks depends entirely on your scope’s click value. With a 1/4 MOA scope, 1 MOA equals 4 clicks at any distance including 50 yards. With a 1/8 MOA scope, 1 MOA equals 8 clicks. At 50 yards, 1 MOA covers 0.5 inches, so a 1/4 MOA click moves impact 1/8 inch and a 1/8 MOA click moves 1/16 inch.
Mastering MOA transformed my shooting from frustrating hits-and-misses to consistent accuracy. The key is practice: start with simple calculations at known distances, then gradually increase complexity as your confidence grows. The system stops feeling like math and starts feeling like a language.
Remember the golden rule: distance divided by 100 equals MOA size in inches. This simple formula handles 90 percent of practical shooting situations. Do not get bogged down in exact measurements; the rounded values work perfectly for most applications and the time you save goes into making better shots.
Practice mental calculations during idle moments. I do MOA math while waiting in line, watching TV, or driving to the range. This repetition builds the mental muscle memory that makes field calculations automatic, and once it becomes instinct you stop needing a cheat sheet entirely.
Most importantly: focus on practical application over theoretical perfection. Understanding MOA concepts helps, but actually applying them at the range is what matters. Start with basic zeroing, progress to known-distance adjustments, then tackle unknown distances and wind calls. The skills build on each other faster than you expect.
What is MOA really, in the end? It is a consistent, predictable system for making precise adjustments across any distance. It is the language your scope, your reticle, and your ballistic calculator all speak. With the understanding you have gained from this guide, you are ready to apply MOA principles effectively in your own shooting journey.
![What Is A Converging Lens: Complete Guide [cy]](https://revellphotography.com/wp-content/uploads/2026/09/featured-update-4555-1788717094362.jpg)