Best Aimpoint Red Dot Sights for AR-15 2025: Complete Guide
Complete expert review of all 8 Aimpoint red dot sights for AR-15. Military-grade reliability, battery life analysis, and real customer…
The difference between a missed opportunity and the perfect shot often comes down to one thing: knowing how to properly use your rifle scope. Whether you’re a hunting enthusiast or a target shooting beginner, mastering scope fundamentals can transform your accuracy from mediocre to exceptional.
Using a rifle scope effectively involves understanding its components, mounting it correctly, zeroing it precisely, and developing proper shooting techniques. Each step builds upon the last to create a system that delivers consistent, accurate shots at various distances.
This comprehensive guide will walk you through everything from basic scope anatomy to advanced shooting techniques. You’ll learn proper mounting procedures, zeroing methods, maintenance tips, and troubleshooting solutions that experienced shooters rely on.
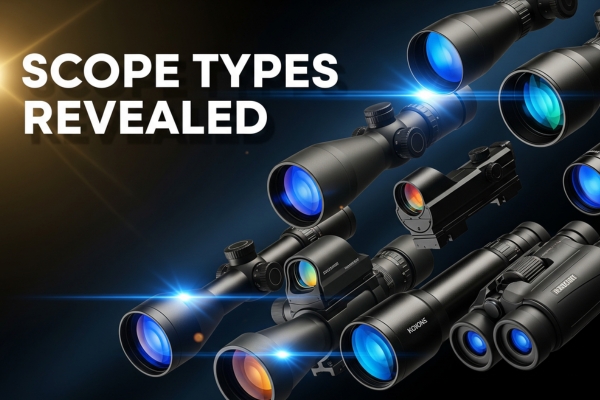
A rifle scope is an optical sighting device that magnifies distant targets and provides precise aiming points through a reticle system. Unlike iron sights, scopes offer enhanced target visibility and improved accuracy, especially at longer ranges where target details become crucial.
The primary function when using a rifle scope is to bring distant targets visually closer while providing a precise aiming reference. Scopes accomplish this through a series of lenses that magnify the image and a reticle that indicates where your bullet will impact.
Modern scopes integrate multiple technologies to compensate for environmental factors and bullet trajectory. This combination of magnification and precision makes them indispensable for hunters, competitive shooters, and tactical applications.
The scope essentially acts as a bridge between your eye and the target, eliminating much of the guesswork involved in long-distance shooting.
Increased Accuracy at Distance: The magnification provided by a scope allows you to see and aim at targets that would be impossible to hit accurately with iron sights. This enhanced visibility translates directly to better shot placement.
Better Target Identification: When looking through a rifle scope, you can clearly identify your target and what lies beyond it. This is crucial for safe shooting and ethical hunting practices, ensuring you’re absolutely certain of your target before pulling the trigger.
Improved Shooting Confidence: Knowing you can see your target clearly and aim precisely builds confidence. This psychological advantage often leads to better shooting performance, as confident shooters tend to have steadier holds and smoother trigger pulls.
Enhanced Safety Features: Many modern scopes include features like illuminated reticles for low-light conditions. These safety enhancements help prevent misidentification of targets and improve overall shooting safety.
Iron sights excel in close-range situations where quick target acquisition is paramount. They’re also more durable, lighter, and don’t require batteries, making them ideal backup sighting systems.
Scopes become advantageous when precision matters more than speed, typically at distances beyond 100 yards. They’re essential for long-range hunting, precision target shooting, and situations requiring exact shot placement.
The choice between iron sights and a scope often depends on your shooting discipline and environment. Consider your most common shooting scenarios when making this decision.
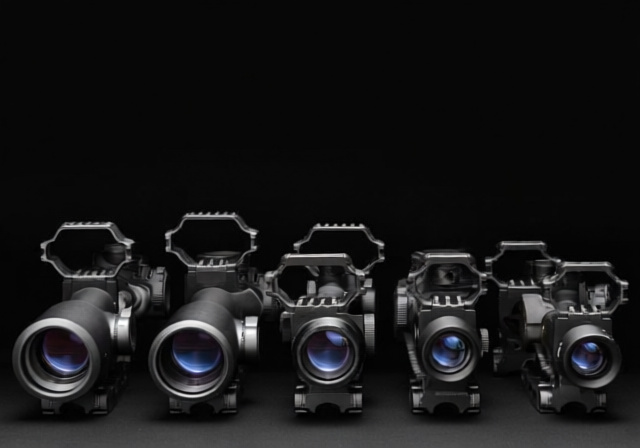
Understanding your scope’s components is fundamental to using it effectively. Each part serves a specific purpose in delivering accurate shots, and knowing how they work together improves your overall shooting performance.
The objective lens sits at the front of your scope, gathering light and forming the initial image. Larger objective lenses collect more light, improving performance in low-light conditions but adding weight and requiring higher mounting rings.
The ocular lens, located at the rear near your eye, magnifies the image created by the objective lens. This lens system works together to provide a clear, magnified view of your target when properly adjusted.
Lens coatings reduce glare and improve light transmission through the scope. Quality multi-coated lenses can transmit up to 95% of available light, significantly improving image clarity and brightness.
Duplex reticles feature thick outer lines that thin toward the center, providing quick target acquisition while maintaining precision. They’re the most popular choice for general hunting and target shooting due to their versatility.
Mil-Dot reticles use dots spaced at milliradian intervals along the crosshairs. Each dot represents a specific angular measurement, allowing shooters to estimate range and compensate for bullet drop without adjusting turrets.
BDC (Bullet Drop Compensation) reticles include additional aiming points below the center crosshair. These points correspond to specific distances, helping shooters quickly adjust for longer shots without dialing elevation changes.
Illuminated reticles use battery power to light up the aiming point, improving visibility in low-light conditions. While adding complexity and battery dependence, they’re invaluable for dawn and dusk hunting situations.
The elevation turret controls vertical adjustments, moving your point of impact up or down. Each click typically represents 1/4 MOA at 100 yards, though some scopes use different values.
The windage turret handles horizontal adjustments, correcting for wind drift or centering your shots left and right. Understanding these adjustments is crucial for sighting in rifle scope steps accurately.
Parallax adjustment ensures the reticle and target image are on the same focal plane. This becomes critical for precision shooting beyond 250 yards, preventing apparent reticle movement when shifting your eye position.
Fixed power scopes offer a single magnification level, providing simplicity and reliability. They’re often more durable and maintain zero better than variable scopes due to fewer moving parts.
Variable power scopes allow magnification adjustments within a specific range, like 3-9x or 4-16x. This versatility lets you adapt to different shooting distances and conditions with one optic.
Choosing appropriate magnification involves balancing field of view with target detail. Higher magnification reduces your field of view and amplifies any movement, making steady shooting more challenging.
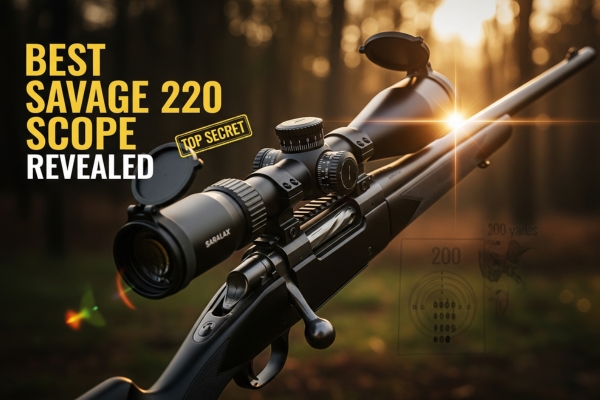
Selecting the appropriate scope requires matching optic capabilities to your intended use, rifle platform, and budget. Making the right choice initially saves money and frustration later.
Hunting scopes prioritize durability, moderate magnification (3-9x or 2-10x), and excellent low-light performance. They typically feature capped turrets to prevent accidental adjustments in the field.
Tactical scopes offer exposed turrets for quick adjustments, higher magnification ranges, and often first focal plane reticles. These features support precision shooting at varying distances.
Competition scopes emphasize extreme magnification (up to 40x or more), fine adjustment increments, and superior glass quality. Weight is less concern than optical performance for these specialized optics.
Long-range scopes combine high magnification with sophisticated reticles and precise tracking. They’re designed for shots beyond 600 yards where small adjustments make significant differences.
| Scope Type | Typical Magnification | Key Features | Best For |
|---|---|---|---|
| Hunting | 3-9x, 2-10x | Capped turrets, lightweight | General hunting |
| Tactical | 3-15x, 5-25x | Exposed turrets, FFP reticle | Precision/tactical |
| Competition | 8-32x, 15-40x | Fine adjustments, heavy | Target shooting |
| Long-range | 5-25x, 7-35x | Advanced reticles, tracking | Extended distances |
The traditional guideline suggests spending approximately half your rifle’s value on optics. This ensures your scope quality matches your rifle’s capabilities without over or under-investing.
A $1,000 rifle deserves a $400-600 scope to maximize its potential. Conversely, mounting a $2,000 scope on a $300 rifle won’t magically improve the rifle’s inherent accuracy limitations.
Consider the total system cost including mounting hardware, which can add $50-200 to your investment. Quality rings and bases are essential for maintaining zero and protecting your scope investment.
Rimfire rifles typically need lower magnification scopes (2-7x or 3-9x) since their effective range is limited. Higher magnification would be wasted on cartridges with 100-150 yard practical limits.
Centerfire hunting rifles benefit from versatile magnification ranges like 3-9x or 4-12x. These ranges cover most hunting scenarios from close forest shots to longer prairie opportunities.
Magnum calibers and specialized long-range rifles require robust scopes with excellent tracking and higher magnification. The increased recoil demands quality construction and secure mounting systems.
Proper scope mounting forms the foundation of accurate shooting. Even the finest scope performs poorly when incorrectly mounted, making this process crucial for sighting a scope on rifle successfully.
Before beginning the mounting process, gather all necessary tools to ensure smooth installation. Having everything ready prevents interruptions that could lead to mistakes.
Essential Mounting Tools Checklist:
The torque wrench is non-negotiable for proper installation. Over-tightening can damage your scope or strip threads, while under-tightening leads to shifting and lost zero.
Quality optical equipment handling techniques apply here just as they do in photography. Clean, careful handling prevents damage to delicate lens coatings.
Scope rings remain the most common mounting method, offering versatility and wide compatibility. They’re available in various heights to accommodate different objective lens sizes and rifle configurations.
One-piece mounts provide superior alignment and often include built-in cant for long-range shooting. These eliminate potential alignment issues between separate rings but limit positioning flexibility.
Picatinny rails offer the ultimate in versatility, allowing quick scope position changes and compatibility with various ring styles. They’re standard on tactical rifles and increasingly common on hunting rifles.
Dovetail mounts work with grooved receivers common on rimfire and some European rifles. While limiting in ring selection, they provide a clean, low-profile mounting solution.
Step 1: Preparing the rifle begins with ensuring your firearm is completely unloaded. Remove the bolt if possible and clean all mounting surfaces with degreasing agent to ensure proper adhesion.
Step 2: Installing bases or rails requires careful attention to screw torque. Apply a small drop of blue Loctite to each screw, then tighten to manufacturer specifications, typically 20-30 inch-pounds.
Step 3: Setting ring height involves checking clearance between the objective lens and barrel. You need enough space for lens caps while keeping the scope as low as practical for proper cheek weld.
Step 4: Positioning for eye relief is critical for both comfort and safety. With the rifle shouldered naturally, the scope should provide a full sight picture without straining forward or pulling back.
Step 5: Leveling the scope prevents canted reticle issues that cause increasing horizontal error at longer distances. Use a quality level on both the rifle and scope to ensure perfect alignment.
Step 6: Torquing to specifications requires patience and precision. Tighten ring screws gradually in a cross-pattern, checking level frequently, until reaching the recommended 15-20 inch-pounds.
Zeroing establishes where your bullets impact relative to your scope’s reticle at a specific distance. This process is essential for accurate shooting and forms the basis for all further adjustments.
Zeroing aligns your scope’s point of aim with your bullet’s point of impact at a chosen distance. Once zeroed, you can predictably adjust for other distances using your scope’s adjustments or reticle features.
Most shooters zero at 100 yards for versatility, though 50-yard zeros work well for rimfire rifles. Some hunters prefer a 200-yard zero for flatter trajectory at common hunting distances.
The zeroing process requires patience and methodical shooting. Environmental conditions, ammunition consistency, and shooter technique all affect the final result.
Visual boresighting provides a rough alignment to get shots on paper. Remove the bolt and look through the bore at a distant target, then adjust the scope to match without moving the rifle.
Using a boresighting tool offers more precision for the initial alignment. Laser boresighters insert into the chamber or attach magnetically to the muzzle, projecting a reference point.
While boresighting saves ammunition, it’s only a starting point. Actual firing is necessary to account for barrel harmonics, bullet trajectory, and scope mounting variables.
Choosing your zero distance depends on intended use and cartridge capabilities. A 100-yard zero provides a good baseline for most centerfire rifles and allows easy mental calculations for other distances.
Setting up at the range requires a stable shooting position and consistent conditions. Use a solid bench rest or bipod, and shoot during calm conditions for best results.
Fire three-shot groups to establish actual point of impact. Single shots can be misleading due to shooter error or ammunition variation. Three shots reveal your true accuracy potential.
Reading your impacts tells you how to adjust your scope. Measure the distance from group center to your aiming point both vertically and horizontally.
Making adjustments follows a simple principle: move the reticle toward your impacts. If shooting low and left, adjust the turrets up and right to align with your group.
MOA (Minute of Angle) represents 1.047 inches at 100 yards, though most shooters round to 1 inch for simplicity. Each click on a 1/4 MOA scope moves impact 1/4 inch at 100 yards.
MILs (Milliradians) equal 3.6 inches at 100 yards or 10 centimeters at 100 meters. MIL adjustments are preferred for metric calculations and tactical applications.
Understanding these measurements is crucial for rifle scope sighting instructions and making precise adjustments. The key is consistency – think in the same system your scope uses.
| Distance | 1 MOA Equals | 1 MIL Equals | 1/4 MOA Click |
|---|---|---|---|
| 100 yards | 1.047″ | 3.6″ | 0.26″ |
| 200 yards | 2.094″ | 7.2″ | 0.52″ |
| 300 yards | 3.141″ | 10.8″ | 0.78″ |
| 400 yards | 4.188″ | 14.4″ | 1.05″ |
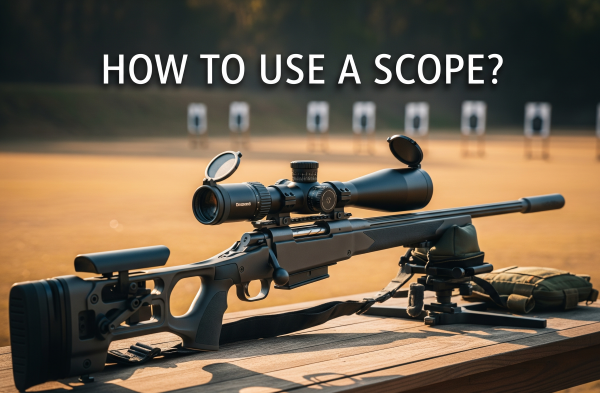
Mastering the mechanics of looking through a gun scope properly makes the difference between consistent accuracy and frustrating misses. These techniques apply whether you’re hunting, target shooting, or in tactical situations.
Finding the eye box requires positioning your eye at the correct distance from the ocular lens. Too close or far results in scope shadow – dark crescents that indicate misalignment.
Achieving proper cheek weld means consistently placing your cheek on the stock in the same position. This repeatable contact point ensures you’re viewing through a rifle scope from the same angle every shot.
Dealing with scope shadow requires minor head adjustments until you see a full, clear sight picture. The image should fill the entire scope view without dark edges.
Proper head position feels natural once established. If you’re straining to see through the scope, your mounting position likely needs adjustment.
Proper rifle hold balances firm control with relaxation. Grip the rifle firmly enough to control recoil but not so tight that you induce tremors or cant the rifle.
Shooting positions vary based on the situation and available support:
Using supports and rests dramatically improves accuracy. Bipods, shooting sticks, and improvised rests like backpacks all help stabilize your rifle for more precise shots.
The key is finding natural point of aim where the rifle wants to point without muscular input. This reduces fatigue and improves consistency.
Proper breathing technique involves taking a deep breath, exhaling halfway, then holding naturally while squeezing the trigger. This respiratory pause provides the most stable shooting platform.
Trigger control requires a straight-back squeeze using the pad of your index finger. The motion should surprise you slightly, preventing anticipation that causes flinching.
Combining breathing and trigger control takes practice. Dry-firing exercises help develop muscle memory without ammunition expense or recoil effects.
Wind compensation challenges even experienced shooters when using a rifle scope effectively. Reading wind indicators like grass movement, mirage, and flag behavior helps estimate necessary adjustments.
Temperature effects change bullet trajectory and scope adjustments. Cold weather typically causes bullets to impact lower, while hot conditions may cause higher impacts.
Elevation changes affect bullet flight due to air density differences. Higher altitudes with thinner air allow bullets to fly flatter, requiring sight adjustments when changing locations significantly.
Understanding environmental effects on optics helps predict necessary adjustments. Similar principles apply whether photographing or shooting in challenging conditions.
Learning from others’ errors accelerates your progress in sighting rifle scope basics. These common mistakes plague beginners and occasionally catch experienced shooters off guard.
Over-magnification for distance ranks among the most frequent errors. Using maximum magnification for 100-yard shots makes finding targets difficult and amplifies every movement, degrading accuracy.
Improper eye relief setup risks scope eye injuries from recoil. Always verify adequate clearance with your most powerful ammunition, as magnum loads produce significantly more rearward thrust.
Neglecting parallax adjustment causes mysterious accuracy problems at varying distances. Scopes with adjustable parallax require checking at each distance change for optimal precision.
Over-tightening mounting hardware damages scopes and strips threads. Following torque specifications prevents crushing scope tubes or creating stress points that affect tracking.
Ignoring regular maintenance leads to degraded performance over time. Lens cleanliness, battery replacement, and mechanical checks maintain your scope’s reliability.
Not verifying zero after transport assumes your scope remains perfectly aligned despite vehicle vibrations and handling. Always confirm zero before important shooting sessions.
Proper maintenance extends scope life and maintains optical performance. Regular care prevents minor issues from becoming major problems requiring professional repair.
Lens cleaning techniques mirror those used for quality camera equipment care. Start with a soft brush to remove debris, then use appropriate optical cleaning solutions.
Approved cleaning products include:
What to avoid includes paper towels, clothing, and household cleaners. These can scratch lens coatings or leave residue that degrades image quality.
Using lens caps protects vulnerable glass surfaces from scratches, impacts, and debris. Quality flip-up caps provide quick access while maintaining protection.
Proper case selection cushions your rifle and scope during transport. Hard cases offer maximum protection, while soft cases work for careful handling.
Legal considerations vary by location and transportation method. Research local laws regarding firearm transport and always comply with regulations.
Monthly checks should include battery testing for illuminated reticles, external cleaning, and mount tightness verification. These quick inspections catch developing issues early.
Seasonal maintenance involves deeper cleaning, lubricating adjustment turrets with appropriate products, and checking zero after temperature extremes.
Annual service might include professional inspection for internal fogging, reticle alignment, and tracking accuracy. This preventive approach avoids field failures.
Remove batteries during extended storage to prevent corrosion damage. Battery compartment corrosion can render expensive scopes unusable if neglected.
Keep spare batteries in your range bag or hunting pack. Illumination failures at dawn or dusk eliminate the advantage these reticles provide in low light.
Quality lithium batteries perform better in temperature extremes than alkaline alternatives. The extra cost provides reliability when conditions challenge equipment limits.
Understanding how to diagnose scope issues saves time and frustration when sighting in a gun scope doesn’t go as planned. Most problems have straightforward solutions once identified correctly.
Loose mounting hardware ranks as the primary culprit when zero shifts between sessions. Verify all screws meet torque specifications and haven’t worked loose from recoil.
Damaged scope internals manifest as erratic shot placement despite solid mounting. If adjustments don’t track predictably, internal components may need professional repair.
Inconsistent ammunition causes apparent zero shifts that aren’t scope-related. Testing with match-grade ammunition helps isolate whether the problem lies with the scope or cartridge variation.
| Problem | Likely Cause | Solution |
|---|---|---|
| Gradual zero shift | Loose mounts | Re-torque all hardware |
| Random impacts | Internal damage | Professional service |
| Vertical stringing | Parallax error | Adjust parallax setting |
| Groups move between sessions | Temperature change | Re-zero for conditions |
Parallax errors create image clarity problems that worsen with head movement. Adjust the parallax knob while looking through a sniper scope until the reticle stays stationary relative to the target.
Incorrect diopter setting causes reticle blur regardless of target focus. Adjust the eyepiece while looking at a blank sky until the reticle appears perfectly sharp.
Dirty lenses obviously degrade image quality but often go unnoticed as deterioration happens gradually. Regular cleaning maintains optimal light transmission and clarity.
Canted reticles cause horizontal errors that increase with distance. Even slight misalignment creates significant windage problems at longer ranges.
Checking alignment requires a plumb line or vertical reference at distance. The vertical reticle line should perfectly parallel true vertical references.
Fixing canted reticles means loosening rings and carefully rotating the scope. This requires patience and repeated checking to achieve perfect alignment.
Tracking refers to the scope’s ability to return to zero after adjustments. Quality scopes track predictably, moving exactly as turret adjustments indicate.
Testing tracking involves shooting a box pattern: adjust specific clicks up, right, down, and left, firing at each position. Groups should form a perfect square.
Poor tracking indicates internal mechanical issues requiring professional service. This problem affects precision more than any other scope defect.
Once you’ve mastered the basics of using a rifle scope, advanced techniques expand your capabilities. These skills separate competent shooters from true marksmen.
MIL and MOA reticles enable distance calculation when target dimensions are known. This skill proves invaluable when laser rangefinders fail or aren’t available.
The formula for MIL ranging: Target size (in yards) × 1000 ÷ Target size (in MILs) = Range in yards. Similar calculations work for MOA systems with different constants.
Practice with known-distance targets develops proficiency. Estimating target size accurately remains the challenging variable in real-world applications.
Holdover technique uses reticle references to compensate for bullet drop without adjusting turrets. This method excels for quick shots at varying distances.
Dialing elevation involves adjusting turrets for precise compensation at specific distances. This provides maximum precision but requires time and returning to zero afterward.
Choosing between methods depends on the situation. Hunting often favors holdover speed, while precision shooting benefits from dialing’s accuracy.
Modern ballistic calculators transform smartphones into powerful shooting aids. Input your rifle, scope, and ammunition data for precise firing solutions.
Environmental inputs including temperature, altitude, and wind provide real-time adjustments. These tools eliminate guesswork from long-range shooting.
Verification remains essential – calculators provide estimates that real-world testing must confirm. Document actual results to refine calculator predictions.
Night vision scopes amplify available light, requiring some ambient illumination. Generation 3+ units provide excellent clarity for nighttime hunting where legal.
Thermal scopes detect heat signatures regardless of lighting conditions. These excel for pest control and finding a game in dense cover.
Both technologies require different shooting through a rifle scope techniques due to their unique display characteristics. Practice in controlled conditions before field use.
Effective range depends on numerous factors including rifle capability, ammunition quality, scope magnification, and shooter skill. Most hunting situations occur within 300 yards where standard scopes excel.
Quality rifles with match ammunition can achieve accuracy at 1000+ yards with appropriate scopes. However, ethical hunting shots rarely exceed 400-500 yards even for experienced shooters.
Environmental conditions dramatically affect maximum range. Wind, temperature, and elevation changes compound at distance, challenging even sophisticated equipment.
First focal plane (FFP) reticles change size with magnification, maintaining consistent subtension values. This benefits ranging and holdover at any magnification setting.
Second focal plane (SFP) reticles remain constant size regardless of magnification. They provide consistent reticle visibility but only offer accurate subtensions at one magnification.
Choose based on intended use: FFP for variable-distance precision work, SFP for hunting where maximum magnification typically coincides with longer shots.
Verify zero before any important shooting event – hunting seasons, competitions, or extended range sessions. Transportation and temperature changes can shift point of impact.
Heavy recoiling rifles require more frequent checks as mounting hardware endures greater stress. Lightweight rifles also prove more susceptible to zero shifts.
Consider seasonal verification at minimum, with additional checks after any impacts, drops, or scope adjustments. Document your zero data for reference.
Mounting your own scope is achievable with proper tools and patience. The investment in quality tools pays dividends for shooters maintaining multiple rifles.
Gunsmiths offer expertise for challenging installations or when specialized mounting solutions are required. They also help diagnose problems beyond typical user experience.
Consider professional installation for expensive scopes or when mounting requires receiver modifications. The cost provides peace of mind for valuable equipment.
Recoil gradually loosens improperly torqued hardware, causing progressive zero shifts. Using thread locker and proper torque specifications prevents most mounting issues.
Internal scope damage from excessive recoil or impacts creates unpredictable zero loss. Quality scopes better withstand heavy-recoiling rifles’ punishment.
Extreme temperature changes cause materials to expand and contract differently, potentially shifting zero. Re-verification after significant temperature swings confirms point of impact.
Mastering how to use a scope transforms your shooting from hoping to hit your target to knowing exactly where each shot will land. The journey from mounting through zeroing to advanced techniques requires patience and practice.
Start with the fundamentals: proper mounting, careful zeroing at your chosen distance, and developing consistent shooting techniques. These basics provide the foundation for all advanced skills.
Remember that equipment quality matters, but technique matters more. A moderately priced scope in skilled hands outperforms expensive glass with poor fundamentals every time.
Take action today by properly mounting and zeroing your rifle scope using these proven methods. With dedicated practice and attention to detail, you’ll achieve the accuracy that makes every shot count.