Best Lightroom Export Settings for Instagram 2026: Pro Guide
I have lost count of how many beautifully edited photos I have watched turn muddy the second they hit the…

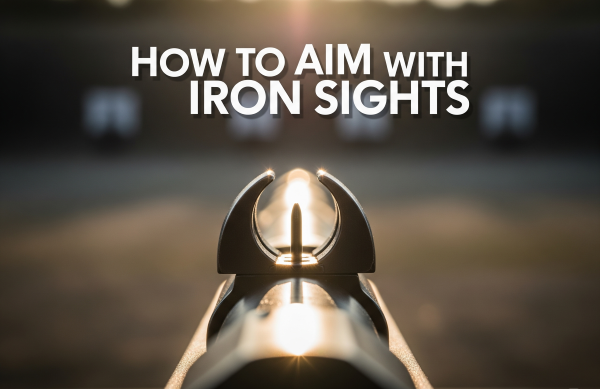
Precision shooting with iron sights separates the truly skilled from those who merely own firearms. While modern optics have revolutionized aiming for many shooters, understanding iron sight fundamentals remains a foundational skill that transfers to every other shooting discipline. Whether you are chambering your first round or refining technique after years of practice, mastering these core principles will dramatically improve your accuracy.
The challenge most shooters face is not physical but perceptual. Your eye must learn to prioritize the front sight over both the rear sight and the target itself. This goes against natural instinct, which draws attention to the target. Iron sight mastery demands retraining your visual focus and building new muscle memory around that central aiming point.
This guide covers everything from basic alignment principles to advanced zeroing procedures. You will discover why consistent practice matters more than expensive equipment, learn techniques used by competition champions, and gain the knowledge needed to shoot accurately in any lighting condition. By the time you finish, you will have a complete framework for developing iron sight proficiency that lasts a lifetime.
Iron sights have equipped shooters for centuries, predating modern optics by generations. Every iron sight system operates on the same fundamental principle: aligning two reference points to direct your projectile toward the intended target. Understanding these components thoroughly prepares you for the precision work ahead.
The front sight serves as your primary aiming reference, positioned near the muzzle. Shooters encounter several common designs including the standard post (rectangular blade), round bead (favored on shotguns), and tapered blade styles. Each variation offers distinct advantages. Posts provide precise alignment edges for competitive work, while beads allow faster target acquisition in defensive or hunting scenarios.
The rear sight works in conjunction with the front sight to establish proper alignment. Rear sights typically feature either a notch (U or V-shaped cut) or an aperture (circular opening). The rear sight frames the front sight consistently, enabling repeatable accuracy when your technique remains constant.
Modern advancements include fiber optic inserts that gather ambient light for excellent daylight visibility and tritium vials that provide continuous illumination in low-light conditions. These enhancements preserve the fundamental operation while addressing visibility challenges that have always confronted iron sight shooters.
Open sights feature a notched rear sight that preserves peripheral vision around the sight picture. This design excels in hunting applications where situational awareness matters. The trade-off involves slightly less precision compared to aperture sights, though accomplished shooters routinely achieve remarkable accuracy with open sights through dedicated practice.
Aperture or “peep” sights utilize a circular rear opening that naturally centers the front sight through the eye’s inherent centering tendency. Military rifles have employed aperture sights extensively due to their superior precision and reduced shooter fatigue. The circular opening eliminates peripheral distractions, allowing concentrated focus on sight alignment.
The choice between open and aperture sights typically aligns with intended use. Open sights perform well for close-range shooting and tracking moving targets, while aperture sights excel at precision work and extended distances where small angular errors translate to significant impact shifts.
Three-dot sights dominate the handgun market, featuring white or colored dots on the front sight and rear sight wings. This system accelerates alignment in defensive situations while maintaining acceptable accuracy for self-defense applications. The dots function as quick visual references, proving especially valuable during high-stress encounters.
Express sights, common on dangerous game rifles, pair a shallow V-rear sight with a prominent front bead. This combination prioritizes speed over precision, suited for rapid shots at close range in thick cover. The wide notch enables quick sight acquisition while providing adequate accuracy for hunting applications.
Ghost ring sights represent a hybrid design, using a thin-walled aperture that nearly disappears when properly focused. This configuration combines the speed of open sights with the precision benefits of aperture sights. Many defensive shotguns and rifles utilize ghost rings for their versatility across varying engagement distances.
Consistent accuracy begins with understanding proper sight alignment. An iron sight alignment chart provides your visual reference for correct positioning. Let us break down the alignment principles for each sight type in detail.
The fundamental rule for open sight alignment follows the “equal height, equal light” principle. The top of your front sight should sit level with the top edges of your rear sight notch. You should observe equal amounts of light on both sides of the front sight within the notch, creating visual balance that promotes consistent alignment.
Common alignment errors include canting (tilting the front sight), elevation mistakes (front sight positioned too high or low), and windage errors (front sight off-center horizontally). Even minor misalignment translates to significant impact shifts downrange. A mere 0.016-inch misalignment can cause over 11 inches of error at 600 yards, demonstrating why precision matters at distance.
Consistent head position and proper cheek weld help maintain alignment shot after shot. Your eye must return to the same position relative to the rear sight for every shot you fire. This consistency explains why competitive shooters obsess over their shooting positions and body alignment.
Peep sights simplify alignment through your eye’s natural centering ability. When looking through a circular aperture, your eye automatically centers the front sight without conscious effort. This phenomenon makes aperture sights more forgiving for new shooters learning proper alignment.
The key is allowing your eye to function naturally rather than forcing geometric alignment. Position the front sight so it appears centered in the rear aperture, with the top of the post at the aperture’s center. Do not stress about perfect geometric centering since your visual system handles this automatically when given the right setup.
For maximum precision, select the smallest aperture that still provides adequate light transmission. Smaller apertures increase depth of field, sharpening both sights in your vision. However, reduced brightness creates challenges in low-light conditions, requiring careful selection based on your typical shooting environment.
Here is a comprehensive sight alignment reference for common configurations:
| Sight Type | Front Sight Position | Light Gap | Common Errors |
|---|---|---|---|
| Square Notch | Level with rear sight top | Equal on both sides | Canting, uneven gaps |
| U-Notch | Centered in curve | Equal space around post | Front sight too deep/shallow |
| V-Notch | Centered in valley | Minimal gaps | Elevation inconsistency |
| Aperture | Centered in circle | N/A – fills aperture | Off-center positioning |
| Ghost Ring | Post tip at ring center | Thin ring barely visible | Focusing on ring instead of front sight |
Remember that sight alignment represents only half the equation. You still need proper sight picture relative to your target, which we cover in the next section.
Learning how to align iron sights properly requires mastering a systematic approach. Each step builds upon the previous one, creating a repeatable process for accurate shooting. Let us walk through the complete aiming sequence.
Your shooting stance forms the foundation for accurate iron sight work. For rifle shooting, begin with a stable position that naturally points toward your target. The standing position provides mobility but less stability, while the prone position delivers maximum support for precision shots at extended distances.
Handgun shooters typically choose between the isosceles stance (squared toward target, arms extended equally) or the Weaver stance (bladed body, support arm bent). The isosceles offers better armor coverage and recoil management, while Weaver provides a more stable platform for precision shooting when time allows proper setup.
Grip pressure should be firm without becoming tense. Excessive grip tension causes tremors and premature fatigue. Imagine holding a hammer firmly enough to control it while remaining relaxed enough to swing smoothly. This balance maintains sight alignment through the entire shot process.
The “blind aiming” drill establishes your natural sight alignment. Close your eyes, mount the firearm to your natural shooting position, then open your eyes. Where the sights point reveals your natural point of aim. Adjust your body position until this natural alignment matches your target center.
For rifles, consistent cheek weld proves essential. Your cheek should contact the stock at the same location every time you mount the rifle. This consistency ensures your eye maintains the same relationship to the rear sight. Many shooters apply tape to their stock as a tactile reference point for establishing consistent positioning.
With handguns, focus on presenting the pistol straight out from your body. The sights should align naturally as your arms extend. If you find yourself muscling the gun into alignment, your technique needs adjustment. Modify your grip and stance until alignment happens automatically without conscious effort.
Sight picture describes the relationship between your aligned sights and the target. Two primary methods each serve different purposes, and understanding when to use each improves your shooting versatility across varying scenarios.
The six o’clock hold places the top of your front sight at the bottom edge of a bullseye target. This creates a clean visual reference and prevents the front sight from obscuring your aiming point. Target shooters favor this method for its precision and repeatability when engaging known-distance targets.
Center hold, also called “combat hold” or “point of aim/point of impact,” places the front sight directly over your intended impact point. This intuitive method works better for irregularly shaped targets and defensive scenarios. Most modern pistol training uses center hold as the default technique.
The golden rule of iron sight shooting centers on front sight focus. Your eye cannot simultaneously focus at three different distances (rear sight, front sight, and target). Attempting to shift focus between them guarantees inconsistent results and degraded accuracy.
Lock your visual focus on the front sight, allowing the target and rear sight to blur slightly. This approach seems counterintuitive since you are focusing on the sights instead of what you are shooting at. However, sight alignment errors multiply with distance, while sight picture errors remain constant. Prioritizing front sight clarity provides the most consistent results.
Training your eye requires discipline over many repetitions. During practice, consciously verify front sight clarity before each shot. The target should appear fuzzy, with a crystal-clear front sight superimposed over it. This mental check becomes automatic with consistent practice over time.
Experienced shooters employ different front sight focus approaches depending on the shooting scenario. Understanding these variations helps you select the appropriate technique for each situation you encounter.
Hard Front Sight Focus involves locking your vision absolutely onto the front sight with maximum concentration. This technique dedicates all visual attention to the front sight, accepting that both the rear sight and target will appear significantly blurred. Competition precision shooters use this method for slow-fire stages where maximum accuracy justifies the reduced situational awareness. The hard focus eliminates any temptation to peek at the target, ensuring sight alignment remains perfect throughout the shot process.
Soft Front Sight Focus maintains general awareness of the front sight while allowing peripheral recognition of the target. This balanced approach works well for timed competition stages where you need some target feedback without sacrificing alignment precision. The soft focus technique reduces eye strain during extended practice sessions and helps shooters who struggle with the tunnel vision effect of hard focus. Many action shooters prefer this middle ground for its versatility.
Flash Sight Picture sacrifices precise alignment for speed and target awareness. In this technique, you bring the front sight into the general field of view and press the trigger when sufficient alignment exists for the given distance. Defensive shooters favor flash sight picture at close range where frame-filling targets require minimal precision. This technique requires extensive practice to develop consistent results, but enables faster engagement when speed matters more than sub-minute accuracy.
Proper breathing stabilizes your sight picture during the critical moment of firing. Take a normal breath, exhale about half of it, then pause at your natural respiratory pause. This pause occurs when your body reaches maximum stability. Fire the shot during this pause, which typically lasts three to five seconds for most shooters.
Never hold your breath completely or for extended periods. Complete breath-holding causes oxygen deprivation that produces tremors and degraded vision. If you cannot break the shot during one respiratory pause, relax, breathe normally, and begin the process again rather than forcing a compromised shot.
Trigger control prevents sight disturbance during firing. Place the trigger on the pad of your index finger, between the pad and first joint. Press straight back with steadily increasing pressure. The shot should surprise you. If you anticipate the break, you will likely disturb the sight alignment before the bullet exits the barrel.
Zeroing ensures your shots impact where you aim them. This adjustment guide covers the process for different firearms. Even perfect sight alignment means nothing if your sights are not properly zeroed to your specific ammunition and shooting technique.
Bore sighting saves ammunition and frustration by getting you “on paper” before conducting live fire zeroing. For bolt-action rifles, remove the bolt and look down the bore at a distant target. Without moving the rifle, adjust your sights to align with that same target reference point.
AR-style rifles require a different approach since you cannot look through the barrel with the bolt removed. Use a bore sighting tool or laser bore sight inserted in the chamber. These devices project a reference point, allowing sight adjustment without any live fire. Our guide to zeroing firearm sights covers this process in detail for various platform configurations.
Bore sighting does not replace live-fire zeroing but gets you close enough that your first shots hit the target paper. This proves especially valuable when mounting new sights or switching between different shooting positions that may require different zeros.
The AR-15 platform uses specific procedures for sight adjustment. Front sight posts adjust elevation using a special tool or bullet tip. Each click moves impact approximately 1.25 inches at 100 yards. Remember this rule: turning the front sight post clockwise lowers your point of impact. Think “clockwise is wise” to lower your groups on target.
Rear sight windage adjustments follow an intuitive rule: move the rear sight in the direction you want impacts to move. If your shots are landing left of target, move the rear sight right. Each click typically equals 0.5 inches at 100 yards, though this varies slightly between sight manufacturers.
The military 25/300 meter zero remains popular for general-purpose rifle applications. This zero configuration allows hits on a man-sized target from point-blank to 300 meters without any holdover adjustment. For more precision-oriented shooting at known distances, a 100-yard zero provides a flatter trajectory and simpler hold calculations.
Pistol sights present unique zeroing challenges due to their shorter sight radius and varying grip pressures. Most pistol sights require drifting for windage adjustments. Use a sight pusher tool or brass punch to avoid damaging the sights during adjustment. Never strike sights with a hammer, as this damages the firearm and can cause injury.
Fixed sights may require Kentucky windage (aiming off the intended point) or adjusting grip pressure to achieve desired impact points. This is why consistent grip pressure matters so much with handguns. Your zero remains valid only when you replicate the specific grip technique used during zeroing.
Modern pistols often feature vertically adjustable rear sights. Raising the rear sight raises your point of impact. Some competitive shooters maintain multiple rear sight heights for different distances or ammunition types, allowing rapid adjustment between stages or matches.
Selecting the appropriate zeroing distance depends on your intended use and typical engagement ranges:
Rifle Zero Options:
Pistol Zero Options:
Always remember that different ammunition shoots to different points of impact. Confirm your zero when changing loads or ammunition manufacturers. Document your settings for future reference so you can quickly re-establish zero after sight removal or firearm storage.
Even experienced shooters develop bad habits over time. Recognizing these common errors and implementing their solutions dramatically improves accuracy. Let us examine the most frequent problems and their effective fixes.
Target focus feels natural but destroys precision. When your eye focuses on the target, the front sight becomes a blurry distraction rather than a precise aiming reference. This single error accounts for more missed shots than any other factor across all skill levels.
The fix requires mental discipline and dedicated practice. During dry fire practice, consciously verify front sight clarity before each trigger press. Place a small piece of tape on your target as a reminder to shift focus forward to the sight rather than staying on the target itself.
Many instructors recommend the “hard front sight focus” drill: aim at a blank wall and maintain front sight focus for 30 seconds without letting your eye drift. This builds the mental discipline needed for consistent accuracy under pressure.
Shooters often change their sight picture based on target appearance or lighting conditions. One shot uses a six o’clock hold, the next centers the target, and another uses an undefined reference. This inconsistency makes meaningful zeroing impossible and destroys group size regardless of how well the sights are aligned.
Choose one sight picture method and commit to it completely. Mark your targets with reference points if needed to ensure consistent alignment. For bullseye shooting, use targets with clearly defined aiming points that naturally promote consistent sight picture development.
Photography principles apply here with remarkable accuracy. Consistency in technique yields predictable results. Document your chosen sight picture method and review it before each practice session to reinforce the habit until it becomes automatic.
Holding your breath creates tremors and vision problems. Attempting to shoot between rapid breaths causes timing inconsistencies. Both errors stem from misunderstanding how respiratory pause should integrate with the shooting process.
Practice breathing exercises without shooting first. Learn to recognize your natural respiratory pause, that moment after exhaling where your body naturally pauses before the next inhale. This pause typically provides three to five seconds of maximum physical stability.
If you run out of breath while aiming, lower the gun and start the breathing sequence over. Forcing shots while oxygen-deprived guarantees poor results. Quality shots require patience and proper preparation before applying pressure to the trigger.
Placing the trigger against your finger joint causes lateral pressure that pulls shots left for right-handed shooters. Using just the fingertip lacks control and causes vertical stringing. Both errors multiply in impact dispersion when trigger weights increase.
The trigger should contact the center of your index finger pad. This placement allows straight-back pressure without lateral movement. Dry fire practice with a penny balanced on your front sight reveals trigger control issues immediately, as any disturbing pressure causes the penny to fall.
For heavy triggers, strengthen your grip and finger muscles through regular practice rather than changing finger placement. Proper technique works regardless of trigger weight when you develop adequate hand strength and trigger finger isolation.
Iron sights excel in specific scenarios when properly employed. Understanding how to adapt your technique for different applications improves versatility across disciplines. Explore these optimized approaches for various shooting situations.
Target shooting with iron sights demands absolute consistency in every aspect of your technique. Competitive shooters using iron sights for precision target work often achieve groups rivaling scope users through meticulous attention to fundamental details.
Position building becomes critical for sustained accuracy at the range. Target shooters spend countless hours perfecting their stance, ensuring natural point of aim aligns perfectly with the target center. This eliminates muscular tension that degrades precision over long strings of fire.
Reading wind becomes more challenging without magnification, but iron sight shooters develop heightened awareness of environmental conditions. They watch mirage patterns, flag movements, and vegetation sway for wind indicators. These skills transfer beautifully to field shooting applications.
Iron sights offer distinct advantages for certain hunting scenarios. In thick cover where shots come quickly, iron sights allow faster target acquisition than scopes. The wide field of view helps track moving game through brush without losing sight of your quarry.
Low light presents the biggest challenge for hunting with iron sights. Upgrading to fiber optic or tritium sights extends your effective shooting hours significantly. Some hunters apply bright paint to their front sights for better visibility against dark animal backgrounds.
Shot distance limitations require closer stalking and improved woodsmanship. Most ethical shots with iron sights stay within 150 yards for big game. This constraint makes you a better hunter by demanding closer approaches and refined field craft skills.
Speed matters more than precision in defensive scenarios. The goal shifts from tiny groups to rapid, combat-effective hits on target. This requires modified techniques that prioritize target acquisition over perfect sight alignment when distance allows.
Both-eyes-open shooting becomes mandatory for situational awareness during self-defense encounters. Your non-dominant eye provides peripheral vision for threat assessment while your dominant eye manages the sights. Our pistol shooting fundamentals guide covers this technique in detail for defensive applications.
Target-focused shooting methods gain relevance at close range. Inside seven yards, precise sight alignment matters less than getting fast hits on target. However, maintaining fundamental skills ensures accuracy when distance increases or lighting conditions deteriorate.
Low light conditions challenge iron sight shooters more than any other environmental factor. Understanding how darkness affects sight picture and implementing proper techniques extends your effective shooting hours significantly.
Changing light conditions actually shift your point of impact. In bright light, your eye perceives a crisp sight picture, resulting in precise alignment. As light fades, the fuzzy sight picture causes subtle alignment errors that accumulate into significant impact shifts at distance.
Shooters typically impact high in low light because the blurry front sight appears to sit lower in the rear notch. Experienced shooters compensate by holding slightly lower or adjusting their zero for typical lighting conditions they expect to encounter.
Light direction matters as much as intensity. Backlighting makes front sights appear larger, while side lighting creates shadows that skew alignment perception. Understanding how light affects visual perception helps experienced shooters predict and compensate for these shifts.
Tritium sights revolutionized low-light shooting by providing battery-free illumination. These radioactive glass vials glow continuously for 10-12 years without any external power source. Military testing confirmed significant improvements in low-light accuracy when shooters transitioned to tritium-equipped sights.
Fiber optic sights gather ambient light to create bright aiming points. While useless in total darkness, they excel during dawn and dusk hunting hours when game animals are most active. Many shooters combine fiber optics with tritium for 24-hour sighting capability.
High-visibility paint offers a budget-friendly upgrade option for improving sight contrast. White or fluorescent orange paint on the front sight improves visibility against dark targets. Apply thin coats to avoid obscuring precise sight details needed for accurate alignment.
Elite shooters develop techniques through thousands of rounds and countless matches. These hard-won insights can dramatically shortcut your learning curve and help you avoid common pitfalls that consume training time.
Service rifle competitors routinely hit 600-yard targets with iron sights, proving these traditional sighting systems remain highly capable when properly employed. Their success stems from fanatical attention to fundamentals and specialized techniques developed over years of competition.
Natural point of aim becomes absolutely critical at distance. These shooters build positions where the rifle naturally points at the target center without muscular input or conscious alignment effort. They test this by closing their eyes, breathing several complete cycles, then checking where the sights point when opened.
Reading wind without magnification requires heightened environmental awareness. Competitors watch mirage patterns through their sights, learning to detect wind speed and direction from heat wave movement. They also develop mental charts for wind hold-offs at various distances based on observed conditions.
Action shooting sports demand rapid sight acquisition with acceptable accuracy. Top competitors develop economy of motion, eliminating wasted movement between targets and minimizing the time between acquiring one target and beginning alignment for the next.
The key concept involves “acceptable sight picture,” understanding how much precision each shot requires based on target distance and size. Close targets need only rough alignment, while distant or small targets demand careful sight picture with full alignment verification.
Target transition techniques focus on moving the eyes first, then driving the gun to follow. The eyes find the next target while the gun is still in recoil from the previous shot. This parallel processing dramatically improves split times between sequential targets.
Consistency separates good shooters from great ones. Elite competitors develop pre-shot routines that ensure identical sight pictures for every shot fired. These routines become automatic under match pressure when adrenaline affects normal conscious control.
Visualization training programs the subconscious mind for perfect sight alignment. Spend five minutes daily visualizing perfect sight pictures. See the front sight in sharp focus, properly aligned within the rear sight, breaking perfect shots on command. This mental rehearsal translates directly to improved physical performance.
Documenting your progress reveals patterns and improvement areas over time. Keep detailed notes about sight picture, lighting conditions, trigger feel, and group sizes. Review these logs to identify consistency issues before they become deeply ingrained habits.
Structured practice accelerates skill development more effectively than random shooting. These proven drills address specific aspects of iron sight shooting while maintaining engagement and providing measurable progress indicators.
This classic drill eliminates flinching and improves trigger control through randomized feedback. Have a partner randomly load dummy rounds among live ammunition in your magazine. You will not know which chambers contain live rounds versus inert dummies during the drill.
When you press the trigger on a dummy round, any flinch becomes immediately obvious. The sights should remain perfectly still through the trigger press on dummies, just as they should on live rounds. This instant feedback rapidly improves trigger control awareness.
Practice this drill weekly until flinching disappears completely from your response to trigger press. Then continue monthly to prevent bad habits from returning unchallenged. Many champion shooters credit this single drill for their trigger control mastery development.
Originally designed for red dot sights, this drill adapts perfectly for iron sight training. Print the standard dot torture target and shoot it at three yards initially. The multiple small targets demand precise sight alignment before each shot.
Each dot requires different skills. Some test precision, others speed, and several combine both demanding characteristics. Shoot the entire course of fire without any misses before progressing back to five yards. This systematic progression builds confidence alongside skill.
Track your progress distance and share results with shooting partners for motivation and accountability. Most shooters plateau around seven yards. Pushing past this barrier requires dedicated focus on sight alignment fundamentals that the drill reinforces.
Start at 10 yards with large targets, focusing on perfect sight alignment and trigger control. Shoot five-round groups, calling each shot immediately after firing. Move back five yards only after consistently shooting satisfactory groups at the current distance.
This progression reveals distance-related weaknesses in your technique. Many shooters discover their sight picture changes unconsciously as targets shrink with increased distance. Identifying these issues early prevents bad habit formation that becomes difficult to correct later.
Set realistic goals for each distance before moving back. This might be 4-inch groups at 25 yards or 8-inch groups at 50 yards with a handgun. Document these benchmarks to track long-term improvement over months and years of practice.
Here are answers to the most common questions about iron sight aiming techniques based on what shooters ask most frequently.
The aiming point depends on your chosen hold technique. With a six o’clock hold, place the front sight tip at the bottom edge of your target. With a center hold (combat hold), place the front sight directly over your intended impact point. Choose one method consistently and practice until it becomes automatic. For targets at known distances, align the front sight center with your aiming point.
For rifles, common zero distances include 25/300 yards for combat and hunting, 50/200 yards for versatile shooting, and 100 yards for precision work. Pistol zeros typically center on 15 yards for defensive use, 25 yards for general purpose, or 50 yards for competition. Your zero should match your intended typical engagement distance.
Yes, both-eyes-open shooting offers significant advantages for most applications. Keeping both eyes open maintains peripheral vision, reduces eye strain, and improves depth perception. Your brain naturally superimposes the sight picture from your dominant eye while maintaining situational awareness through your non-dominant eye. This technique requires practice but becomes natural with consistent training.
Skilled shooters can achieve remarkable accuracy with iron sights at extended distances. Service rifle competitors routinely hit 12-inch targets at 600 yards using only iron sights. With quality ammunition and excellent fundamentals, 500-600 yard shots are achievable. The limitation is typically the shooter’s skill rather than the sighting system itself.
The fundamental principle is equal height, equal light. The top of your front sight should sit level with the top edges of your rear sight notch, with equal light gaps on both sides of the front sight. This creates visual balance that translates to accurate shot placement when combined with proper sight picture and trigger control.
For elevation, raising the rear sight or lowering the front sight raises your point of impact. For windage, move the rear sight in the direction you want impacts to move. With AR-15 front sights, clockwise rotation lowers impact. Keep adjustments small and verify each change through live fire before making further adjustments.
Both-eyes-open shooting is generally recommended for situational awareness and reduced eye strain. However, some shooters prefer closing their non-dominant eye to eliminate distractions and enhance focus on sight alignment. If you struggle with both-eyes-open technique, try using an eye patch or blinder on your non-shooting eye rather than closing it, which can cause eye strain over extended practice sessions.
Clarity issues typically stem from incorrect focus technique or age-related vision changes. Remember that your eye cannot simultaneously focus on the rear sight, front sight, and target. Proper iron sight technique demands front sight focus, accepting that the rear sight and target will appear slightly blurry. For presbyopia (age-related focus loss), solutions include prescription shooting glasses or upgrading to more visible sight designs with larger posts or fiber optic inserts.
For defensive shooting, center hold (combat hold) works best because it prioritizes speed and intuitive shooting. This point-of-aim/point-of-impact system allows instinctive shooting without calculating hold-offs. At typical defensive distances of 3-7 yards, perfect sight alignment matters less than getting rapid hits on target in the vital zone.
The fundamental principle remains identical: front sight centered in the rear sight with equal light gaps. However, execution differs due to sight radius and shooting positions. Rifle shooting allows bone support and multiple contact points for stability. Pistol shooting relies on muscle control with much shorter sight radius, which magnifies alignment errors. Focus on consistent grip pressure and presentation to achieve repeatable sight alignment with handguns.
Mastering iron sights requires dedication to fundamental marksmanship principles that have served shooters for generations. The journey from struggling with basic sight alignment to achieving consistent accuracy rewards patient practice across thousands of repetitions. Remember these core takeaways: maintain unwavering front sight focus, choose one sight picture method and commit to it completely, and develop consistent breathing and trigger control that produces identical results shot after shot.
Modern optics may offer convenience, but iron sights teach irreplaceable shooting skills that transfer directly to every other shooting discipline. They force you to perfect your fundamentals without technological assistance, building the kind of marksmanship ability that lasts a lifetime and adapts to any firearm you encounter.
Begin your improvement journey with dry fire practice at home, focusing on perfect sight alignment and trigger control. Progress to live fire drills at increasing distances, always emphasizing consistency over speed. Our rifle shooting basics guide builds on these iron sight fundamentals to help you develop well-rounded shooting skills. With dedication and proper technique, you will discover that iron sights remain highly capable tools for accurate shooting in any situation you encounter.