Best Birding Blogs 2025: Top Resources for Bird Enthusiasts
Discover the best birding blogs with our expert reviews of 12 top resources. From photography tips to scientific insights, find…
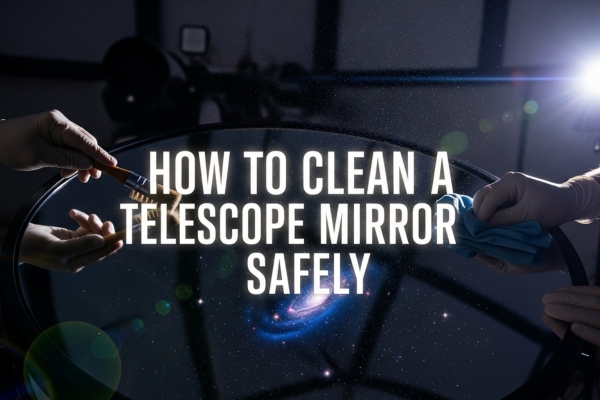
I’ve cleaned dozens of telescope mirrors over the years, and I can tell you that most amateur astronomers clean their mirrors way too often. The truth is, a little dust on your mirror affects image quality far less than the microscopic scratches that come from unnecessary cleaning. In this guide, I’ll show you exactly when and how to clean your telescope mirror safely, based on real experience and industry best practices.
Before we dive into the cleaning process, here’s something crucial: your telescope mirror probably doesn’t need cleaning as often as you think. Sky & Telescope magazine emphasizes that dirt has surprisingly little effect on telescope performance – even a mirror that looks quite dusty might only lose 1-2% of its light-gathering capability. The real enemy isn’t dust; it’s the damage that comes from improper or too-frequent cleaning.
I learned this lesson the hard way with my first 8-inch reflector telescope. After noticing some dust particles on the primary mirror, I cleaned it monthly for the first year. By year two, I noticed my images were getting worse, not better. A closer inspection revealed hundreds of tiny scratches from my overzealous maintenance routine. That mirror now serves as an expensive reminder that prevention beats cleaning every time.
Let’s establish clear guidelines for when cleaning is actually necessary. I follow what I call the “80% rule” – if your mirror still reflects 80% or more of its surface clearly, leave it alone. Dust, pollen, and even small debris particles scatter surprisingly little light. Your telescope’s optical performance won’t noticeably degrade until contamination becomes severe.
You should consider cleaning your mirror only when you observe these specific conditions: visible fungus or mold growth (common in humid climates), sticky residues from tree sap or bird droppings, significant accumulation of greasy fingerprints, or a thick layer of grime that covers more than 30% of the mirror surface. If you’re seeing any degradation in image quality, first check your collimation, eyepieces, and atmospheric conditions – these are far more likely culprits than a dusty mirror.
Here’s when you absolutely should NOT clean your mirror: if there’s just a light coating of dust or pollen, if you see a few water spots from dew, if there are tiny specks or particles scattered across the surface, or if you cleaned it within the last 2-3 years. According to Celestron’s official maintenance guidelines, most telescope mirrors need cleaning only every 3-5 years under normal use conditions.
I’ve found that many beginners panic when they shine a flashlight down their telescope tube and see dust particles. Remember that you’re not looking through the mirror – you’re looking at the light it reflects. Those dust specks that look huge under direct illumination have minimal impact on your viewing experience.
Before you touch anything, you need to understand what you’re dealing with. Most telescope mirrors have an aluminum coating that’s only about 100 nanometers thick – that’s roughly 1/1000th the width of a human hair. This coating is then protected by a silicon dioxide overcoat, but even this protective layer is incredibly delicate.
Some high-end mirrors feature enhanced coatings like Celestron’s StarBright XLT or similar multi-layer coatings. These can be even more delicate than standard aluminum coatings. If you’re unsure about your mirror’s coating type, check your telescope’s documentation or contact the manufacturer. Different coatings may require slightly different cleaning approaches.
The biggest risk during cleaning isn’t the cleaning solution – it’s physical contact. Every touch, no matter how gentle, has the potential to create microscopic scratches. These scratches scatter light and reduce contrast, permanently degrading your telescope’s performance. This is why we use specific techniques to minimize contact and pressure during the cleaning process.
Gathering the right materials before you start is crucial for safe mirror cleaning. Here’s exactly what you’ll need:
Cleaning Solutions: Use only distilled water (never tap water, which contains minerals), 99% pure isopropyl alcohol (avoid drugstore rubbing alcohol with additives), and a tiny amount of liquid dish soap (Dawn or similar, without lotions or additives). For the cleaning solution, I mix 1 gallon of distilled water with 2-3 drops of dish soap and optionally add 2 ounces of isopropyl alcohol for faster drying.
Cleaning Materials: You’ll need surgical cotton or pure cotton balls (avoid synthetic materials), a brand new, soft natural sponge (never reuse), lens tissue or high-quality paper towels (Kimwipes work well), and a bulb blower or canned air for initial dust removal. Some people swear by using surgical cotton, while others prefer natural sponges – both work when used correctly.
Work Setup: Prepare a clean, flat work surface with soft padding, several clean containers for rinse water, clean towels for drying the mirror cell, rubber gloves to protect the coating from skin oils, and a dust-free area for air-drying (a clean bathroom works well). Good lighting is essential – you need to see what you’re doing without creating shadows.
Never use these items on your mirror: glass cleaners (contain ammonia), acetone or strong solvents, rough paper towels or tissues, compressed air at close range (can damage coatings), or any abrasive materials. I’ve seen mirrors ruined by well-meaning owners using Windex or other household cleaners – the ammonia in these products can strip the aluminum coating entirely.
Start by removing the mirror from your telescope. This process varies by telescope design, but generally involves removing the mirror cell from the back of the tube. Take photos before disassembly to help with reassembly later. Mark the mirror’s orientation relative to the cell with small pieces of tape – this helps maintain collimation.
Once removed, inspect the mirror under good lighting. Look for any coating damage, scratches, or problem areas. If you see any coating peeling or significant scratches, stop – these issues require professional attention. Place the mirror on a padded surface with the coated side up.
Before any liquid touches your mirror, remove loose particles with compressed air or a bulb blower. Hold the air source at least 12 inches away and blow at an angle, not straight down. This prevents particles from being driven into the coating. Work from the center outward in a spiral pattern.
Don’t try to remove everything with air – you’re just getting rid of the loose stuff that could cause scratches during wet cleaning. If particles don’t move with gentle air pressure, leave them for the wet cleaning phase.
Fill a clean container with room-temperature distilled water. Holding the mirror at an angle, pour water gently across the surface. Start at the top and let gravity carry the water down. This initial rinse removes more loose particles and prepares the surface for cleaning.
Never use hot or cold water – temperature extremes can stress the glass and coating. Room temperature or slightly warm water (around 70-80°F) works best. The rinse water will probably look dirty – that’s normal and shows the process is working.
Prepare your cleaning solution fresh – never reuse old solution. In a clean container, mix 1 gallon of distilled water with 2-3 drops of dish soap. If desired, add 2 ounces of isopropyl alcohol for faster drying. The solution should barely feel slippery between your fingers.
Submerge the mirror completely in the cleaning solution if possible. If your container isn’t large enough, place the mirror flat and flood the surface with solution. Let it soak for 2-3 minutes to loosen stubborn contaminants.
This is the most critical step. Using surgical cotton or a new natural sponge soaked in cleaning solution, make single, straight strokes across the mirror surface. Use zero pressure – let the weight of the wet cotton do the work. After each stroke, use a fresh piece of cotton or rinse the sponge thoroughly.
Work systematically across the mirror, slightly overlapping each stroke. Never scrub back and forth or use circular motions. If you encounter stubborn spots, let the solution soak longer rather than applying pressure. Each stroke should glide across the surface with no resistance.
Rinse thoroughly with distilled water to remove all soap residue. I typically rinse at least three times, using fresh distilled water each time. Hold the mirror at an angle and pour water across the surface, ensuring complete coverage. Any soap residue left behind will create spots when dry.
The final rinse is crucial – soap residue is one of the most common causes of cloudy mirrors after cleaning. If you added alcohol to your cleaning solution, it helps the water sheet off more easily, reducing spot formation.
Proper drying prevents water spots. Stand the mirror on edge at a slight angle on a clean, lint-free towel. Most water will run off naturally. You can accelerate drying by gently blowing filtered air across the surface, but never wipe the mirror dry.
If you must remove remaining water droplets, use a corner of lens tissue to carefully wick them away without dragging across the surface. Any spots that remain after air drying are usually cosmetic and won’t affect performance. It’s better to live with a few water spots than risk scratching the coating trying to achieve perfection.
Parabolic mirrors require extra care around the edges where the coating might be thinner. Spherical mirrors are generally more robust but follow the same cleaning principles. Cassegrain secondary mirrors are especially delicate due to their small size and precise curves – consider professional cleaning for these.
Large mirrors (12 inches and above) present handling challenges. You might need an assistant to safely manage the weight. Consider cleaning these mirrors in place if possible, using the flooding technique rather than full immersion. The larger the mirror, the more critical proper support becomes during cleaning.
Mirrors with enhanced multi-coatings require manufacturer-specific care. Some coatings are incompatible with alcohol, while others specifically require it. When in doubt, use only distilled water with minimal soap. Check your telescope’s manual or contact customer support for coating-specific guidance.
Problem: Water spots won’t come off
These are usually mineral deposits from previous cleaning with tap water. Try a solution of 1 part white vinegar to 10 parts distilled water, applied with cotton. Rinse thoroughly afterward. If spots persist, they’re likely underneath the coating and permanent.
Problem: Coating looks cloudy after cleaning
This usually indicates soap residue. Rinse again with plenty of distilled water. If cloudiness persists, the coating itself might be degrading – this requires professional recoating.
Problem: New scratches appeared during cleaning
Unfortunately, scratches are permanent. They happened either from trapped particles during wiping or from using too much pressure. Learn from this for next time – less contact is always better. Minor scratches have minimal impact on visual observation but can affect astrophotography.
Problem: Mirror won’t come clean despite multiple attempts
Some contamination bonds permanently with the coating. If gentle cleaning doesn’t work, stop – aggressive cleaning will cause more harm than leaving the contamination alone. Consider professional ultrasonic cleaning or recoating if the contamination significantly affects performance.
Professional cleaning or recoating is worth considering when your mirror has coating damage, deep contamination that won’t respond to gentle cleaning, or it’s a valuable vintage mirror with special coatings. Professional services typically cost $100-300 for cleaning and $200-500 for recoating, depending on mirror size.
Many astronomy equipment retailers offer cleaning services. Check telescope comparison guides to find reputable service providers for your specific telescope brand. Some manufacturers offer cleaning services that maintain warranty coverage.
Professional ultrasonic cleaning can remove contamination that home cleaning can’t touch. Recoating services can restore an old mirror to better-than-new performance with modern coating technology. For valuable telescopes, professional service is cheap insurance against damage.
Preventing contamination is far easier than cleaning. Always use dust caps when your telescope isn’t in use. Store your telescope in a clean, dry environment with stable temperatures. A simple shower cap makes an excellent dust cover for the tube opening.
Control humidity to prevent fungus growth. In humid climates, store your telescope with silica gel packets or a small dehumidifier. Ensure good ventilation to prevent condensation. I keep a hygrometer in my telescope storage area to monitor conditions.
During use, avoid touching the mirror and keep the tube pointed slightly downward when not observing to prevent debris from falling onto the mirror. When transporting your telescope, secure all components to prevent shifting that could grind particles into the coating.
Consider your observing environment. Avoid setting up under trees that drop sap or near dusty areas. If you observe from your driveway, wait for car engines to cool to avoid oil vapor contamination. These simple precautions can extend the time between cleanings by years.
After reinstalling your mirror, collimation is essential. Even if you marked everything carefully, slight position changes are inevitable. Start with rough collimation using a collimation cap or sight tube, then fine-tune with a star test.
The star test reveals any remaining issues. Point at a bright star and defocus slightly. The donut pattern should be perfectly concentric. If it’s not, adjust your collimation screws incrementally. This process might take 20-30 minutes but is crucial for optimal performance.
Document your collimation settings for future reference. Some astronomers mark their collimation screws’ positions with a permanent marker. This gives you a starting point after future mirror removal, though fine adjustment is always necessary.
How often should I clean my telescope mirror?
Under normal conditions, clean your mirror every 3-5 years at most. Many amateur astronomers go 5-10 years between cleanings with no noticeable performance loss. Clean only when contamination visibly affects more than 20-30% of the mirror surface.
Can I use eyeglass cleaner on my telescope mirror?
Never use eyeglass cleaner or any commercial glass cleaner. These products contain chemicals like ammonia that can strip your mirror’s aluminum coating. Stick to distilled water and minimal dish soap only.
What if I accidentally touch the mirror surface?
If you accidentally touch the mirror, don’t panic. A single fingerprint won’t ruin your views. You can spot-clean with a cotton swab dipped in isopropyl alcohol, followed by distilled water. Avoid cleaning the entire mirror just for one fingerprint.
Is it safe to use compressed air on telescope mirrors?
Compressed air is safe when used correctly. Keep the can upright and at least 12 inches from the mirror. Never shake the can, as this can cause liquid propellant to spray out. Use short bursts at an angle, not directly perpendicular to the surface.
Should I clean the secondary mirror the same way?
Secondary mirrors require even more caution due to their small size and precise figure. The same cleaning principles apply, but handling is more difficult. Consider professional cleaning for secondary mirrors unless you’re very experienced.
What about cleaning corrector plates on SCTs?
Corrector plates have different coatings than mirrors and require specialized techniques. They’re also more exposed to contamination. Many SCT owners have them professionally cleaned to avoid damage to the delicate coatings.
Can I prevent dew without causing contamination?
Yes, use a dew shield or dew heater system. These prevent condensation without touching the mirror. Avoid using fans that could blow dust onto the mirror surface. Proper dew prevention eliminates water spots and reduces cleaning frequency.
How do I know if my mirror needs recoating?
Signs include visible coating deterioration, persistent cloudiness after cleaning, numerous scratches affecting views, or if the coating is over 20 years old. A professional can assess whether recoating is necessary.
After maintaining telescopes for over two decades, I’ve learned that less is definitely more when it comes to mirror cleaning. That dusty mirror that’s bothering you? It’s probably performing at 95% or better. The risk of damage during cleaning far outweighs the minimal improvement you might achieve.
Focus your maintenance efforts on prevention rather than cleaning. Proper storage, careful handling, and environmental control will keep your mirror in excellent condition for years. When cleaning does become necessary, approach it with patience and the right materials.
Remember that your telescope mirror is a precision optical surface. Treat it with respect, clean it only when truly necessary, and use the gentlest methods possible. Your reward will be years of stunning views through clean, undamaged optics that perform at their best.
The night sky awaits, and with proper mirror care, your telescope will reveal its wonders for decades to come. Clear skies, and remember – when in doubt, don’t clean it!