Apex Covert Pro Review 2026: Illuminated Single-Pin Tested
After three months of rigorous testing, our Apex Covert Pro review reveals real-world performance data, battery life results, and detailed…

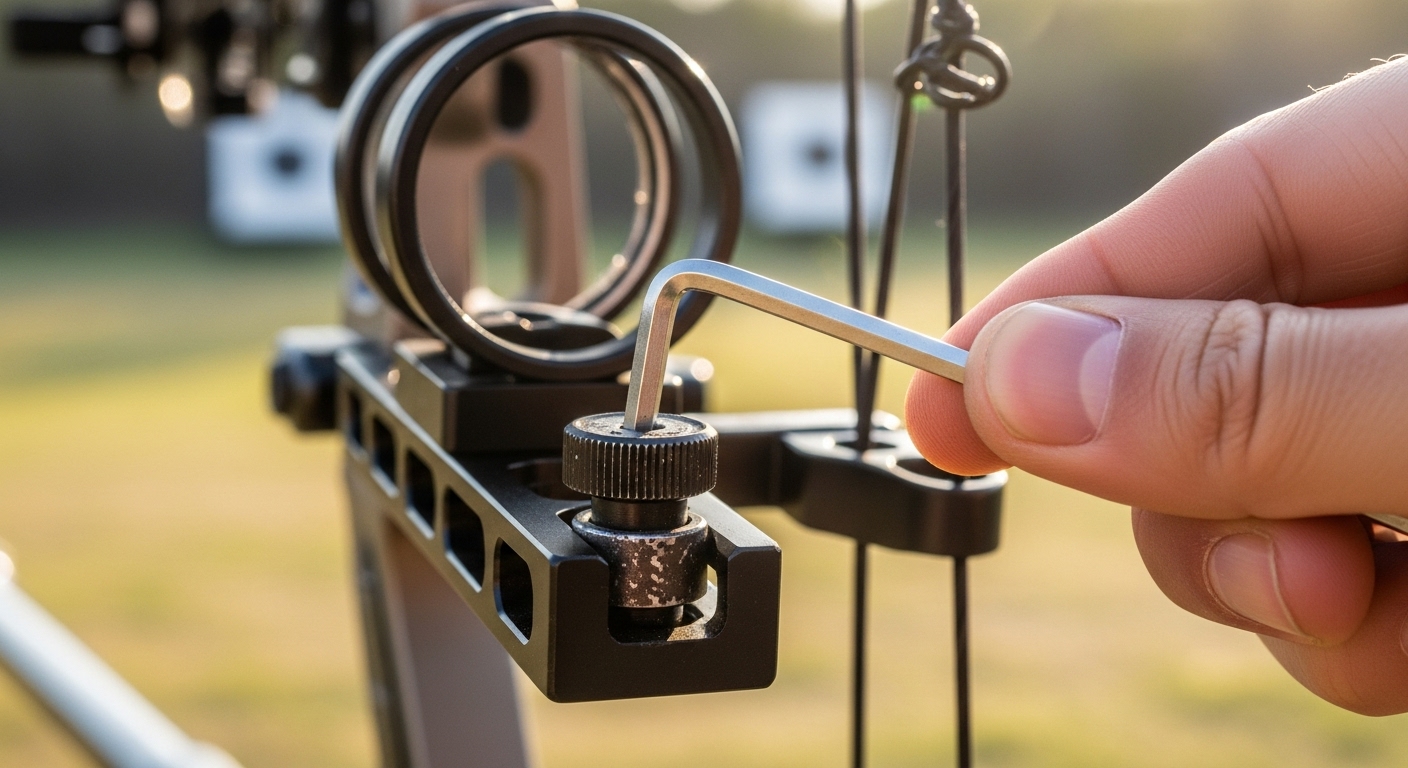
If your bow sight has run out of vertical travel right when you need that 40, 50, or 60-yard pin, take a breath. A bottomed-out bow sight is one of the most common frustrations compound bow shooters run into, and in nearly every case it is a tuning issue upstream of the sight rather than a defective part. The housing is doing its job by compensating, and once you fix what it is compensating for, the adjustment room usually comes back on its own.
This guide walks through how to fix a bottomed out bow sight in 2026 using a structured six-step method I have refined across years of compound bow tuning work. You will learn how to read the symptoms, where to make the smallest change that produces the largest result, and how to confirm each fix with paper tuning or a walk-back test before moving on. By the end, your 20-yard pin should sit in the middle of its adjustment range with enough travel left to reach your farthest hunting or 3D distance.
If you want foundational bow sight adjustment principles alongside these troubleshooting techniques, our complete guide to adjusting bow sights covers the basics of elevation, windage, and sight radius.
Quick Answer: How to Fix a Bottomed Out Bow Sight (6 Steps)
1. Check peep height and rotation – move peep in 1/8 inch increments.
2. Verify arrow rest height through the Berger hole – adjust in 1/8 inch increments.
3. Confirm nocking point sits 1/8 to 3/8 inch above square.
4. Adjust center shot alignment until arrows group horizontally.
5. Paper tune and read the tear pattern; follow up with a walk-back test.
6. Reposition the sight housing closer to the riser only if needed.
Steps 1 through 3 resolve the vast majority of cases. Skip to step 6 and you will often run out of room again the next season.
A bottomed-out bow sight is what archers call the moment when the sight housing or a specific pin reaches the end of its physical adjustment travel and still cannot place the arrow on target. The sight cannot move any further, so your group stays high, low, or out of reach of the distance you are trying to dial in.
That limitation is rarely the fault of the sight itself. The housing is the last variable in a chain that includes your peep, your arrow rest, your nocking point, your center shot, and the arrow itself. When any link in that chain is off, the sight has to travel further than it was designed to in order to compensate. Push it to the limit and you end up pinned at the top of the housing wondering what changed.
Bottomed Out Bow Sight: The sight housing or an individual pin has reached its maximum upward or downward adjustment limit and cannot be moved further to compensate for the current arrow impact. The cause is almost always somewhere else in the bow’s tuning chain.
The most common triggers I see are switching from lighter target arrows to heavier hunting or broadhead-tipped arrows, draw weight or draw length adjustments, a fresh string that has stretched unevenly, and a peep sight that has rotated in its serving. A shop setup that placed the housing too far from the start can also leave you with almost no travel from day one. Understanding the root cause prevents the same problem from creeping back next season.
Before you start cranking on screws, gather the right tools. Most archers already own everything on this list, and the few specialty items are inexpensive enough to keep in your range bag permanently.
Bow square: Required for measuring nocking point height and peep rotation. A quality aluminum bow square from a brand like Last Chance Archery or Lone Star Archery typically runs in the $20-30 range and lasts for years.
Allen wrench set (SAE): Most sight and rest hardware uses 3/32 inch or 5/64 inch Allen keys. Get a bonded set so the keys do not strip out under torque.
Paper tuning frame: A simple PVC frame holding butcher paper or newsprint, set roughly 4 to 6 feet in front of your shooting position. You can build one for under $20 or buy a folding unit for around $40.
Tape measure and small bubble level: For sight radius measurements and confirming the housing sits level on the riser.
Nocking pliers: Brass nocking points require pliers that grip without crushing. Brass Jaw Archery or Bohning pliers are popular with compound shooters.
Notebook or tuning log: Recording your peep height, rest height, and sight housing position before you change anything is the single biggest insurance policy against making the problem worse.
Safety note: any time you compress or relax a bow with a bow press, follow the press manufacturer’s directions and keep fingers clear of the string path. Stand clear of the draw path during every test shot, even with target points.
Work through these steps in order. Each one tackles a specific upstream cause, and the diagnostic logic only holds together if you start at step 1 and confirm results before moving to step 2. Resist the temptation to move your sight housing first – it almost always comes back to haunt you when the next arrow change or string stretch rolls around.
Peep height is the single most common cause of a bottomed-out sight. If the peep sits too high on the string, your sight has to travel further upward to see through it, and at long range you end up pinned at the top of the housing. Too low, and the opposite happens at close range.
Establish your anchor with eyes closed: Draw your bow, settle into a relaxed anchor, then open your eyes. The peep should line up with your sighting eye without tilting or shifting your head. If you have to crane your neck, the peep is wrong for your current anchor.
Measure peep height: With the bow at rest, lay a bow square against the string. Read the angle from the nocking point to the center of the peep. Most adult compounds land somewhere between 90 and 100 degrees from the string, but draw length changes that number.
Check peep rotation: Look down the string from the cam end. A peep that has spun inside its serving can present the hole at an angle, forcing you to tilt your head and breaking the sight picture. If the rubber serving is loose, the peep will keep rotating back to its preferred angle every few shots.
Adjust in small increments: Move the peep up or down in 1/8 inch steps. After each move, shoot three to five arrows at 20 yards and note the change in point of impact. A 1/8 inch peep move typically shifts impact by 2 to 3 inches at 20 yards.
Re-serve if the peep keeps spinning: If rotation is the issue, the fix is not adjusting position – it is adding a half-wound of serving above and below the peep to lock it in place. A loose peep that has crept downward will quietly eat your sight adjustment range all season long.
Common Mistake: Moving the peep more than 1/8 inch at a time. I have watched shooters crank the peep an entire inch in a single afternoon and then chase their tail trying to resight every pin. Small moves, verify, repeat.
Success indicator: After peep adjustment, your 20-yard pin should land near the middle of its adjustment range with travel available both up and down. You should be able to look through the peep with your head held naturally at full draw.
The arrow rest controls the vertical launch angle of the arrow. If the rest sits too low, the arrow leaves the bow nock-high and arcs upward, and your sight has to compensate. If it sits too high, the opposite happens. Either extreme can push the sight to the limit of its travel.
Locate the Berger hole: The Berger hole is the threaded mounting hole in the riser where the arrow rest attaches. It is your reference point for both rest height and center shot.
Check arrow alignment: Nock an arrow and look at the setup from directly behind. The arrow shaft should pass through or just above the center of the Berger hole. If it clears the hole by more than 1/8 inch, your rest is likely set too high.
Mark the starting position: Place a small piece of tape on the rest mounting bar at the current height before you move anything. If the change does not help, you can return to baseline without guesswork.
Adjust in 1/8 inch steps: Lower the rest if arrows are impacting high at long range. Raise it if arrows are flying low. Most drop-away and fixed rests offer around 1/4 inch of vertical adjustment, so you usually have just one or two moves to make.
Torque everything to spec: Loose rest hardware is one of the most common hidden causes of inconsistent groups. Re-tighten the rest mounting screws and confirm nothing shifted during your test shots.
Success indicator: The arrow passes through the Berger hole with no daylight on either side at full draw, and your 20-yard pin sits in the middle 60 percent of its adjustment range with measurable room to spare in both directions.
The nocking point determines where on the string the arrow sits relative to the riser. If it is too high or too low, the arrow leaves the bow at an angle instead of straight, and the sight is forced to chase the impact. This is especially common after a string change, a peep adjustment, or after swapping to a heavier arrow.
Square the nocking point: Hang your bow square on the string at the nocking point. The brass nock or D-loop should sit perpendicular to the string – 90 degrees – with no tilt toward the riser or the cam side.
Measure height above square: Standard starting position is 1/8 to 3/8 inch above the square line. Heavier arrows often want the upper end of that range; lighter target arrows can sit closer to square.
Move in 1/16 inch increments: Nocking point position is a high-leverage adjustment. A 1/16 inch move can shift impact by an inch or more at 20 yards, so work slowly and verify after each change.
Inspect the serving: If the serving around the nocking point is fuzzy, flat, or separating, the nock can drift on its own. Replace the serving before trusting any nocking point adjustment.
Success indicator: Arrows fly straight through paper without a tail-high or tail-low pattern, and your sight regains measurable adjustment range without sacrificing point of impact at 20 yards.
Center shot is the horizontal relationship between the arrow, the string, and the riser. When center shot is off, arrows drift left or right as distance increases, and the sight has to compensate horizontally, which can crowd out vertical travel on a multi-pin housing.
Use a laser or mirror tool: A laser center shot tool is the fastest way to confirm alignment. The budget option is to sight down the string with a mirror placed behind the riser, looking for the arrow shaft to split the riser centerline.
Measure horizontal offset: For a right-handed shooter, the arrow should sit centered or slightly offset to the left of the Berger hole (the reverse for left-handed). Most setups land between 1/16 and 1/8 inch of offset.
Adjust the rest laterally: Move the rest in 1/32 inch steps. Center shot is sensitive, but most rests offer a wider lateral window than vertical, so you usually have room to work.
Walk-back tune to confirm: Shoot at 10, 20, and 30 yards from the same anchor. If impacts drift horizontally as distance increases, your center shot still needs work. Once they stack vertically, you are dialed in.
For foundational center shot alignment concepts and sight radius principles, see our guide to bow sight adjustment.
Success indicator: Arrow impacts stack vertically at 10, 20, and 30 yards from the same anchor point, with no horizontal drift.
By step 5 you have corrected the most common upstream causes. Now you need two diagnostic tests that confirm the bow is actually flying the arrow straight. Paper tuning reveals arrow flight issues at the micro level; walk-back tuning confirms center shot at multiple distances.
Paper tuning setup:
Stretch paper or butcher paper tight in your tuning frame, 4 to 6 feet in front of your shooting line.
Stand 6 to 8 feet from the paper and shoot through it with field points. Shoot straight at the paper, not at an angle.
Read the tear pattern. A clean hole with three small cuts where the fletching passes through is a well-tuned bow. A high tear (nock end of the arrow is higher than the point as it exits) means the arrow is leaving the bow nock-high – lower the rest. A low tear means raise the rest. Left and right tears indicate center shot issues.
Adjust in 1/16 inch increments and re-test until you get a clean bullet hole.
Paper Tear Pattern Quick Reference
Clean hole (3 small fletching cuts): Bow is tuned. No change needed.
High tear (nock above point): Arrow leaves nock-high. Lower the rest in 1/16 inch steps.
Low tear (nock below point): Arrow leaves nock-low. Raise the rest in 1/16 inch steps.
Left tear (right-handed shooter): Arrow is fishtailing weak. Move rest left or stiffen the setup.
Right tear (right-handed shooter): Arrow is fishtailing stiff. Move rest right or weaken spine.
Tear with porpoising or angled cut: Cam timing or rest timing issue. Check cam sync first.
Walk-back tuning:
Stand at 20 yards and shoot three arrows at a target with a horizontal line drawn across it, aligned with your 20-yard pin.
Without changing your anchor, step back to 30 yards and shoot three more arrows. Then 40 yards. Use the same horizontal reference line on a fresh target face at each distance.
Look at the pattern of impacts. If they fall on the horizontal line at all distances, your center shot is correct. If impacts drift right as distance increases, move the rest left. If they drift left, move the rest right.
Make 1/32 inch rest moves, repeat, and confirm before moving on.
Success indicator: A clean bullet hole through paper at 6 to 8 feet, plus walk-back impacts that stack vertically across 20, 30, and 40 yards.
If you have worked through steps 1 through 5 and your sight is still pinned at the top of the housing, the remaining option is to move the sight housing itself. This is the most invasive change because it alters your sight radius, which changes pin gap, sight picture, and how forgiving the sight is at long range.
Mark the current position: Place tape on the riser along the sight bar so you know exactly where the housing sat before you started.
Move the housing closer to the riser: Pulling the housing back 1/4 to 1/2 inch effectively adds upward travel because the angle of adjustment changes. Most shooters see noticeably more room within a half-inch move.
Consider an extension bar instead: Some sights accept an extension bar that moves the housing further out. This increases sight radius (larger pin gaps) and reduces total travel, so it usually makes bottoming out worse, not better. Use it only when you need a more forgiving sight picture for very long range.
Resight from scratch: Any major sight housing move resets all of your pin gaps. Start at 20 yards with a single pin and walk it out to your farthest distance before touching the others.
Success indicator: Every distance you want to shoot (20 through 60-plus yards) is reachable with pins in the middle 50 percent of their adjustment range, leaving room for future fine-tuning.
If you have finished the six steps and still have issues, the problem likely lives deeper in the bow’s mechanics. These advanced checks address causes that do not show up on paper or in walk-back tests alone.
Cam timing: If the top and bottom cams do not rotate in sync, the bow stores and releases energy unevenly, and your sight cannot hold a steady zero. Draw the bow with a helper watching both cams. They should reach their timing marks (a string alignment mark, usually a colored thread wrap or a mark on the cam) at the exact same moment. Anything more than 1/8 inch off means a trip to a shop with a bow press.
Draw weight and draw length changes: Reducing draw weight by 2 to 3 pounds slows the arrow and drops the trajectory, which can restore vertical sight range on bows at the top end of their draw weight. A draw length change of even 1/4 inch shifts anchor point and usually requires a full retune starting at the peep.
Bareshaft tuning: Some archers prefer bare shaft tuning as an additional check. Shoot an unfletched arrow through paper alongside a fletched one. If the bare shaft tears the same pattern as the fletched arrow, your tuning is locked in. If the bare shaft goes weak (left for right-handed shooters), your arrow spine is too stiff or your rest is too far left. If it goes stiff, the opposite is true.
Broadhead tuning: Hunting broadheads have more drag than field points and will sometimes fly slightly differently even when the bow is perfectly tuned with field points. Always finish your tuning session by shooting the actual broadheads you plan to hunt with, and adjust your sight to match.
Upgrade to a sight with more adjustment range: Budget sights often run out of travel by 50 yards even on a perfectly tuned bow. Brands like Spot Hogg, Axcel, and CBE are well known for generous elevation travel and micro-adjustable dials. If you have chronic bottoming-out issues across multiple bows and tuning sessions, the sight itself may be the weak link.
Professional tuning: A pro shop tune typically runs $50 to $100 and includes paper tuning, walk-back tuning, broadhead tuning, and a full mechanical inspection. If you have spent an afternoon on the six steps without solving the issue, the cost is usually less than replacing damaged components or buying a new sight on a guess.
Prevention is faster than troubleshooting. Build these habits into your yearly archery routine and you will rarely see a bottomed-out sight again.
Document your baseline: Measure and record peep height in degrees, nocking point height, rest height, sight housing distance from the riser, and each pin’s setting. Photograph the whole rig. When something changes, you have an exact target to return to instead of guessing.
Schedule a monthly check: During hunting season, shoot a paper tune once a month. In the off-season, a quarterly check is usually enough. String stretch, serving wear, and tiny rest shifts all add up faster than most archers realize.
Lock your anchor point: Anchor drift is the most common cause of gradual sight issues. Use a kisser button or a reference on your face to keep the anchor consistent. If your anchor has changed because of a draw length adjustment, retune the peep before you retune anything else.
Change one variable at a time: New arrows? Keep the rest, peep, and nocking point where they are until the new arrows are sighted in. New string? Re-measure the peep and nocking point, then re-verify everything. Compounding changes is how minor adjustments turn into full retunes.
Inspect string serving twice a year: A worn or fuzzy serving lets the peep rotate and the nocking point drift. Replace the serving before trusting any other tuning step. This is one of the most frequently missed causes on forums, and a $10 serving job can prevent a $150 shop visit.
Replace strings on a schedule: Most compound bow strings should be replaced every 2 to 3 years, or sooner if you shoot frequently. Old strings stretch unevenly and slowly eat your sight adjustment range all season. When you swap strings, have the shop install the new peep and nocking point at the same measured positions as the old string.
Practice with your hunting setup: Field points and broadheads of the same weight can still fly differently because of drag and blade design. Spend the last 20 minutes of each practice session shooting your actual hunting broadheads. If they impact differently than field points, that is the sight setting you should trust on opening day.
Pro Tip: Build a small “tuning kit” with your bow square, Allen wrenches, nocking pliers, a notepad, and a sharpie. Keep it in your bow case so you can make a quick adjustment at the range or in the field without driving home for tools.
Work through six steps in order: (1) check peep height and rotation, adjusting in 1/8 inch increments and re-serving if the peep spins; (2) verify arrow rest height through the Berger hole, adjusting in 1/8 inch steps; (3) confirm nocking point sits 1/8 to 3/8 inch above square; (4) adjust center shot alignment until a walk-back tune stacks vertically; (5) paper tune and read the tear pattern, then follow up with a walk-back tune; (6) reposition the sight housing closer to the riser only if needed. Most issues resolve in steps 1 through 3.
Closer to the riser increases effective vertical adjustment range but reduces sight radius, which makes pin gaps smaller and the sight picture less forgiving. Farther from the riser increases sight radius and pin gaps but reduces total vertical travel. Start with the manufacturer’s recommended mounting position, and only move the housing after the rest of the six-step method is complete.
Common signs include angled or porpoising paper tears, inconsistent groups at the same distance, arrows drifting left or right as distance increases, unusual noise or hand shock at the shot, serving separation or fuzz, cam timing marks that do not align at full draw, and a sudden need for major sight adjustments without any equipment changes.
Start by moving the sight housing to its lowest position and as far forward (closest to the riser) as the mount allows. Set your 20-yard pin to the middle of its adjustment range, then walk-back tune at 20, 30, and 40 yards to verify center shot. Adjust each remaining pin from there, and document the final settings for future reference.
The most common causes, in order, are: peep height or peep rotation wrong, arrow rest height off relative to the Berger hole, nocking point not perpendicular to the string, center shot misaligned, cam timing off, or the sight housing positioned too far from the riser. In most cases the cause is upstream of the sight rather than a defect in the sight itself.
First, complete the six-step method to confirm the bow is tuned. If more vertical range is still needed, move the sight housing closer to the riser, switch to lighter arrows (which requires a retune), reduce draw weight by 2 to 3 pounds, or upgrade to a sight with more elevation travel such as a Spot Hogg, Axcel, or CBE model.
For a right-handed shooter, common causes include grip torque (squeezing the riser), center shot set too far right, cam timing off, a windage knob that has drifted, or an inconsistent anchor point. Check grip pressure first since most horizontal misses are form-related rather than equipment-related.
Digital bow sights are restricted or banned for hunting in many states, including (but not limited to) Washington, Oregon, Idaho, Montana, Colorado, Wyoming, Utah, Nevada, and Arizona. Regulations change frequently, so always check your specific state’s wildlife agency website before hunting with any electronic sighting aid. Traditional pin and fiber-optic sights remain legal in all states.
Fixing a bottomed out bow sight is almost always a tuning problem in disguise. Walk through the six steps in order, make small adjustments, verify after each change, and resist the urge to move the sight housing first. By the time you finish step 5, your pins should be back in the middle of their adjustment range with travel to spare.
Once the immediate problem is solved, build a habit of documenting your settings and checking them monthly during hunting season. Most bottomed-out sights are preventable, and the archers who document their setups almost never have to chase the same problem twice in a row.
If you reach the end of step 5 and still have issues, do not be afraid to take the bow to a pro shop. A $75 tune is cheaper than a new sight purchased on a guess, and a good tech will catch cam timing or serving wear issues that are easy to miss from the shooting line. Hunting season is too short to spend it fighting a sight that will not hold a zero.