Best Birding Blogs 2025: Top Resources for Bird Enthusiasts
Discover the best birding blogs with our expert reviews of 12 top resources. From photography tips to scientific insights, find…
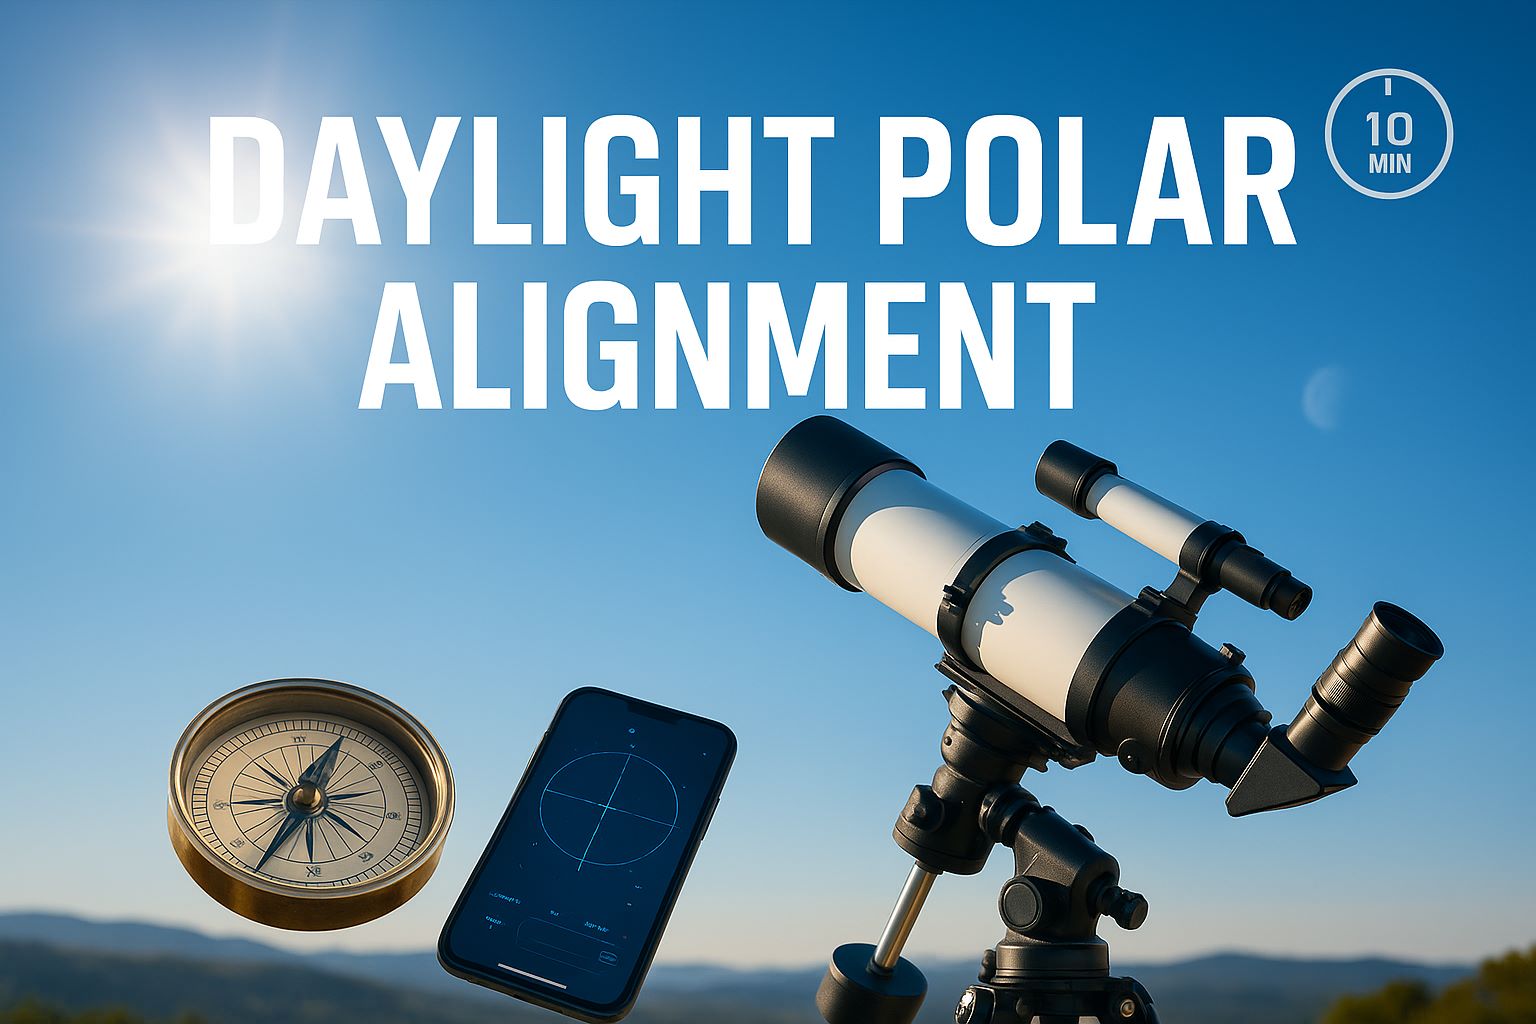
When I first started in astrophotography, I assumed polar alignment was something you could only do at night. After spending countless hours waiting for darkness just to set up my mount, I discovered several reliable methods for achieving accurate polar alignment during daylight hours. This comprehensive guide shares the techniques I’ve perfected over years of daytime solar observation and preparation for nighttime imaging sessions.
Polar alignment is the process of aligning your telescope’s equatorial mount with Earth’s axis of rotation. Getting this right means your telescope can track celestial objects smoothly across the sky with minimal adjustments. While traditional methods rely on seeing Polaris or southern celestial pole stars, daytime alignment opens up possibilities for solar observation, equipment testing, and getting a head start on your evening sessions.
In this guide, I’ll walk you through four proven methods for daytime polar alignment, each with its own advantages depending on your equipment and accuracy requirements. We’ll cover essential safety protocols, troubleshooting common issues, and techniques for verifying your alignment accuracy before the stars come out.
Before diving into the methods, let’s establish why polar alignment is crucial for telescope operation. An equatorial mount has two axes: the right ascension (RA) axis and the declination (Dec) axis. When the RA axis points directly at the celestial pole, your mount can track objects across the sky by rotating around just this single axis, compensating for Earth’s rotation.
Poor polar alignment leads to several problems I’ve encountered firsthand. Your tracked objects will drift out of view, requiring constant manual corrections. For astrophotography, this means star trails instead of pinpoint stars, even with short exposures. During solar observation, the sun will gradually drift out of your field of view, making it difficult to maintain consistent framing for time-lapse sequences or detailed observations.
The accuracy requirements vary based on your intended use. Visual observation can tolerate alignment within a degree or two of the pole. Solar photography typically needs alignment within 30 arcminutes for acceptable results. Deep-sky astrophotography demands the highest precision, often requiring alignment within 5 arcminutes or better for long exposures without autoguiding.
One advantage of daytime alignment is the ability to take your time without racing against astronomical twilight. You can methodically work through the process, make adjustments, and verify your results without the pressure of losing precious dark sky time. This is particularly valuable when setting up for solar eclipses or transit events where alignment accuracy directly impacts your ability to capture the entire sequence.
⚠️ CRITICAL SAFETY WARNING: Never look at the sun through any optical device without proper solar filters. Permanent eye damage or blindness can occur instantly. This includes telescopes, binoculars, camera viewfinders, and finder scopes.
Working with telescopes during daylight requires strict safety protocols. The most critical rule: never point your telescope anywhere near the sun without appropriate solar filters properly secured over the objective lens or mirror. Even a brief glimpse of unfiltered sunlight through a telescope can cause permanent retinal damage.
Remove or cap all finder scopes before beginning any daytime alignment work. I learned this lesson when a friend’s red dot finder focused sunlight onto the mount, melting the plastic housing. Even devices that don’t magnify can concentrate dangerous amounts of solar energy. If you must use a finder during daytime, ensure it’s covered with an appropriate solar filter or use it only when pointed well away from the sun.
When using solar filters, inspect them carefully before each use. Look for pinholes, scratches, or signs of deterioration by holding the filter up to a bright indoor light. Any damage means the filter is unsafe and must be replaced immediately. Secure filters with tape or retention rings to prevent them from falling off during observation.
For methods involving the sun’s shadow, work in the telescope’s shadow whenever possible. Wear sunglasses and use sunscreen, as you’ll be spending extended time outdoors. Keep lens caps on all equipment not actively being used, and never leave optical equipment unattended where others might inadvertently look through it.
The compass method is my go-to technique for quick daytime polar alignment when I need reasonable accuracy without complex calculations. This method works anywhere you have a clear view of the northern or southern horizon and can achieve alignment accuracy within 1-2 degrees, sufficient for visual observation and short-exposure solar photography.
Start by determining your exact location’s coordinates using your smartphone’s GPS. You’ll need both latitude and longitude to calculate magnetic declination – the difference between magnetic north (where your compass points) and true north (where the celestial pole actually is). I use the NOAA magnetic declination calculator or apps like Compass 55 that automatically apply this correction.
Set your mount’s latitude adjustment to match your location’s latitude. For example, at 40° north latitude, tilt the polar axis to 40° using the mount’s latitude scale. This scale is usually marked on the side of the mount head. Use a digital level or inclinometer app to verify the angle if your mount’s markings are worn or unclear.
Level your tripod carefully using a bubble level on the mount head, not the tripod legs. Even slight leveling errors will translate into polar alignment errors. I carry a small carpenter’s level specifically for this purpose, as many tripod bubble levels aren’t precise enough for accurate alignment.
With your mount leveled and latitude set, use your corrected compass bearing to point the mount toward true north (or south in the Southern Hemisphere). Stand behind the mount and sight along the polar axis while rotating the entire mount in azimuth. Modern smartphone apps like PhotoPills or SkySafari include augmented reality features that overlay the celestial pole’s position on your camera view, making this process more intuitive.
For improved accuracy, use the shadow method to refine your compass alignment. On a sunny day, observe the shadow cast by the mount’s polar axis. When the shadow appears shortest and falls directly below the axis, you know the axis is pointing due north-south. This occurs at solar noon, which you can calculate for your location using online tools or astronomy apps.
Fine-tune the alignment by making small adjustments to both altitude and azimuth while monitoring a distant terrestrial object through the telescope. Choose a target at least a mile away to minimize parallax. If the object drifts consistently in one direction when you move the telescope in RA, adjust the mount’s azimuth. Vertical drift indicates an altitude error.
Solar alignment provides excellent accuracy for those with proper solar filters and can achieve precision within 10-15 arcminutes. This method uses the sun’s predictable position to establish accurate polar alignment during daylight. I’ve found this particularly useful when preparing for solar eclipse photography or hydrogen-alpha solar observation.
Required Equipment: ISO 12312-2 certified solar filter for your telescope, solar finder or filtered finder scope, smartphone with planetarium app showing sun’s current coordinates, and accurate time source (GPS or internet time).
Begin by securely attaching your solar filter to the telescope’s objective. Double-check that it’s firmly in place and won’t slip during movement. Point the telescope toward the sun using the shadow method – adjust the telescope until its shadow is minimized on the ground. This gets you close enough to find the sun in a filtered finder or low-power eyepiece.
Center the sun in your telescope’s field of view using the mount’s slow-motion controls. Note the exact time and look up the sun’s current right ascension (RA) and declination (Dec) coordinates using your planetarium app. Set your mount’s RA and Dec circles to match these coordinates. If your mount has digital setting circles or a GoTo system, sync it to the sun’s position.
With the sun centered and tracking, monitor its drift over 5-10 minutes. If the sun drifts north or south, your polar axis altitude needs adjustment. East-west drift indicates azimuth error. This drift method works identically to nighttime drift alignment but uses the sun as your target star.
Make systematic adjustments based on the drift direction. If the sun drifts north, lower the polar axis altitude slightly. For southward drift, raise it. Eastern drift means rotate the mount clockwise in azimuth (when viewing from above), while western drift requires counterclockwise rotation. After each adjustment, recenter the sun and monitor drift again.
The key to success is making small, incremental adjustments. Large corrections often overshoot, leading to a frustrating back-and-forth process. I typically make adjustments of no more than 1/4 turn of the adjustment knobs at a time. Keep detailed notes of your adjustments and their effects to develop a feel for your specific mount’s response.
For enhanced precision, use a reticle eyepiece or camera with crosshairs displayed. This allows you to detect subtle drift that might not be apparent with a standard eyepiece. Some dedicated solar observers use webcams with solar filters to monitor drift on a laptop screen, providing a comfortable and precise way to track alignment progress.
Modern smartphones contain surprisingly accurate sensors that can facilitate precise polar alignment during daylight. This method combines digital inclinometers, GPS, and augmented reality to achieve alignment accuracy comparable to traditional star alignment methods. I’ve successfully used this technique to achieve sub-30 arcminute alignment consistently.
Download a quality inclinometer app that displays angles to at least 0.1-degree precision. I recommend apps that can calibrate against a known flat surface and save reference angles. Also install a planetarium app with augmented reality features – SkySafari, Star Walk 2, or Stellarium Mobile all work well for this purpose.
Start by precisely leveling your mount base using the digital level. Place your phone on the mount’s flat surfaces, checking multiple positions to ensure true level. Many mounts have slight manufacturing irregularities, so check several spots and average your readings. Record these baseline measurements for future reference.
Your polar axis should be tilted at an angle equal to your latitude. However, atmospheric refraction and local conditions can introduce small errors. Use your GPS coordinates to determine your exact latitude to the nearest arcminute. Online tools like GPS Coordinates finder provide this precision.
Place your smartphone along the polar axis of your mount, using a straight edge if necessary to bridge any gaps. The phone’s inclinometer should read your latitude when properly aligned. Some apps allow you to set a target angle and provide audio or visual feedback as you approach it, making fine adjustments easier.
For mounts without convenient flat surfaces along the polar axis, create a reference tool. I use a piece of aluminum angle bracket that fits snugly against the mount’s dovetail saddle. This provides a consistent, flat surface for phone placement and can be calibrated once and reused for future sessions.
Modern planetarium apps can overlay the celestial pole’s position on your phone’s camera view. Stand behind your mount and use the app to visualize exactly where the pole is located relative to your horizon. This visual reference makes azimuth adjustment intuitive – simply rotate the mount until the polar axis points directly at the marked pole position.
The accuracy of AR alignment depends on your phone’s compass calibration. Before starting, calibrate your phone’s compass by moving it in a figure-8 pattern away from magnetic interference. Metal tripod legs, motors, and counterweights can affect readings, so take measurements from a consistent position.
Cross-check your alignment using multiple methods within the same app. Most planetarium apps can display compass bearings, altitude angles, and celestial coordinates simultaneously. When all three indicators agree with your mount’s pointing direction, you’ve achieved good alignment. This redundancy helps identify and correct systematic errors.
Computerized GoTo mounts offer sophisticated daytime alignment routines that can achieve excellent polar alignment without seeing any celestial objects. These methods rely on the mount’s ability to calculate celestial positions based on time, date, and location data. I’ve found these automated routines particularly valuable when setting up remote imaging rigs or when training newcomers to astronomy.
Initialize your GoTo mount with accurate time, date, and location information. GPS-equipped mounts handle this automatically, but manual entry requires attention to detail. Ensure your timezone and daylight saving time settings are correct – a one-hour error in time translates to 15 degrees of RA error, completely ruining your alignment.
Most GoTo mounts offer a “polar alignment assistant” or similar feature that works during daytime. The Celestron All-Star Polar Alignment (ASPA), Skywatcher’s Polar Alignment routine, and iOptron’s Polar Alignment feature all function without seeing Polaris. These routines use the mount’s encoders and calculated celestial mechanics to determine and correct polar alignment errors.
Start with rough polar alignment using a compass or smartphone app to get within 5 degrees of the pole. This gives the mount’s calculations a reasonable starting point. Level the mount carefully, as most alignment routines assume a level base for their calculations.
Select a terrestrial target at least one mile distant for the alignment routine. The target should be stationary and easily identifiable – radio towers, mountain peaks, or distinctive buildings work well. Center this target in your eyepiece and tell the mount to use it as an alignment reference. The mount will then slew to calculated positions and prompt you to recenter the same target using only the mount’s altitude and azimuth adjustments.
The mount’s computer calculates the polar alignment error based on how much adjustment was needed to recenter the target. Some systems provide numerical readouts of your alignment error in arcminutes, while others simply guide you through the correction process. Follow the mount’s prompts carefully, making only the adjustments it specifies.
Advanced mounts with plate-solving capabilities can achieve remarkable daytime accuracy. By taking images of terrestrial targets from multiple positions and analyzing the geometric relationships, these systems can calculate polar alignment errors to within a few arcminutes. This technology, originally developed for military applications, has become increasingly accessible to amateur astronomers.
After completing any alignment method, it’s crucial to verify your accuracy before committing to an observation session. During daytime, we can’t use the traditional star drift method, but several alternatives provide reliable accuracy assessments.
The terrestrial drift test offers immediate feedback on alignment quality. Center a distant object in a high-power eyepiece and track it for 15-30 minutes using only the RA motor. Any drift indicates alignment error – vertical drift suggests altitude error, while horizontal drift indicates azimuth error. The rate of drift correlates with the magnitude of misalignment.
For quantitative assessment, calculate your theoretical drift rate based on assumed alignment errors. A one-degree polar alignment error causes approximately 15 arcseconds of drift per minute at the celestial equator. By measuring actual drift against this baseline, you can estimate your alignment accuracy to within a few arcminutes.
Smartphone apps can verify alignment by comparing your mount’s polar axis angle to theoretical values. Apps like PolarScope Align Pro or PS Align Pro calculate exactly where Polaris should appear in your polar scope for perfect alignment, even during daylight when you can’t see it. By comparing your physical alignment to these calculations, you can assess accuracy.
If you have a camera attached, take test images of distant terrestrial objects with long exposures (30-60 seconds). Even slight polar misalignment will show as curved star trails or, in this case, motion blur in your terrestrial target. The direction and magnitude of blur indicate the alignment error direction and approximate size.
For solar observers, the sun itself provides an excellent alignment check. With proper filtration, track the sun for an hour, noting any drift patterns. The sun’s large apparent size makes small drifts easily noticeable. Document the drift direction and rate for future reference – this data helps you recognize and correct systematic errors in your alignment procedure.
Over years of daytime alignment practice, I’ve encountered numerous challenges and developed solutions for the most common problems. Understanding these issues and their fixes will save you hours of frustration and improve your alignment consistency.
Magnetic deviation caused by nearby metal objects is a frequent source of alignment error. Your mount itself contains significant ferrous metal that affects compass readings. To minimize this, take compass readings at least 3 feet from the mount, then transfer the bearing to your setup. Mark true north on the ground with tape or chalk for reference.
Urban environments present additional magnetic challenges from buildings, vehicles, and underground utilities. If your compass behaves erratically or gives inconsistent readings, switch to smartphone GPS-based methods or use the sun shadow technique at solar noon for true north determination.
Mechanical issues in the mount can masquerade as alignment problems. Before adjusting alignment, verify that your mount’s clutches are properly tensioned and gears are meshing correctly. Excessive backlash in the adjustment mechanisms makes precise alignment nearly impossible.
Some mounts have limited adjustment ranges that may not accommodate all latitudes. If you’re operating near the extremes of your mount’s latitude range, you may need to shim the mount base or use an equatorial wedge to achieve proper polar axis angle. Document these modifications for consistent setup at your observing location.
Temperature changes during alignment can cause metal components to expand or contract, shifting your carefully achieved alignment. If you’re aligning in cool morning air for afternoon solar observation, expect some drift as temperatures rise. Plan for a quick alignment check and adjustment after thermal equilibrium is reached.
Wind loading affects alignment stability, particularly with larger telescopes. Even moderate winds can flex the mount enough to appear as alignment error. If possible, perform alignment procedures during calm conditions and use wind shields or observing tents for protection during critical adjustments.
Understanding how much alignment precision you actually need prevents over-engineering your setup and wasting valuable observing time. Different astronomical activities have vastly different polar alignment tolerance levels.
For casual visual observation, alignment within 2-3 degrees of the pole is entirely adequate. Objects will stay in a low-power eyepiece for 10-15 minutes, and occasional recentering is no hardship. This level can be achieved with basic compass alignment in under five minutes.
Solar observation and short-exposure photography require better precision – typically within 30 arcminutes. This keeps the sun centered for 30-45 minutes and allows tracked exposures up to 30 seconds without noticeable trailing. Any of the smartphone-assisted methods can achieve this accuracy level.
Serious astrophotography demands the highest precision, especially for long exposures without autoguiding. Alignment within 5 arcminutes or better is the target, requiring careful application of drift alignment or computerized polar alignment routines. Plan to spend 30-45 minutes achieving and verifying this level of accuracy.
There’s a point of diminishing returns in polar alignment refinement. Moving from 1 degree to 30 arcminutes error might take 10 minutes of adjustment, while improving from 30 to 5 arcminutes could require another 30 minutes. Consider your imaging goals and whether that time investment is worthwhile for your specific session.
For portable setups that must be aligned each session, developing a efficient routine is more valuable than achieving perfect alignment. I maintain a checklist and use consistent reference marks on my equipment to achieve “good enough” alignment quickly and reliably.
Polar alignment requirements and challenges vary with your observing location and the time of year. Understanding these variations helps you adapt your techniques for consistent results.
At extreme latitudes, polar alignment becomes geometrically challenging. Near the equator, the polar axis points nearly horizontal, making traditional altitude adjustments difficult. Near the poles, the axis points nearly vertical. Special wedges or mounting adaptors may be necessary for proper alignment at these locations.
Seasonal changes affect daytime alignment opportunities. In summer, longer days provide more flexibility for solar alignment methods but also mean waiting longer for stellar verification. Winter’s shorter days offer quicker transition to nighttime verification but may present weather challenges for extended outdoor alignment procedures.
Local horizon obstructions impact alignment options, particularly in urban or mountainous areas. If you can’t see the true horizon, you’ll need to calculate the angular height of your visible horizon and adjust your measurements accordingly. Smartphone apps with inclinometer functions can measure these obstruction angles for incorporation into your alignment calculations.
The field of telescope alignment continues to evolve with new technologies making precision alignment more accessible. Electronic polar scopes with built-in GPS and accelerometers can achieve sub-arcminute alignment in minutes. Products like the QHY PoleMaster or iPolar have revolutionized polar alignment for serious astrophotographers.
Software solutions continue to improve as well. Plate-solving technology, once requiring dark skies and visible stars, now works with daytime sky images in some specialized applications. These systems analyze the sky’s polarization patterns or atmospheric gradients to determine precise pointing information.
Machine learning algorithms are beginning to appear in alignment software, learning from your historical alignment sessions to predict and compensate for systematic errors in your specific equipment. These systems can account for mount flex, non-orthogonal axes, and other mechanical imperfections that traditional alignment methods ignore.
Yes, I regularly achieve alignment within 15-30 arcminutes using daytime methods. While not as precise as stellar alignment, it’s more than adequate for most observing purposes and can be refined once stars become visible.
For visual observation, alignment typically remains stable throughout a session unless you bump the mount. For imaging, I check alignment every 2-3 hours or if I notice consistent drift in one direction.
Accurate time and location data are crucial. A one-minute error in time or a few arcminutes in position can introduce significant alignment errors. Always verify these parameters before starting alignment procedures.
For occasional use, smartphone apps and basic techniques suffice. If you frequently set up portable equipment or require consistent sub-10 arcminute alignment, electronic polar scopes or specialized software are worthwhile investments.
All these techniques work in the Southern Hemisphere with minor modifications. Use south instead of north for compass alignment, and remember that altitude adjustments work opposite to Northern Hemisphere conventions.
Rotate your mount in RA while watching a distant terrestrial object through the polar scope. If the object stays centered on the reticle throughout rotation, the scope is properly aligned. If it traces a circle, adjustment is needed.
Smartphone compass apps with magnetic declination correction can achieve 1-2 degree accuracy in under 5 minutes. This is perfectly adequate for visual observation and can be refined later if needed.
If you only moved the telescope on its axes (RA and Dec), alignment is preserved. If you moved the entire mount or adjusted the tripod legs, you’ll need to verify and likely redo the alignment.
Daytime polar alignment opens up new possibilities for astronomical observation and photography. Whether you’re preparing for a night of deep-sky imaging, conducting solar observations, or simply wanting to test equipment during convenient daylight hours, these techniques provide reliable paths to accurate alignment.
The key to success lies in understanding your accuracy requirements and choosing the appropriate method for your situation. Basic compass alignment takes minutes and works fine for casual observation. Smartphone-assisted methods balance speed with precision for most applications. Solar and computerized alignment procedures offer the highest accuracy when conditions and equipment permit.
Remember that perfect polar alignment is rarely necessary or practical. Focus on achieving alignment appropriate for your observing goals and equipment capabilities. With practice, you’ll develop an efficient routine that gets you observing quickly while maintaining the precision your astronomy pursuits require.
Safety remains paramount when working with optical equipment during daylight. Never compromise on solar safety protocols, and always assume any telescope might accidentally be pointed at the sun. Proper filters, careful procedures, and constant vigilance prevent the instant, irreversible eye damage that can result from solar observation mistakes.
As technology continues to advance, daytime polar alignment becomes increasingly accessible and precise. However, understanding the fundamental principles behind these techniques ensures you can achieve good alignment regardless of what tools are available. The methods I’ve shared here have served me well across diverse locations and conditions, from remote dark sky sites to urban backyards.
Take time to practice these techniques when you’re not under pressure to begin an observation session. Build familiarity with your equipment’s quirks and your local magnetic environment. Document your procedures and results to build a personal alignment database. This investment in skill development pays dividends every time you set up your telescope, turning what many see as a tedious chore into a quick, confident process that gets you observing sooner and with better results.