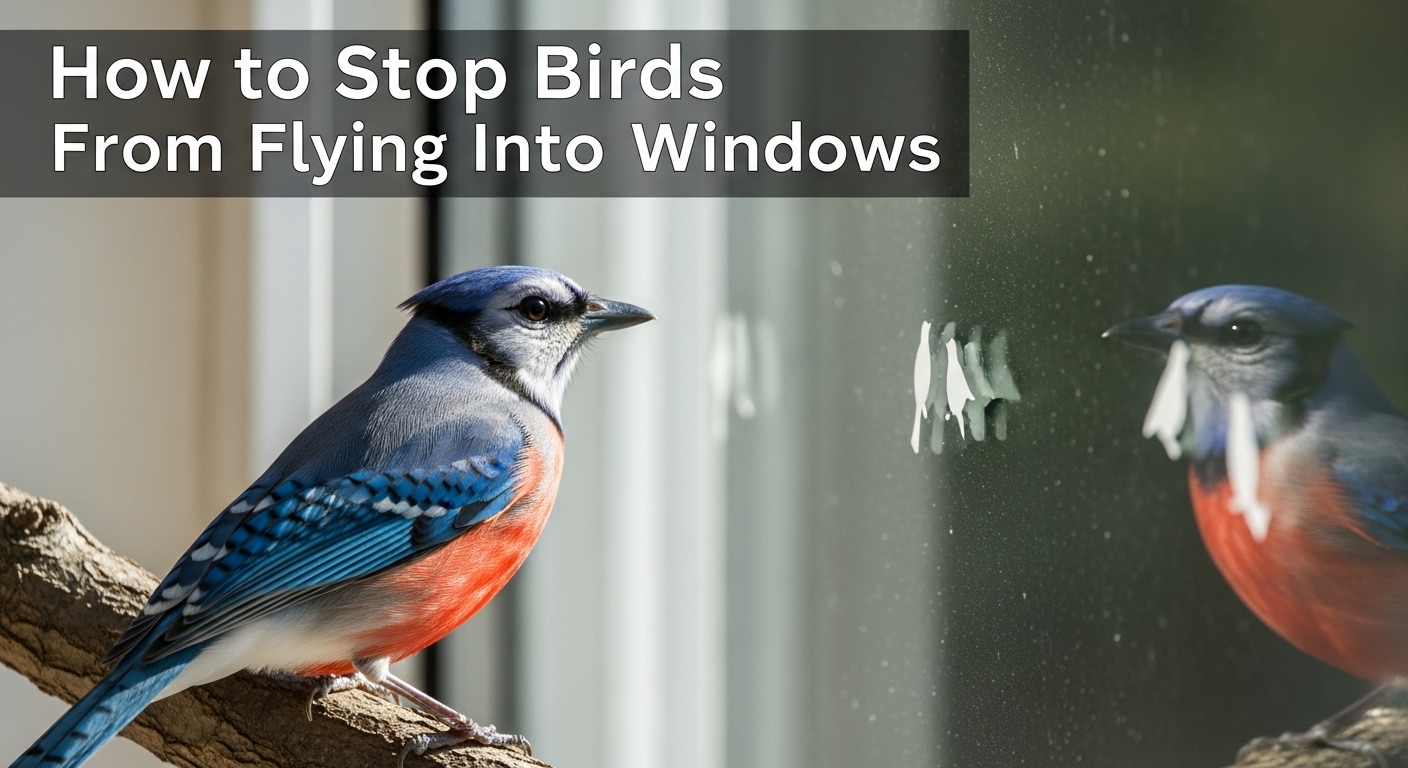
The sudden thud against your window, the heartbreaking sight of a beautiful bird lying motionless below—it’s an experience that leaves millions of homeowners feeling helpless and guilty each year. With up to 1 billion birds dying from window collisions annually in the United States alone, this represents one of the most significant human-caused threats to our feathered friends.
How to stop birds from flying into windows? The solution lies in making your glass visible to birds through strategic markings spaced no more than 2 inches apart, applied to the exterior surface of windows using inexpensive materials like tempera paint, soap, or specially designed commercial products.
Having spent years documenting wildlife through my camera lens, I’ve witnessed both the tragedy of preventable collisions and the joy of successful interventions. This guide combines scientific research, proven methods, and practical experience to help you protect birds while maintaining your home’s aesthetic appeal.
Whether you’re a homeowner, renter, or building manager, these solutions range from completely free DIY options to professional installations, ensuring everyone can make a difference. By implementing these strategies, you can reduce window collisions by up to 95%, creating a safer environment for the birds we all cherish.
Birds collide with windows because they simply don’t perceive glass as a barrier. Unlike humans, birds don’t understand architectural cues like window frames or handles. Instead, they rely on natural indicators to navigate their environment.
The primary culprit is reflection. Windows mirror surrounding trees, sky, and vegetation, creating what appears to be an inviting continuation of habitat. Birds see these reflections and fly toward what they believe is safe space, often at full speed. This explains why collisions peak during daylight hours when angles create the most convincing reflections.
Transparency poses another significant threat. Birds see through glass to plants, light fixtures, or other attractive features inside your home and attempt to fly through what appears to be an open passage. This is particularly problematic with glass doors, corner windows, or floor-to-ceiling installations.
During breeding season, many birds exhibit territorial behavior known as reflection aggression. Species like cardinals and robins will repeatedly attack their own reflection, perceiving it as a rival bird. These persistent attacks can result in injury or exhaustion, even if direct collisions don’t occur.
Migration periods increase collision risk significantly. Disoriented by urban environments and traveling unfamiliar routes, migratory birds rely heavily on visual cues. Glass buildings and windows can become deadly obstacles, especially during spring and fall when billions of birds navigate between breeding and wintering grounds.
⚠️ Critical Factor: Buildings under 4 stories cause the vast majority of bird deaths from window collisions. While skyscrapers capture headlines, residential homes are responsible for most fatalities due to their sheer numbers.
Preventing bird collisions requires making your windows visible to birds through physical markers. Research has established that markings must follow specific guidelines to be effective: spaced no more than 2 inches apart horizontally and 4 inches apart vertically, and applied to the exterior surface of the glass.
The 2-inch spacing rule exists because most small birds won’t fly through gaps smaller than 2 inches. This critical measurement ensures that even the smallest species recognize the barrier. Interior applications rarely work because reflections occur on the exterior surface, making exterior placement essential.
Tempera Paint Method: Tempera paint stands out as one of the most effective and economical solutions. Applied with brushes, sponges, or even fingertips, tempera creates visible patterns that birds easily recognize. This washable paint lasts through rain but can be removed when needed, making it ideal for seasonal use or temporary situations.
I’ve personally used tempera paint patterns on my home’s most problematic windows, reducing collisions from several per week to zero over a three-year period. The key is creating dense patterns rather than isolated designs—think abstract art or seasonal themes rather than single shapes.
Soap Markings: A simple bar of soap can provide temporary but effective window coverage. Drawing patterns, dots, or lines on the exterior glass creates visible marks that last 2-3 months depending on rainfall. This zero-cost solution works well for immediate protection when you first notice collision problems.
Masking Tape Patterns: Create grids, stripes, or decorative patterns using painter’s tape or masking tape. While less permanent than paint, tape provides immediate visibility and can be arranged in attractive designs. Remember to use UV-resistant tape if possible, as standard masking tape can deteriorate in sunlight.
String Curtains (DIY Zen Curtains): Create hanging strings using parachute cord or fishing line spaced 2 inches apart. Mount these outside windows for a decorative solution that creates gentle movement, further deterring birds. Commercial versions like Acopian BirdSavers are available, but DIY versions cost just a few dollars per window.
Window Decals and Stickers: Specialized bird collision prevention decals differ from decorative stickers in their UV-reflective properties. Products like Window Alert feature coatings visible to birds but nearly invisible to humans. Remember that single large decals won’t work—you need sufficient coverage following the 2-inch rule.
Collision Prevention Film: Specialty films like Collidescape make windows appear opaque from the outside while maintaining clear views from inside. These films often feature subtle patterns or fritted designs that break up reflections. One-way transparent films are particularly effective for windows where you want to maintain privacy.
Feather Friendly Tape: This professional-grade tape system creates dotted patterns proven to prevent collisions. The UV-reflective dots are nearly invisible from inside but highly visible to birds. While more expensive than DIY options, the durability and effectiveness make it ideal for long-term protection.
External Screens and Netting: Installing window screens or netting creates a physical barrier that cushions any impact. Fine-mesh netting (¼-inch or smaller) mounted a few inches from the glass prevents birds from reaching the surface. This method provides 100% protection when properly installed.
| Solution Type | Cost per Window | Effectiveness | Durability | Installation Difficulty |
|---|---|---|---|---|
| Soap Markings | $0 | 80% | 2-3 months | Easy |
| Tempera Paint | $2-5 | 90% | 3-6 months | Easy |
| Masking Tape | $3-8 | 85% | 6-12 months | Easy |
| Commercial Decals | $15-30 | 75% | 1-3 years | Easy |
| Window Film | $25-50 | 95% | 5-10 years | Medium |
| External Screens | $40-80 | 100% | 10+ years | Medium |
For maximum effectiveness, always apply treatments to the exterior surface of windows. Interior applications rarely work because birds react to reflections on the exterior. Clean windows thoroughly before applying any product to ensure proper adhesion and visibility.
Measure and mark spacing carefully—use a ruler or template to maintain the critical 2-inch horizontal spacing and 4-inch vertical spacing. Inadequate spacing is the most common reason treatments fail, as birds will attempt to fly through gaps larger than 2 inches.
Cover the entire window area, not just portions. Birds don’t understand that parts of a window are off-limits. Partial coverage might redirect collisions rather than prevent them. Focus especially on windows that reflect vegetation or show passage through your home.
Many well-intentioned bird lovers implement ineffective solutions that fail to prevent collisions. Understanding these common mistakes can save you time, money, and birds’ lives.
Single Hawk Silhouettes: The persistent myth that hawk-shaped stickers deter birds has been debunked by research. Birds don’t perceive single large shapes as threats, and such decals provide insufficient coverage. More importantly, they don’t address the fundamental issue of making the entire window surface visible.
Reflective Materials: Using reflective tape or mirrors hoping to scare birds away often backfires spectacularly. These materials can actually increase collisions by creating more confusing reflections. Flashing devices might work temporarily but birds quickly learn they pose no real threat.
Interior-Only Solutions: Applying films, decals, or other treatments to the interior surface of windows rarely prevents collisions because birds react to exterior reflections. While interior applications might make you feel better, they provide minimal actual protection.
Inadequate Coverage: Spacing treatments too far apart is the most common installation error. Remember the 2-inch rule—any gap larger than 2 inches presents an opportunity for small birds to pass through. Coverage must be continuous and dense to be effective.
⏰ Time Saver: Test solutions on your most problematic windows first before treating all windows. This approach helps identify what works best for your specific situation and budget.
Despite your best prevention efforts, collisions may still occur. Knowing how to respond properly can mean the difference between life and death for an injured bird. Your calm, appropriate actions can significantly increase a bird’s chances of recovery.
First, determine if the bird is actually injured or merely stunned. Many collisions result in temporary stunning rather than fatal injury. Observe from a distance—if the bird appears dazed but breathing normally, it may recover on its own within 10-30 minutes.
Never touch a bird with bare hands. Birds carry bacteria and parasites, and they can injure themselves further if handled improperly. Always wear gloves or use a lightweight towel when handling injured wildlife.
Check for obvious injuries: bleeding, broken wings, or inability to stand. If you see severe injuries or the bird doesn’t recover within 30 minutes, contact a licensed wildlife rehabilitator immediately. Do not attempt to treat injuries yourself.
If the bird is merely stunned and appears likely to recover, create a safe recovery space. Gently cover the bird with a lightweight towel or small box to reduce stress and protect it from predators. Darkness helps calm birds and allows them to recover without additional stimulation.
Prepare a cardboard box with ventilation holes, lined with a soft cloth. Place the bird inside and keep it in a quiet, dark, warm location away from pets and children. Do not provide food or water—birds have specific dietary needs, and improper feeding can cause more harm.
After 30-60 minutes, take the box outside and remove the lid. If the bird has recovered, it will fly away on its own. If it remains inside or appears weak, contact a wildlife rehabilitator for further assistance.
Certain situations require immediate professional intervention. Contact a wildlife rehabilitator if you notice blood, broken bones, or visible injuries. Birds that remain unconscious for more than 5 minutes need professional care. Also seek help for baby birds that have fallen from nests due to collisions.
Never give food or water to an injured bird. Improper feeding can lead to aspiration pneumonia or other complications. Wildlife rehabilitators have the training and resources to provide appropriate care for injured birds.
Keep your local wildlife rehabilitation center’s number handy, especially during migration seasons when collisions peak. Quick response times often determine whether injured birds can be successfully rehabilitated and released back into the wild.
Bird collision patterns vary throughout the year, with distinct peaks that require special attention. Understanding these seasonal patterns helps you prepare and implement prevention strategies before high-risk periods begin.
Spring migration (March-May) brings heightened collision risk as birds travel north to breeding grounds. These often inexperienced migrants navigate unfamiliar territories, making them particularly vulnerable to window hazards. Install prevention measures by early March to protect the first wave of migrants.
Fall migration (September-October) presents similar challenges as birds return to wintering grounds. This period often involves larger numbers of birds, including young ones making their first migration. Maintain vigilance through November, as some species migrate later than others.
Breeding season (May-August) increases territorial behavior, especially in species like robins and cardinals. These birds may repeatedly attack their reflections in windows, causing stress and injury even without direct collisions. Additional prevention measures may be needed during this period.
Winter months bring different challenges. Snow cover can create unusual reflection patterns, while limited food sources may drive birds to approach homes more frequently. Some solutions, like soap markings, may be less effective in winter weather, requiring adjustment of your prevention strategy.
✅ Pro Tip: Use BirdCast’s live migration maps to track when large numbers of birds are moving through your area. These free tools help you know when to be especially vigilant about window protection.
As wildlife photographers, we have a special responsibility to observe ethically while capturing stunning images. Window protection isn’t just about preventing collisions—it’s about creating safe environments where we can observe and document birds without causing harm.
Positioning your feeders and baths strategically can reduce collision risk while improving photographic opportunities. Placing feeders either very close to windows (1-3 feet) or far away (30+ feet) gives birds less momentum if they do collide. Close placement also provides great opportunities for intimate portraits through safe, treated windows.
For serious bird observation, having the right optics enhances your experience without endangering birds. Quality spotting scopes for bird watching allow you to observe behavior from a distance, reducing stress on birds. This approach produces more natural images while keeping birds safe from window hazards.
Investing in specialized equipment can improve both your photography and bird safety. Bird observation equipment with appropriate magnification lets you document species without luring them dangerously close to windows. Remember that ethical wildlife photography prioritizes subject welfare over the perfect shot.
Many photographers find that treated windows create unique opportunities for creative imagery. The patterns required for bird safety can add artistic elements to your images, turning conservation measures into distinctive photographic elements. This approach demonstrates how protection and photography can beautifully coexist.
Place bird feeders either very close to windows (1-3 feet) or far away (30+ feet). Close placement reduces collision speed if birds do hit windows, while distant placement gives birds time to change direction. Avoid placing feeders at intermediate distances where birds can gain dangerous momentum.
Yes, but only when properly spaced following the 2-inch rule. Single large decals like hawk silhouettes don’t work because birds will fly around them. Effective coverage requires multiple decals or patterns with no gaps larger than 2 inches horizontally and 4 inches vertically.
No, interior applications rarely prevent collisions because birds react to exterior reflections. Treatments must be applied to the outside surface of windows to break up reflections that confuse birds. Interior solutions might make you feel better but provide minimal actual protection.
This is likely territorial behavior called reflection aggression, common during breeding season. Birds perceive their reflection as a rival and repeatedly attack it. The solution is to cover the reflective area with exterior treatments following the 2-inch spacing rule until the breeding season ends.
Soap markings last 2-3 months depending on rainfall. Tempera paint typically lasts 3-6 months. Masking tape can last 6-12 months with UV-resistant varieties. Commercial products generally last 1-10 years depending on quality and exposure. Plan to refresh DIY solutions seasonally.
Not always. Many collisions result in stunning rather than immediate death. Birds may recover within 10-30 minutes if given safe, quiet space. However, internal injuries can cause death hours or days later. Always check on collided birds and follow proper recovery protocols to maximize survival chances.
Preventing bird window collisions is one of the most impactful conservation actions homeowners can take. With 1 billion birds dying annually from collisions, your efforts directly contribute to protecting vulnerable populations, especially during migration periods.
Start with the simplest, most cost-effective solutions first. Soap markings or tempera paint patterns provide immediate protection while you evaluate longer-term options. The critical factor is proper spacing—maintain that 2-inch horizontal and 4-inch vertical pattern regardless of materials chosen.
Remember that effectiveness trumps aesthetics when lives are at stake. While many homeowners worry about appearance, modern solutions like collision prevention films and UV-reflective dots provide excellent protection with minimal visual impact. The small compromises in appearance are outweighed by the tremendous satisfaction of knowing you’re saving lives.
Document your success by keeping a collision log before and after implementing solutions. Not only does this provide satisfaction, but it also contributes to citizen science efforts helping researchers understand collision patterns and prevention effectiveness.
By taking action today, you join a growing community of bird advocates making a measurable difference. Every treated window represents multiple lives saved, contributing to the conservation of the species we admire and photograph. Together, we can turn our homes from hazards into havens for the birds that share our world.

