
Best Lightroom Export Settings for Instagram 2026: Pro Guide
I have lost count of how many beautifully edited photos I have watched turn muddy the second they hit the…

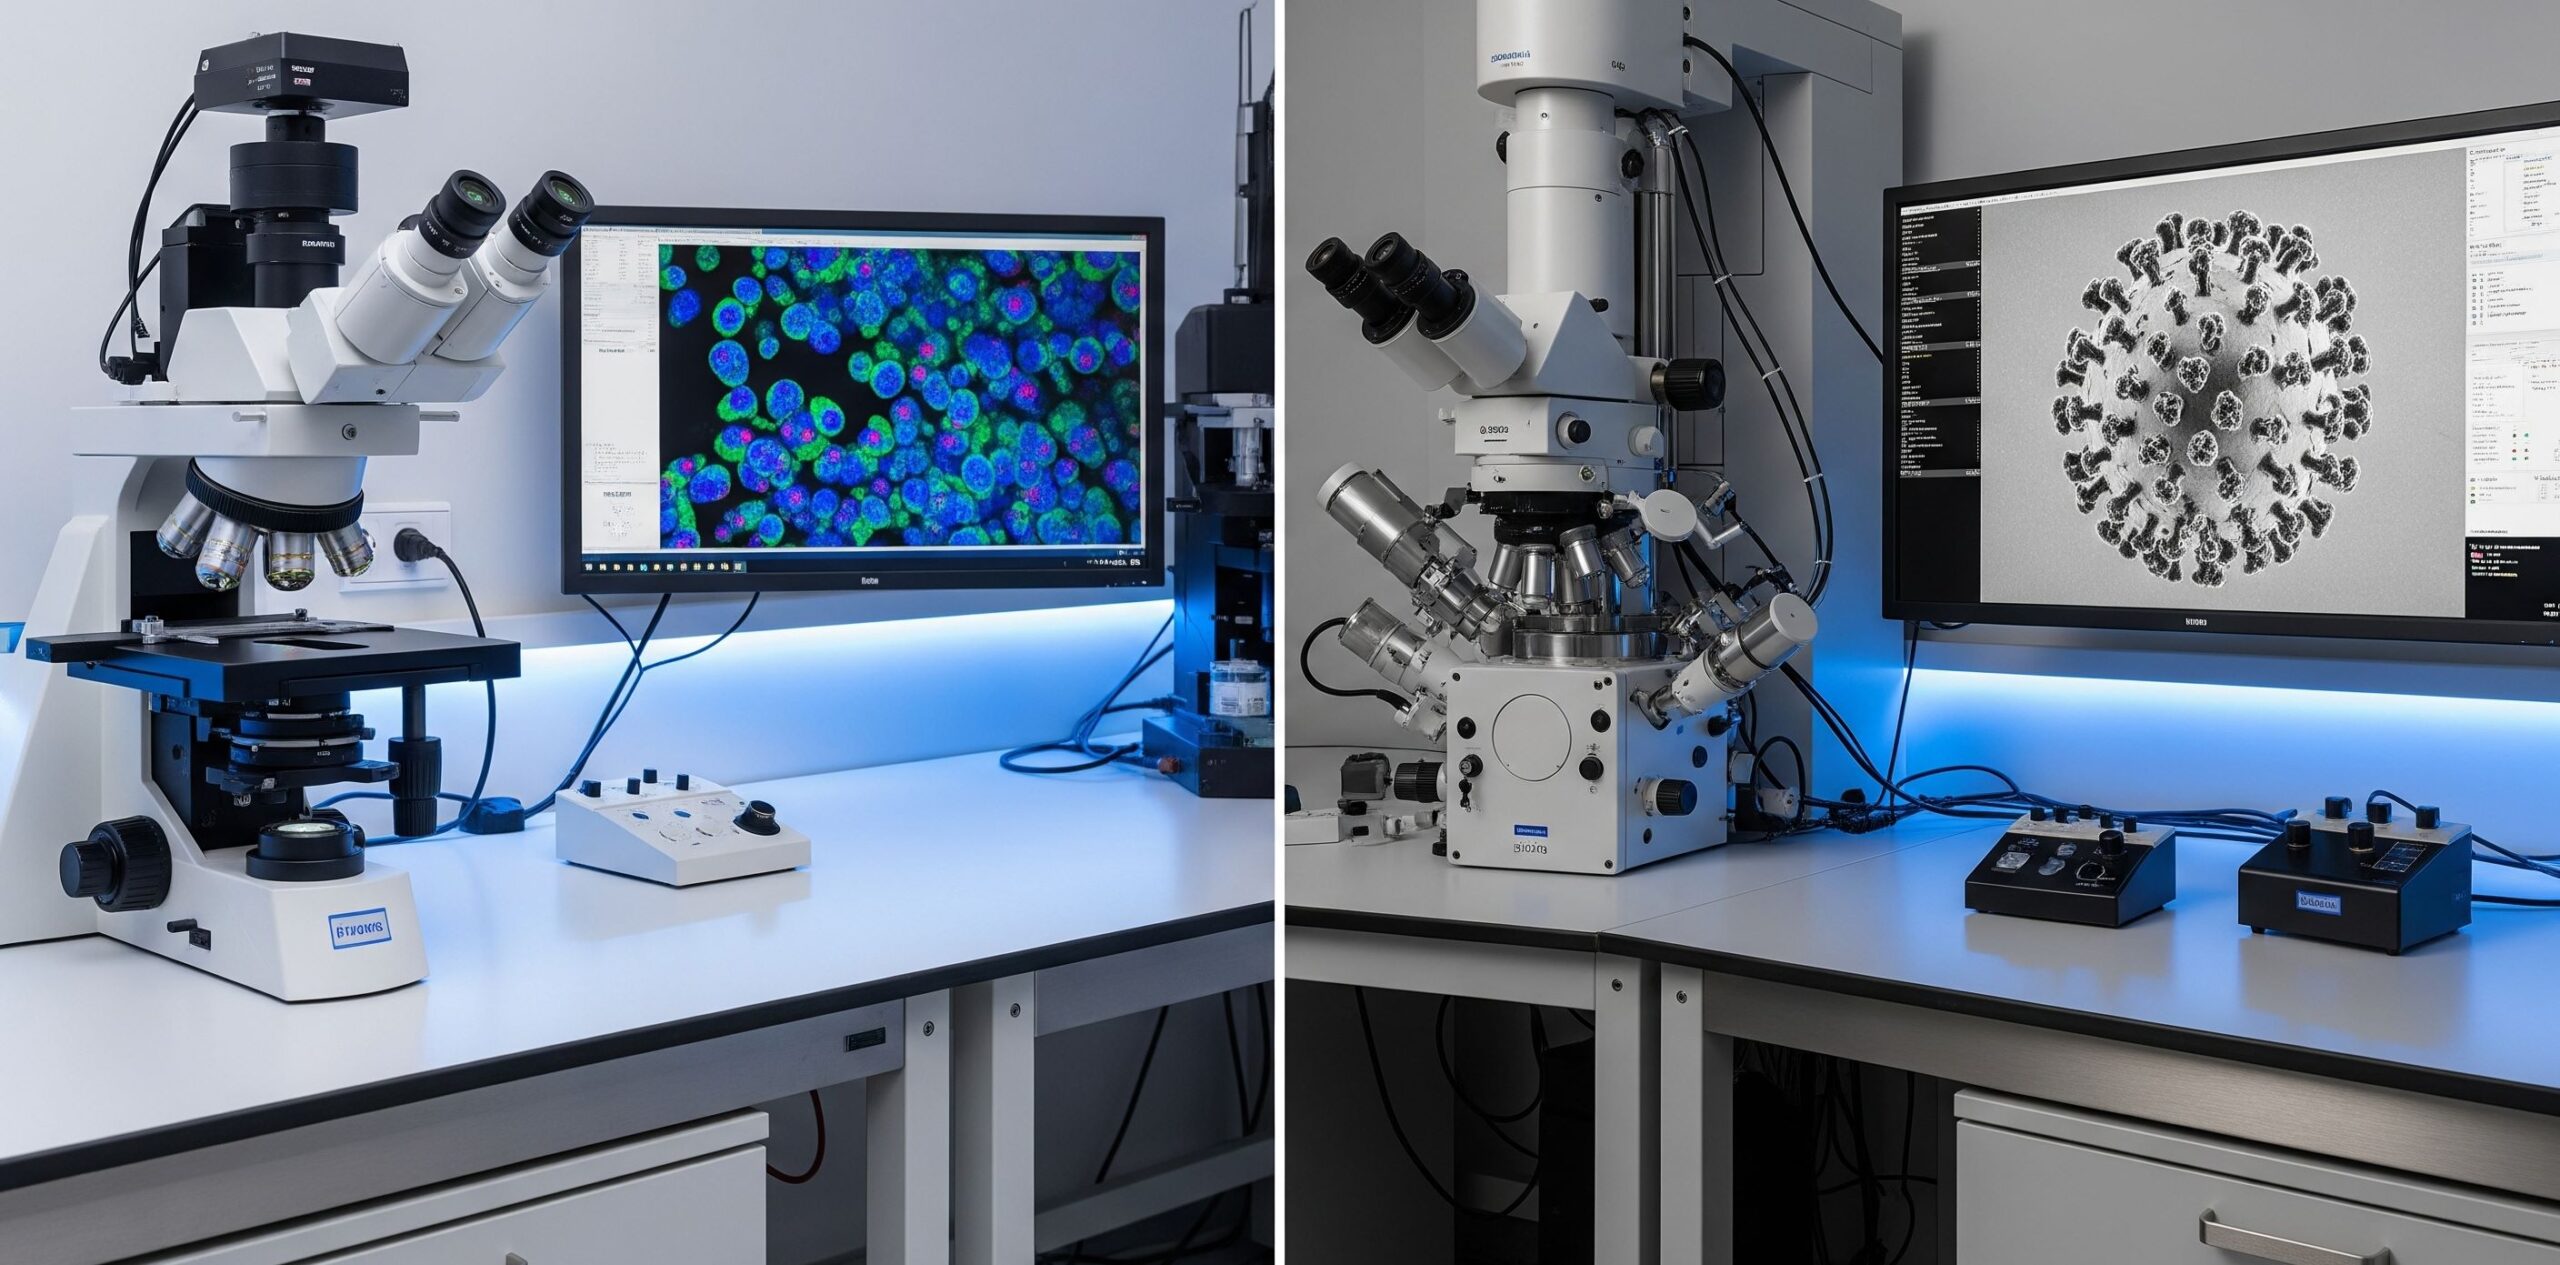
When deciding between a light microscope vs electron microscope, the answer depends entirely on your imaging needs: light microscopes excel at viewing living specimens in full color up to 2,000x magnification, while electron microscopes reveal nanoscale details at up to 1,000,000x magnification but require dead, fixed specimens and produce only black and white images. For scientific photography, light microscopes offer accessibility and real-time observation capabilities, whereas electron microscopes provide unparalleled resolution for researchers documenting sub-cellular structures. Understanding the fundamental differences in how these instruments work, particularly the Abbe diffraction limit that constrains light microscopy, helps photographers and researchers choose the right tool for their specific applications.
This guide covers the technical principles behind each microscope type, practical photography considerations, and a detailed cost-benefit analysis to help you make an informed decision. Whether you are a student documenting cells for GCSE biology, a professional photographer working with biological specimens, or a researcher capturing ultrastructure images, you will find practical guidance for selecting and using the appropriate microscopy equipment for your photography needs.
The following comparison table highlights the fundamental differences between these two microscopy technologies. These specifications directly impact what you can photograph and how you will capture images with each system.
| Feature | Light Microscope | Electron Microscope |
|---|---|---|
| Magnification | Up to 1,500x-2,000x | Up to 1,000,000x |
| Resolution | Limited to ~200nm (Abbe limit) | Sub-nanometer (~0.05nm) |
| Specimen Type | Living or dead specimens | Dead/fixed specimens only |
| Image Color | Full natural color | Black and white (false color added) |
| Cost Range | $500-$5,000 (consumer) | $50,000-$1,000,000+ (research grade) |
| 3D Imaging | Limited (stereo microscopes) | SEM provides detailed 3D surface imaging |
| Vacuum Required | No | Yes, high vacuum environment |
| Radiation Hazard | None (visible light) | Electron beam requires shielding |
Before diving into specific microscope types, it is essential to understand why electron microscopes can achieve such dramatically better resolution than light microscopes. The answer lies in a fundamental physical principle called the Abbe diffraction limit, named after the German physicist Ernst Abbe who formulated it in 1873.
The Abbe diffraction limit defines the maximum resolution achievable with any optical system based on visible light. This limit arises because light behaves as a wave, and when it passes through a lens system, it diffracts or spreads out. The smallest resolvable detail is approximately half the wavelength of the illuminating light. Since visible light has wavelengths between 400-700 nanometers, the theoretical maximum resolution for a light microscope is around 200 nanometers.
This physical constraint means that structures smaller than 200 nanometers, including individual proteins, viruses, and detailed cellular organelles, simply cannot be resolved with any light-based microscope regardless of how perfect the lenses are or how much you increase magnification. You can magnify the blurred image further, but you will never see additional detail.
Electron microscopes overcome this limitation by using electrons instead of photons. At typical operating voltages of 200 keV, accelerated electrons have a wavelength of approximately 2.5 picometers. This is roughly 100,000 times shorter than visible light wavelengths, allowing electron microscopes to achieve sub-nanometer resolution and resolve individual atoms in crystal structures.
For photographers, understanding the Abbe diffraction limit helps explain why certain subjects require electron microscopy while others can be adequately captured with light microscopy. A typical animal cell measures 10-30 micrometers in diameter, well within the resolution capabilities of light microscopes. However, the internal structures within that cell, such as ribosomes (20nm), lysosomes (0.2-0.5 micrometers), and mitochondrial cristae, often fall below the diffraction limit and require electron microscopy for detailed imaging.
A light microscope is an optical instrument that uses visible light (wavelengths between 400-700nm) and a system of glass lenses to magnify the image of a specimen. The basic principle involves passing light through or reflecting it off a specimen, then focusing that light through objective and eyepiece lenses to produce a magnified virtual image. For photographers documenting scientific subjects, light microscopes provide several distinct advantages that make them ideal for capturing living organisms and colorful biological specimens.
The optical path of a typical compound light microscope begins with light from an illumination source (usually an LED or halogen lamp) passing through the specimen on a glass slide. The objective lens, positioned close to the specimen, collects the light that passes through and forms an intermediate image. This intermediate image is then further magnified by the eyepiece lens, which produces the final virtual image that your eye sees or that your camera captures.
Light microscopes are relatively lightweight, portable, and straightforward to operate. They do not require vacuum systems, radiation shielding, or cryogenic cooling. This accessibility makes them perfect for photographers who need to capture images in various settings, from field work collecting specimens to studio environments for controlled photography. The ability to observe specimens in real-time with immediate feedback on focus, exposure, and composition significantly streamlines the photomicrography workflow.
The imaging process in light microscopy relies on several key optical principles. Specimens are typically illuminated using Koehler illumination, a technique that ensures even lighting across the entire field of view by carefully aligning the condenser lens system. This alignment creates parallel rays of light passing through the specimen, minimizing artifacts and providing uniform illumination for photography.
Modern compound microscopes use achromatic objective lenses designed to correct for color fringing (chromatic aberration) that occurs when different wavelengths of light focus at slightly different points. Higher-end objectives may also correct for spherical aberration and flatness of field. For photomicrography, plan achromatic or plan apochromatic objectives provide the flattest field of view, ensuring that details at the edges of your images are as sharp as those in the center.
Total magnification in a light microscope is calculated by multiplying the objective lens magnification by the eyepiece magnification. Common objective magnifications include 4x (scanning), 10x (low power), 40x (high power), and 100x (oil immersion). A 100x objective used with a 10x eyepiece produces 1000x total magnification. However, useful magnification for visual observation and photography is ultimately limited by the Abbe diffraction limit to approximately 1000x-2000x, beyond which no additional detail becomes visible.
One significant advantage of light microscopes for photography is the ability to observe and capture living cells in real-time. This means you can document dynamic biological processes as they occur: cell division progressing through mitosis, bacteria swimming through liquid media, or protists feeding and reproducing. For scientific photographers, this dynamic capability enables storytelling through sequences of images showing processes unfold over time.
Light microscopy also offers flexibility with staining and labeling techniques. Biological specimens can be treated with various histological stains that bind to specific cellular components, producing vivid colors that enhance contrast and highlight structures of interest. Fluorescent dyes and tags allow multiple targets to be visualized simultaneously in different colors, enabling complex multichannel imaging experiments that produce visually striking photographs.
Camera integration with light microscopes is relatively straightforward. Most modern compound microscopes accept DSLR or mirrorless camera adapters through standard c-mount threads or eyepiece projection systems. The real-time viewing capability through camera live view allows precise focus adjustment and composition without eyestrain. Many microscope manufacturers also offer dedicated microscope camera systems with specialized sensors optimized for the low-light conditions typical of microscopy.
Electron microscopy (EM) is an imaging technique that obtains high-resolution images by using electrons as the illumination source instead of visible light. Ernst Ruska and Max Knoll developed the first electron microscope in 1931 at the Technical University of Berlin, building on the theoretical insight that electrons could be focused using electromagnetic fields, analogous to how glass lenses focus light.
The fundamental principle behind electron microscopy involves accelerating electrons through a high-voltage electric field, typically 200 kilovolts in conventional transmission electron microscopes. These high-energy electrons have extremely short de Broglie wavelengths, approximately 2.5 picometers at 200 keV, which is roughly 100,000 times shorter than visible light wavelengths. This ultra-short wavelength is what enables electron microscopes to achieve sub-nanometer resolution that is fundamentally impossible with optical systems.
Electron microscopes operate by directing a focused beam of accelerated electrons toward a specimen in a high-vacuum environment. The electron column consists of several key components working together to produce and focus the electron beam. An electron gun at the top of the column emits electrons from a heated tungsten filament or field emission cathode. These electrons are then accelerated through a series of anode plates and focused into a narrow beam by electromagnetic condenser lenses.
The condenser lens system in an electron microscope functions analogously to the illumination system in a light microscope, controlling the spot size and convergence angle of the electron probe. Aperture diaphragms within the column limit the angular spread of the electron beam, reducing spherical aberration and improving coherence. The final objective lens focuses the electron beam onto the specimen with a probe diameter that can be less than 0.5 nanometers in modern instruments.
Two primary image formation mechanisms operate in electron microscopy. In transmission electron microscopy (TEM), electrons pass through an ultra-thin specimen section (typically 70-90 nanometers thick). Electrons scatter as they interact with atoms in the specimen, with heavy metal stains used to enhance contrast by scattering electrons more strongly. The objective lens forms an image from the transmitted electron distribution, which is then magnified by subsequent projector lenses onto a fluorescent screen or digital camera.
Scanning electron microscopy (SEM) operates on a different principle. A finely focused electron probe raster scans across the specimen surface in a television-like pattern. As the probe interacts with the specimen, it generates various signals including secondary electrons, backscattered electrons, and characteristic X-rays. Secondary electrons, emitted from near the specimen surface, are collected by a detector to produce an image with exceptional depth of field and three-dimensional appearance.
The vacuum system in an electron microscope is critical for operation. Gas molecules in the air would scatter and absorb the electron beam, preventing image formation. Electron microscopes employ multiple vacuum stages using oil diffusion pumps, turbomolecular pumps, and ion pumps to achieve the ultra-high vacuum (typically 10^-6 to 10^-9 Pascal) required for proper electron optics and specimen integrity.
Photographing specimens with electron microscopes requires extensive sample preparation that fundamentally differs from light microscopy workflows. Specimens must be completely dehydrated because water vapor scatters electrons and would destroy the vacuum. This dehydration is typically achieved through graded alcohol or acetone series dehydration, followed by critical point drying or freeze-drying to avoid surface tension artifacts that would distort delicate structures.
After dehydration, specimens receive heavy metal coating to enhance electron scattering and produce contrast. Common staining agents include osmium tetroxide (which binds to lipids), uranyl acetate (which binds to nucleic acids and proteins), and lead citrate (a general stain). For scanning electron microscopy, a thin conductive coating of gold, platinum, or carbon is applied by sputtering to prevent charging artifacts from the electron beam accumulating on specimen surfaces.
The images produced by electron microscopes are inherently monochromatic because the detectors measure electron intensity rather than wavelength. Variations in electron density appear as shades of grey, similar to black and white photography. Scientific publications typically present these images with false colors added to highlight specific structures or differentiate between multiple overlaid channels. For photographers, this means post-processing image enhancement is a standard part of the electron microscopy workflow, requiring specialized software knowledge beyond standard photographic editing tools.
Modern electron microscopes use specialized digital cameras including charge-coupled devices (CCDs) and direct electron detectors that offer high dynamic range and quantum efficiency. These cameras can capture thousands of frames per second in burst mode, enabling researchers to record dynamic processes or collect multiple images for noise reduction through frame averaging. For photographers working with EM systems, understanding camera settings, exposure times, and digital image processing is essential for producing publication-quality micrographs.
Electron microscopes achieve magnification up to 1,000,000x with sub-nanometer resolution approximately 250 times better than conventional light microscopes. This dramatic difference in resolution capability means these instruments reveal entirely different categories of biological structures. Electron microscopy can visualize virus particles (30-250 nanometers), individual protein molecules (~10 nanometers), DNA double helix structures (~2 nanometers wide), and even atomic arrangements in crystal lattices.
For photographers, this translates to working at fundamentally different imaging scales. Light microscopes excel at documenting whole cells and tissue architectures with natural coloration and contextual relationships between cells and their environment. Electron microscopes reveal the intricate molecular machinery within cells, exposing structures invisible to light-based techniques. Understanding what each instrument can resolve helps photographers choose the appropriate tool for their specific subject matter and research questions.
Light microscopy offers much simpler and faster specimen preparation, accommodating living or dead specimens with minimal processing. You can observe cells in culture media directly, apply simple stains in minutes, or prepare permanent mounts that last for years with proper storage. This flexibility allows photographers to document dynamic processes in real-time and rapidly iterate through different preparation techniques to optimize imaging conditions.
Electron microscopy requires labor-intensive specimen preparation that demands high skill levels and specialized equipment. Processing a specimen for TEM typically takes 2-5 days including fixation, dehydration, embedding, sectioning, and staining. Each step requires careful attention to preserve ultrastructure while preventing artifacts. For photographers, this means electron microscopy projects require substantial planning and batch processing multiple specimens together to make efficient use of expensive instrument time.
Scanning electron microscopes offer significantly greater depth of field compared to light microscopes, typically 100-300 times greater at equivalent resolutions. This exceptional depth of field creates the striking three-dimensional appearance that makes SEM images so visually compelling. The electron beam interacts predictably with specimen topography, producing images where surface features appear sculpted and tangible.
For photographers documenting surface structures, industrial components, or biological specimens where three-dimensional relationships matter, SEM provides unique capabilities unavailable through any other imaging technique. Material science applications particularly benefit from SEM depth of field, enabling fracture surface analysis, particle morphology studies, and quality control documentation where surface features across large areas need to remain in focus simultaneously.
When evaluating which microscope type to invest in for scientific photography, understanding the cost-benefit relationship helps photographers and researchers make practical decisions aligned with their specific needs and budget constraints.
Entry-level compound microscopes suitable for hobbyist photography start around $200-500, offering adequate optics for basic photomicrography of stained slides and common biological specimens. Student-grade microscopes in the $500-1,500 range provide improved optics, more robust mechanical components, and better camera adapter options. Research-grade light microscopes with plan apochromatic objectives, phase contrast, and fluorescence capabilities range from $3,000-15,000, while specialized instruments like confocal microscopes can exceed $50,000.
The benefits of light microscope investment include low operating costs (consumables like slides and stains are inexpensive), minimal maintenance requirements (no vacuum pumps or high-voltage systems), and immediate accessibility for imaging sessions without advance booking. For photographers primarily documenting living specimens, cells in culture, or common biological materials, a quality light microscope delivers excellent return on investment with professional-grade results achievable at modest cost.
Scanning electron microscopes suitable for research photography start around $50,000-100,000 for refurbished instruments from the 1990s-2000s, while new field emission SEM systems with 1nm resolution typically cost $250,000-500,000. Transmission electron microscopes start at approximately $150,000 for basic instruments and exceed $1,000,000 for high-end aberration-corrected systems capable of atomic resolution imaging.
Beyond purchase price, electron microscopy involves substantial ongoing costs including facility infrastructure (stable power, vibration isolation, humidity control), maintenance contracts ($15,000-50,000 annually for preventive maintenance), consumables (stains, embedding media, replacement filaments), and specialized training for operators. These costs make electron microscopy accessible primarily through institutional core facilities rather than individual purchase for most photography applications.
The benefit analysis for electron microscopy centers on resolution capability that is simply unachievable through any other technique. For researchers documenting viral particles, protein complexes, or molecular structures where nanoscale detail is essential for the research question, electron microscopy provides irreplaceable imaging capability. However, for photographers whose subjects fall within the light microscopy resolution range, the additional cost and complexity of electron microscopy provides no practical advantage.
Light microscopes are the appropriate choice for photographers when your subject matter involves living organisms, dynamic biological processes, or specimens larger than approximately 200 nanometers. Specific scenarios where light microscopy excels include documenting cell division and cell culture work, capturing fluorescence in living cells or fixed specimens, photographing stained tissue sections for histology or pathology, creating educational materials for biology instruction, and any application where natural coloration provides important visual information.
Budget-conscious photographers will find light microscopy provides the best value proposition for most common scientific photography applications. The accessibility of light microscopes enables photographers to build expertise through hands-on experience without requiring institutional infrastructure or specialized technical training. Additionally, the portability of light microscopy equipment allows for field work, classroom demonstrations, and flexible studio arrangements that electron microscopy cannot support.
Electron microscopy becomes necessary when your photography requires resolving structures smaller than 200 nanometers, documenting viral particles or molecular complexes, creating publication-quality images of subcellular ultrastructure, or capturing detailed surface topology with three-dimensional appearance. Material science applications including fracture analysis, nanoparticle characterization, and surface coating inspection routinely require electron microscopy resolution capabilities.
For photographers considering electron microscopy access, collaboration with university core facilities or commercial microscopy service providers offers a practical path to acquire high-quality electron micrographs without institutional equipment purchase. These facilities provide instrument time, technical expertise in specimen preparation, and guidance on optimal imaging parameters for your specific sample types. Planning experiments to maximize efficiency during allocated instrument time helps manage the significant cost of electron microscopy access.
For students studying microscopy at the GCSE level, understanding the fundamental differences between light and electron microscopes provides essential foundations for cell biology. Light microscopes remain the primary tool in school laboratories because they are affordable, portable, safe for student use, and capable of viewing living specimens. Students can prepare their own wet mounts, observe cell organelles in real-time, and develop practical microscopy skills that form the basis of biological investigation.
Key learning objectives for GCSE microscopy include understanding magnification calculations, identifying cell structures visible with light microscopy (cell wall, cell membrane, nucleus, chloroplasts, vacuoles), and comprehending why electron microscopy is necessary for viewing smaller subcellular structures. Students should recognize that electron microscopes achieved Nobel Prize-winning insights into cell ultrastructure, revealing organelles like ribosomes and mitochondria that light microscopy could only hypothesize about.
Electron microscopy has transformed our understanding of subcellular architecture by revealing structures invisible to light microscopy. The detailed visualizations of mitochondrial cristae, endoplasmic reticulum, Golgi apparatus, and plasma membrane structure owe entirely to electron microscopy techniques developed in the mid-twentieth century. For students considering careers in biology, medicine, or materials science, familiarity with both microscopy techniques provides context for understanding how scientific imaging enables discovery.
Super-resolution light microscopy techniques continue pushing the boundaries of what is achievable with optical systems, bridging the gap between conventional light and electron microscopy. STED (Stimulated Emission Depletion) microscopy, developed by Stefan Hell (Nobel Prize 2014), achieves resolutions of 20-50 nanometers by selectively deactivating fluorophores, effectively overcoming the Abbe diffraction limit through clever photophysics rather than shorter wavelengths.
MINFLUX microscopy, another innovation from the Hell laboratory, achieves single-molecule localization with resolutions down to 1-3 nanometers while maintaining the ability to image living cells. This technique represents a paradigm shift, enabling researchers to visualize molecular complexes within living cells at resolutions approaching electron microscopy while preserving the advantages of fluorescence labeling and live cell compatibility.
For photographers, these advances mean expanded possibilities for scientific visualization that combine the best aspects of both light and electron microscopy. AI-powered image analysis and reconstruction techniques are also transforming microscopy workflows, enabling automated segmentation of cellular structures, denoising of low-signal images, and intelligent optimization of imaging parameters. These tools will increasingly democratize access to high-resolution imaging capabilities previously available only at specialized research facilities.
Neither microscope type is universally better. Light microscopes excel at viewing living specimens in natural color up to 2,000x magnification, while electron microscopes provide sub-nanometer resolution at up to 1,000,000x magnification but require dead, fixed specimens and produce only black and white images. The choice depends entirely on your imaging requirements, specimen type, and budget.
Electron microscopes can resolve structures smaller than 200 nanometers, including viruses (30-250nm), individual ribosomes (~20nm), protein molecules (~10nm), DNA double helix (~2nm wide), and even individual atoms in crystal lattices. These structures fall below the Abbe diffraction limit that constrains all light-based microscopy.
Electron microscopes provide two primary advantages: 1) Significantly higher resolution, achieving sub-nanometer detail approximately 250 times better than light microscopes, and 2) Much higher magnification capability, reaching 1,000,000x compared to approximately 2,000x maximum practical magnification for light microscopy.
Light microscopes are limited by the Abbe diffraction limit to approximately 200nm resolution, meaning they cannot visualize structures smaller than this regardless of magnification. They also have a maximum practical magnification of around 1,500-2,000x. Light microscopy cannot achieve the sub-cellular detail visible in electron micrographs, and living specimens must be thin enough for light to pass through, limiting observation of thick tissues.
No, electron microscopes cannot observe living cells. The specimen preparation process requires complete dehydration and chemical fixation, followed by embedding in resin and sectioning. Additionally, the electron microscope chamber operates under high vacuum, which is incompatible with living material. Only light microscopes can observe living specimens in real-time.
Electron microscopes detect electrons rather than visible light wavelengths, so they cannot capture color information the way a camera detects red, green, and blue channels. The images display variations in electron density as shades of grey. Scientists often add false colors to highlight different structures, materials, or immunogold labels, but these colors are artificially applied during post-processing.
Light microscopes are ideal for GCSE biology because they are accessible, easy to use, and allow students to observe living organisms and perform real-time experiments. Students can prepare their own slides and see cells, bacteria, and tissues in their natural colors. The low cost and simple operation make light microscopes practical for classroom settings where students need hands-on experience with microscopy techniques.
Electron microscopes can achieve magnifications up to 1,000,000x compared to a light microscope’s maximum of approximately 1,500-2,000x, making them roughly 500-650 times more powerful in terms of magnification. More importantly, electron microscopes offer resolution approximately 250 times better than light microscopes, enabling visualization of structures that light simply cannot resolve due to the diffraction limit.
The choice between light microscope vs electron microscope for scientific photography ultimately depends on your specific imaging goals, budget constraints, and the nature of your specimens. Light microscopes remain the workhorses of biological imaging, offering color visualization, convenience, and the ability to capture living organisms in action. They provide the best return on investment for photographers whose subjects fall within the 200nm+ resolution range and who need flexible, accessible equipment for routine imaging tasks.
Electron microscopes provide unparalleled resolution for researchers seeking to document the nanoscale world, despite their requirements for extensive specimen preparation, monochromatic output, and substantial infrastructure investment. For photography projects that demand sub-cellular detail, viral particle characterization, or surface topology visualization at nanometer resolution, electron microscopy is the only viable option.
For photographers entering scientific imaging, starting with a quality light microscope builds foundational skills in photomicrography while delivering professional results for most common applications. As your projects demand higher resolution or specialized applications require electron microscopy capabilities, collaboration with research facilities and core imaging centers provides access to these powerful instruments without requiring personal equipment investment at that scale. Remember that the best microscope is the one that enables you to capture the images your specific project requires, whether that means documenting living cells in vibrant color or revealing the intricate ultrastructure of materials at the atomic scale.