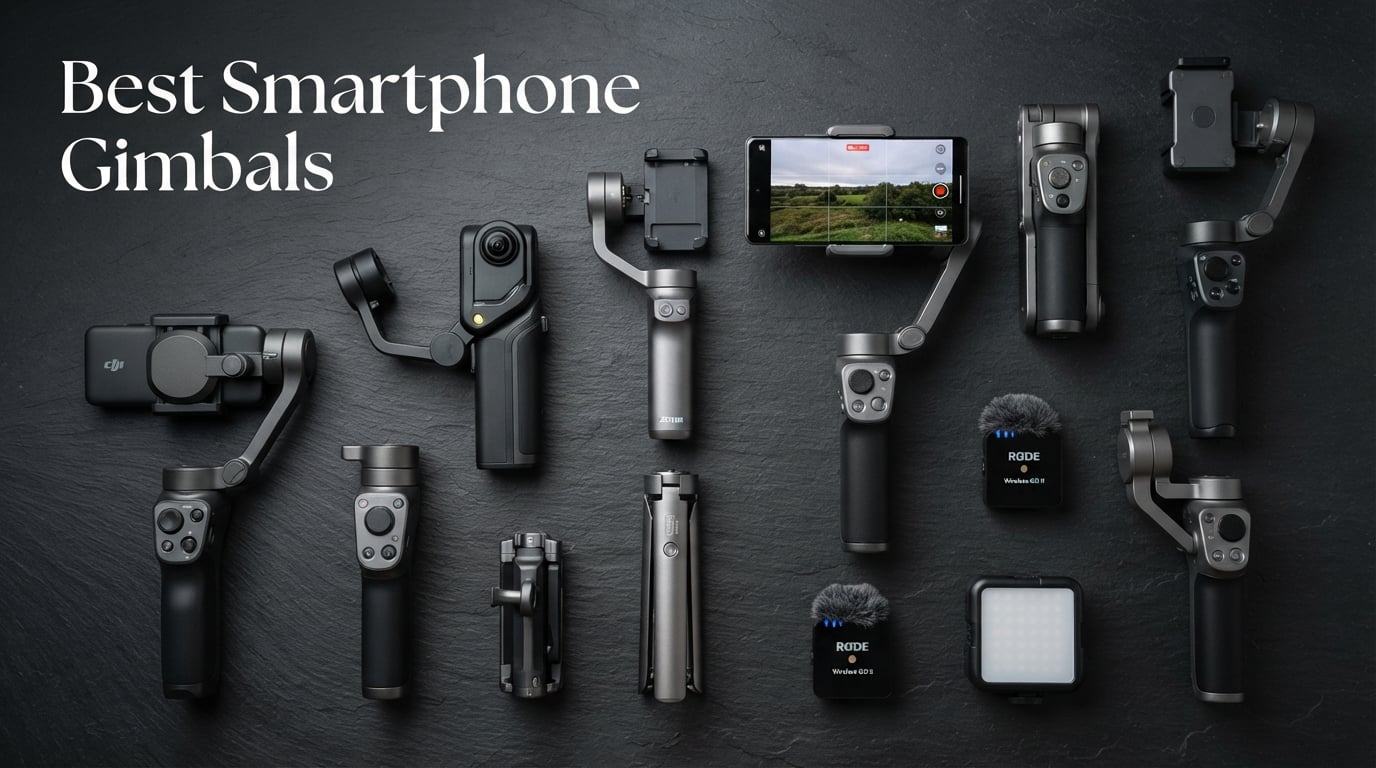
8 Best Smartphone Gimbals (October 2026) – Tested and Compared
I spent the last 90 days shooting real vlogs, walk-and-talk product reviews, and travel clips with eight smartphone gimbals strapped…

![Motion Blur Photography Ideas: 25 Creative Techniques for [cy]](https://revellphotography.com/wp-content/uploads/2026/09/featured-update-4347-1788716412287.jpg)
Every photograph is a slice of time. Most of us spend our careers trying to make that slice perfectly sharp – and for good reason. But somewhere along the way, a curious kind of photographer asks the opposite question: what happens when I let the slice stretch? That question is the doorway into motion blur photography ideas, a creative practice where movement itself becomes the subject and time becomes visible on the sensor.
After more than fifteen years of shooting long exposures, panning cyclists on rural roads, dragging my shutter through forests, and freezing dancers with off-camera flash, I’ve come to see motion blur as a vocabulary rather than a single trick. Different shutter speeds speak different languages – a one-second exposure whispers, a thirty-second exposure shouts, and a 1/60 second panning shot tells an entire story in a single frame. This 2026 guide collects the techniques, the settings, and the field-tested ideas that have actually worked for me and for photographers I’ve coached, so you can build your own vocabulary faster than I did.
Whether you’re drawn to silky waterfalls, neon car-light ribbons, or the quiet poetry of leaves falling across an autumn sky, you’ll find 25 hands-on motion blur photography ideas here, organized by subject. We’ll cover the camera settings, equipment, and troubleshooting techniques that turn failed experiments into keepers, plus advanced tips on flash sync, intentional camera movement, and post-processing that elevate good shots into memorable ones. If you’ve ever felt that still photography leaves something out, motion blur is how you put it back in.
Motion blur is the visual record of time passing during a single exposure. When a subject moves faster than the shutter can freeze, the sensor captures a trail of positions rather than a single instant, and that trail is what we call motion blur. Used intentionally, it transforms a flat photograph into a layered composition of stillness and motion.
The key word is intentional. Camera shake from an unsteady hand produces accidental blur that flattens detail and undermines the image. Creative motion blur, by contrast, is precise: stationary elements remain crisp while moving elements streak across the frame, guiding the eye through the scene and revealing energy that a frozen shutter could never show. The difference is the photographer’s choice of shutter speed, focus point, and – when needed – camera movement.
The expressive power of motion blur comes from what it adds rather than what it removes. A sharp image shows a moment; a motion-blurred image shows the journey. That simple shift opens an entire branch of visual storytelling – from the calm of a slow waterfall to the kinetic charge of a skateboarder crossing the frame. For more on how long exposure and motion fit into broader photography techniques and guides, our homepage hub covers related genres like astrophotography and night photography.
You can start making motion-blurred images with whatever camera you already own, but a few pieces of gear make the process faster, more reliable, and a lot more fun. Here’s what I actually carry in my bag and why.
Budget tip: Don’t buy everything at once. Start with the gear you already own, add a tripod if you don’t have one, then layer in ND filters and a remote release as your techniques demand them.
A tripod is the single most useful accessory for motion blur work. For long exposures of waterfalls, light trails, or star trails, it is non-negotiable – handheld shots longer than about 1/15 second almost always reveal camera shake that ruins the effect. You don’t need a heavy pro model; any tripod that holds the camera steady without flexing in a light breeze will do.
I learned this lesson the hard way during a golden-hour waterfall shoot when my bargain tripod quietly slipped during a four-second exposure. The resulting image was a smear of moss and sky. These days I use a mid-weight aluminum tripod with a hook on the center column so I can hang my camera bag as a counterweight in wind. If a tripod isn’t available, a flat rock, a fence post, or a beanbag on a car roof can stabilize your camera well enough for short long exposures.
ND filters are essentially dark sunglasses for your lens. They cut the amount of light reaching the sensor without changing color, which lets you use slower shutter speeds in bright daylight. A 3-stop (ND8) filter is a versatile starter, while a 6-stop (ND64) or 10-stop (ND1000) opens up dramatic multi-second exposures even at noon.
One common pitfall: variable ND filters can produce an X-shaped polarization pattern at their darkest settings on wide-angle lenses. Fixed-strength ND filters avoid this and are usually sharper. If you’re on a tight budget, a circular polarizer gives you 1-2 stops of light reduction plus the ability to cut glare – a double-duty bargain.
Pressing the shutter button with your finger creates micro-vibrations that show up as softness in long exposures. A remote release (wired or wireless) eliminates that. If you don’t own one, your camera’s 2-second self-timer is a perfect substitute – the delay lets the camera settle after your finger leaves the button. Many newer cameras also pair with a phone app that triggers the shutter remotely.
Three controls – shutter speed, aperture, and ISO – govern every motion-blurred image you take. Understanding how they interact is the difference between a guess and a reliable workflow. The table below summarizes the ranges that work for the most common scenarios.
| Subject / Effect | Shutter Speed | Aperture | ISO | Difficulty |
|---|---|---|---|---|
| Silky water (waterfalls) | 1/2 – 2 seconds | f/8 – f/11 | 100-400 | Beginner |
| Light trails (cars at night) | 10 – 30 seconds | f/8 – f/11 | 100-200 | Beginner |
| Panning (moving vehicles) | 1/15 – 1/60 | f/5.6 – f/8 | 200-800 | Intermediate |
| Crowd blur (busy streets) | 1/4 – 1 second | f/8 – f/11 | 100-400 | Intermediate |
| Intentional camera movement | 1/10 – 1 second | f/8 – f/11 | 100-400 | Advanced |
| Zoom burst | 1/2 – 2 seconds | f/8 – f/11 | 100-400 | Advanced |
| Rear-curtain flash sync (subject sharp, trail behind) | 1 – 4 seconds | f/8 – f/16 | 100-400 | Advanced |
| Star trails (astrophotography) | 15 – 60+ minutes (Bulb) | f/2.8 – f/5.6 | 200-800 | Advanced |
Shutter speed is the dial that turns ordinary photos into motion-blurred ones. The slower the shutter, the more time the sensor has to record movement. The exact speed you need depends on how fast your subject is moving and how much blur looks right to you.
Heads up: When you slow the shutter for motion blur, you’ll often stop down the aperture to compensate for extra light. Be cautious past f/16 – smaller apertures introduce diffraction, which softens fine detail across the entire image. For most motion blur work, f/8 to f/11 is the sweet spot.
Aperture and ISO exist to support the shutter speed you’ve chosen. In Manual mode, you set all three yourself; in Shutter Priority (S or Tv), you pick the shutter and the camera picks the aperture. For repeatable results I prefer Manual – especially at night when the camera’s meter is easily fooled by bright lights.
One more setting worth toggling: in-body image stabilization (IBIS) and lens stabilization should generally be turned OFF when your camera is on a tripod. The stabilization system can introduce its own micro-movements when it detects no shake, producing a soft image even on a locked-down camera. Flip it back on when you go handheld.
For related long-exposure workflows applied to the night sky, our guide on photographing stars covers the 500 rule and similar principles in detail.
Four techniques cover the vast majority of motion-blurred images you’ll see in magazines and galleries: panning, long exposure, intentional camera movement, and zoom burst. Once you can tell them apart at a glance, you can choose which one fits the scene in front of you.
Panning is the technique where you follow a moving subject with your camera during a slow exposure, keeping the subject relatively sharp while the background streaks into motion. The visual payoff is dramatic: a cyclist frozen in focus against a river of blurred street. Panning is also one of the harder techniques to learn – expect weeks of practice before results become consistent.
| Subject | Suggested Shutter Speed | Notes |
|---|---|---|
| Walking pedestrian | 1/15 – 1/30 | Slow subject, easy to keep sharp |
| Jogging / running person | 1/30 – 1/60 | Standard panning range |
| Cyclist | 1/60 – 1/125 | Add a monopod for steadier tracking |
| Slow-moving car | 1/125 | Shoot from a low angle for drama |
| Race car / motorbike | 1/250 – 1/500 | Stand at trackside, follow through fully |
| Birds in flight (large) | 1/250 – 1/500 | Continuous AF is essential |
| Vertical panning (skyscrapers, elevators) | 1/8 – 1/2 | Tilt up or down, not horizontally |
Long exposure is the workhorse behind silky waterfalls, streaking clouds, and flowing car-light trails. The principle is simple: open the shutter for longer than the movement you’re recording. The longer the exposure, the smoother and more abstract the motion becomes.
For waterfalls and streams, half a second to two seconds yields water with visible texture smoothed into silk. Past five seconds the water turns to mist, which is gorgeous for seascapes but loses the sense of flow on a creek. Ocean waves benefit from 5-30 second exposures, especially at golden hour when the sky still holds color.
Field note: To prevent star trails in night sky shots, apply the 500 rule – divide 500 by your lens’s focal length to get the longest shutter speed (in seconds) before stars streak. A 24mm lens allows about 20 seconds; a 50mm lens allows about 10.
Intentional Camera Movement turns the camera itself into the brush. Instead of holding the camera still, you deliberately sweep, tilt, or rotate it during a long exposure, smearing the scene into painterly streaks. The results are abstract, unpredictable, and often hauntingly beautiful – especially with subjects that already have strong vertical or radial structure.
Common ICM movements include:
For an advanced twist, pair ICM with off-camera flash fired at the end of the exposure. The flash freezes one crisp frame on top of the painterly blur, marrying abstraction and detail in a single image. Set your camera to rear-curtain flash sync (covered below), expose for the ambient blur, and trigger the flash manually with a remote at the tail end of the shutter window.
Zoom burst is the most visually obvious motion-blur technique. You start an exposure, then smoothly rotate the zoom ring during the shutter window, creating streaks that radiate outward from the center of the frame. It’s eye-catching, fast to learn, and works with almost any subject that has a clear focal point.
Shutter speeds of half a second to two seconds are ideal. Too short and the zoom barely registers; too long and the image becomes a featureless starburst. Use a wide-to-telephoto zoom (such as 24-70mm or 18-55mm), set the camera on a tripod, and zoom at a steady pace. A subject with strong central interest – a single flower, a lit window, a face – produces the most compelling results.
Flash opens up an entirely different vocabulary for motion blur. Instead of relying solely on ambient light during a slow shutter, you can use a brief pulse of flash to freeze part of the scene while the rest streaks. The trick is choosing when during the exposure the flash fires, because the placement of the frozen frame determines whether the motion trail appears in front of or behind your subject.
In front-curtain sync – the camera’s default flash mode – the flash fires the instant the shutter opens. Any movement that happens later in the exposure is recorded as a trail that appears in front of the sharply frozen subject. For most moving subjects this looks unnatural: imagine a car frozen in place with its light trail leading out of the front of the vehicle. It’s useful for certain effects (a ghostly leading edge) but rarely what people want.
Rear-curtain sync fires the flash at the end of the exposure instead of the beginning. The trail is recorded first, then the flash freezes the subject at the tail end of the motion – so the streak appears to follow behind the sharp subject, the way your eye expects. Rear-curtain sync is the go-to choice for dancers, spinning dancers, leaping subjects, and any shot where you want a sharp subject with a believable motion trail.
To enable rear-curtain sync, look in your camera’s flash menu for “Rear-curtain sync,” “Second-curtain sync,” or “Trailing shutter mode.” Most mirrorless and DSLR bodies support it with both the built-in flash and external speedlights. Use shutter speeds of 1 second or longer to give the ambient blur time to build up before the flash fires.
Slow sync flash pairs a long ambient exposure with a flash pulse to balance a dim subject against a darker background. It’s the mode that rescues portraits at dusk: the flash freezes the person’s face while the slow shutter records the glowing sky or city lights behind them. Slow sync isn’t a single setting – it’s a family that includes rear-curtain slow sync, where both the slow shutter and the trailing-flash timing work together.
Practical settings: start at 1/15 to 1 second shutter speed, an aperture around f/4 to f/5.6 for decent background sharpness, ISO 400-800, and let the flash expose the subject. Bracket a few frames to find the balance that keeps the subject lit without blowing out the highlights.
Here are twenty-five field-tested motion blur photography ideas, organized by subject and rated by difficulty. Pick one that matches the conditions in front of you and the gear in your bag – then push the shutter.
Even with the right technique, motion blur can be finicky. Here are the four problems I troubleshoot most often – and the fixes that actually work in the field.
Problem: You want a two-second exposure but the image blows out the moment you press the shutter.
Solution: Stack a 6-10 stop ND filter in front of your lens. As a backup, shoot during golden hour, find open shade, or stop down to your lens’s sharpest aperture (usually f/8-f/11) before pushing smaller apertures that introduce diffraction softening.
Problem: The whole frame is blurry instead of just the moving subject.
Solution: Check the tripod legs – are all three sections fully locked and on solid ground? Hang your camera bag from the center column in wind. Use a remote release or 2-second self-timer. For handheld work, keep shutter speeds at 1/60 or faster and tuck your elbows against your ribs. If your camera has IBIS, turn it OFF on the tripod – stabilization systems can actually introduce shake when they expect movement and find none.
Problem: Your subject is soft or your camera hunts back and forth without locking on.
Solution: For predictable paths, switch to manual focus and pre-focus on a spot your subject will cross. For unpredictable movement, use continuous autofocus (AF-C / AI Servo) with a single-point AF area placed over the subject’s expected position. For stationary scenes with internal motion (waterfalls, light trails), manual focus plus Live View zoom makes focusing precise.
Problem: One good shot out of twenty attempts, and you can’t figure out what made the difference.
Solution: Build a personal “settings log.” Every time you nail a shot, write down the exact shutter, aperture, ISO, focal length, focus mode, and any relevant notes (cloud cover, subject speed, wind). Review EXIF data in Lightroom to spot patterns. The single biggest predictor of consistent results is consistent technique – practice the same setup until the muscle memory takes over.
Modern phones can do far more than auto-mode snapshots. With the right app and a tiny bit of stabilization, you can produce motion-blurred images that hold their own next to a DSLR.
Apps like ProCam X (Android), Halide (iOS), and the stock Pro mode on many phones give you manual shutter control. The longest exposure varies by device – some phones allow up to 30 seconds, while others top out at 1 second. Even that 1-second limit can produce surprisingly silky water when paired with a phone tripod.
iPhone users have a clever workaround in Live Mode: shoot in Live, swipe up on the resulting image, and choose “Long Exposure.” The phone stacks the live frames and applies a motion-blur effect that mimics a long shutter. It’s not a true long exposure, but the look is convincingly similar for waterfalls, crowds, and night scenes.
Phone-specific mini tripods are inexpensive and well worth it. A pocketable GorillaPod-style mount grips railings and branches, opening up shooting angles that would be impossible handheld. In a pinch, prop your phone against a coffee cup, a wallet, or a wall – anything that keeps the lens stable during the shutter window.
ICM works beautifully with phones because of their light weight and small footprint. Try slow pans across a scene, then capture the blur in a single slow-shutter frame. You can also extract frames from slow-motion video (120 fps or 240 fps) and stack them in an editing app to fake a longer exposure. The limited control often sparks more creative problem-solving than a fully featured camera.
Once the basics feel comfortable, the next leap comes from combining techniques, working with light, and shaping the final image in post. These are the advanced moves that turn motion blur from a fun exercise into a signature style.
Combining flash with a slow shutter gives you the best of both worlds: ambient light smeared into motion, plus a crisp subject frozen by the flash pulse. Rear-curtain sync is the secret weapon – the flash fires at the end of the exposure, leaving the motion trail to lead naturally into a sharp subject. Use this for dancers, party portraits, and any subject you want to anchor against a moving background.
Many modern cameras offer a multiple exposure mode that combines two or more frames into one image. Shoot one exposure with a sharp subject, then another with intentional camera movement, and let the camera blend them. The result is a hybrid image that fuses detail and abstraction in ways a single exposure can’t achieve. Mirrorless bodies often allow up to nine exposures in a single composite.
When the camera’s 30-second shutter limit isn’t enough, switch to Bulb (B) mode. The shutter stays open as long as you hold the button (or as long as the remote release is locked). Bulb is essential for star trail stacks, lightning photography, and very long waterfall exposures in low light. A locking remote release and a fully charged battery are non-negotiable.
The RAW file is your friend. JPEG compression can muddy the fine streaks that make motion blur look luminous; RAW preserves the tonal gradient across the trail. In Lightroom, dial in subtle adjustments to contrast, clarity, and saturation first, then use the Dehaze slider sparingly to deepen atmospheric blur without crushing highlights. A light radial or directional sharpening mask on stationary areas can also help anchor the eye.
In Photoshop, the Motion Blur filter (Filter > Blur > Motion Blur) lets you add or extend blur along a chosen direction. Use it to lengthen a too-short panning trail or to fix an inconsistent streak. For pure artistic effects, the Smudge tool can manually push pixels into flowing shapes that mimic ICM, and layer masks let you blur the background while keeping the subject crisp.
The direction of your blur carries meaning. A trail that moves left-to-right reads as forward progress in cultures that read that way; a vertical streak suggests falling or rising; a radial zoom burst implies energy or explosion. Think about the emotional message before you press the shutter. A sharp face with a soft trail flowing from the eyes reads as contemplation; a sharp dancer with a trail flowing from the feet reads as movement and joy.
Each season unlocks different motion blur subjects. Spring brings swollen streams and budding branches that respond to gentle wind. Summer offers thunderstorms, beach waves, and outdoor festivals full of moving crowds. Fall gifts us falling leaves and misty mornings. Winter turns snow into a soft white canvas for car-light trails and holiday-light streaks. Build a year-round shot list and motion blur stays fresh through every weather change.
Start with shutter speeds between 1/2 second and 30 seconds depending on your subject. Waterfalls work well at 1/2-2 seconds, light trails need 10-30 seconds, and panning requires faster speeds of 1/15-1/60 second. Test, review your image, and adjust the shutter speed up or down based on how much blur you see.
Yes. Panning is usually done handheld for mobility. For long exposures, brace the camera against stable surfaces like rocks, railings, or bean bags. Some motion blur techniques, such as intentional camera movement, actually work better handheld because you can introduce smoother, more deliberate motion.
Use neutral density filters to reduce the light entering your lens. A 3-stop ND filter works for overcast days, while 6-10 stop filters are needed for bright sun. Other options include shooting during golden hour, using the smallest practical aperture (f/8 to f/11 to avoid diffraction), or finding shaded areas where slower shutter speeds will not overexpose.
The best aperture depends on your depth-of-field goals and available light. Generally, use f/8 to f/11 for landscapes to keep everything sharp, or f/2.8 to f/5.6 to isolate a subject from the background. In bright light, smaller apertures help achieve slower shutter speeds, but avoid going past f/16 because diffraction softens fine detail.
Use shutter speeds between 0.5 and 2 seconds for silky water effects in waterfalls and streams. For ocean waves creating misty effects, use 5-30 second exposures. Always use a tripod for stability, and consider using ND filters in bright conditions. The key is finding the right balance between texture and blur for your taste.
Panning is a photography technique where you follow a moving subject with your camera, keeping it relatively sharp while blurring the background. Use shutter speeds of 1/15-1/60 second for slow to moderate subjects and up to 1/250 for fast subjects like race cars. Practice smooth motion that starts before you press the shutter and continues after the shutter closes.
Front-curtain sync fires the flash at the start of the exposure, so the motion trail appears in front of the sharp subject. Rear-curtain sync fires the flash at the end of the exposure, so the trail follows behind the subject the way your eye expects. For most motion-blur subjects, rear-curtain sync produces the more natural look.
Yes. Use pro camera apps for manual shutter control, or try iPhone Live Mode with the Long Exposure effect. Stabilize your phone with a mini tripod or by propping it against a stable object. Intentional camera movement techniques work particularly well with phones because their compact size makes deliberate sweeps easier to control.
Use a sturdy tripod and hang a weight from the center column in windy conditions. Use a remote shutter release or 2-second self-timer to avoid vibration when pressing the button. Turn off in-body image stabilization when the camera is on a tripod. For handheld shots, use shutter speeds of at least 1/60 second and tuck your elbows against your body.
The 500 rule helps you avoid unwanted star trails caused by Earth’s rotation. Divide 500 by your lens’s focal length to find the longest shutter speed (in seconds) before stars begin to streak. A 24mm lens allows about 20 seconds, while a 50mm lens allows about 10 seconds. Use longer exposures only when you want intentional star trails.
Motion blur is one of the few photography techniques where a beginner and a master can share the exact same shutter speed and still produce entirely different images. The difference is intention – what you choose to keep sharp, where you place the trail, and what story the motion tells. That choice is yours, and it gets stronger with every frame you shoot.
Pick one idea from the list above and commit to twenty attempts this week. Don’t chase perfect images; chase repeatable technique. Log your settings. Notice what changes between a keeper and a near-miss. Within a few sessions, you’ll develop instincts that no article can teach you – and that, more than any gear upgrade, is what makes motion blur photography ideas your own.
When you’re ready to expand into night sky work, the principles here transfer directly to long exposure star photography. Our full guide on how to photograph stars covers the 500 rule and stacked exposures in detail, and it pairs naturally with the motion blur techniques you’ve just learned. Explore more photography techniques and guides from our homepage to keep building your visual vocabulary through 2026 and beyond.
The world is in constant motion. Your camera already has everything it needs to prove it – just open the shutter, hold it a little longer than feels safe, and watch the ordinary world reveal its hidden pace. Welcome to motion blur.