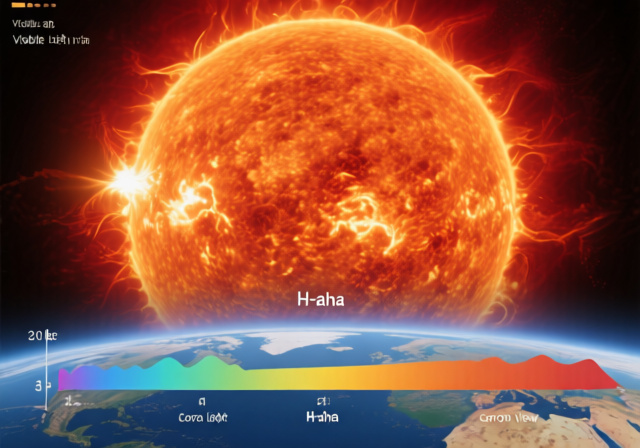
Sun Facts: Complete Guide to Our Closest Star (August 2026)
Essential Sun facts from size and temperature to composition. Learn about our 4.6-billion-year-old star, safe solar observation, and photography techniques…


Walking into a gun shop or browsing optics online can feel overwhelming when you encounter terms like “1/4 MOA click value” or “first focal plane reticle.” Yet rifle scope terminology follows logical principles that become intuitive once explained properly. This guide translates that specialized vocabulary into clear, understandable concepts.
Understanding optics terminology matters because it directly impacts your shooting success. Misunderstanding eye relief could lead to dangerous “scope bite” injuries. Confusing MOA with MIL adjustments means missed shots at distance. When you grasp these terms, you make better purchasing decisions and shoot more accurately.
This guide uses photography parallels throughout because photographers already understand core optical principles. Your knowledge of aperture, focal length, and light transmission gives you a head start on rifle scope fundamentals. Each section builds on concepts you already know, then introduces the specific terminology shooters use.
Whether you are comparing a 3-9×40 scope against a 6-24×50, deciding between FFP and SFP reticles, or simply trying to decode manufacturer specifications, this rifle scope glossary provides the clarity you need. Every term here connects to practical application so you can use your knowledge immediately.
Rifle scope specifications follow standardized notation that tells you exactly what the optic offers at a glance. Learning to read these numbers unlocks quick comparison between models without needing to research every detail.
The specification “3-9×40” contains three distinct pieces of information. The first two numbers represent magnification range, while the third indicates objective lens diameter in millimeters.
Magnification Range: The 3-9x indicates a variable power scope offering 3x to 9x magnification. This means the target appears 3 times closer at minimum power and 9 times closer when fully zoomed in.
Consider this like a photography zoom lens. A 70-200mm lens offers a similar versatility range, letting you adjust framing as needed. The scope magnification works the same way, giving you flexibility to scan broadly at 3x then zoom to 9x for precise shot placement.
The final number in “3-9×40” refers to the objective lens diameter. This 40mm lens at the front gathers light for your view. Larger objective lenses collect more light, improving brightness and low-light performance. A 50mm objective like on the 6-24×50 provides noticeably better twilight capability than a 40mm model.
Fixed power scopes use simpler notation. A “4×32” means exactly 4x magnification with a 32mm objective lens. No range means no adjustment, similar to a prime photography lens versus a zoom.
Photography Parallel: A 3-9×40 scope offers similar versatility to a 70-200mm f/4 lens. The 3x represents your wide angle view while 9x provides telephoto reach. The 40mm objective lens delivers light-gathering comparable to an f/4 aperture in low-light situations.
The maintube is the main body cylinder of the scope that houses the optical system. This specification matters significantly for mounting because ring size must match tube diameter precisely.
Maintube Diameter: The core body tube measurement, typically 1 inch for standard scopes or 30mm, 34mm, and 35mm for premium models. Larger diameters allow for greater internal adjustment range.
Most consumer scopes use 1-inch maintubes, which work well for typical hunting and target applications. Premium scopes increasingly use 30mm or larger tubes because greater diameter provides more room for lens elements and internal mechanisms, resulting in better optical performance and adjustment travel.
When selecting mounting rings, you must match the maintube diameter exactly. A 30mm scope requires 30mm rings. Attempting to mount a 30mm scope in 1-inch rings causes serious problems including scope damage and unreliable mounting.
Larger maintubes also affect weight and balance. The 34mm tubes common on high-end tactical scopes add noticeable weight compared to 1-inch models. Consider your rifle setup and intended use when balancing tube size against weight.
Variable power scopes dominate the market because versatility proves more valuable than fixed-power optical perfection for most shooters. You gain the ability to adapt magnification to different situations without carrying multiple scopes.
Fixed power scopes like a 4×32 offer advantages in specific applications. Simpler construction means potentially better optical quality at that magnification. Tactical competition shooters often prefer fixed power for the consistency and simplicity.
Modern variable scopes have largely closed the optical quality gap through improved lens coatings and precision manufacturing. For general hunting and recreational shooting, variable power provides practical advantages that outweigh minor optical differences.
Understanding how rifle scopes transmit and focus light connects directly to photography knowledge. These optical principles determine image brightness, clarity, and overall shooting performance.
Eye relief measures the distance between your eye and the scope eyepiece when you see the full field of view. This specification exists primarily for shooter safety because insufficient eye relief causes painful recoil injuries.
Eye Relief: The distance from the scope’s eyepiece to your eye for complete field of view, typically 3.5-4 inches on standard scopes. Long-eye-relief models provide 5+ inches for heavy-recoiling firearms.
When your eye sits at the correct eye relief distance, you see a perfectly circular field of view through the scope. Move your eye closer and black shadows appear at the edges. Move too far back and the view cuts off entirely, leaving you with only a partial image.
Photographers experience something similar with viewfinder eye cups. Too close causes vignetting. Too far and you lose the frame entirely. The difference with scopes involves safety. A scope positioned incorrectly when a rifle fires can strike your face or eye, causing serious injury sometimes called “scope bite.”
Eye relief changes on variable power scopes. Most designs provide shorter eye relief at higher magnification settings. Always check eye relief at your intended maximum magnification, not just at minimum power where it typically measures longer.
Field of view describes the width of the visible area you see through your scope at a given distance, typically measured in feet at 100 yards. Wider fields of view let you observe more surroundings, while narrower fields provide higher magnification.
Field of View (FOV): The width of the visible area at 100 yards, usually expressed as a number like “30 feet at 100 yards.” Higher magnification produces narrower FOV.
Photography provides an intuitive analogy. Wide-angle lenses capture broad scenes but show less detail. Telephoto lenses narrow the view but magnify distant subjects. Scopes work identically, trading field width for magnification power.
A scope offering 30 feet FOV at 100 yards when set to 3x power might shrink to 13 feet when you zoom to 9x. That dramatic reduction explains why variable scopes prove so valuable. You need the wide view to locate targets, then zoom for precision aiming.
Hunters pursuing game in dense cover need wide fields of view to track moving animals through brush. Long-range target shooters accept narrow fields because magnification precision matters more than situational awareness at known distances.
Exit pupil describes the diameter of the light beam exiting the scope eyepiece toward your eye. Calculating exit pupil helps predict low-light performance and overall image brightness.
Exit Pupil: Calculated by dividing the objective lens diameter by magnification. A 40mm objective at 9x produces a 4.4mm exit pupil. Larger exit pupils create brighter images.
Understanding exit pupil matters because your eye pupil behaves differently under various lighting conditions. In complete darkness, human pupils dilate to approximately 7mm. At twilight, around 5mm. In bright daylight, only 2-3mm.
When exit pupil exceeds your eye’s pupil diameter, you waste light because your eye cannot gather it all. Conversely, exit pupil smaller than your dilated eye produces a dim image. For dawn and dusk hunting, exit pupils of 5-7mm provide optimal performance.
Photography mirrors this concept directly. Larger camera apertures (smaller f-numbers) gather more light, just as larger exit pupils produce brighter scope images. Both systems involve trade-offs between light-gathering ability and other performance factors.
Every glass surface in a scope reflects some light away, reducing the brightness reaching your eye. Lens coatings minimize these reflections, allowing more light to pass through the optical system.
Light Transmission: The percentage of light that passes through the entire optical system to your eye. Premium scopes achieve 90-95% transmission through advanced multi-coating processes.
Uncoated glass reflects approximately 4-5% of light at each air-to-glass surface. With 10-15 individual elements in a typical scope, uncoated optics would lose half the light before it reaches your eye. Coatings solve this problem just as they do on camera lenses.
High-end scopes use expensive multi-layer coatings on every glass surface, achieving 90-95% light transmission. This performance difference becomes obvious in marginal lighting conditions like dawn and dusk when every photon matters for a clear view.
Aberration describes optical defects that cause image distortion or color fringing. Understanding aberration helps you evaluate scope quality and recognize why expensive optics outperform budget models.
Chromatic Aberration: Color fringing where edges show red or blue outlines, caused by different wavelengths of light focusing at slightly different points. Premium scopes use special glass elements to minimize this effect.
Spherical aberration occurs when light passing through the edge of a curved lens focuses at a different point than light entering the center. The result softens the image and reduces resolution. Premium scopes use aspherical lens elements to correct spherical aberration.
Photographers encounter chromatic aberration as purple fringing in high-contrast scenes, especially at wide apertures. The same phenomenon affects rifle scopes when viewing bright targets against dark backgrounds. Quality optics minimize these artifacts through specialized glass formulas and precise element curvature.
Resolution describes the ability to distinguish fine detail. High-resolution scopes show crisp, clean edges on targets while low-resolution optics produce soft, muddy images. This factor separates premium scopes from budget options more than any single specification.
Collimation refers to proper optical alignment within the scope. A poorly collimated scope produces double images or soft spots across the field. Quality control during manufacturing ensures each scope arrives properly collimated, though rough handling can throw alignment out of specification.
Shooters often evaluate scopes for low-light capability using the twilight factor calculation. This formula combines magnification and objective diameter to estimate performance in limited lighting conditions.
Twilight Factor: Calculated as the square root of (objective diameter x magnification). Higher twilight factors indicate better performance in low-light conditions. A 3-9×40 scope at 9x yields TF = sqrt(40×9) = 18.97.
The twilight factor helps compare scopes objectively, though practical performance depends on additional factors like lens coatings and glass quality. Two scopes with identical twilight factors can perform very differently based on coating quality and optical design.
Photographers can think of twilight factor as related to low-light exposure capability. Larger apertures and higher ISOs improve low-light photography performance similarly to how larger objectives and appropriate magnification improve scope twilight performance.
For hunting at dawn and dusk, consider both twilight factor and exit pupil together. A scope with high twilight factor but small exit pupil may not deliver the expected low-light advantage because your eye cannot gather all the available light.
The diopter adjustment focuses the reticle image specifically for your eye. Since everyone’s vision differs, this fine-tuning control compensates for prescription glasses or natural eye characteristics.
Diopter: A focus adjustment on the eyepiece that tunes reticle clarity for your individual vision. Typically adjusted once during initial setup, then left alone during shooting.
Most diopter adjustments use a simple rear-mounted ring that rotates to move the eyepiece element closer or further from your eye. The adjustment range usually spans several diopters to accommodate most vision differences.
Photographers recognize this concept from viewfinder focus adjustment on cameras. Just as you adjust the viewfinder to match your vision, you set the scope diopter once for your eyes, then rely on it consistently.
Incorrect diopter setting causes the reticle to appear soft even when the target focuses properly. If you notice persistent fuzziness despite checking everything else, the diopter probably needs adjustment for your eyes.
Modern scope manufacturers apply specialized coatings to glass surfaces for multiple purposes. Anti-reflective coatings increase light transmission while protective coatings repel water and resist scratches.
Some coatings provide specific advantages. Nitrogen purging prevents internal fogging by eliminating moisture inside the tube. Argon purging offers similar benefits with potentially better long-term seal integrity. Both processes create fogproof scopes that perform reliably in wet conditions.
External lens coatings often include hydrophobic layers that cause water droplets to bead and roll off rather than spreading across the glass. This feature proves invaluable in rain or morning dew situations.
When evaluating scope quality, examine the coatings by looking through the scope at an angle. Quality coatings appear clear across the entire surface without color tinting. Budget coatings sometimes show rainbow patterns indicating inferior or uneven application.
The objective bell refers to the front housing section containing the objective lens. This area flares outward to accommodate the lens elements and often includes the adjustment turret for parallax or focus.
Eyepiece design similarly refers to the rear housing containing the eyepiece lens and diopter adjustment. The eyepiece must position correctly relative to your eye for proper eye relief and full field of view.
Premium scopes often feature threaded objective bells for attaching accessories like sun shades or filter adapters. These accessories reduce glare and protect the front lens from damage without affecting optical performance.
The reticle provides your aiming reference through the scope. Modern reticles range from simple crosshairs to sophisticated ballistic systems with ranging marks and holdover references.
The duplex reticle remains the most common crosshair design. Fine center lines transition to thicker posts toward the edges, providing precise aiming without obscuring targets at distance.
Duplex Reticle: Fine crosshairs in the center that thicken toward the edges, offering versatile aiming for most hunting and target shooting applications.
For photography enthusiasts, the duplex resembles viewfinder grid lines. The fine center provides precision while thicker outer sections remain visible without dominating the view, exactly like focus points in a camera viewfinder.
Fine crosshair reticles use thin lines throughout, ideal for precision target shooting where every visual element matters. Heavy duplex variants thicken the posts for better visibility in low contrast conditions.
The German post design originated from European tradition, featuring three posts around an open center rather than crossing lines. This style suits shooters who prefer minimal center obstruction for quick target acquisition.
Ballistic Drop Compensating reticles include additional marks below the center aiming point, each representing a specific distance. These marks let you hold over for bullet drop without adjusting turrets.
BDC Reticle: A ballistic reticle with drop compensation marks calibrated for specific bullet trajectories. Each mark corresponds to a known distance, allowing rapid holdover adjustments.
Photography parallels exist in focus distance scales on manual lenses. Both provide reference marks for quick adjustments without interrupting your view of the subject.
Modern BDC reticles often include marks for 200, 300, 400, 500, and 600 yards. The spacing between marks follows specific cartridge ballistics, so manufacturers provide calibration charts matching their reticles to common ammunition types.
Mil-dot reticles offer a different approach using small dots along the crosshairs for ranging. The mil-dots function as angular measurement references for calculating distance to targets of known size. This system requires more training but provides greater versatility.
Focal plane designation describes where the reticle sits in the optical system relative to magnification lenses. This specification significantly impacts reticle functionality at different zoom levels.
First Focal Plane (FFP): The reticle scales proportionally with magnification. Ranging marks and holdover references remain accurate at any power setting.
Second Focal Plane (SFP): The reticle remains constant size regardless of magnification. Holdover marks are only accurate at one specific magnification setting, typically maximum power.
Second Focal Plane reticles behave like fixed viewfinder elements in cameras. The aiming marks stay the same size whether you zoom the lens or not. Most hunting scopes use SFP because the reticle stays visible at low magnification where FFP reticles can become uncomfortably small.
First Focal Plane reticles behave like zoom viewfinder overlays. When you increase magnification on an FFP scope, the reticle grows proportionally. This means mil-dot ranging remains accurate at any zoom level, and BDC holdovers work correctly regardless of power setting.
Photography knowledge helps immediately. SFP resembles maintaining consistent focus point size while zooming. FFP resembles how focus points appear larger when you zoom in with certain camera systems. Both optical systems involve the same fundamental trade-offs.
Time Saver: For hunting at unknown distances using turret adjustments for elevation, SFP provides better reticle visibility at low power. For long-range shooting where holdover marks must work at any magnification, FFP delivers consistent angular measurements.
Want to explore focal plane differences in greater depth? Review our detailed comparison of FFP vs SFP scopes with practical field examples and real-world testing.
Illuminated reticles include battery-powered illumination systems that make the aiming marks glow. This feature helps in low-light conditions when standard reticles become difficult to distinguish against dark backgrounds.
Illuminated Reticle: A reticle with an internal light source and adjustable brightness settings, allowing visibility in low-light conditions where standard crosshairs disappear against dark targets.
Like camera backlit LCD displays or illuminated focus points, illuminated reticles require brightness balance. Too dim produces no visible benefit. Too bright creates glare that washes out your target. Premium scopes offer multiple brightness levels and sometimes automatic sensors that adjust based on ambient light.
Most illuminated reticles use red illumination because human eyes detect red light quickly without excessive pupil constriction. Some scopes offer multiple colors for different lighting conditions, though red remains the most popular choice for general use.
Battery life varies significantly between designs. Quality illuminated scopes provide hundreds of hours of continuous use, while budget models might drain batteries in dozens of hours. Consider this factor if you plan extended field use.
Reticles manufacture using two primary methods. Wire reticles use thin metal wires stretched across the focal plane, while etched glass reticles use photographic processes to create marks on glass elements.
Etched Glass Reticle: Intricate reticle patterns photographically etched onto glass, allowing complex designs impossible with wire construction. Premium scopes typically use etched glass for superior reticle detail.
Wire reticles represent traditional manufacturing, producing reliable crosshairs for basic designs. The duplex pattern works well with wire construction, and high-quality wire reticles provide excellent durability.
Etched glass reticles enable sophisticated ballistic patterns with numerous marks and reference points. The photographic manufacturing process allows much greater design complexity and line consistency than wire stretching permits.
Premium scope manufacturers predominantly use etched glass reticles because the technology enables finer detail and more complex ballistic features. The trade-off involves potentially lower durability if the scope experiences extreme shock, though modern etched glass reticles prove highly resilient.
Scope adjustment systems control point of impact, letting you zero your rifle and make precise changes for different shooting conditions. Understanding these mechanisms connects directly to shooting accuracy.
MOA (Minute of Angle) and MIL (Milliradian) represent two angular measurement systems used for scope adjustments. Both measure the same phenomenon but use different units, similar to metric versus imperial measurement.
Minute of Angle (MOA): 1/60th of a degree. At 100 yards, 1 MOA equals approximately 1.04 inches of point-of-impact shift. Most American shooters prefer MOA for its intuitive inch-based approximation.
Milliradian (MIL): 1/1000th of a radian (approximately 0.057 degrees). At 100 yards, 1 MIL equals 3.6 inches. The military and long-range community favor MIL for its decimal-based calculations.
At 100 yards, 1 MOA spreads roughly 1 inch while 1 MIL spans about 3.6 inches. Neither system is objectively better. MOA aligns naturally with inch-based measurements familiar to American shooters. MIL works elegantly with ballistic calculators and rangefinders using metric or decimal calculations.
The critical rule involves matching adjustment systems to reticle types. MOA adjustments work with MOA reticles. MIL adjustments work with MIL reticles. Mixing systems introduces unnecessary complexity and potential for calculation errors.
Photography analogies help clarify the distinction. MOA relates to intuitive fractions most people grasp naturally. MIL relates to decimal mathematics preferred in technical calculations. Neither is more accurate; they simply suit different preferences and applications.
Turrets provide tactile adjustment controls on scope bodies. Windage turrets adjust horizontal point of impact. Elevation turrets adjust vertical point of impact. Each click produces a precise, repeatable movement.
Click Value: The point-of-impact shift produced by one turret click. Common values include 1/4 MOA (4 clicks per 1 MOA), 1/8 MOA (8 clicks per 1 MOA), and 0.1 MIL (10 clicks per 1 MIL).
Standard turrets use 1/4 MOA clicks, meaning four clicks shift point of impact by approximately 1 inch at 100 yards. Precision competition scopes often use 1/8 MOA clicks for finer adjustment control, though such precision exceeds what most shooters need.
Quality turrets provide positive tactile feedback so you feel and hear each click. This confirmations helps when making adjustments without looking at the turret, like when adjusting elevation between shots at different distances.
Target turrets feature exposed adjustment knobs designed for easy manipulation during competitions or precision shooting. Huntng scopes typically use lower-profile capped turrets that protect against accidental adjustment during carry.
Parallax occurs when the reticle image stays fixed while the target image moves as you shift eye position behind the scope. This optical phenomenon causes aiming errors if not corrected.
Parallax: Apparent reticle movement relative to the target when the shooter’s eye shifts position. Eliminated by focusing the reticle at the same distance as the target.
Photographers understand parallax from rangefinder cameras or twin-lens reflex systems. In scopes, parallax most noticeably affects accuracy at higher magnifications and closer distances. Even slight parallax causes misses at long range.
Adjustable Objective scopes include a front-mounted adjustment ring typically marked with distance scales. Rotating this ring focuses the reticle to match target distance, eliminating parallax at that specific range.
Side focus parallax adjustment provides the same functionality through a side-mounted knob, offering easier access during shooting. This design has become standard on premium scopes regardless of price point.
For typical hunting under 300 yards, parallax rarely causes noticeable accuracy problems. Beyond 400 yards in precision shooting, proper parallax adjustment becomes essential for consistent hit placement.
Zero stop mechanisms provide a physical hard stop preventing turret rotation below your established zero setting. This feature simplifies returning to zero after making elevation adjustments for different distances.
Zero Stop: A mechanical feature allowing quick return to your zero without counting clicks or checking turret position. Essential for competitive shooters making frequent elevation changes.
Photography parallels include focus ring hard stops at infinity position. You know the ring cannot go past that point, so you never accidentally unfocus beyond your intended setting.
Tactical and competition shooters benefit most from zero stop systems. When ranging targets at different distances, you dial elevation up for longer shots, then quickly return to your zero for closer targets without guesswork.
Subtension describes the angular measurement represented by reticle marks at specific distances. Understanding subtension enables range estimation using mil-dot reticles.
Subtension: The physical distance corresponding to reticle marks at a given range. A mil-dot subtension represents 3.6 inches at 100 yards, 7.2 inches at 200 yards, and so on proportional to distance.
Mil-dot reticles allow range calculation when you know target size. If a 16-inch wide target spans 2 mils on your reticle, simple mathematics yield the distance: 16 inches divided by 2 mils equals 8 inches per mil, times 100 yields 800 yards range.
Photographers apply similar principles when estimating distance using lens focal length and known subject sizes. The mathematical relationships remain consistent, just expressed differently between optical systems.
Windage adjustment controls horizontal point of impact, compensating for wind drift or aligning your rifle to account for shooting from angles. Elevation adjustment controls vertical point of impact for distance and trajectory compensation.
Windage: Horizontal adjustment for left-right point-of-impact changes. Elevation: Vertical adjustment for up-down point-of-impact changes based on distance.
Initial zeroing involves adjusting both turrets until point of aim matches point of impact at your chosen distance. Once zeroed, subsequent adjustments involve dialng elevation up for longer shots and windage to compensate for crosswinds.
Adjustment direction matters. Most scopes follow standard conventions where clockwise elevation increases point of impact. Windage typically moves point of impact in the direction you turn the turret relative to the rifle. Check your specific scope manual for confirmation.
Knowing terminology means nothing without applying it effectively. These practical guidelines help you use scope knowledge for better purchasing decisions and shooting results.
Photographers transitioning to shooting often overprioritize magnification specs, similar to new photographers wanting the longest telephoto available. Practical versatility usually matters more than maximum specifications.
Pro Tip: A 3-9×40 scope covers most hunting needs better than a 6-24×50. The lower end enables quick target acquisition in tight spaces while 9x provides precision for typical hunting distances under 300 yards.
Match your scope to your actual needs rather than perceived future requirements. Most hunters never shoot beyond 300 yards yet buy scopes offering 500+ yard capability. That extra magnification adds weight and cost without benefit.
Photography experience provides valuable perspective. You would not buy a 600mm lens for general portraits. Similarly, buying maximum magnification for occasional long-range shooting wastes capability you will rarely use.
Different shooting disciplines and cartridges benefit from different scope characteristics. Understanding these relationships helps optimize your equipment choices.
For specific scope recommendations matching your particular cartridge, explore our comprehensive scope reviews that include real-world testing and detailed ballistics comparisons.
Ballistic coefficient measures how efficiently a bullet moves through the air. While not a scope specification directly, understanding ballistic coefficient helps you use BDC reticles effectively and comprehend trajectory compensation.
Ballistic Coefficient (BC): A number representing bullet drag characteristics. Higher BC bullets maintain velocity better over distance, resulting in flatter trajectories and less wind drift.
G1 and G7 refer to different drag models used to calculate ballistic coefficients. Most manufacturers publish both G1 and G7 BC values for their ammunition. G7 values generally provide more accurate trajectory predictions for modern bullet designs.
BDC reticle calibration assumes specific ballistic coefficients. If your ammunition BC differs significantly from the reticle calibration, holdover marks become inaccurate. Many scope manufacturers provide online calculators matching their reticles to various ammunition BC values.
Understanding typical beginner errors helps you avoid them. These mistakes stem from prioritizing marketing claims over practical knowledge.
Photography Parallel: Your camera knowledge proves valuable here. You understand that gear quality matters less than operator skill, that versatile tools often outperform specialists, and that fundamentals matter more than marketing.
Understanding rifle scope terminology transforms an intimidating subject into an accessible skill set. The principles underlying these optical instruments connect directly to concepts photographers already understand, creating a bridge between two disciplines.
Photography knowledge provides genuine advantages when evaluating scopes. You intuitively grasp how lens coatings affect light transmission, why exit pupil matters for image brightness, and how magnification changes field of view. These parallels accelerate learning dramatically compared to starting from scratch.
Fundamentals always outweigh marketing terminology. A well-built scope with quality glass and reliable mechanics serves you better than a feature-heavy optic with inferior optics. Understanding what specifications actually mean helps you distinguish genuine quality from impressive-sounding claims.
This rifle scope glossary covers the terminology you encounter when shopping for optics or discussing scopes with fellow shooters. Apply this knowledge practically, test scopes in person when possible, and remember that understanding the language represents just the beginning of mastering the craft.
For deeper exploration of specific topics, compare scope brands or browse our complete guide to optical instruments for additional insights into choosing the right optics for your needs.