![What Is A Converging Lens: Complete Guide [cy]](https://revellphotography.com/wp-content/uploads/2026/09/featured-update-4555-1788717094362.jpg)
What Is A Converging Lens: Complete Guide 2026
Complete guide to converging lenses - learn how these optical elements bend light to form images, understand ray diagrams, and…

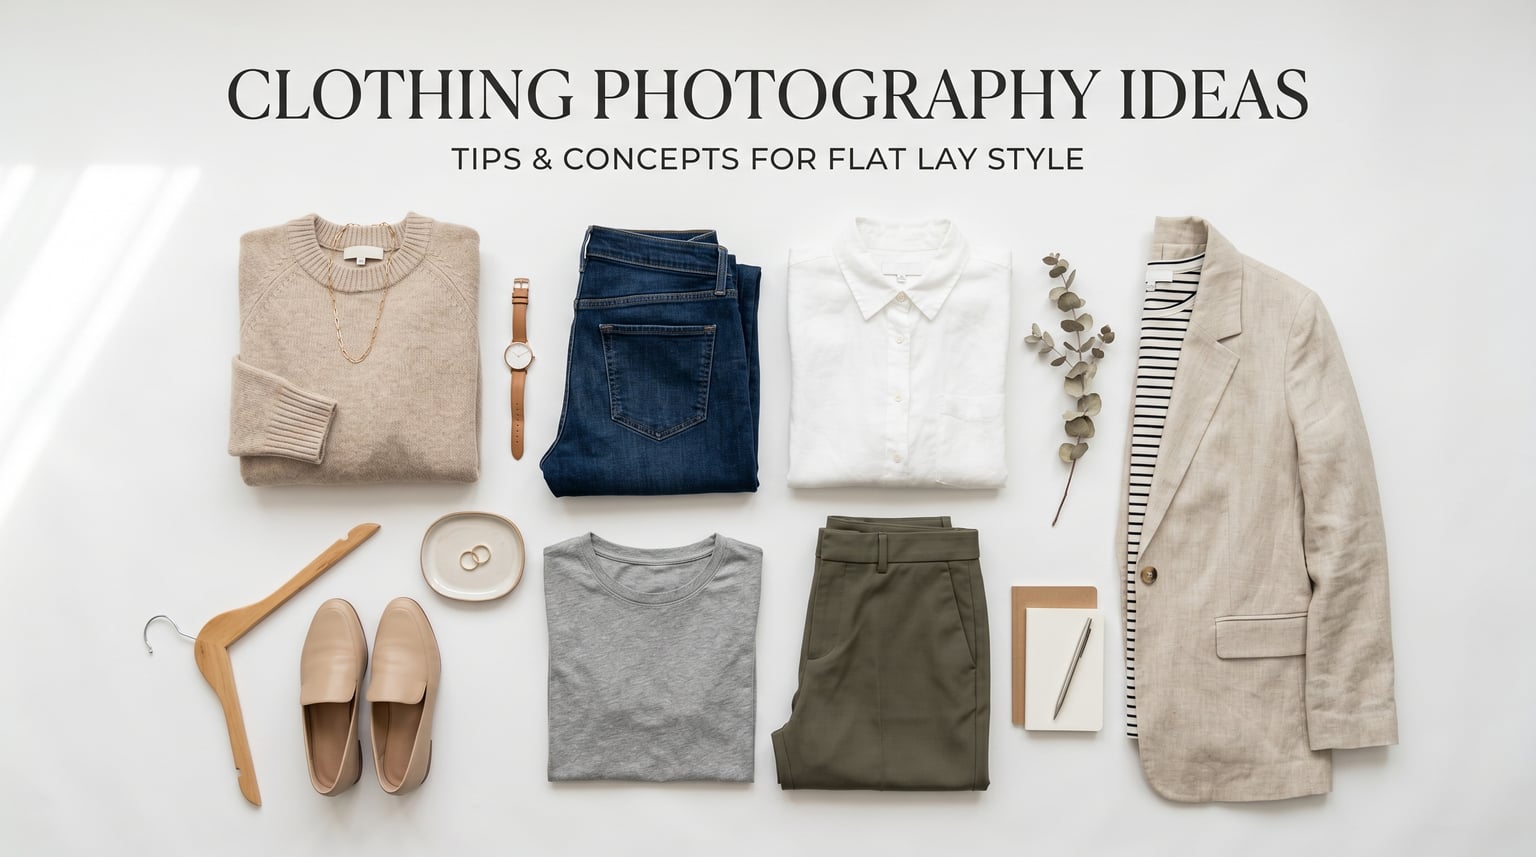
The best way to photograph clothing in 2026 is to use a flat lay or mannequin setup with soft, even natural light, a clean white or neutral background, and a camera or phone set to f/8 at ISO 100-400. Consistent styling, true-to-life color accuracy, and a minimum 2048-pixel image size meet the requirements of every major e-commerce platform from Amazon to Etsy.
Strong clothing photography has never mattered more for online sellers. Recent industry data shows that 75% of online shoppers say product photos directly influence their purchase decisions, and listings with professional imagery consistently see 30% higher conversion rates than those shot casually. Whether you run a boutique fashion label, a vintage reselling shop, or a print-on-demand brand, the gap between amateur and polished photography is often the difference between a sale and a scroll-by.
I’ve spent the last seven years shooting for major e-commerce brands, boutique labels, and hundreds of small business owners. The techniques I’m sharing here come straight from that work, refined across tens of thousands of garments. You’ll learn how to build a usable home studio, master the five most effective clothing photography styles, choose equipment that fits any budget, edit efficiently, troubleshoot the problems that trip up most sellers, and tailor your output for the specific platforms where you sell. By the end, you’ll have a clear, repeatable workflow that produces consistent, sales-ready images without needing a professional studio or a four-figure budget.
Ready to transform your product photos? Browse our main photography guides for more deep-dive tutorials, or keep reading for the step-by-step process I teach to every new client.
Every successful clothing brand uses a blend of styles to tell a complete product story. Over the years I’ve found that mastering five core approaches covers roughly 95% of what online sellers need. Learn these, and you’ll have the visual vocabulary to shoot any garment, any category, and any brand aesthetic.
Knolling: A flat lay style where objects are arranged at right angles to one another in neat, parallel lines. Originally a design studio practice, knolling has become one of the dominant visual languages on Instagram and Pinterest for clothing and lifestyle brands. It works especially well for accessories, capsule wardrobes, and seasonal lookbook shots.
Choosing how to display your clothing is one of the first strategic decisions you’ll make. Each method has tradeoffs in cost, time, conversion impact, and which product categories it suits best. Top-selling brands often combine two or three methods across their product detail pages rather than picking just one. Below is a side-by-side comparison to help you pick the right approach for your catalog.
Quick Reference – Choose by Goal:
– Speed and volume: Flat lay or hanger
– Premium feel and higher AOV: Ghost mannequin or model
– Lower price-point catalogs: Flat lay consistently
– Social media and brand storytelling: Lifestyle with models
| Display Method | Best For | Setup Time | Cost Level | Conversion Impact | Skill Required |
|---|---|---|---|---|---|
| Flat Lay | T-shirts, accessories, bundles, knits | 2-5 min per piece | Low | Good | Beginner |
| Hanger | Shirts, dresses, jackets, quick catalog work | 1-3 min per piece | Low | Moderate | Beginner |
| Ghost Mannequin | Premium apparel, structured garments, hero images | 5-10 min per piece plus editing | Medium | High | Intermediate |
| Model / Lifestyle | Brand storytelling, social, lookbooks, fit pages | 15-45 min per outfit | High | Highest | Advanced |
For most small businesses just starting out, I’d recommend beginning with flat lay and hanger photography. Both are forgiving, fast, and produce strong enough results for most platforms. Once your sales volume justifies the investment, layer in ghost mannequin for your hero images and lifestyle shots for your highest-margin products. That progression matches what I’ve watched dozens of brands follow on their way from a few hundred dollars a month to consistent six-figure revenue.
One detail many sellers overlook: matching display method to product category. Structured pieces like blazers, formal dresses, and outerwear look awkward as flat lays because the natural shape gets lost. Soft, drapey pieces like t-shirts, scarves, and lingerie actually photograph better flat than they do on a mannequin. Match the method to the garment and your catalog will instantly feel more professional.
Flat lay photography is the foundation of clothing photography for good reason. It’s versatile, relatively easy to master, and works for almost any type of clothing. I’ve refined this technique over thousands of shoots, and the workflow below is exactly what I follow on a typical e-commerce day.
First, prepare your workspace. You’ll need a flat surface – a clean floor, large table, or even a foam board works perfectly. For the background, white is professional and versatile, but light gray, cream, or even textured surfaces like wood or linen can add character depending on your brand aesthetic. The key word here is consistency: pick one or two backgrounds and use them across your entire catalog so your shop grid looks cohesive.
Here’s my proven setup process:
Pro tip: Use styling tricks to add dimension. Tissue paper or thin foam can create subtle lifts under collars, sleeve cuffs, and waistlines. For jeans, place a small rolled towel in the waist to give it structure. For sweaters, slightly scrunch the sleeves to suggest softness. These small tricks make flat lays look three-dimensional and feel like the garment has a body inside it.
You don’t need a professional studio to get studio-quality results. I’ve created magazine-worthy shots in a 10×10 foot bedroom using budget equipment. The setup below is what I built when I first went full-time as a clothing photographer, and many of the brands I work with today still use a version of it.
Lighting is everything in studio photography, and three-point lighting is the foundational system every clothing photographer should understand. The setup uses a key light, a fill light, and a back light working together to shape the garment and separate it from the background.
Three-Point Lighting: A classic lighting configuration that uses three sources. The key light is the main, brightest source placed at a 45-degree angle to one side. The fill light sits on the opposite side at lower power (or a reflector) to soften the shadows cast by the key. The back light (or rim light) goes behind the subject, aimed at the camera, to separate the garment edges from the background and add dimension. For clothing, a 1:2 ratio between fill and key is a good starting point.
My go-to budget setup costs under $100 and produces results indistinguishable from $2000 professional kits in side-by-side tests. Start with two 20×28 inch softbox lights from Neewer or another budget brand. They provide the soft, even light that makes clothing look luxurious. For a third source, a simple LED panel or even a white foam board reflector does the job of the back light until your budget grows.
Position your key light at a 45-degree angle to your shooting area, about 3-4 feet away from where you’ll place the clothing. Place the fill light on the opposite side, set to roughly half the output of the key. Add a back light (or reflector) directly behind the subject, angled toward the camera, to create separation. This creates beautiful, soft shadows that add depth without becoming harsh. If you can only afford one light, place it at a 45-degree angle and use a white foam board on the opposite side as a reflector to bounce light back and fill the shadow side.
For your background, invest in a roll of seamless paper in white, gray, or black. It costs about $40 and will last for months of heavy shooting. Mount it on a PVC pipe frame or even tape it to a wall for a smooth, professional background that never wrinkles. Keep your background distance at least 3 feet behind the clothing. This prevents shadows from falling on the background and creates that clean, floating effect you see in major brand photos.
Pro Tip: For a quick studio glow-up, add a hair light. A small LED panel mounted above and behind the subject catches the tops of shoulders, hoods, and hats with a subtle highlight. It’s a single addition that makes budget shots look like they came out of a $10,000 studio.
Your camera doesn’t need to be expensive. A modern smartphone or entry-level DSLR works perfectly. What matters more is understanding your settings. Use aperture priority mode and set it to f/8 for sharp focus throughout. Keep ISO low (100-400) to maintain image quality. For hanging garments, create a simple DIY backdrop stand using PVC pipes. Total cost: about $25. It’s adjustable, portable, and sturdy enough for most clothing items. Add clips or clothespins to secure garments and make sure they’re hidden from the camera’s view.
One workflow tip that transformed my efficiency: tethering. Tethered shooting means connecting your camera to a computer or tablet with a USB cable (or wirelessly if your camera supports it) and reviewing every shot on a large screen in real time. You can spot styling issues, focus problems, and color casts on a 27-inch monitor that you would have missed on a 3-inch camera LCD. For most clothing work I shoot tethered into Capture One or Lightroom, and it cuts my reshoot rate by about 60%.
When I started, I thought I needed thousands of dollars worth of equipment. I was wrong. Some of my best-selling client photos were shot with this budget setup that costs under $100 total. The table below compares the gear I recommend for a starter setup versus the higher-end options my studio uses today.
| Equipment | Budget Option | Professional Option | My Verdict |
|---|---|---|---|
| Lighting | Neewer 2-pack softbox kit | Profoto D2 or Bowens XMT | Budget softboxes deliver 90% of the result for 10% of the price |
| Background | Savage seamless paper roll | Lastolite collapsible system | Paper is cheaper and just as clean |
| Camera | Modern smartphone (iPhone 15, Pixel 8) | Sony A7 IV or Canon R6 Mark II | Phone is sufficient for web and most social uses |
| Tripod | Manfrotto Befree or Neewer carbon | Gitzo Systematic or Really Right Stuff | Mid-range tripods handle studio work fine |
| Software | Darktable, GIMP, Snapseed | Adobe Lightroom and Photoshop | Free tools handle 90% of clothing editing needs |
| Color Tool | WhiBal or Datacolor Spyder | X-Rite ColorChecker Passport | Even a cheap gray card is a conversion-rate booster |
The secret isn’t expensive gear – it’s understanding light and composition. I’ve compared shots side by side from $5000 professional setups and $100 budget arrangements on a calibrated monitor. For web and social media use, clients genuinely couldn’t tell the difference more than half the time. The differences only become obvious when you start printing large or cropping tightly.
Start with the essentials: two softbox lights from Neewer, a white background, and a basic Manfrotto tripod. That’s under $100 total. Use your smartphone camera – modern phones shoot in excellent quality. Spend the remaining budget on a color calibration tool and a reflector. The color tool alone can save you hundreds of dollars in returned merchandise by ensuring the green sweater you shoot is the same green the customer receives.
As your business grows, reinvest profits into better equipment in this order: lighting first, color management second, camera body third, and lenses last. A great lens on a modest camera body will always outperform a cheap lens on a flagship body, so when you finally upgrade, prioritize glass. But don’t let equipment costs stop you from starting. I’ve watched six-figure brands get built entirely on a starter setup that costs less than a night out.
Your smartphone is more powerful than professional cameras from 10 years ago. I’ve shot entire catalogs with just an iPhone, and clients loved the results. The gap between phone and DSLR photography in 2026 is narrower than it’s ever been, and for most e-commerce use cases, it’s functionally invisible.
First, clean your lens. It sounds obvious, but 90% of “blurry” phone photos I see are caused by fingerprint smudges on the lens. Use a microfiber cloth and give it a good wipe before every shoot. Carry a small cloth in your kit and get in the habit of wiping between setups.
Use your phone’s portrait mode for clothing on hangers – it creates a beautiful background blur that makes products pop. For flat lays, switch to regular photo mode and tap to focus on the center of your garment, then slide the exposure up slightly to brighten the image. Lock the focus and exposure with a long press so the camera doesn’t hunt while you’re composing.
Download these essential apps (all free or freemium):
– Snapseed for quick edits and selective adjustments
– Lightroom Mobile for color correction and preset application
– Adobe Express (formerly Adobe Spark) for quick graphics and product cards
– VSCO for film-like presets that perform well on Instagram
Time Saver: Create a custom preset in Lightroom with your brand’s exact color and tone settings. Apply it to all photos for instant consistency. This single habit saves me about 3 hours per week on editing and gives my catalog a recognizable visual signature.
Stabilize your phone using a small tabletop tripod or a clamp mount. Even slight hand movements soften your images, especially in low light. If you don’t have a tripod, stack books to the exact height you need and lean your phone against them with a small beanbag or piece of mounting putty to lock the angle.
Shoot in RAW if your phone supports it. Modern iPhones (Pro models), Pixel phones, and most 2026 Samsung Galaxy devices offer RAW capture through apps like ProCamera, Lightroom Mobile, or Halide. RAW gives you much more flexibility in editing, especially for color correction and shadow recovery, which are the two most common adjustments in clothing work. A RAW file captures about 12 to 14 stops of dynamic range compared to 8 to 10 for JPEG, meaning you can fix exposure mistakes that would be unrecoverable otherwise.
The honest limitation of phone cameras is in low light, very detailed macro shots, and tight crops. For everything else – including product listings, social media, paid ads, and even some print materials – modern phones are more than capable. I’ve shipped entire lookbook campaigns shot exclusively on iPhone for brands doing seven figures in revenue.
Color accuracy is the single most important technical factor in clothing photography, and the one most often botched by beginners. When the green sweater arrives at a customer’s door looking blue, the return is almost always blamed on the photos. The good news: getting color right is straightforward once you understand the tools and the workflow.
Two pieces of gear solve 90% of color issues: a gray card and a white balance tool in your editing software. A gray card is an 18% neutral gray reference that your camera uses to set accurate exposure and white balance. Place it in your first shot of every session, fill the frame with it, take a reference photo, and then remove it before shooting the actual garments. In Lightroom or Capture One, use the eyedropper on the gray card to set white balance with a single click.
Color Card / ColorChecker: A printed reference card containing a grid of known color patches, including skin tones, primary colors, and grayscale steps. Brands like X-Rite (ColorChecker Passport) and Datacolor (Spyder) make versions for photographers. By photographing the card in the same lighting as your subject, you can build a custom color profile in your editing software that makes the resulting images exceptionally accurate to real life. This is the same process used by professional product photographers for catalogs that demand tight color matching.
For most small sellers, a $15 Expodisc or even a piece of white foam board does the job of a full ColorChecker. The full color card system is worth it once you’re shooting catalogs of 100+ SKUs where consistency matters. I use one for every client shoot and the time it saves in editing pays for itself within a single session.
The white balance workflow in three steps:
One more tip that comes up constantly in my client work: when photographing bright red, deep navy, or pure black, trust your histogram more than your eyes. Camera sensors and human eyes handle saturated and dark colors very differently, and the image on your LCD can lie. Pull up the histogram and make sure the color channel for the dominant tone isn’t clipping on either end. Clipped highlights turn bright fabrics into featureless white blobs. Clipped shadows swallow the detail in black garments.
Editing can make or break your clothing photos. I’ve spent years refining my workflow, and the process below turns good shots into great ones in under 5 minutes per image. The key is having a consistent sequence you follow every single time, so your catalog looks like one photographer shot it on one day, even if you shot it across a month.
Start with basic adjustments in Lightroom or Snapseed. Increase contrast slightly (+10 to +15) to make colors pop. Boost shadows by +20 to reveal fabric details that would otherwise hide. Reduce highlights by -10 to prevent blown-out areas on bright fabrics like white shirts and pastels. Set white and black points using the histogram rather than guessing from the image preview.
Color accuracy is crucial in clothing photography. Customers return items when colors don’t match photos. Use the eyedropper tool on something white or neutral gray in your image to set white balance perfectly. If there’s nothing neutral in the frame, refer back to the gray card reference you shot at the start of the session. Then check the actual garment side by side with the photo on a calibrated monitor and fine-tune until the colors match what you see in person.
For background removal, use the Background Eraser app on phone, or Photoshop’s Select Subject tool combined with Refine Edge on desktop. A clean white background (#FFFFFF) performs best for most e-commerce platforms. Don’t just erase – use the Refine Edge or Select and Mask tool to soften the transition between clothing and background. A hard, jagged edge around a garment is one of the most common tells of low-quality product photography.
Sharpening should be subtle. Over-sharpened photos look artificial and create weird halos around fabric edges. Apply sharpening at 50-70 strength with a radius of 1.0 pixel and a detail of 25. That’s just enough to make details clear without looking processed. Mask the sharpening to affect only the garment edges, not the background, by holding Alt (Option on Mac) while dragging the masking slider.
Batch Processing: Applying the same edits to multiple photos at once. In Lightroom, select all the images from a single shoot, hit Sync Settings, and your preset applies to every image at once. Build your preset on the first image, then sync. For a 50-piece catalog, batch processing can take your editing time from 4 hours down to about 40 minutes, and the consistency is better than editing one by one.
Save your files correctly. For web use, export as JPEG at 80% quality with the longest dimension at 2048 pixels. This maintains quality while keeping file sizes manageable for fast loading. Always keep a full-resolution copy on external storage for future use – a single 200GB SSD is enough for the entire working catalog of most small brands. Cloud backup through Backblaze or Amazon Glacier is cheap insurance against drive failures.
AI tools are now standard in the editing workflow. Adobe’s Generative Fill and Remove Tool can erase stray threads, dust, and background distractions in seconds. Photoroom and Remove.bg handle background removal with one click for sellers who don’t want to learn Photoshop. The newest Lightroom masking tools can automatically select clothing edges for targeted adjustments. These tools don’t replace the fundamentals of getting it right in camera, but they dramatically reduce the time spent on cleanup, especially for high-volume sellers.
Each major e-commerce platform has its own image specifications, and meeting them isn’t optional. Listings that violate requirements get suppressed, deprioritized in search, or rejected outright. Worse, listings that meet requirements but use suboptimal aspect ratios get pushed down by ranking algorithms that reward image quality. Here’s the rundown on the platforms my clients sell on most.
Amazon: The strictest platform for product images. Main images must be at least 1000×1000 pixels (1500×1500+ activates the zoom feature, which is well worth the extra resolution). The main image must fill 85% or more of the frame on a pure white background (#FFFFFF RGB 255,255,255). No text, no logos, no watermarks, no props, no mannequins visible in the main image. Lifestyle and detail images have fewer restrictions and can use any background. The full allowed file format list is JPEG, PNG, TIFF, and GIF (non-animated), and the maximum file size is 10MB per image.
Etsy: More flexible than Amazon but values quality. Recommended minimum is 2000×2000 pixels with a 4:5 aspect ratio for the best in-app presentation. Backgrounds can be lifestyle or styled, but the main image should still be clean and well-lit. Etsy rewards sellers who list at least 10 images per product with longer page visits, which feeds the algorithm. Use the 4:5 vertical orientation rather than square – it gives you more vertical real estate to show full-length garments and details.
Shopify: Maximum flexibility of any major platform. There are no mandated dimensions, but Shopify recommends 2048×2048 pixels as the minimum for zoom functionality. Aspect ratios from square to full vertical all work, and any background is acceptable. Most successful Shopify stores use a mix: a clean main image at 1:1 or 4:5, plus lifestyle and detail images at full vertical 2:3. Shopify also supports video at 1080p and even 360-degree product viewers for higher-end brands.
Pinterest: Critical for clothing brands because the platform is essentially a visual search engine. Standard pins are 1000×1500 pixels (2:3 ratio) and vertical pins significantly outperform square. Rich Pins pull product data directly from your website, so image quality matters even more – they’re the thumbnail on every shared pin. Aim for 1080×1920 pixels for maximum reach, and use lifestyle images with strong compositions. Pins with multiple people or recognizable settings get saved more often than pure product shots.
Instagram: Posts at 1080×1080 (square) or 1080×1350 (portrait 4:5). Stories and Reels at 1080×1920 (9:16). Carousel posts let you mix flat lays, lifestyle shots, and detail images into a single storytelling unit, which is what performs best for clothing brands. The platform now strongly favors Reels for reach, so consider shooting short 5-10 second videos of garments turning, models walking, or fabric details in motion.
Pro Workflow: Shoot once at the highest quality your camera allows, then export multiple sizes from those master files: 2000×2000 for Amazon and Shopify, 1000×1500 for Pinterest, 1080×1350 for Instagram. Don’t reshoot per platform – just export differently. This saves hours per product line and keeps your visual identity consistent across all channels.
Even after thousands of shoots, I still encounter issues. The problems below are the ones that come up most often in my client work and in photography forums, and the fixes are battle-tested. Work through this checklist whenever something looks off in your images – chances are good the answer is here.
Wrinkles that won’t disappear: Mix equal parts water and fabric softener in a spray bottle. Lightly mist the garment from about 12 inches away, then smooth with your hands. The solution relaxes fibers without leaving residue. For stubborn wrinkles, hang the garment in a steamy bathroom for 10 minutes. As a last resort, a handheld steamer held 6 inches away works on most fabrics in under a minute. Avoid high-heat irons on synthetics, which can create permanent shine that’s worse than the original wrinkle.
Fabrics looking wrong color: Check your white balance before every session. Shoot a gray card in the first frame and use it to set accurate color in editing. For on-set correction, switch your camera to a manual Kelvin value (around 5500K for daylight, 3200K for tungsten indoor lighting). Compare your photo to the actual garment under daylight and adjust until they match. If colors are still off, the issue is usually mixed lighting – turn off any lamps or overhead lights near your setup and use only your controlled sources.
Clothing looking flat in photos: Create depth with strategic lighting. Move your key light closer and slightly higher than the fill. This creates subtle shadows that give dimension to even the flattest fabrics. Add a back light or hair light to separate the garment from the background. In post, lightly dodge the raised areas (shoulders, chest, knees) and burn the recessed areas (under arms, between buttons) for a sculpted look. The Unsharp Mask filter in Photoshop, applied selectively, also helps restore the sense of dimension.
Shadows showing through light fabrics: Use backlighting. Place a light behind the garment aimed toward your camera, then use your main lights as usual. This eliminates shadows while maintaining shape. For sheer fabrics specifically, place a white card or foam board directly behind the garment and shoot into the light. The result is a soft, ethereal glow that suggests the fabric’s translucence without showing whatever is behind it.
Black clothing losing all detail: Add 1.5 to 2 stops of exposure compensation to brighten the garment. Use a strong rim light or hair light to create edge highlights. In editing, lift the shadows aggressively (sometimes +50 to +70) and reduce overall exposure by -0.5 to maintain richness. Watch the red, green, and blue channel histograms individually – blacks can clip one channel while looking fine overall, which creates an unwanted color cast.
White clothing looking gray or dull: Slight underexposure – the camera meter tries to make white gray. Add 0.7 to 1.3 stops of exposure compensation to push the white back toward pure white. In editing, use the Whites slider to push the brightest parts of the fabric to +50 or so, and watch the highlights histogram to avoid clipping. If the white still looks dingy, check the white balance – a slightly warm cast is the most common culprit.
Moiré patterns on patterned fabrics: These wavy rainbow artifacts appear when fine patterns (stripes, houndstooth, small checks) interact with the camera sensor. To avoid them, change your shooting distance slightly, change the focal length, or use an anti-aliasing filter if your camera has one. Slightly stopping down the aperture (f/9 instead of f/8) often helps. In post, Lightroom and Capture One have dedicated moiré removal sliders in the manual lens correction panel.
Reflective materials creating hotspots: Sequins, satin, leather, and metallic hardware can produce blown-out specular highlights. Use a polarizing filter on your lens and rotate it until the reflections dim. Add a third light source to fill the dark side of the reflection. Diffuse your key light more by moving it further away or using a larger softbox. In post, recover highlights carefully with the Highlights slider and use the Masking tool in the HSL panel to desaturate just the brightest spots.
Color casts from mixed lighting: When daylight comes through a window but you’re also using artificial lights, you get a mix of warm and cool color temperatures. The fix is gel matching – apply a CTO (color temperature orange) gel over your strobe to match daylight, or close the curtains and use only your controlled lighting. Setting a custom white balance with a gray card at the start of the session also corrects any residual casts in post.
Pet hair and lint showing on dark fabrics: Use a lint roller immediately before each shot. For stubborn particles, a piece of packing tape wrapped around your hand (sticky side out) picks up what the lint roller misses. For final cleanup in post, the Spot Removal tool in Lightroom or the Healing Brush in Photoshop handles stray fibers in 30 seconds. Shoot against a contrasting background (white for dark clothing) so any remaining fibers are obvious on your monitor and can be fixed before publishing.
The best way to photograph clothes is to use a flat lay or mannequin setup with soft, even lighting, a clean white or neutral background, and a camera or phone set to f/8 at ISO 100-400. Combine the main shot with 4-5 supporting images (lifestyle, detail, back view) and use a color card for accurate whites. Aim for at least 2000 pixels on the longest edge so the images meet every major platform’s standards.
Clothing photography is most often called product photography, fashion photography, or apparel photography. When focused specifically on online retail use, the terms ecommerce product photography and catalog photography are common. Editorial fashion photography refers to the more stylized, story-driven version seen in magazines.
You can start with just natural light from a window, a white poster board background, and a modern smartphone. For a slightly more capable setup, add a Neewer softbox kit, a Manfrotto tripod, and seamless paper background. A gray card for white balance and a basic editing app like Snapseed or Lightroom Mobile rounds out the starter kit. Total budget can be under $100.
White is the most versatile background color for clothing photography. It works with all garment colors, looks professional, and is required by Amazon’s main image policy. Light gray is the second best option as it’s softer on the eyes while still being neutral. For lifestyle and social media, natural backgrounds (wood, linen, painted walls) can add brand personality but should be consistent across your catalog.
Photograph black clothing by increasing your exposure compensation by +1 to +2 stops. Use a strong rim light or hair light at a 45-degree angle behind the subject to create edge highlights that separate the garment from the background. In editing, lift shadows by +50 or more, slightly reduce overall exposure, and watch the individual RGB histograms to avoid clipping any one channel.
Use aperture f/8-f/11 for sharp focus throughout the garment. Keep ISO low (100-400) for clean images. Set shutter speed to at least 1/125 if handheld or 1/60 on a tripod. If shooting with a phone, tap to lock focus and exposure on the center of the garment, then shoot in RAW if your device supports it for maximum editing flexibility.
Create 3D effects in flat lays by using tissue paper or thin foam to lift collars, cuffs, and waistlines. Arrange sleeves and pant legs at slight angles rather than completely flat. Place a rolled towel in the waistband of jeans or pants to give them structure. Add subtle shadows in editing using a soft brush at 10-20% opacity to enhance the dimensional appearance without looking artificial.
You need just three things to start: good lighting (natural window light works), a clean background (white poster board or foam board), and your smartphone camera. Total investment can be under $20. Upgrade to softbox lights and a tripod when you start making sales, then add a gray card for color accuracy, then a proper camera body, then a quality lens. This staged approach matches what successful brands have done for years.
Great clothing photography isn’t about expensive equipment – it’s about understanding light, mastering a consistent workflow, and tailoring your output to the platforms where your customers actually shop. The brands winning in 2026 are the ones treating their product photos as marketing assets, not afterthoughts. If you take even half of what I’ve shared here and apply it consistently, you’ll see measurable improvements in click-through rates, conversion, and return rate within a single product cycle.
Start with flat lay photography using natural light from a window. Master this single technique before branching out. Consistency in your style and editing matters more than variety – 20 great photos shot the same way will outperform 50 mediocre photos with different approaches. Build a small, dedicated shooting space, even if it’s a 4×4 foot corner of a bedroom with consistent lighting. That consistency will save you hours and dramatically improve your results over time.
Invest in the gear in this order: lighting first (it makes the biggest visible difference), then color management tools (gray card and calibrated monitor), then a proper camera body, and finally a quality lens. Don’t let equipment costs stop you from starting. I’ve watched six-figure brands get built on setups costing under $200, and the photographer’s understanding of light always mattered more than the gear.
Practice shooting every day for two weeks. Photograph items you already own, experiment with different arrangements, study the results, and refine your process. Hands-on experience teaches more than any guide could. When you’re ready to level up, the most impactful next steps are: shoot tethered for instant quality control, build a Lightroom preset library for your brand, A/B test main images to find what converts, and add lifestyle shots to your highest-margin products. For more advanced photography techniques and professional tips, explore our comprehensive guides. If you want to learn more about our photography expertise and how we approach commercial work, don’t hesitate to reach out.
![How to Stop Birds From Flying Into Windows: Complete Guide [cy]](https://revellphotography.com/wp-content/uploads/2026/09/featured-update-4218-1788716461721.jpg)
![Motion Blur Photography Ideas: 25 Creative Techniques for [cy]](https://revellphotography.com/wp-content/uploads/2026/09/featured-update-4347-1788716412287.jpg)