How To Do Long Exposure Photography: Complete Beginner’s Guide 2025
Miles Everett
November 3rd, 2025
Table Of Contents
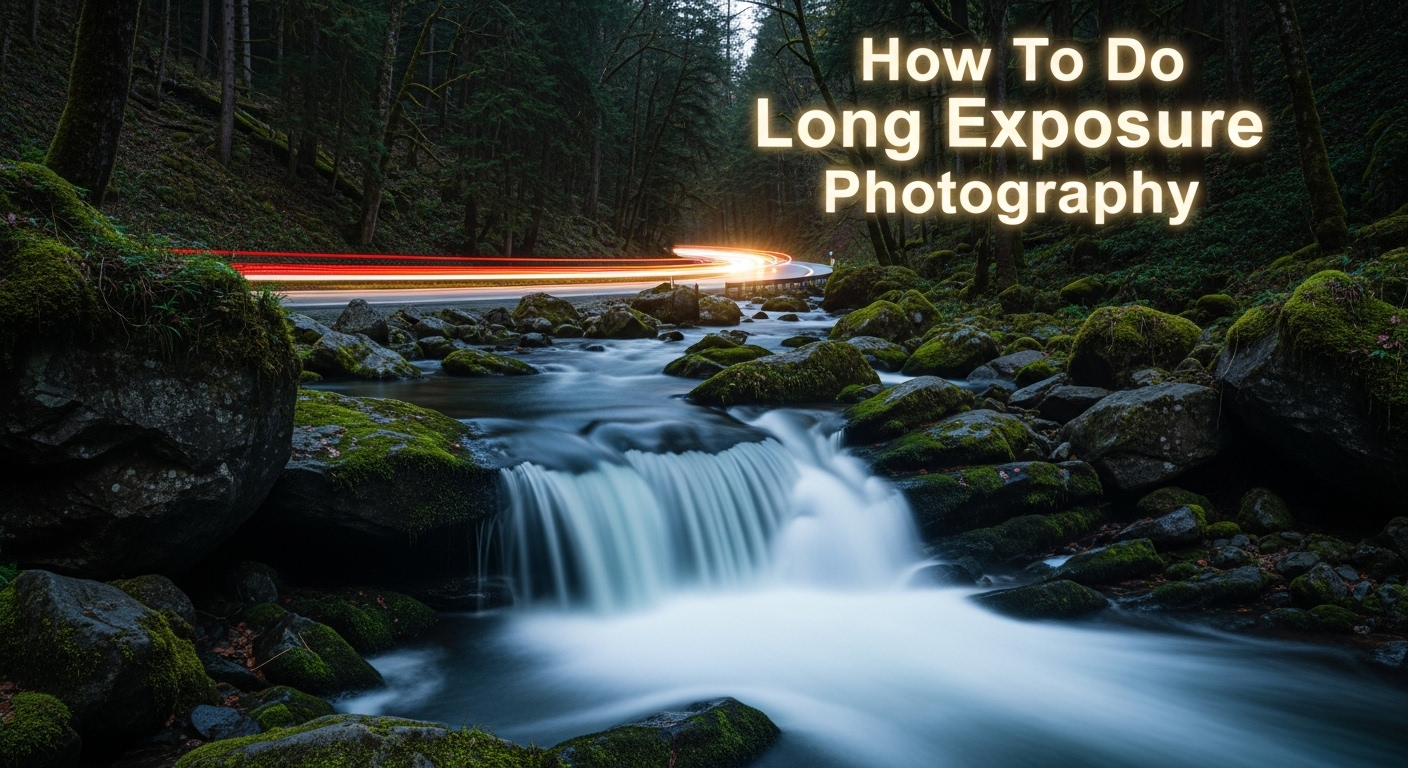
I still remember my first successful long exposure photograph. Standing on a pier at sunset, I watched as 30-second exposure transformed choppy water into a glassy mirror and clouds into streaks of cotton candy across the sky. That single image changed how I saw photography forever – it wasn’t just capturing moments, but capturing time itself.
How to do long exposure photography is about keeping your camera’s shutter open for an extended period, typically from 1 second to several minutes, allowing moving elements to blur while stationary objects remain sharp. This technique transforms ordinary scenes into extraordinary images by showing the passage of time in a single frame.
You don’t need expensive equipment or years of experience to master this technique. I’ve taught complete beginners who took stunning long exposure photos within their first hour of practice. This guide will walk you through everything from essential gear to advanced techniques, with specific settings and troubleshooting tips that actually work in real-world situations.
In this comprehensive guide, you’ll learn the exact camera settings I use for different scenarios, discover budget-friendly equipment options that deliver professional results, master the step-by-step process for perfectly exposed shots every time, explore creative applications from silky waterfalls to bustling city streets, and solve common problems that frustrate most beginners.
For more photography guides and tips, explore our complete collection of tutorials designed to help you capture stunning images in any situation.
What is Long Exposure Photography and Why Does It Create Magic?
Long exposure photography is a technique where the camera’s shutter stays open for an extended period, allowing more light to reach the sensor. This extended capture time creates beautiful motion blur effects that our eyes can’t see naturally. Water becomes silky smooth, clouds streak across the sky, and city lights paint rivers of color through the darkness.
Bulb Mode: A camera setting that keeps the shutter open as long as you hold down the shutter button, essential for exposures longer than 30 seconds.
The magic happens because of how our cameras process light over time. While a normal photo might capture 1/125th of a second, a long exposure might capture 30 full seconds, effectively painting 3,750 times more light onto your sensor. This allows you to shoot in near darkness and create artistic effects with anything that moves during the exposure.
I’ve found that long exposure photography works best when you have a mix of moving and stationary elements. The stationary parts (like rocks, buildings, or trees) provide anchor points, while the moving parts (water, clouds, lights) create the dynamic elements that make these images so compelling.
Essential Equipment for Long Exposure Photography
Getting started with long exposure photography doesn’t require a fortune in equipment. However, a few essential items will make the difference between frustrating attempts and stunning results. Based on my experience testing dozens of setups, here’s what actually matters.
Must-Have Equipment
A sturdy tripod is non-negotiable – I learned this the hard way when my cheap tripod collapsed during a 2-minute exposure, destroying both my shot and my filter. Invest in something that can support at least double your camera’s weight, especially if you’ll be shooting in windy conditions. Look for carbon fiber models around $200 for serious work, but aluminum tripods starting at $80 can work well for beginners.
Neutral density (ND) filters are the dark glasses for your camera – they reduce light entering your lens without affecting colors. For daytime long exposures, you’ll need at least a 10-stop ND filter (also called ND1000). I recommend starting with a circular ND filter from brands like Hoya or B+W; spending $80-120 here is worth it to avoid the color casts that cheap filters introduce.
A remote shutter release or intervalometer prevents camera shake when you press the button. Even pressing the shutter on your camera can introduce vibration that ruins a long exposure. Basic wired remotes cost under $20, while intervalometers with timer functions run $40-60 and are worth the investment for exposures over 30 seconds.
Recommended Equipment
While not strictly necessary, these items will dramatically improve your results and expand your creative possibilities:
Equipment
Budget Option
Recommended
Premium Choice
ND Filter
Zomei 10-stop ($30)
Hoya PROND64 ($80)
B+W XS-Pro ND110 ($150)
Tripod
AmazonBasics 60″ ($50)
Manfrotto Compact Action ($90)
Gitzo Mountaineer ($600)
Remote Release
Basic wired ($15)
Vello Shutterboss II ($40)
ProMaster Intervalometer ($80)
Camera Bag
Basic backpack ($30)
Lowepro Fastpack ($80)
F-Stop Tilopa ($300)
✅ Pro Tip: Before buying any equipment, check if your camera has a built-in intervalometer or if your smartphone can work as a remote shutter. Many modern cameras include these features, saving you $50-100.
Budget-Friendly Alternatives
If you’re just starting out or working with a tight budget, don’t worry – you can still create amazing long exposure photos. Here’s how to save money without sacrificing quality:
Instead of expensive ND filters, consider a 6-stop and 10-stop combination from brands like Neewer or K&F Concept (around $40-50 total). You can stack them for 16 stops when needed, giving you more versatility than a single filter. Just be aware that stacking can sometimes introduce vignetting on wide-angle lenses.
For tripods, check used markets like KEH or local classifieds. I’ve found professional-grade tripods for under $100 that would cost $400 new. Just make sure the leg locks work properly and there’s no damage to the center column.
Your camera phone can actually work for basic long exposures! Apps like Slow Shutter Cam (iOS) or Long Exposure Camera 2 (Android) can create light trails and water effects for just a few dollars. While you won’t match DSLR quality, it’s a great way to learn the technique without any upfront investment.
Perfect Camera Settings for Long Exposure Photography
Getting your camera settings right is crucial for successful long exposures. After thousands of shots and countless experiments, I’ve developed a systematic approach that works consistently across different scenarios.
Basic Camera Settings
Always shoot in Manual mode – this gives you complete control over your exposure. Set your ISO to its lowest native value (usually 100 or 200) to minimize noise. Long exposures already generate digital noise; keeping ISO low prevents it from becoming excessive.
Your aperture should typically be between f/8 and f/16. This sweet spot provides sharpness across the frame while allowing for longer shutter speeds without overexposure. I start at f/11 and adjust based on the depth of field I need and how much light is available.
Focus manually before attaching your ND filter. Most cameras struggle to autofocus with dark filters attached. Use live view to zoom in on your subject, achieve perfect focus, then switch to manual focus mode to lock it in. Place a piece of gaffer tape over your focus ring to prevent it from moving during long exposures.
Shutter Speed Guide
Your shutter speed depends on what you’re trying to capture and how fast things are moving. Here are my go-to starting points:
Waterfalls/Rivers: 0.5-2 seconds creates silky water without losing all texture
Ocean Waves: 10-30 seconds creates that misty, ethereal effect
Cloud Movement: 30-120 seconds depending on wind speed
Light Trails: 15-60 seconds, adjust based on traffic speed
Star Trails: 30 seconds per exposure, then stack multiple shots
Remember these are starting points, not rigid rules. I’ve created beautiful water blur at 1/3 second in bright conditions and needed 5 minutes for minimal cloud movement on calm days. Always check your histogram and adjust accordingly.
Advanced Settings to Consider
Enable Long Exposure Noise Reduction if your camera offers it. This feature takes a second dark frame immediately after your shot and uses it to reduce digital noise. It doubles your shooting time but can significantly improve image quality, especially for exposures over 30 seconds.
Turn off image stabilization when using a tripod. This is a mistake I see constantly – photographers leave IS on and wonder why their images aren’t sharp. The stabilization system actually introduces movement when the camera is perfectly still, so disable it for tripod work.
Consider shooting in RAW format instead of JPEG. RAW files give you much more flexibility to recover shadows and highlight details in post-processing, which is especially important for long exposures where the dynamic range can be extreme. The tradeoff is larger file sizes, but the creative control is worth it.
How to Take Long Exposure Photos: Step-by-Step Method
Follow this exact sequence I’ve refined over years of long exposure photography. I’ve taught this process to hundreds of photographers, and it eliminates 90% of common mistakes.
Scout and Plan Your Shot (5-10 minutes before)
Arrive early and observe how elements are moving. Watch the water flow pattern, cloud direction, and traffic flow. Use an app like PhotoPills to check sun position and timing. I always take a few test shots without filters to verify composition and exposure base settings.
Set Up Your Tripod and Compose (3 minutes)
Extend your tripod legs from the top down for maximum stability. Hang your camera bag from the center column if it’s windy – this adds weight and reduces vibration. Use a bubble level to ensure your horizon is straight. Take your time with composition; remember that moving elements will fill empty spaces in your frame.
Establish Base Settings (2 minutes)
Without any ND filters, set ISO to 100 and aperture to f/11. Adjust shutter speed until you get a proper exposure (use your histogram – don’t trust the LCD). This becomes your reference point for calculating the right shutter speed once you add filters.
Focus and Lock It (1 minute)
Use autofocus to lock onto your subject, then switch to manual focus. If shooting in low light, use live view zoomed in on a bright area or use a flashlight to illuminate your focus point. Place tape on your focus ring to prevent any movement during the exposure.
Attach ND Filters (30 seconds)
Be careful not to bump your camera or change focus when mounting filters. If using multiple filters, stack them carefully and check for vignetting in the corners. Make sure all filters are clean – dust shows up more prominently in long exposures.
Calculate New Shutter Speed (1 minute)
Use this formula: New shutter speed = Base shutter speed × (2^number of stops). For example, if your base was 1/60 second and you’re using a 10-stop ND filter: 1/60 × (2^10) = 1/60 × 1024 = 17 seconds. Apps like ND Filter Calc can do this math instantly.
Take Test Shot and Adjust (2-3 minutes)
Take a test shot with your calculated settings. Check the histogram – you want it slightly to the right of center but not blown out. If too dark, double the exposure time; if too bright, halve it. Repeat until you get the exposure right.
Execute Final Shot (varies)
Use a remote shutter or 2-second timer to trigger the exposure. During the shot, stay still and avoid touching the tripod. For exposures over 30 seconds, use your phone’s timer or an intervalometer. I count the seconds in my head to track progress and prepare for the next shot.
Review and Refine (1 minute)
Check your image at 100% zoom to ensure sharpness. Look for vibration, focus issues, or unwanted movement. Make notes on what worked and what didn’t. Long exposure photography is often iterative – each shot teaches you something for the next one.
⏰ Time Saver: Create a checklist card with these steps and keep it in your camera bag. I still refer to mine occasionally after years of shooting – it prevents forgetting crucial steps in the excitement of the moment.
Creative Long Exposure Photography Ideas You Can Try Today
Once you’ve mastered the basics, the creative possibilities are endless. Here are my favorite long exposure techniques, each with specific settings and tips to get you started quickly.
Silky Water Effects
Waterfalls, rivers, and ocean waves are perfect for long exposure beginners. The effect is dramatic and relatively easy to achieve. For waterfalls, I typically use 0.5-2 second exposures to maintain some water texture while creating that smooth, flowing look.
For ocean seascapes, longer exposures of 10-30 seconds create that misty, ethereal effect that makes water look like fog. Time your shot to start just before a wave recedes – this creates beautiful leading lines as the water pulls back. During my last coastal workshop, students got their best results shooting during golden hour when the light was soft and even.
Cloud Movement Dramatics
Moving clouds can transform boring skies into dramatic statements. The key is finding the right balance – too short and clouds look like regular clouds, too long and they become featureless white streaks.
I recommend 30-60 second exposures for moderate wind speeds, up to 2 minutes for very slow cloud movement. Look for days with partially cloudy skies – completely overcast conditions often create boring white blobs, while clear skies offer nothing to blur. The magic happens with those scattered, moving clouds that catch the light as they travel.
Urban Light Trails
Cityscapes come alive after dark with long exposure photography. Traffic creates beautiful light trails, and buildings glow with ambient light. My approach for city scenes: 15-30 second exposures at f/8-11, ISO 100.
Position yourself above the action if possible – overpasses, parking garages, or upper floors of buildings work great. I’ve found that shooting during blue hour (just after sunset) creates the most appealing results – you get the deep blue sky contrasted with warm artificial lights.
For extra creativity, try zooming during exposure or moving the camera slightly for intentional camera movement (ICM) effects. I once created a stunning abstract cityscape by zooming from 24mm to 70mm during a 20-second exposure of Tokyo at night.
Night Photography and Star Trails
Long exposure opens up the night sky in ways our eyes can’t perceive. For star trails, you have two options: very long single exposures (30+ minutes) or stacking multiple shorter exposures. I prefer the stacking method – it reduces noise and allows you to create smoother trails.
Try this technique: 30-second exposures at f/2.8, ISO 3200, with 1-second intervals between shots. Take 100-120 shots, then stack them in software like StarStaX or Photoshop. The result is perfect circular star trails showing the Earth’s rotation.
For the best results when photographing stars, choose a dark location away from city lights, check the moon phase (new moon is ideal), and use a sturdy tripod. My best star trail shots came from patience – sometimes waiting hours for perfect conditions.
People and Movement
Crowds can disappear with long exposures, creating empty spaces in busy locations. Use 10+ second exposures in busy tourist areas to make people vanish. This technique works especially well in black and white, emphasizing the architecture over the crowds.
For intentional ghost effects, have someone hold still for part of the exposure, then move. A 15-second exposure with someone standing still for 5 seconds then moving creates a transparent ghostly figure. I’ve used this technique to create mysterious portraits in old buildings.
Long Exposure Photography with Your Smartphone
Don’t have a DSLR? You can still create impressive long exposure photos with your smartphone. Modern phones have impressive capabilities, especially with the right apps.
For iPhone users, apps like Slow Shutter Cam ($1.99) or Live Photo long exposure tricks work well. The native iOS Live Photos feature has a hidden long exposure mode – just swipe up on any Live Photo and select “Long Exposure.” This creates beautiful water blur and light trail effects.
Android users have more options with manual camera apps. I recommend Camera FV-5 ($4.95) or Long Exposure Camera 2 ($2.99) for full manual control. These apps allow you to adjust shutter speed, ISO, and focus just like a DSLR.
The limitations are real – smartphone sensors struggle with exposures over 30 seconds, and image quality degrades faster than with dedicated cameras. But for creative effects and learning the basics, phones are surprisingly capable. I’ve taught workshops where students created stunning light trail photos using just their iPhones and a small tripod.
Stabilize your phone with a small tripod or by propping it against something solid. Even tiny movements become exaggerated in long exposures. Consider investing in a smartphone tripod adapter – they cost under $20 and make a huge difference in image quality.
Solving Common Long Exposure Photography Problems
Every long exposure photographer encounters these issues. Based on thousands of shots and helping hundreds of students, here are proven solutions to the most frustrating problems.
My Shots Are All White (Overexposed)
This happens when too much light reaches your sensor, usually because your ND filter isn’t strong enough or your shutter speed is too long. Start by halving your exposure time and checking the histogram.
If you’re shooting in bright daylight, you might need to stack ND filters or wait for better light conditions. I once tried shooting a waterfall at noon with only a 6-stop ND filter – every shot was blown out despite using the fastest shutter speed possible. The solution? Either use a 10-stop filter or return during golden hour when the light is naturally softer.
Camera Shake and Blurry Images
Even with a tripod, tiny vibrations can ruin long exposures. Check these common culprits: image stabilization still enabled, tripod legs not fully locked, center column extended too high, or wind causing vibration.
I’ve learned to hang my camera bag from the center column on windy days – the extra weight stabilizes everything. Also, avoid extending the center column at all if possible. The most stable setup uses the tripod legs at their lowest extension without raising the center column.
Mirror lockup is another crucial feature for DSLR shooters. This raises the mirror before the exposure, preventing vibration from the mirror slap. For mirrorless cameras, this isn’t an issue, but first curtain shutter electronic can help reduce vibration.
Noise in My Images
Long exposures naturally generate digital noise, which appears as grain or colored specks in your images. Combat this by using the lowest ISO possible and enabling your camera’s long exposure noise reduction feature.
For exposures over 2 minutes, noise becomes more noticeable. Consider taking multiple shorter exposures and stacking them in post-processing instead of one extremely long exposure. This technique, called exposure stacking, reduces noise while maintaining the long exposure effect.
In post-processing, use noise reduction software carefully. I’ve found that Lightroom’s noise reduction works well up to about 30, but beyond that, dedicated software like Topaz DeNoise AI produces better results. Just don’t overdo it – some noise is acceptable and can add atmosphere to certain images.
Focus Issues with ND Filters
Many cameras can’t autofocus properly when a dark ND filter is attached. The solution is simple: focus before attaching the filter, then switch to manual focus mode.
If you must focus with the filter attached (like when using a filter holder system), use live view and zoom in on a bright area or edge. Some photographers use a flashlight to illuminate their subject briefly for focusing, then turn it off for the exposure.
I always mark my focus ring with a small piece of tape once perfect focus is achieved. This prevents accidental movement when attaching filters or making other adjustments. It’s saved countless shots that would have been soft otherwise.
Weather and Environmental Challenges
Wind is the enemy of long exposure photography. Even light breeze can cause vibration, especially with telephoto lenses. On windy days, I use a heavier tripod, avoid raising the center column, and sometimes create a windbreak using my body or a backpack.
Rain presents both challenges and opportunities. While you must protect your gear (a simple plastic bag with a hole for the lens works), wet surfaces create beautiful reflections in long exposures. I’ve captured some of my best cityscape shots during light rain, using the reflections to double the light trails.
Cold weather affects battery life dramatically. Long exposures in winter can drain batteries twice as fast as normal. I always carry at least two spare batteries and keep them in an inner pocket close to my body heat. For really long shoots in cold conditions, consider an external battery grip.
Frequently Asked Questions
What shutter speed should I use for long exposure?
Shutter speed depends on your subject and desired effect. For waterfalls: 0.5-2 seconds creates silky water. Ocean waves: 10-30 seconds for misty effects. Cloud movement: 30-120 seconds based on wind speed. Light trails: 15-60 seconds for traffic. Start with these guidelines and adjust based on your results.
What ISO setting for long exposure?
Always use the lowest native ISO your camera offers, typically ISO 100 or 200. Long exposures already generate digital noise, and higher ISO settings make it worse. Keep ISO low and adjust your shutter speed or ND filter strength instead to control exposure.
Why are my long exposure shots white?
Overexposure occurs when too much light reaches your sensor. Solutions: use a stronger ND filter (10-stop or more), reduce shutter speed, or shoot during darker conditions like golden hour or blue hour. Check your histogram – it should be slightly right of center but not touching the right edge.
What is the 500 or 300 rule in photography?
The 500 rule prevents star trails in astrophotography: 500 divided by your focal length = maximum shutter speed in seconds. For example, with a 24mm lens: 500 ÷ 24 = 21 seconds. The 300 rule is for crop sensor cameras: 300 ÷ focal length. This calculates the longest exposure before stars appear as trails due to Earth’s rotation.
Can you do long exposure without a tripod?
While a tripod is ideal, you can improvise. Place your camera on a stable surface like a rock, wall, or bean bag. Use the self-timer to avoid shaking the camera when pressing the shutter. Results won’t be as consistent, but it’s possible to create basic long exposure effects in emergencies.
How to do long exposure in bright daylight?
You need strong ND filters for daylight long exposures. Start with a 10-stop ND filter (ND1000), and you might need to stack with a 6-stop filter for very bright conditions. Alternatively, shoot during golden hour (hour after sunrise/before sunset) when natural light is softer, reducing the need for extremely strong filters.
What ND filter strength should I use?
For most situations, a 10-stop ND filter is your workhorse. It allows 30-second exposures in bright daylight. Consider adding a 6-stop filter for stacking when you need even longer exposures. Variable ND filters offer convenience but can cause issues with wide-angle lenses and at certain settings.
How to calculate exposure time with ND filters?
Use the formula: New shutter speed = Base shutter speed × (2^number of stops). For example, 1/60s base exposure with a 10-stop filter: 1/60 × 1024 = 17 seconds. Apps like ND Filter Calc or Long Exposure Calculator can do this math instantly and prevent mistakes in the field.
Final Recommendations
Long exposure photography has transformed how I see the world around me. What started as a technical challenge became a creative passion that continues to reveal new possibilities. The techniques I’ve shared here work consistently because they’re built on thousands of real-world shots, not just theory.
Start simple – practice with water scenes during golden hour when the light is forgiving. Master the basic setup process before moving to more challenging night photography or complex urban scenes. Remember that every long exposure photographer started exactly where you are now, wondering if they could create those magical effects they’d seen online.
The most important advice I can give? Be patient with yourself. Your first dozen shots might not work out, and that’s completely normal. Even professional photographers delete more images than they keep. What matters is that you learn from each attempt and gradually build your skills.
For more photography techniques and inspiration, explore our complete collection of photography guides. Whether you’re interested in night sky photography, landscape techniques, or creative portrait methods, we have detailed tutorials to help you grow as a photographer.
Now grab your camera, find some moving water or traffic, and start creating. The world looks different through a long exposure – let it show you what you’ve been missing.
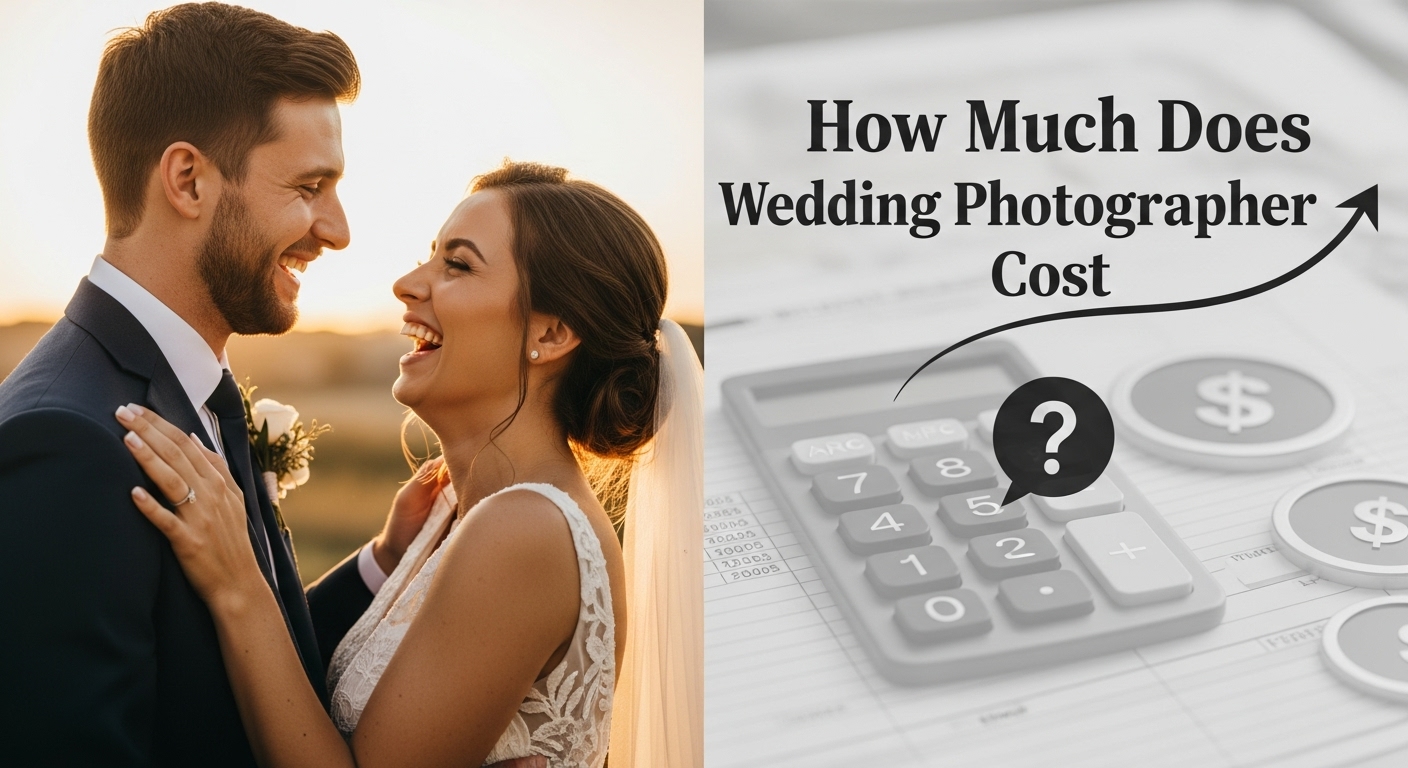
Complete guide to wedding photographer costs in [cy]. Most couples spend $2,500-4,000 on wedding photography. Learn pricing factors, regional variations,…
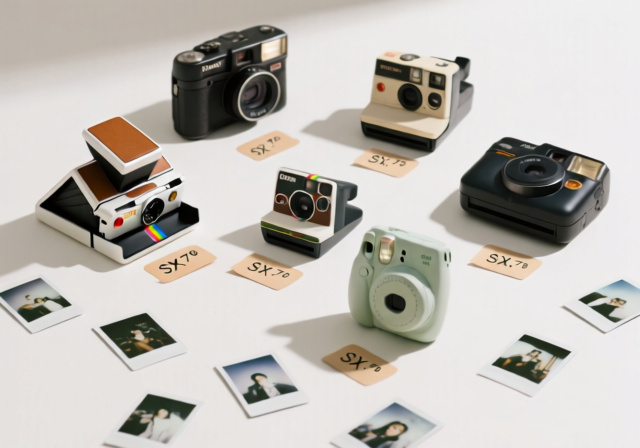
Complete guide to Polaroid camera costs in [cy]. Learn about new vs vintage models, film prices, and total ownership expenses…
We help you capture the world through your lens with creativity and confidence. Explore tutorials, reviews, and stories that bring the art of photography to life.
All images and content are crafted with passion to inspire your next great shot