How to Fix Bottomed Out Bow Sight: Complete Guide 2026
Complete guide to fix bottomed out bow sight with 6 proven troubleshooting steps. Works for all compound bows with specific…

The product images on your site are doing more work than you think. According to recent visual commerce research, buyers form an opinion about a product in less than 50 milliseconds – and that snap judgment drives whether they scroll further or hit the back button. After a decade of photographing everything from handmade ceramics to industrial equipment, I’ve watched small businesses transform their conversion rates with nothing more than a phone and a few creative tweaks.
Creative product photography ideas blend lighting, composition, styling, and storytelling to present your products in ways that feel alive rather than catalog-flat. Whether you sell on Amazon, run an Etsy shop, or post daily on Instagram, the right image makes a shopper stop, look closer, and ultimately buy. The techniques that follow work across every budget because they lean on ideas instead of expensive gear.
What changed for me is realizing that today’s smartphones – the iPhone 15 and 16 series, the Samsung Galaxy S24 and S25, the Google Pixel 8 and 9 – shoot images that exceed what flagship DSLRs produced just a few years ago. That shift puts every shop on equal footing. The gap between amateur and pro now lives in creative decisions, not hardware. The 15 ideas below are exactly the kinds of decisions that close that gap, and you can try every one of them this weekend.
Let’s clear up the biggest myth in product photography: you do not need a $3,000 camera to start. My own career began with an iPhone 8, a sheet of white foam board, and a window that faced north. The fundamentals – clean light, a tidy background, sharp focus – mattered far more than the sensor size. Here’s how to build your setup at any budget.
Pro Tip: Master the budget kit before chasing gear. I’ve watched photographers spend $5,000 on strobes and modifiers and still produce muddy, flat images because they never learned how light falls on a surface. Conversely, a phone shooter who understands direction, diffusion, and contrast will outperform them every time.
Light is the single most important ingredient in product photography. No amount of editing rescues a photo where the lighting is wrong, while great lighting forgives almost every other flaw. The five techniques below are the ones I return to again and again, no matter what I’m shooting.
Place your product two to three feet from a large window and let the sun do the work. A north-facing window gives the most consistent results throughout the day, with soft shadows that wrap gently around curved surfaces. Diffuse the light further by taping a sheet of white tracing paper or a thin shower curtain across the glass if sunlight is hitting it directly. This setup excels for textured goods – knitwear, baked goods, ceramics, anything where you want the viewer to almost feel the surface.
Two matched softboxes positioned at 45-degree angles on either side of the product create the workhorse lighting of product photography. The key light sits slightly forward, the fill light slightly back, with the fill set to half the key’s intensity. The result is dimensional, color-accurate, and forgiving – perfect for electronics, cosmetics, packaged goods, and most marketplace listings.
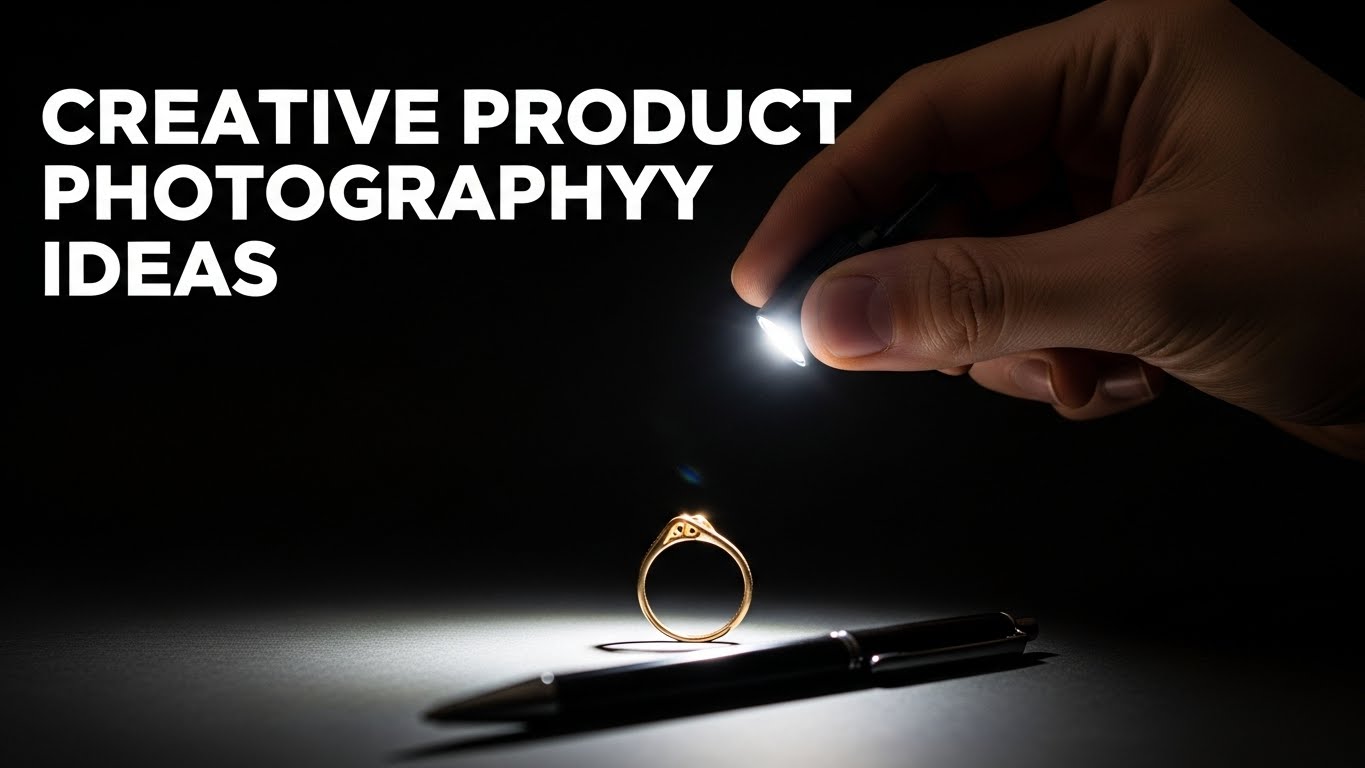
Turn off every light in the room, set your camera to a 2- to 5-second exposure at f/8 and ISO 100, then “paint” light across your product using a small flashlight or even your phone’s LED. Move the light constantly – pausing on edges, sweeping across broad surfaces – so you build up highlights exactly where you want them. This technique turns glassware, metallic items, and tech gadgets into moody, editorial-quality images.
Position a single bright light directly behind your product. For beverages, perfumes, and translucent items, backlighting reveals liquid color and internal detail that front lighting simply hides. Pair it with a black background for a stark silhouette or a white background for a halo glow. Cosmetics brands use this constantly to make serums and oils look luminous.
Cut window-sized openings in three sides of a cardboard box, tape white tissue paper or thin fabric across them, and aim two lights from outside the box through the panels. Your product sits inside, bathed in soft, wrapping light with zero harsh shadows. This is the classic catalog look – perfect for jewelry, watches, small electronics, and anything reflective that you want to look polished without spending hours fighting glare.
Here is the core of the guide: fifteen techniques I reach for constantly, organized by category. Each one has been tested with real client work and refined until it consistently produces results that move the needle on engagement and sales. Mix and match them – the best product photography almost always combines several ideas at once.
1. The Infinity Cove. Take two large white foam boards and form an L – one flat on your surface, the other taped vertically where they meet. Curve the join with a small piece of tape so there’s no visible seam. The result is a seamless white background that makes your product appear to float. This is the Amazon standard for a reason: it removes every distraction and keeps the eye on the product itself. Once you have this dialed in, you’ll never go back to a wrinkled bedsheet backdrop.
2. Textured Backgrounds. Wood planks, marble contact paper from a hardware store, brushed metal sheets, linen, leather scraps, slate tiles – textured surfaces add depth and mood without competing with the product if you choose carefully. For food and drink, slate or rustic wood reads as artisanal. For skincare and perfume, marble or velvet says luxury. The trick is matching texture to brand: a $5 tube of hand cream photographed on raw concrete looks misplaced, but the same tube on soft linen looks like a $50 serum.
3. The Flat Lay. Shoot straight down with your phone’s grid lines turned on, then arrange the product alongside complementary props that tell a story. A coffee mug with whole beans, a biscuit, an open newspaper, and reading glasses says “Sunday morning” instantly. Flat lays dominate Pinterest and Instagram because they communicate lifestyle in a single glance – and lifestyle is what separates a $12 candle from a $12 commodity. Keep the props few, related, and tonally consistent.
4. Negative Space. Push the product into one third of the frame and leave the rest empty. Negative space reads as confidence and premium quality because it forces the viewer to focus. Luxury brands use this constantly because the empty space signals that the product does not need decoration to earn attention. Leave space intentionally for text overlays if you plan to add a quote, price, or call to action later.
5. Color Theory in Action. Use a color wheel. Complementary colors (opposite on the wheel – red and green, blue and orange, purple and yellow) make each other vibrate. Analogous colors (neighbors on the wheel – blue, teal, green) create calm harmony. For Amazon listings, soft neutrals keep the focus on product accuracy. For Instagram and ads, bold complementary pairings grab the scroll. Test two or three color combinations per product and you’ll start to feel what your audience responds to.
6. The Worm’s Eye View. Drop your camera to ground level and shoot upward. Footwear, plants, furniture, water bottles, tall electronics – anything with vertical presence gains stature and importance. Prop your phone against a book stack to keep it stable, or use a small tabletop tripod with articulating legs. This angle works especially well for hero images where you want one product to dominate the frame.
7. Macro Detail Shots. Get within a few inches of your subject. Stitching on a leather wallet, the grain in a wooden bowl, the texture of frosting on a cupcake, the brushed finish on aluminum headphones – close-ups communicate craftsmanship in a way no other angle can. Most current phones have a dedicated macro mode; if yours doesn’t, a $15 clip-on macro lens delivers excellent results. Aim for one macro shot for every three or four standard images in your set.
8. The 360-Degree Spin. Place your product on a turntable (a $20 lazy Susan works) and capture 12 to 24 images as you rotate it 15 to 30 degrees at a time. Stitch them into an interactive spin view using free tools like Sirv, Spinstack, or the Adobe Commerce product viewer. Buyers who can rotate a product spend more time on the listing and convert at significantly higher rates. It’s also one of the best ways to reduce returns – shoppers know exactly what they’re getting.
9. Forced Perspective. Play with size perception by placing items at different distances from the camera. A tiny bottle cap in the foreground can look like a manhole cover; a person in the far background makes a watch look exactly the right size. This is the technique behind those “giant product” social media shots. It also lets you show scale – a $4 travel mug next to a $1,500 espresso machine tells a different story than the mug alone.
10. Reflections. Mirrors, glass shelves, polished black acrylic, even a thin layer of water on a dark surface all create reflections that add luxury and dimension. Place a small mirror under a perfume bottle for a double image, or photograph a wristwatch on black glass for a sleek editorial feel. A clean black plexiglass sheet (about $10 from a hardware store) is the most versatile reflective surface you can own – it wipes clean between shots and produces zero water spots.
11. Splash Photography. Drop fruit into water, pour milk over a bowl of cereal, or dunk a product into a glass tank. Use a fast shutter speed (1/1000 or faster) with a speedlight or flash to freeze droplets in mid-air. Splash shots grab attention like almost nothing else, which is why beverage brands and waterproof product makers rely on them. Build a small splash rig from a clear acrylic box and a clamp to hold objects in position; you’ll cut your shooting time in half.
12. Levitation Effects. Suspend products with clear fishing line or thin acrylic rod, shoot, then clone out the supports in editing. Sneakers, books, cosmetics, headphones – levitation works for almost anything. Levitation images get shared far more than standard product shots because they create instant visual surprise. The two-person version (one drops the item while the other shoots) makes this far more consistent than trying to hold everything steady yourself.
13. Light Writing. Long exposure, dark room, ISO 100, f/8, and a small flashlight or LED wand. Move the light through the air around your stationary product, drawing loops, spirals, words, or geometric shapes. Tech products, holiday items, and anything with a “wow” factor benefits from this. Five to ten second exposures give you plenty of time to trace patterns. Layer multiple light passes at different points during one exposure to build complexity.
14. Smoke and Fog Effects. A $30 handheld smoke machine or a piece of dry ice in warm water creates atmosphere that highlights product shape and adds mystery. Backlight the smoke with a tightly focused beam and you’ll see swirling patterns that frame the product beautifully. This is the go-to look for premium spirits, cologne, and high-end electronics. Use it sparingly – one atmospheric shot per product set adds drama; five becomes a fogged-in mess.
15. Color Gel Overlays. Tape colored transparent film (the same gels photographers have used for decades) over your lights to push mood. Cool blue for tech and electronics, warm orange for food and organic products, deep green for eco and natural lines, soft pink for beauty and self-care. A pack of gels costs under $20 and the visual shift they create is dramatic. Pair gels with smoke for cinematic results, or use them alone for clean, editorial color work.
Shoppers buy with the calendar in mind, even when they don’t realize it. Seasonal product photography taps into that psychology directly: a throw blanket styled with autumn leaves reads “cozy season,” a candle surrounded by pine sprigs reads “holiday gifting,” a swimsuit on a sunny beach towel reads “summer.” You don’t need to redesign your entire catalog – one seasonal hero image per month, rotated quarterly, keeps your visuals fresh without ballooning your workload.
Build a small kit of seasonal props that you can swap in and out: faux autumn leaves, fresh or faux evergreen sprigs, pastel paper for spring, beach shells and sand for summer, knit textures for winter. Photograph your best-selling product against each backdrop and you’ve got a year’s worth of campaign imagery. The same mug photographed four different ways across four seasons keeps the brand feeling current and connected.
Themed shoots go beyond the calendar. Try a “morning routine” set with a coffee product, a “Friday night in” set with a candle and book, a “post-workout” set with a water bottle and towel. These themes sell a lifestyle your product fits into, not just the product itself – and lifestyle sells at a premium.
A hand holding the product tells the viewer three things instantly: scale, use, and trust. Shoppers want to see how a product fits in real life, and nothing delivers that like a hand. You don’t need a professional model – your own hand, a friend’s, or a hired hand model from a local agency will do. Keep the skin tone consistent across shots for catalog work, or feature diverse hands to broaden appeal.
For full model integration, lifestyle photography with people sells apparel, beauty, furniture, and home goods particularly well. The model doesn’t need to face the camera – over-the-shoulder shots, hands at work, feet on a couch reading a book, all communicate “this product is part of a real life.” Many brands now shoot with friends and family instead of agency talent, which actually adds authenticity that polished campaigns sometimes lack.
Avoid the trap of stiff, posed shots. The best hand-in-shot and lifestyle images feel candid. Have the model actually use the product – pour the coffee, apply the cream, sit in the chair, wear the jacket. Authenticity reads instantly, and viewers reward it with trust.
The unboxing experience matters more than ever. Photograph your packaging as carefully as you photograph the product inside, because for many buyers the packaging is the first physical touchpoint. Shoot the box on its own from multiple angles, then add “content pour-out” shots – the product spilling out of opened packaging with tissue paper, ribbon, and inserts visible.
Pour-out shots communicate abundance and gift-readiness. Stack the contents around the box: a candle still in its wrapper next to the opened box, matches beside it, a small branded card on top. These images work brilliantly for subscription boxes, beauty kits, food hampers, and gift sets. They also help brands that sell at premium price points justify the cost by visually communicating the full experience.
For eco-friendly and minimal brands, photograph the packaging in the act of being recycled or repurposed. A kraft mailer folded into a planter, a glass jar that now holds a succulent, a cloth bag reused as produce storage. These shots reinforce brand values while extending the visual life of the packaging itself.
The same product needs different imagery depending on where it lives. A photo that crushes it on Instagram will get cropped to nothing on Amazon, and a 360 spin that wows on your Shopify site is invisible in a Pinterest pin. Tailoring images to each platform is the difference between “nice photos” and “images that sell.”
Amazon’s main image rules are strict: pure white background (RGB 255, 255, 255), product fills 85% or more of the frame, no text or graphics, no props. The secondary images have more freedom – lifestyle shots, infographics, scale references, and before/after comparisons all work here. Shoot the main image with the infinity cove and overexpose slightly in editing to guarantee pure white. Aim for 1,600 pixels on the long side minimum so the zoom feature stays sharp.
Instagram rewards consistent visual style and bold color. Shoot square (1:1) or vertical (4:5) crops for feed posts, vertical (9:16) for Stories and Reels. Build a recognizable color palette across your feed – even three to five tones repeated through your product photography will make your grid feel intentional. Lifestyle shots with hand-in-shot elements, flat lays, and seasonal backdrops perform strongly here. Plan a content calendar that mixes product shots, lifestyle shots, and community-style behind-the-scenes images so the feed never feels like a catalog.
Product pages thrive on information density. Lead with a clean hero image on white, then add detail shots, scale references, lifestyle context, infographics showing dimensions or features, and ideally a 360-degree spin. Page weight matters – compress images aggressively and serve them in WebP format so your site loads quickly. Mobile is where most shoppers browse, so test every shot at phone resolution before publishing.
Print demands higher resolution and proper color management. Shoot at 300 DPI for anything that will be printed at the same size, embed an ICC color profile in your files, and convert to CMYK before sending to the printer. Print images can be more stylized than web images – textures, deep shadows, and rich color all translate beautifully to paper.
Pinterest is a search engine disguised as a social network. Tall, vertical images (2:3 ratio) perform best because they take up more feed real estate. Add text overlays sparingly – keywords in the image description do more for discovery than graphics. Lifestyle flat lays and seasonal imagery dominate this platform, especially in home, fashion, food, and wellness niches.
Static images are no longer the only option. Shoppers increasingly expect to rotate, zoom, and explore products before buying – especially for higher-priced items where the purchase decision carries real risk. Interactive product visualization tools have matured to the point where a small business can add a 360 spin viewer to a Shopify page in an afternoon.
Tools like Sirv, Spinstack, and Adobe’s product visualization suite handle the heavy lifting. Capture 24 to 36 frames on a turntable, upload them, and the platform generates a smooth interactive view. Conversion rates on listings with interactive views rise substantially because shoppers spend more time on the page and feel more confident about what they’re buying. Returns also drop because buyers know exactly what to expect.
Augmented reality is the next step. AR lets shoppers place a product in their own space through their phone camera – a lamp on the bedside table, a couch in the living room, a piece of art on the wall. Tools like Shopify AR, Apple’s AR Quick Look, and Google’s Scene Viewer make this accessible without custom development for many product categories. If you sell furniture, decor, or anything with a meaningful physical footprint, AR is worth experimenting with.
The rise of remote work has reshaped how products are marketed. Desks at home, kitchen counters as office space, dining tables as standing desks – the work-from-home context is now the lived reality for hundreds of millions of people. Photographers who lean into that context create images that resonate immediately.
Show your product in everyday environments. A water bottle on a cluttered home desk, a candle burning beside a stack of work papers, a coffee mug on a treadmill tray. These shots sell the product as part of an authentic life rather than an aspirational one – and that authenticity drives connection. Viewers see themselves in the scene, and self-recognition is the most powerful form of marketing.
Everyday activities extend beyond work. Cooking, gardening, exercising, parenting, reading, relaxing – any of these activities paired with the right product gives you a story. Build a small library of these lifestyle shots and rotate them through your social feeds. The cost is just an afternoon of shooting, but the return is months of varied, engaging content.
Different product categories demand different approaches. What works for jewelry will fail for furniture, and vice versa. Here’s how to tailor your shoot based on what you’re selling.
Macro photography is essential. For jewelry, hang pieces with invisible thread to show how they catch the light when worn. Cosmetics benefit from textured backgrounds and dramatic lighting that emphasizes the product’s color and finish. Electronics need clean, technical shots that show interfaces, ports, and accessories. Always use a light tent or diffuser to control reflections on shiny surfaces – that’s the single biggest challenge in small-product work.
Show products in use with props that communicate scale. Books look great stacked with coffee cups. Bags benefit from being lightly stuffed so they hold their shape. Small appliances should appear alongside their accessories and packaging. The 45-degree angle remains the most flattering perspective for most medium products – it’s the angle we naturally view objects on a table or shelf.
Clothing needs models or mannequins to show fit and drape – flat shots alone rarely sell apparel. Furniture requires wide shots that establish scale and context, ideally styled as it would appear in a real room. For large equipment, include multiple angles and detail shots of controls, materials, and craftsmanship. Lifestyle settings sell these products more reliably than sterile studio shots.
Editing is where good photos become great ones – but only if you keep it disciplined. Heavy filters and aggressive retouching quickly turn product photos into something that looks nothing like the real item, and that destroys buyer trust. The goal is to make the image accurately reflect the product while removing distractions and correcting technical flaws.
Time Saver: Build editing presets for your most common looks. A single preset applied across a product line keeps colors and contrast consistent, cuts editing time dramatically, and gives your catalog a recognizable visual signature that builds brand recognition.
Artificial intelligence has moved from novelty to standard tool in product photography. AI background removal, AI upscaling, AI relighting, and AI-generated lifestyle contexts are now mainstream, and they’re not replacing photographers – they’re making good photographers dramatically faster.
Background replacement tools like Remove.bg and Photoroom deliver clean cutouts in seconds. AI relighting can simulate studio lighting on a flat phone shot, opening up professional-looking results to anyone. Generative tools like Adobe Firefly and Midjourney can mock up lifestyle scenes that would otherwise require location scouting, model bookings, and a full day of shooting.
The honest truth: AI works brilliantly as a production accelerator but struggles as a sole creative voice. It produces technically clean images that often lack the intentionality and emotion a photographer brings. Use AI to handle the tedious parts – background cleanup, batch resizing, draft lifestyle scenes – and reserve the final creative decisions for yourself. That combination gives you speed and craft.
Consistency is the secret weapon of successful product photography. Every image in your catalog should feel like it came from the same studio, the same eye, the same brand – even if you shoot it all on your kitchen table. Pick a small set of decisions and stick to them: two background colors, one lighting setup, one editing preset, one prop style. Repeat relentlessly.
Build a simple style guide you can reference before every shoot. Define your background colors, your lighting angle, your crop ratios for each platform, your editing preset settings, and a short list of approved prop categories. The style guide does not need to be fancy – a single page document is enough – but it should be specific enough that someone else could shoot in your style by following it.
Shoot in batches. Pick a single setup and shoot every variant of every product you can in one session. The efficiency gains are huge, and the consistency shows immediately when the catalog looks like a unified collection rather than a mishmash of one-off shoots. Refresh your style guide every six months as your brand evolves.
Start with your smartphone and a window. Add a white foam board ($2) for backgrounds, a stack of books for stabilization, and a piece of white paper to diffuse the window light. You can produce excellent results with under $20 in supplies and upgrade gear gradually as your skills and catalog grow.
Yes. Modern smartphones like the iPhone 15 and 16, Samsung Galaxy S24 and S25, and Google Pixel 8 and 9 capture images that match or exceed what entry-level DSLRs produced just a few years ago. Use portrait mode for subject isolation, lock focus and exposure before each shot, and edit with Snapseed or Lightroom Mobile for polished results.
Build an infinity cove from two white foam boards arranged in an L shape, with the vertical piece taped to the back edge of the flat piece. Curve the join with a piece of tape to eliminate the seam. Light it evenly from both 45-degree angles and slightly overexpose in camera or editing to push the background to pure white.
Use a light tent, light box, or DIY diffuser to wrap your product in soft, even light from multiple angles. Position two diffused sources at 45-degree angles, one slightly brighter than the other, and use black cards to block reflections where needed. For diamonds and gemstones, add a backlight to reveal brilliance and fire.
Use large, diffused light sources rather than direct light. A softbox, light tent, or shoot-through white fabric spreads light evenly and reduces hot reflections. Position lights at 45-degree angles, never directly facing the reflective surface, and use black foam cards as flags to block stray reflections from unwanted areas.
Shoot in aperture priority or manual mode. Use f/8 to f/11 for sharpness across the product, ISO 100 to 400 for clean images, and a shutter speed of 1/125 or faster if hand-holding. On smartphones, use Pro or Manual mode if available, lock focus on the product, and tap to set exposure. Always stabilize the camera on a flat surface or tripod for tack-sharp results.
After more than a decade of photographing products for clients ranging from solo Etsy sellers to nationally distributed brands, the lesson I keep relearning is this: creativity always beats equipment. The best camera in the world, mounted wrong and lit poorly, produces forgettable images. A modest smartphone in the hands of someone who understands light, composition, and storytelling produces images that sell.
Start where you are. Build the budget kit, master natural window light, and work through the fifteen ideas above at your own pace. Add seasonal shots, hand-in-shot details, and lifestyle contexts as your confidence grows. Tailor each shoot to the platform where the image will live. Edit consistently, shoot in batches, and refresh your catalog every season. The compound effect of small, steady improvements is what separates a side hustle from a brand.
Creative product photography is one of the highest-leverage investments a small business can make. The cost is time, a few supplies, and the willingness to experiment. The return is a catalog that stops the scroll, builds trust, and converts browsers into buyers. Pick one technique from this guide, set up your phone, and shoot today. Your future customers are waiting to see what you create.