5 Best Tripods Under $100 (September 2026) Tested & Reviewed
Expert reviews of the top 5 tripods under $100 after 30 days of intensive testing. Find stable camera support that…

![Flower Photography Ideas: Complete Guide for Capturing Stunning Botanical Photos [cy]](https://revellphotography.com/wp-content/uploads/2026/09/featured-update-4128-1789145532922.jpg)
When a bee hovers above a foxglove at dawn, frost clings to a late-autumn dahlia, or a wild meadow explodes in spring color, you are standing inside one of the most forgiving yet endlessly detailed genres photography has to offer. Flower photography ideas range from tight macro studies of a single stamen to wide environmental portraits that place a bloom in its habitat, and the gap between a casual snapshot and a gallery-worthy botanical image is smaller than most beginners expect.
According to recent industry surveys, botanical and nature photography remains one of the fastest-growing niches on stock platforms and Instagram, with tagged posts for #flowerphotography crossing 95 million and the demand for fresh, well-lit floral imagery increasing year over year into 2026. The reason is simple: flowers are patient, available, and visually generous. They don’t ask for a model release, they don’t fly away, and they reward the same techniques that professional botanical artists have used for centuries, applied through a modern lens.
I’ve been photographing flowers for more than a decade, from the controlled environment of a botanical conservatory to backcountry wildflower meadows in three different countries. What follows is a complete guide to flower photography, written for beginners and intermediate shooters who want consistent, beautiful results with any camera. We will move from light and composition through equipment, creative ideas, smartphone workflows, seasonal calendars, editing, and finally the most common mistakes and how to fix them.
By the end, you will have a working mental checklist for every flower photo you take, a solid understanding of which flower photography techniques matter most, and a list of fresh flower photography ideas to try this week, indoors, outdoors, with a phone or with a full mirrorless kit.
Quick Answer (TLDR): The best flower photography ideas combine soft natural light, a clean background, and a single, intentional subject. Shoot during golden hour or on overcast days, use a wide aperture (f/2.8 to f/5.6) for creamy background blur, get low for dramatic perspective, and stabilize the camera with a tripod for sharp results. The 3-5-8 rule (3 main subjects, 5 supporting, 8 filler flowers) helps when arranging bouquets, while the 80/20 rule reminds us that 80% of a great flower photo is decided before the shutter is pressed. Use a macro lens or your smartphone’s portrait mode for detail shots, and edit in Lightroom or Snapseed to bring out color and texture.
If you only have time to learn ten flower photography techniques, these are the ones that will produce immediate, visible improvement. I have tested each of them across thousands of frames in gardens, conservatories, and the wild, and they form the backbone of any reliable flower photography workflow for 2026.
Pro Tip: Spend a single session focusing on only one of these techniques at a time. A morning with “backgrounds only” will teach you more than a year of unfocused shooting. Build the skill set one habit at a time.
Light is the single most important variable in flower photography. The same tulip, shot an hour apart, can look like a botanical illustration in soft window light or a harsh, contrasty mess at noon. Understanding how to read light and how to modify it is the difference between snapshot and art.
Golden Hour: The first hour after sunrise and the last hour before sunset. The sun is low in the sky, producing soft, warm, directional light with gentle shadows. Ideal for backlighting petals and creating a glow effect.
Early morning, just after sunrise, is my preferred window for outdoor flower work. The light is low, warm, and the air is usually still. Flowers are freshly open and frequently covered in dew, which adds sparkle and natural focal points. By 9 a.m. in summer, the light is already flattening out.
Late afternoon, roughly 5 p.m. to 7 p.m. depending on your latitude and season, offers a second window. The shadows lengthen, the color temperature warms, and you’ll often find the wind dropping as the day cools. This is the time for golden hour backlit shots and wide field compositions.
Don’t discount overcast days. Clouds act as a giant diffuser, turning the entire sky into a softbox. Color rendition is more accurate, contrast is reduced, and you can shoot all day without worrying about harsh shadows. Some of my most technically clean flower portraits were captured under flat, gray skies.
Midday sun is the most difficult light for flower photography. Shadows are short and harsh, highlights blow out quickly, and colors can look washed out. If midday is your only option, you can still get usable images by working with the light rather than against it.
A 5-in-1 reflector lets you bounce soft light into shadow areas or shade a small subject entirely. A collapsible diffuser, held between the sun and your flower, produces the same effect as an overcast sky for one bloom at a time. Both tools weigh under a pound and fit in any camera bag.
If you want a deeper dive into reading light and using reflectors effectively, our photography lighting basics guide covers the same principles with more worked examples and diagrams.
When you can’t go outside, window light is your most powerful tool. A north-facing window in the northern hemisphere (or south-facing in the southern hemisphere) provides consistent, cool, diffused light for hours at a time. Place a single flower on a table two to three feet from the glass and shoot at an angle to the light source for natural dimension.
For more control, set up a small tabletop studio. A sheet of white foam board opposite the window bounces light back into shadows, acting as a free reflector. A piece of black foam board on the same side deepens shadows for a moody, low-key look. A small LED panel with adjustable color temperature lets you shoot any time of day or night.
Composition is the silent ingredient that makes a flower photo feel intentional rather than accidental. It determines where the viewer’s eye lands, how the eye travels through the frame, and what emotion the image conveys. The good news is that flowers are natural subjects for compositional experimentation because they stay still.
The rule of thirds is the most-taught composition rule in photography, and for good reason. Divide the frame into a 3×3 grid. Place the main flower on one of the four intersection points rather than dead center. This creates a more dynamic, visually pleasing image than a centered subject, especially for off-center blooms with strong leading lines.
That said, centered composition has its place. Flowers with strong radial symmetry (daisies, sunflowers, dahlias) often look powerful when placed in the middle of the frame. The key is intentionality: make a deliberate choice, not an accidental one. For more compositional frameworks, our photography composition rules guide goes deeper into the rule of thirds, golden ratio, and negative space.
Negative space, the empty area around your subject, is another compositional tool. A single flower against a soft, blurred background creates a minimalist image that draws the eye directly to the subject. This works especially well for editorial, fine art, and Instagram-style floral shots.
The angle you choose changes the entire mood of a flower photo. Eye level creates intimacy, a feeling of being in the same space as the bloom. Shooting from below makes the flower appear monumental, almost heroic, particularly effective for tulips, lilies, and sunflowers. Shooting from above flattens the subject and works well for arrangements, patterns, and overhead flat lays.
Side angles reveal depth and structure, showing the profile of the petals and the stem. They work beautifully for single-stem portraits and for showing how a flower sits in its environment. Try circling your subject fully before lifting the camera, and you’ll discover compositions that never occur when standing still.
The background is half the image, and it deserves as much attention as the flower itself. Three techniques cover most situations: shallow depth of field to blur busy backgrounds, repositioning to place a clean color or texture behind the subject, and adding an artificial background for studio work.
Leading lines guide the viewer’s eye through the image to your subject. In flower photography, these can be stems, branches, leaf veins, paths through a flower bed, or the curve of a petal. Position your camera so the strongest line leads directly to the main bloom.
Natural frames add depth and context. An arching branch can frame a flower from above. Two out-of-focus flowers in the foreground can create a window through which the main subject is viewed. Fences, arbors, and trellises all work as environmental frames when shooting in gardens.
Time Saver Composition Checklist: Before each shot, run a 10-second check. (1) Is the background clean? (2) Is the horizon or dominant line level? (3) Does the subject sit on a thirds intersection or have a strong reason to be centered? (4) Is there a clear focal point? (5) Are there leading lines? This habit alone lifts an average flower photo into a strong one.
Once you understand light and composition, the next step is knowing exactly which camera settings to dial in. Many beginners leave their camera on automatic and hope for the best, but a few intentional adjustments will give you predictable, repeatable results across any flower photography scenario.
Aperture controls two things at once: how much light enters the lens, and how much of the image is in sharp focus. For most flower photography, the sweet spot sits between f/2.8 and f/5.6. This range gives you creamy background blur while keeping the main subject sharp. If you are shooting a bouquet or a wide field, stop down to f/8 or f/11 to bring more of the scene into focus.
For macro work at 1:1 magnification, f/8 to f/11 is often a better starting point. Depth of field at high magnification is measured in millimeters, not inches, and even a wide aperture will leave most of the flower soft. Focus stacking, where you combine multiple frames focused at different distances, solves this problem entirely.
Shutter speed freezes or blurs motion. For still flowers on a calm day, 1/125s is more than enough. For breezy conditions, push to 1/500s or faster to freeze the petals. If you want to embrace motion and create artistic blur, drop to 1/15s or 1/30s and let the wind paint across the frame.
Keep ISO as low as possible, ideally ISO 100 to ISO 400 on modern mirrorless and DSLR bodies. Higher ISO values introduce noise and reduce color depth. In low-light indoor situations, raise ISO before you lower shutter speed. A tripod lets you keep ISO at 100 with shutter speeds of 1 second or longer, ideal for studio-style flower portraits.
Aperture Priority mode (A or Av) is the most flexible option for most flower photography. You set the aperture, the camera picks the shutter speed. Switch to Manual mode (M) for consistent results across a series of frames, particularly in studio work or when shooting bracketed exposures for HDR.
White balance matters more than beginners realize. Auto white balance works in most situations, but on overcast days, set the white balance manually to “cloudy” or “shade” to keep colors warm and accurate. Shoot in RAW format so you can fine-tune white balance after the fact without losing image quality.
The best camera for flower photography in 2026 is the one you have with you. The market has shifted decisively toward mirrorless, and most major manufacturers have released bodies with features that make flower work easier than ever. The most important factor is understanding what your gear does well, not chasing the latest flagship model.
Smartphones now produce images that rival entry-level cameras from a decade ago. Modern phones offer dedicated macro modes, computational photography features, and RAW capture through apps like Lightroom Mobile and Halide. The convenience of a phone means you will have it with you when a perfect moment appears, which is worth more than any lens.
If you own a mirrorless or DSLR camera, a basic kit lens is a capable starting point. Most kit lenses cover 18mm to 55mm or 24mm to 70mm, which is enough for environmental flower portraits and travel garden work. Add a 50mm f/1.8 “nifty fifty” for a major upgrade in subject isolation and low-light performance at a modest price.
For beginners stepping up from a phone, three current mirrorless models deliver excellent flower photography results without overwhelming complexity. The Sony A7 IV offers 33 megapixels, industry-leading autofocus, and full-frame image quality. The Canon EOS R6 Mark II brings 24 megapixels, in-body stabilization, and the most user-friendly menu system for first-time mirrorless shooters. The Fujifilm X-T5 uses an APS-C sensor with film simulation modes that are particularly flattering to botanical subjects.
For more advanced users, the Nikon Z8 and Canon EOS R5 offer 45+ megapixel resolution, which is a significant advantage for macro and detailed wildflower work. The high resolution lets you crop aggressively while retaining print-quality detail. All five of these bodies shoot in RAW, support modern focus stacking workflows, and have weather-sealed bodies suitable for outdoor garden work.
If you’re choosing your first dedicated camera, our guide to the best cameras for photography beginners compares the leading options side by side with sample flower images and beginner-friendly feature explanations.
Three lens categories cover virtually all flower photography needs. A 50mm to 90mm macro lens, such as the Canon RF 100mm f/2.8L Macro, Sony FE 90mm f/2.8 Macro, or Nikon Z MC 105mm f/2.8 VR, gives you true 1:1 magnification and razor-sharp close-up performance. These are the workhorse lenses for serious botanical and product flower work.
A short telephoto prime in the 85mm to 135mm range, such as the Sony FE 135mm f/1.8 GM or the Canon RF 85mm f/1.2L, produces the most beautiful background blur and is ideal for single-flower portraits and editorial flower work. These lenses are expensive but deliver image quality that few zooms can match.
A standard zoom like a 24mm to 70mm f/2.8 or 24mm to 105mm f/4 covers environmental flower work, garden scenes, and travel. A kit lens at 18mm to 55mm is a perfectly reasonable starting point and will not hold you back as a beginner.
For macro work specifically, our detailed macro photography techniques guide covers extension tubes, bellows, focus rails, and lighting for serious close-up work.
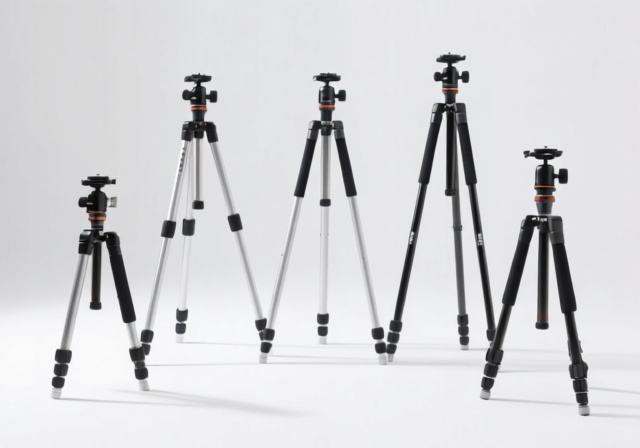
A stable tripod is the single most underrated piece of flower photography equipment. A travel tripod with a center column that swings to 90 degrees lets you shoot straight down at flowers on the ground. Carbon fiber models are light enough to carry on a full day of garden walking. Aluminum tripods cost less and are more durable, just heavier.
A 5-in-1 reflector (translucent, white, silver, gold, black) weighs around a pound, folds to the size of a small plate, and is the most versatile light-shaping tool you can own. The translucent panel softens harsh sun. The white side fills shadows. The silver side adds punchy contrast. The gold side warms skin tones (useful for wedding and event flower work). The black side subtracts light and deepens shadows.
The most useful piece of gear in my bag isn’t a lens. It’s a 5-in-1 reflector. I’ve used it to soften sun on a peony, to fill shadows on a white lily, and to create a black background for a high-end commercial rose shoot. It cost less than a decent dinner and has done more for my flower work than any lens I own.
– Working photographer, dpreview forum discussion
Once the basics are in place, creative flower photography ideas are what separate memorable work from forgettable snapshots. The following techniques are field-tested by professionals and achievable by hobbyists. Mix and match them to develop a personal style.
Intentional camera movement turns flowers into painterly impressions. Set a slow shutter speed (1/15s to 1 second), press the shutter, and pan or zoom the lens during the exposure. The result is a streak of color with hints of structure, an image that looks like an oil painting rather than a photograph.
Multiple exposures layer several frames of the same flower into a single image, creating ghostly, ethereal results. Most modern mirrorless cameras offer in-body multiple exposure modes. Or you can blend exposures in Photoshop for more precise control.
Reflections add an unexpected dimension. Place a flower on a piece of black acrylic, a mirror, or a still pond. Shoot from a low angle to include the reflection in the frame. A single rose on wet slate can produce a striking abstract that combines subject, color, and texture in one image.
Water adds life and visual interest. Morning dew is the classic choice; it appears naturally on outdoor flowers in the first hour after sunrise. A spray bottle filled with water and a drop of glycerin creates artificial dew on indoor flowers that lasts longer than water alone. Sugar water attracts bees and butterflies, adding movement and storytelling to a static flower portrait.
Rain is one of the most underused flower photography ideas. After a rain shower, droplets cling to petals and leaves, and the air is clean. The light is usually overcast and soft. Overcast light plus wet surfaces equals saturated color and minimal harsh shadows. Bring a microfiber cloth to wipe your lens between frames.
Snow is rare but powerful. A single flower poking through fresh snow tells a story of resilience and seasonality. A winter rose covered in ice crystals is one of the most striking botanical images you can capture. Photograph quickly; snow melts, and the moment is short.
Show your flower in context. A wide shot that places a sunflower in a field, a wild orchid in a meadow, or a single rose in a garden bed tells a story a tight macro cannot. Use a wider focal length (24mm to 50mm) and a smaller aperture (f/8 to f/11) to keep both subject and environment in focus.
Include human elements. Hands holding a flower, a child examining a bloom, or a florist’s tools on a workspace add scale, narrative, and emotional weight. A single hand cradling a peony can be more powerful than the same peony photographed alone. Many of the most-shared editorial flower images use this human-element trick.
Focus stacking solves the depth of field problem in macro work. Take a series of frames, each focused slightly farther back, then combine them in software (Photoshop, Helicon Focus, or the in-camera focus stacking of newer cameras like the OM System OM-1). The final image is sharp from front to back, something a single exposure cannot achieve at high magnification.
Freelensing detaches the lens slightly from the camera body, creating tilt-shift effects, light leaks, and unique bokeh shapes. It’s a low-cost experiment that requires patience and a willingness to fail, but the results are unlike anything else in flower photography.
Black background flower photography is one of the most popular styles on Pinterest and Instagram. Two techniques work: a low key setup with a snoot or flag, or a post-processing technique in Lightroom that darkens the background to pure black. Either way, the result is a dramatic, gallery-style image with a single flower floating in negative space.
Smartphone cameras in 2026 are remarkably capable tools for flower photography. Computational photography, multi-lens systems, and AI scene detection have closed the gap between phones and dedicated cameras for everyday use. The following tips are written for iPhone and Android users who want professional results without carrying extra gear.
Start with a clean lens. Phone camera lenses live in pockets and pick up fingerprints, dust, and skin oils. A quick wipe with a microfiber cloth can make a sharper image than any software update. This single habit fixes more “blurry phone photos” than any other tip.
Use Portrait mode or the dedicated macro mode if your phone has one. Portrait mode uses computational depth mapping to blur the background behind a sharp subject. Macro mode (available on iPhone 13 Pro and later, and many Android flagships) lets you focus as close as 2 centimeters, perfect for stamen and petal details.
Shoot in RAW if your phone supports it. ProRAW on iPhone, Pro mode RAW on Samsung Galaxy, and similar features on Google Pixel and other Android phones preserve more color information than compressed JPEGs. RAW files are larger but offer dramatically more flexibility in editing.
Turn on the grid overlay in your camera settings. The rule of thirds grid helps you place the flower on an intersection point without guesswork. It also keeps your horizon (or in flower work, your stem) straight and balanced.
Zoom with your feet, not with digital zoom. Digital zoom on phones crops into the image, reducing resolution. Optical zoom (when available) is fine, but stepping closer usually produces a sharper, more engaging photo. If you cannot get closer, take the photo at the widest zoom you have and crop later in editing.
External lens attachments turn a phone into a serious flower photography tool. A clip-on macro lens for $20 to $50 lets you focus closer than the built-in lens allows. A wide-angle lens attachment helps with environmental flower shots. Quality varies widely, so read reviews before buying.
Lightroom Mobile (free on iOS and Android) is the most powerful free editing app for flower photography. It includes RAW editing, selective adjustments (brush on a specific petal), masking tools, and presets. The desktop-to-mobile sync means you can start an edit on your phone and finish on your computer.
Snapseed (free) is a Google-owned editor with excellent one-tap adjustments. The “Details” tool sharpens petal textures. The “Selective” tool lets you brighten a specific part of the flower. The “Tonal Contrast” tool adds depth without over-saturating colors.
VSCO and Afterlight offer strong filter libraries for stylized looks. Use them sparingly. Heavy filters can quickly push flower photos into artificial territory. A light touch, a slight warm tone, and a small bump in clarity usually beats a heavy filter.
Macro flower photography is its own discipline, and it opens a world most people never see. At 1:1 magnification, the image on your sensor is the same size as the subject in real life. A single stamen, normally a small yellow thread, becomes a dramatic landscape. Petal textures look like aerial photography of a colorful terrain.
A dedicated macro lens is the best tool for the job. The 90mm to 105mm range is the most versatile, providing enough working distance to light the subject without casting shadows from the lens itself. A 60mm macro is a great budget option for smaller subjects. A 150mm to 200mm macro gives more working distance and is ideal for skittish insects on flowers.
Extension tubes are an affordable way to turn a regular lens into a macro lens. They fit between camera and lens, reducing the minimum focus distance and increasing magnification. A set of three tubes (12mm, 20mm, 36mm) costs a fraction of a macro lens and works with any lens you own.
Close-up filters screw onto the front of a lens like a regular filter and add diopter strength, allowing closer focus. They are inexpensive, lightweight, and good for travel, but they reduce sharpness at the edges of the frame compared to a true macro lens.
At 1:1 magnification, depth of field can be as thin as one millimeter. A flower that looks sharp in your viewfinder will be soft on the edges when you view the image on a computer. Focus stacking solves this by combining multiple frames, each focused slightly farther back, into a single sharp image.
To stack effectively, mount the camera on a tripod with a macro rail (a sliding platform that moves the camera in tiny increments). Take 10 to 30 frames, advancing the rail by 0.5mm to 1mm between shots. Combine them in Photoshop (File > Scripts > Load Files into Stack, then Edit > Auto-Blend Layers > Stack Images) or in dedicated software like Helicon Focus or Zerene Stacker.
Some modern cameras, including the OM System OM-1 Mark II, Canon EOS R5, and Sony A7R V, offer in-camera focus stacking that automates the process. The camera takes the frames, aligns them, and outputs a single stacked image without a computer.
Diffused natural light is the most flattering option for macro flower work. A cloudy day, a north-facing window, or shade from a tree produces even, low-contrast illumination. Direct sunlight creates harsh shadows and blown-out highlights at close distances.
A small LED macro light or a ring light attaches to the front of the lens and provides shadow-free, adjustable illumination. Off-camera flash with a diffuser offers more control but requires more setup. Whichever you choose, light from the side at a 45-degree angle to add depth and reveal texture, rather than lighting from the front which flattens the subject.
Wildflower photography is a unique branch of the genre. The subjects are usually smaller, the locations are often remote, and the conditions are unpredictable. The reward is images that no greenhouse or garden can replicate, capturing flowers in the ecosystems they actually belong to.
Research your local bloom calendar. Different species peak at different times, and missing a peak by even a week can mean a thin or wilted display. Local botanical gardens, national parks, and state wildflower reports are excellent sources of timing information. Apps like iNaturalist and Seek use crowd-sourced data to show what is blooming near you in real time.
Arrive at sunrise. Wildflower meadows are usually empty in the early morning, the light is golden, the air is still, and the flowers are freshly open. By mid-morning, winds pick up, light flattens, and the meadow may be crowded with other photographers and hikers.
For more field-specific guidance, our wildflower photography tips guide covers the gear, ethics, and technique of working in natural settings.
Wide field shots work best with a small aperture (f/8 to f/11) and a focal length of 24mm to 50mm. Get low to the ground and shoot across the field rather than down at it. The angled perspective shows the depth and density of the bloom in a way overhead shots cannot.
Single-bloom portraits in a wildflower field use a longer focal length (100mm to 200mm) and a wide aperture (f/2.8 to f/5.6). The shallow depth of field turns the surrounding flowers into a soft, colorful wash that frames the main subject.
Environmental context shots include the wider landscape. A patch of poppies against a mountain backdrop, a lupine meadow with trees beyond, or a desert bloom with cacti and rock formations all tell a stronger story than a tight close-up alone.
Stay on designated trails. Wildflower meadows are fragile, and trampling damages the very plants you came to photograph. In protected areas, off-trail hiking can result in fines. When in doubt, shoot from established paths.
Never pick flowers, even if they appear common. Many wildflower species are protected, and a “single bloom” picked by thousands of photographers adds up. Leave the field exactly as you found it. Other photographers will follow.
Photograph insects on flowers without disturbing them. A bee feeding on a wild rose is a stunning subject, but a stressed bee that flies away is a missed opportunity. Move slowly, shoot from a respectful distance, and let the insect dictate the timing.
Editing is where a good flower photo becomes a great one. Modern RAW editing tools like Adobe Lightroom, Capture One, and the free RawTherapee give you precise control over color, exposure, and texture. The goal is enhancement, not transformation. Subtlety wins.
Start with white balance. Flowers often look too cool in the RAW file because the camera meter was confused by bright colors. Slide the white balance temperature warmer (toward yellow) until the colors look natural. A starting point of 5500K works well for daylight shots; 6500K for overcast.
Adjust exposure next. Use the histogram to avoid clipping highlights or crushing shadows. Flowers with bright petals are easy to overexpose. Pull the highlights slider down to recover detail, and lift the shadows slider to reveal hidden texture in darker areas.
Add clarity and texture for tactile detail. Clarity boosts mid-tone contrast, perfect for petal texture. Texture does the same with less impact on edges. A setting of +15 to +25 for clarity is plenty. Beyond that, the image starts to look crunchy.
Boost vibrance more than saturation. Vibrance selectively boosts muted colors, leaving already-saturated colors (like a bright red rose) alone. Saturation boosts everything, which quickly creates an unnatural, oversaturated look. A vibrance of +20 paired with a saturation of +5 is a good starting point.
Lightroom’s masking tools let you edit specific parts of the image. Use a subject mask to apply sharpening only to the flower, not the background. Use a radial gradient to darken the edges of the frame, drawing the eye to the center. Use a brush to brighten a specific petal or dewdrop that has fallen into shadow.
Photoshop is the right tool for more advanced work. Removing distracting elements (a piece of dead leaf, a piece of trash), combining focus-stacked images, replacing a background, and complex composite work all happen in Photoshop or Affinity Photo. Most flower photos, however, never need anything more than Lightroom.
Export at the highest quality your destination needs. For Instagram, 1080 pixels wide is sufficient. For printing, 300 DPI at the final print size. For sharing with a stock agency, follow their technical specifications exactly.
Add a subtle watermark if you publish online and worry about unauthorized use. A small, semi-transparent logo in a corner is enough. Heavy watermarks across the center of the image look unprofessional and distract from the photo.
Even experienced photographers repeat the same flower photography mistakes. Recognizing them in your own work is the first step toward consistent improvement. The seven issues below account for the majority of “almost great” flower photos that never quite land.
Flowers don’t stop when summer ends. Each season offers its own botanical subjects, lighting conditions, and creative opportunities. The following year-round calendar breaks down what to look for and how to approach it, month by month.
Spring is peak season for flower photography in most temperate climates. Early bloomers, crocuses, snowdrops, daffodils, and tulips, appear first. Cherry and magnolia blossoms follow in April. The light is soft, the air is fresh, and the colors are saturated. Visit botanical gardens in early morning to capture cherry blossoms before they blow off the trees.
Wildflower meadows begin blooming in late spring. Check local reports for peak bloom timing, which can shift by two to three weeks depending on rainfall and temperature. In mountainous regions, peak bloom moves up the elevation gradient over several weeks, allowing a long shooting season if you are willing to drive.
Spring rains are an opportunity, not an obstacle. After a rain shower, droplets cling to petals and leaves, and the air is clean. Pack a microfiber cloth and a plastic cover for your camera. The soft, post-rain light is some of the year’s best.
Summer brings the widest variety of flowers. Roses peak in June, lavender in July, sunflowers and dahlias in August. Garden flowers reach their full height, providing dramatic vertical compositions. Wildflower meadows in the alpine zones hit peak color in mid to late summer.
The challenge of summer is harsh light. Shoot before 9 a.m. and after 5 p.m. Use a diffuser or move into shade for midday sessions. Heat stresses flowers, so early morning shoots find the most photogenic blooms, fresh from the cool night.
Insects are most active in summer, which is an opportunity for bee-on-flower, butterfly, and pollinator shots. Move slowly, use a longer focal length, and respect the insects’ space. A pollinator on a flower is a complete natural story in one frame.
Autumn is a transitional season that few photographers fully use. Late bloomers like asters, chrysanthemums, and sedums provide color into October. Seed heads, dried grasses, and ornamental grasses offer texture and golden tones. Fallen leaves provide a colorful natural background.
Pair flowers with autumn foliage. A red maple leaf behind an orange marigold, a yellow aspen beside a purple aster, or a carpet of fallen leaves around a single chrysanthemum creates strong seasonal storytelling. Use warm white balance (cloudy or shade) to enhance the autumn palette.
Capture the transition from bloom to decay. Wilting petals, exposed seed heads, and drying stems tell an authentic story of the season. Many viewers find these images more powerful than peak-bloom shots precisely because they evoke the passing of time.
Winter is the most overlooked season for flower photography, and that is exactly why it is an opportunity. Indoor arrangements, dried bouquets, and conservatory flowers provide controlled subjects. Frost-covered plants, snow on berries, and ice-encased blooms offer rare and dramatic images.
Force bulbs indoors for winter subjects. Amaryllis, paperwhites, and hyacinths bloom reliably in a sunny window and offer classic flower subjects in the depths of winter. Set up a small tabletop studio with window light and a simple background for editorial-quality images.
Look for structure, not color, in winter. Bare branches, dried seed heads, and bark textures become the subjects. Black and white processing emphasizes shape and form. A single dried sunflower head against a snowy field is one of the strongest botanical images you can capture.
The 3-5-8 rule is a floral arrangement principle, not strictly a photography rule, but it translates well to bouquet and arrangement photography. Use 3 focal flowers (the largest, most striking blooms), 5 supporting flowers (smaller blooms that complement the focal flowers), and 8 filler flowers or greenery to round out the arrangement. When photographing an arrangement, place the camera so all three groups are visible, and use a smaller aperture (f/8 to f/11) to keep everything in focus.
Shoot during golden hour or on overcast days for soft, flattering light. Use a wide aperture (f/2.8 to f/5.6) to blur the background and make the flower pop. Get down to flower level instead of shooting from standing height. Fill the frame by moving closer or zooming in. Check the background before each shot to remove distractions. Use a single focus point on the stamen or the leading edge of a petal for sharp results.
The 80/20 rule (Pareto principle) suggests that 80% of a great flower photo is decided before the shutter is pressed: choosing the right subject, finding the right light, positioning for a clean background, and selecting a strong composition. Only 20% comes from camera settings, gear, and post-processing. This is why experienced photographers spend more time looking and less time shooting. Slowing down and observing often produces better images than rapid-fire shooting.
Try less common techniques: intentional camera movement for painterly blur, multiple exposures for ethereal layering, reflections on black acrylic or still water, backlighting through translucent petals, or focus stacking for front-to-back sharpness in macro work. Shoot in unusual weather (rain, snow, frost), at unusual angles (lying flat on the ground, shooting straight down), or with unusual lenses (Lensbaby, tilt-shift, freelensing). Black background flower photography is currently one of the most popular creative styles.
A 90mm to 105mm macro lens is the most versatile choice for dedicated flower work, providing true 1:1 magnification, sharp optics, and enough working distance to light the subject. For non-macro flower portraits, an 85mm to 135mm telephoto prime delivers beautiful background blur. For beginners on a budget, a 50mm f/1.8 prime is a strong starting point. The best lens is the one you have with you, so a kit lens is a perfectly valid choice while you learn.
For most flower photography, f/2.8 to f/5.6 produces a sharp subject with creamy background blur. For macro work at 1:1 magnification, f/8 to f/11 is a better starting point because depth of field becomes very thin at close distances. For wide field shots of meadows and gardens, f/8 to f/11 keeps both the foreground flower and the background environment in focus.
Use a wide aperture (f/1.8 to f/4), get close to the subject, and use a longer focal length (85mm to 200mm). The combination of wide aperture, close subject distance, and distant background produces the strongest background blur. On smartphones, Portrait mode uses computational depth mapping to achieve a similar effect. The farther the background is from the flower, the more blurred it will appear.
Flower photography rewards patience, observation, and practice more than any other photographic genre. The techniques in this guide provide a strong foundation, but the real growth happens when you take them into the field, shoot a lot, and review your work honestly. Set yourself a 30-day challenge: pick one flower in your garden or neighborhood and photograph it every day. Notice how light changes, how petals age, how the angle you choose transforms the same subject.
Join an online community. Reddit’s r/photography, r/macro, and the dedicated flower photography communities on Flickr and Discord offer free, constructive feedback. Share one image per week and ask for critique. Specific feedback from experienced photographers will accelerate your growth faster than any tutorial.
Build a personal project. A series always teaches you more than a single image. Photograph the same garden through a full year, document a single bouquet from purchase to decay, or shoot 30 different wildflowers in your region. A project gives you focus, motivation, and a portfolio of work that shows your development over time.
Continue your education with related resources on our site. Our golden hour photography guide extends the light techniques in this article. Our photography lighting basics tutorial covers natural and artificial light in more depth. Our photography composition rules guide gives you a complete framework for stronger images. Our macro photography techniques tutorial takes you further into the close-up world.
Most importantly, keep shooting. The most beautiful flower photos are made by photographers who show up consistently, in every season and in every light. Take what you have learned here, take your camera or your phone, and start capturing the flowers around you. The rest is practice.