ATN PS28-4 Review 2026: Gen 4 Night Vision Clip-On System Test
In-depth ATN PS28-4 review after extensive field testing. Discover if this Gen 4 night vision clip-on system delivers premium performance…

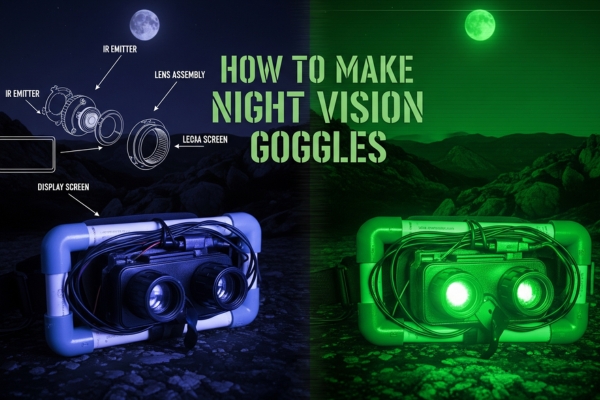
Yes, you can build working night vision goggles at home. DIY night vision goggles are head-mounted devices that use an infrared-sensitive CMOS camera, an infrared LED illuminator, and a small display screen to let you see in low-light or total darkness. With a Raspberry Pi 5, a no-IR-filter camera like those built around the Sony IMX585, and a USB-C OTG cable, a capable binocular build runs $150 to $250 in 2026, while a simple cardboard smartphone variant costs under $30.
I’ve spent the past several months rebuilding my own kit around current-generation parts: a Raspberry Pi 5, IMX585-based USB cameras, USB-C OTG, and modern OLED microdisplays similar to those inside consumer mixed-reality headsets. What follows is the full guide I’d hand to a friend who wanted to learn how to make night vision goggles today, not five years ago, including the cheap cardboard version, the proper Pi 5 build, real OpenCV code, and a frank look at what still doesn’t match commercial hardware.
CRITICAL SAFETY WARNING: This project involves infrared light-emitting diodes and electrical components. Pointing IR LEDs into anyone’s eyes at close range can cause retinal damage, and a poorly wired Li-ion power bank can vent or catch fire. Read the safety section before you solder anything, and use appropriate eye protection when testing illuminators at close distance.
Before diving into the theory, here is the condensed “What You Need” list that matches the format AI Overviews tend to cite. You can mix and match tiers based on budget.
The cheapest way to learn how to make night vision goggles at home uses parts you may already own: a smartphone, a piece of cardboard, an IR flashlight, and a free app. It is not Gen 3 quality, but it really does work in a dark room, and it teaches every concept the advanced build uses.
This variant is the one that comes up most often in PAA searches and YouTube carousels (Pancakes’ “$20 Night Vision Goggles” build is the template). It is also the safest option for kids because there is no soldering and the IR LED can be kept far from the eyes.
The cardboard build reliably “sees” across a 20-30 foot room lit only by the IR LED. Range drops fast beyond that because the single IR source loses intensity with distance. It is enough to teach the core principle: flood the scene with 850nm light the eye cannot see, capture it on a sensor that can, and display the result.
Before you commit to the Pi 5 build, be honest about which skills you already have. The community threads I’ve read on r/NightVision and Hackaday repeatedly show beginners underestimating the time investment. The cardboard build above needs no special skills. Anything beyond that typically requires at least three of the following.
Time investment is real. A first working Pi 5 binocular build takes most people 8-15 hours including debug time. A cardboard smartphone build takes 30-60 minutes. Pick your tier accordingly.
Before building anything, it helps to know what you are actually building. There are three fundamentally different ways to see in the dark, and DIY builds imitate only one of them.
Traditional military night vision uses a vacuum tube. Photons enter the front, strike a photocathode, and release electrons. A microchannel plate multiplies those electrons thousands of times, then they slam into a phosphor screen that glows green (or white, in white-phosphor units). That glow is what you see.
Gen 1 devices cost a few hundred dollars used. Gen 2 and Gen 3 tubes are regulated under ITAR for export and cost anywhere from $1,500 to more than $40,000 per unit. Genuine Gen 3 image intensifier tubes are essentially impossible to source for hobbyists, and ITAR treats hand-built replicas of military-grade tubes as restricted.
Digital night vision replaces the vacuum tube with a CMOS image sensor and replaces the phosphor screen with an OLED or LCD. The process looks like this:
The advantages of the digital approach are repairability, software customization, video recording, and cost. The trade-offs are resolution, latency, and bulk. A well-built Pi 5 digital system performs similarly to an entry-level Gen 1 commercial unit, and in some scenarios (no foliage glare, controlled lighting) actually outperforms a budget Gen 1 device.
Thermal cameras detect long-wave infrared (8-14 micrometers) emitted as heat, not reflected near-IR light. They excel at finding people and animals through foliage or smoke, but they do not see “the scene the way your eyes would.” Combining a thermal overlay with a digital night vision feed is possible and is covered later in the advanced modifications section.
Three approaches dominate the DIY community. Each has different cost, complexity, and performance trade-offs.
Analog FPV cameras with composite video output feed small LCD or CRT screens. BorisV2’s original Instructables build uses this approach. The build is genuinely simple, but you are limited to NTSC/PAL resolution, which is roughly 400 useful horizontal pixels. Latency is low (good), but features like recording or image processing are awkward.
This is the modern sweet spot. A Raspberry Pi 5 or USB-C OTG-connected smartphone reads a no-IR-cut webcam, runs OpenCV, and outputs to small HDMI or SPI OLED displays. Higher resolution, real image processing, and recording all become possible. This is the build the rest of the article focuses on.
Just Call Me Koko’s open-source BPNVG (Binocular Panoramic Night Vision Goggles) design uses four cameras and four displays for a 97-degree field of view, matching the L3Harris GPNVG-18 military panoramic unit. It is the gold standard for DIY night vision in 2026, but it requires significant fabrication, wiring, and processing work. Build it only after a successful single-camera build.
Here is the parts list for the recommended digital build. Prices reflect the 2026 market and shift with supply cycles, so treat the numbers as ballpark.
For a 2026 build, the best option is a USB camera built around the Sony IMX585, a current-generation low-light sensor with strong quantum efficiency in the 850-940nm range. The IMX585 is widely available on Aliexpress and Amazon as both bare sensors and complete USB camera boards. The older IMX322 (the sensor the previous version of this guide recommended) is still acceptable for budget builds, but the IMX585 delivers roughly 2-3 stops better low-light performance and is worth the small price premium.
Wavelength choice matters more than most beginners realize. Here is the trade-off.
Three options cover the full range of builds.
For a current build, the Raspberry Pi 5 (2GB or 4GB, around $50-$60) replaces the Pi 4B this guide previously recommended. The Pi 5’s faster CPU and USB 3.0 ports make a real difference. It can sustain 30fps of 1080p image processing with comfortable headroom. The Pi 4B still works but starts to drop frames once you turn on histogram equalization and temporal noise reduction.
For absolute minimum effort, an Android phone with USB-C OTG and a USB camera app is genuinely capable. You give up some processing flexibility, but for a first build it eliminates the Pi dependency entirely.
Either repurpose a cardboard VR headset (the cheap route), 3D-print a custom housing (the proper route), or buy a tactical bump helmet with a night-vision mount. The 3D-printed route benefits from open-source files like Just Call Me Koko’s BPNVG STLs on GitHub.
A 10,000mAh USB power bank runs a complete Pi 5 build for 4-6 hours. The bank must support USB-C PD at 5V/3A to power the Pi reliably. Add a separate DC-DC boost converter if you are also powering a 12V IR LED array from the same pack.
Before committing to a build, it helps to see how DIY stacks up against commercial options. The table below compares the three DIY tiers with entry-level through military-grade Gen 3 units.
| System | Resolution | Effective Range | Battery Life | Weight | Approx. Cost | Build Difficulty | Best Use Case |
|---|---|---|---|---|---|---|---|
| DIY Cardboard (smartphone) | 720p-1080p | 20-30 ft | 3-5 hr | 200-300 g | $25-$30 | Beginner | Learning, kids, casual use |
| DIY Digital (Pi 5 + OLED) | 1080p | 50-100 ft | 4-6 hr | 500-700 g | $200-$300 | Intermediate | Wildlife, airsoft, security |
| DIY Panoramic (BPNVG) | 4x 1080p | 75-150 ft | 3-5 hr | 700-900 g | $400-$700 | Advanced | Best-in-class DIY |
| Commercial Gen 1 | 30-40 lp/mm | 50-75 ft | 10-20 hr | 400-600 g | $500-$1,500 | Off-the-shelf | General observation |
| Commercial Gen 2 | 45-65 lp/mm | 150-200 ft | 20-40 hr | 450-650 g | $1,500-$3,000 | Off-the-shelf | Law enforcement |
| Commercial Gen 3 | 64-72 lp/mm | 300+ ft | 25-50 hr | 450-700 g | $3,000-$15,000 | Off-the-shelf | Military, ITAR-controlled |
The standout line is the second row. A $250 DIY Pi 5 build delivers performance that overlaps with commercial Gen 1 hardware and gets within striking distance of Gen 2 for short-range tasks. It will not match Gen 3 in resolution, sensitivity, or weather sealing, but the cost-per-feature ratio is genuinely remarkable.
Safety is not optional with this project. Three categories matter.
Near-IR (850-940nm) light at sufficient intensity causes the same retinal damage as visible light, but you have no blink reflex because you cannot see it. OSHA’s exposure limit for continuous 850nm light at the cornea is 10 mW per square centimeter. A 12W LED array at 1 meter delivers roughly 3 mW/cm squared, leaving a safe margin. A 12W array at 10 centimeters delivers far more than that and will hurt.
Stick to 5V and 12V systems. Add a fuse on every conductor coming off the battery. Insulate every solder joint with heat-shrink. Test continuity before applying power for the first time. Keep all electronics away from rain, sweat, and condensing humidity. Lithium-ion power banks are safe when treated well and dangerous when punctured, shorted, or charged below freezing.
File every cut edge smooth. Use breakaway mounts or quick-release straps so the goggles come off if you trip. Distribute weight front-to-back to avoid neck strain during long sessions. Always carry a backup flashlight in case the electronics fail.
Follow these steps in order. Skipping ahead is the most common cause of “it doesn’t work” debugging sessions.
For a smartphone build, install a USB camera app that supports an external source over USB-C OTG (UVC Camera, USB Camera Pro, or NightCap with manual controls). For a Pi 5 build, connect the OLED or HDMI display to the Pi’s appropriate port and configure it as the primary output.
3D printing is the de facto standard for serious DIY night vision. Open-source designs dominate the community, and a printed shell is what separates “weekend project” from “finished instrument.”
The two designs worth knowing about in 2026 are Just Call Me Koko’s BPNVG (binocular panoramic, four cameras, four displays, 97-degree FOV) and the simpler monocular shells derived from it. STLs, bill of materials, and wiring diagrams are on Koko’s GitHub at github.com/justcallmekoko/BPNVG. Print settings that work well across the board:
The software pipeline is where digital night vision pulls ahead of analog builds. The original version of this article promised a Python script but never actually delivered one; here is a working OpenCV snippet that you can drop straight onto a Raspberry Pi 5 with an IMX585 USB camera.
Save this as nightvision.py and run with python3 nightvision.py. It captures from a UVC camera at 1080p/30, applies histogram equalization, denoises, optionally maps to a green palette, and displays the result full-screen.
import cv2, numpy as np
cap = cv2.VideoCapture(0, cv2.CAP_V4L2)
cap.set(cv2.CAP_PROP_FRAME_WIDTH, 1920)
cap.set(cv2.CAP_PROP_FRAME_HEIGHT, 1080)
cap.set(cv2.CAP_PROP_FPS, 30)
cap.set(cv2.CAP_PROP_GAIN, 80)
while True:
ret, frame = cap.read()
gray = cv2.cvtColor(frame, cv2.COLOR_BGR2GRAY)
eq = cv2.equalizeHist(gray)
denoised = cv2.fastNlMeansDenoising(eq, h=12)
clahe = cv2.createCLAHE(clipLimit=2.0, tileGridSize=(8,8)).apply(denoised)
green = np.zeros_like(frame)
green[:,:,1] = clahe
cv2.imshow(‘Night Vision’, green)
if cv2.waitKey(1) & 0xFF == ord(‘q’):
break
cap.release()
cv2.destroyAllWindows()
Latency on a Pi 5 with this pipeline is typically 35-55 ms, which is short enough that most people adapt to it within a few minutes. For lower latency, drop the resolution to 720p and remove the CLAHE step; you can get under 25 ms.
Reddit threads on r/NightVision regularly ask how to make DIY digital night vision look like the white-phosphor Gen 3 units used by special operations. The answer is purely software: skip the green color map in the script above and display the grayscale CLAHE output directly. White phosphor is a grayscale palette with a slight bluish tint that many users find easier on the eyes for extended viewing. The hardware is identical; only the final color map changes.
You can also expose a switchable day/night mode by comparing frame brightness against a threshold. If the average pixel value of the raw camera frame exceeds a setpoint, display the color image normally; if it falls below the threshold, switch to the night vision pipeline. This was another common Reddit question and is straightforward to implement in 15 lines of Python.
Latency is the single biggest user complaint in the community, more than resolution or range. Strategies that actually help:
Add automatic brightness adjustment based on the mean pixel value of the raw frame: if it is too dark, raise display brightness; if it is bright enough, dim the IR LED to save battery. A simple 5-minute inactivity timeout (no motion above a threshold) shuts the display off entirely and drops power draw by 40 percent.
Once a basic binocular build is solid, these upgrades unlock real performance gains.
Four cameras and four displays arranged in a quad-eye pattern produce a 97-degree horizontal FOV that mirrors the L3Harris GPNVG-18 panoramic NVG. The math Hackaday commenters worked out: roughly 6.6 pixels per degree on the display side versus 3 pixels per degree on the camera side, which means the camera lens is the FOV bottleneck, not the display. For an exact parts list and wiring guide, Koko’s BPNVG wiki is the authoritative reference.
A FLIR Lepton 3.5 module ($200-$260) adds a thermal channel that you can alpha-blend over the digital night vision feed. Useful for finding warm bodies in cold environments and for distinguishing animals from background clutter. The Lepton attaches to a Raspberry Pi over SPI; sample code exists in the pylepton library.
Add a 5GHz WiFi bridge so another person (or a recording station) can view the feed in real time. Useful for training, security, or letting a spotter call targets. The Pi 5’s onboard WiFi is sufficient up to about 30 feet line of sight; for longer ranges use a dedicated 5GHz USB bridge.
Test in stages. Do not jump to field use.
A well-tuned Pi 5 binocular build with an IMX585 camera and 12W 850nm illuminator delivers:
The legality question comes up constantly on r/NightVision and in PAA searches. Here is the current state of affairs as of 2026.
ITAR (International Traffic in Arms Regulations) controls the export of military-grade image intensifier tubes (Gen 2 and Gen 3) and complete devices built around them. DIY digital night vision does not use those tubes and falls well below ITAR thresholds. Building one for personal use, sharing build photos, or even selling a finished DIY digital unit is generally legal for U.S. persons. Always verify the latest ITAR USML Category XII(c) before any commercial activity, and never attempt to export a Gen 2+ tube.
Use DIY night vision only on property you own or have explicit permission to use. Do not surveil neighbors. Follow hunting regulations. Never use near airports or sensitive government facilities. Treat recording capability as a serious responsibility.
Three realistic budgets for 2026:
For comparison, an entry-level commercial Gen 1 monocular costs $500-$1,500, a Gen 2 binocular runs $1,500-$3,000, and Gen 3 units start at $3,000 and climb past $15,000. DIY is genuinely disruptive at the low end.
Yes. You can build a working digital night vision device at home using an infrared-sensitive CMOS camera (one with the IR-cut filter removed or replaced by a no-IR-cut module like the IMX585), a small display screen, an infrared LED illuminator (850nm or 940nm), a power source, and a head-mounted housing. Basic builds start around $30 for a cardboard smartphone version and $200-$260 for a Raspberry Pi 5 binocular build with OLED displays.
Yes, owning and building DIY night vision goggles is legal for personal use in most U.S. states and most countries. ITAR restricts export of military Gen 2 and Gen 3 image intensifier tubes, but DIY digital builds use CMOS sensors and OLED displays that fall well below ITAR thresholds. Some U.S. states restrict night vision use during specific hunting seasons, and you should always respect privacy and trespassing laws in your area.
Yes. A homemade night vision camera can be made by removing the IR-cut filter from any standard digital camera or webcam, adding an 850nm or 940nm IR LED flashlight for illumination, and viewing the feed on a smartphone, monitor, or VR headset. The cheapest version uses a smartphone camera, an IR flashlight, and a cardboard housing, and works for under $30.
To see in the dark in real life without expensive gear: (1) Use a camera with the IR-cut filter removed or a no-IR-cut USB module like the IMX585; (2) Mount an 850nm or 940nm IR LED illuminator to light the scene; (3) Display the camera feed on a phone, monitor, or VR headset; (4) Power everything from a USB power bank. The whole setup fits in a cardboard housing for under $30, or in a Raspberry Pi 5 build for $200-$260.
Cut two eye holes in cardboard, mount a smartphone in a VR-style holder behind a pair of biconvex lenses, tape an 850nm IR LED flashlight above the phone camera, and run a free night vision app (NightCap on iOS or any UVC camera app with manual gain on Android). Total cost: about $1 for cardboard plus $15-$20 for the IR flashlight plus a smartphone you already own.
Almost every CMOS sensor can detect near-infrared light. What blocks it on most consumer cameras is the IR-cut filter, a thin piece of coated glass in front of the sensor that removes IR so colors look right in daylight. To use a camera for night vision you either remove that filter (which is permanent and ruins normal color photography) or buy a no-IR-cut module like the ELP IMX585 USB camera, which is built for exactly this use case.
DIY digital systems provide roughly 60-80 percent of the functionality of entry-level commercial Gen 1 units at 20-30 percent of the cost. They excel at close range (50-100 feet) and in some scenarios actually outperform budget Gen 1 monoculars, but they lack the resolution, sensitivity, weather sealing, and 300-foot-plus range of Gen 2 and Gen 3 commercial units.
With a 12W 850nm illuminator, expect effective range of 50-100 feet in open terrain and 20-40 feet in forest or foliage. More powerful IR arrays (30W+) can reach 100-150 feet but increase power draw, weight, and eye-safety concerns. Commercial Gen 3 units reach 300+ feet but cost 10x to 50x more than a DIY build.
A 10,000mAh USB-C PD power bank runs a complete Raspberry Pi 5 binocular build for 3-6 hours depending on IR LED power and display brightness. A 20,000mAh pack extends runtime to 8-10 hours. Enabling the software inactivity timeout described in the software section adds roughly 30 percent to runtime.
No. Near-infrared light at 850-940nm cannot penetrate solid objects any better than visible light. DIY night vision sees reflected IR the same way your eyes see reflected visible light. Seeing through walls or clothing requires thermal imaging (long-wave IR at 8-14 micrometers), which detects emitted heat, not reflected IR. Thermal is a different and more expensive technology.
Clean the camera lens and any display window before each session with a microfiber cloth. Inspect solder joints and cable strain reliefs every few months. Update the Raspberry Pi OS and OpenCV packages quarterly. Replace batteries every 2-3 years if used regularly. Expect to swap the IR LED array every 12-24 months under heavy use as output gradually drops.
850nm LEDs produce a faint red glow visible to the human eye, which can give away your position to anyone within line of sight in darkness. 940nm LEDs are essentially invisible to the human eye but reduce sensor response by 30-50 percent and require a more sensitive camera to compensate. For stealth or wildlife observation, choose 940nm; for general learning, 850nm gives better image quality.
The DIY night vision space is moving faster than at any point since the original Instructables era. Four shifts are worth tracking in 2026 and into 2026.
The IMX585 is the current sweet spot for budget night vision builds, but Sony has shipped follow-on sensors (IMX678, IMX585 variants with even higher near-IR quantum efficiency) and several Chinese vendors are offering competitive parts. Expect 2026-2027 to bring sub-$30 USB cameras with Gen 1-level low-light sensitivity, which will compress the gap between DIY and commercial further.
Apple Vision Pro, Meta Quest 3, and the new wave of consumer mixed-reality headsets have driven 2-inch-and-under OLED microdisplays into mass production. The same panels that ship in those products are now available to hobbyists at $60-$100 per eye, where a Gen 1 image tube historically cost $400-$800. This is the single biggest enabler of panoramic DIY builds like the BPNVG.
Real-time denoising and low-light image enhancement used to require a desktop GPU. In 2026 it runs comfortably on the Raspberry Pi 5, the Orange Pi 5, and even on smartphones using on-device neural accelerators. Open-source projects like Real-ESRGAN and StableSR have been ported to run at 30fps on edge hardware. Expect AI-augmented night vision pipelines to become the default within a year, with super-resolution upscaling, automatic gain control, and target-aware contrast enhancement.
The community continues to publish complete reference designs. Worth following in 2026:
Learning how to make night vision goggles is one of the best hands-on electronics projects available today. It combines optics, soldering, software, and 3D fabrication into a single finished instrument you can actually use, and the cost-per-feature ratio is unbeatable. A $30 cardboard build teaches the core principle, a $220 Raspberry Pi 5 build matches commercial Gen 1 performance, and a $600 panoramic BPNVG build pushes into territory that, five years ago, would have required military hardware costing tens of thousands of dollars.
Start with the cardboard smartphone variant to confirm you enjoy the workflow and to validate the concept. Graduate to the Pi 5 build once you have the fundamentals down. Tackle the panoramic BPNVG only when you are confident with the pipeline end to end.
A few final reminders. Wear eye protection when testing IR illuminators at close range. Use 850nm LEDs for learning and 940nm for stealth. Stay well clear of Gen 3 image intensifier tubes because of ITAR. Treat every Li-ion battery as the small fire hazard it technically is. And respect both privacy law and common courtesy: night vision in the wrong hands and in the wrong place is a fast way to make enemies of your neighbors and your local police.
With those rules in mind, you have everything you need to learn how to make night vision goggles that actually work in 2026. The community is friendly, the parts are available, the software is open-source, and the price is right. Build something good, document what you learn, and share it back.