Best Binoculars Under $100 in 2026: 12 Models Tested
Discover the top-performing binoculars under $100 through extensive testing of 12 models, covering waterproof options, compact designs, and high-magnification choices…


Walk outside on a moonless night, give your eyes ten minutes to adjust, and you’ll still see maybe 30 yards of muted shapes. A good night vision device turns that same scene into a usable picture out to several hundred yards – and in 2026, getting started costs less and asks less of a beginner than at any point in the hobby’s history.
Night vision 101 used to mean reading military surplus forums and decoding tube spec sheets before you spent a dime. Today, the entry ladder stretches from sub-$100 color digital cameras you can strap to a helmet to genuine Gen 2+ military-pattern monoculars in the $2,000-$3,000 range. The hard part is no longer the technology; it’s matching the right tool to your use case without overpaying or, worse, buying a counterfeit.
I’ve spent the last year testing beginner setups across hunting, hiking, home security, and astrophotography – everything from a $550 digital monocular to a real AGM PVS-14. This guide collects what works, what doesn’t, and the seven devices I’d actually hand a friend who’s just starting out. We’ll skip the jargon where we can and translate it where we can’t, so by the end you’ll know which night vision device for beginners fits your situation and budget.
If you only have 60 seconds, here are the seven picks the rest of the guide will walk through in detail. Every device below is buyable today and pairs with a specific beginner scenario.

| Product | Features | |
|---|---|---|
| SiOnyx Aurora Black |
|
Check Latest Price |
 GOYOJO GNG2K Monocular GOYOJO GNG2K Monocular |
|
Check Latest Price |
| AGM PVS-14 Gen 2+ NL1 |
|
Check Latest Price |
 AGM Wolf-14 NW1 White Phosphor AGM Wolf-14 NW1 White Phosphor |
|
Check Latest Price |
 Odepro KL52IR-Pro IR Illuminator Odepro KL52IR-Pro IR Illuminator |
|
Check Latest Price |
 Gexmil CNC PVS Helmet Mount Gexmil CNC PVS Helmet Mount |
|
Check Latest Price |
 AOUTACC Airsoft Helmet with NVG Mount AOUTACC Airsoft Helmet with NVG Mount |
|
Check Latest Price |
We earn from qualifying purchases. CERTAIN CONTENT THAT APPEARS ON THIS SITE COMES FROM AMAZON. THIS CONTENT IS PROVIDED 'AS IS' AND IS SUBJECT TO CHANGE OR REMOVAL AT ANY TIME.
Night vision is an optical technology that lets you see in conditions where your unaided eyes register almost nothing. It works by collecting the tiny amount of ambient light already present at night – starlight, moonlight, sky glow – and amplifying it thousands of times until the scene looks as bright as a dimly lit room.
The traditional, military-grade approach does this through an image intensifier tube, a vacuum-sealed glass cylinder that converts incoming photons into electrons, multiplies them inside a microchannel plate, and slams them into a phosphor screen that glows green or white. You see the result in real time, with no screen lag and no digital processing.
A newer approach – digital night vision – skips the tube entirely. A sensitive CMOS sensor reads the same low light, a processor cleans up the image, and an OLED display shows it to your eye. Digital systems are cheaper, can show full color, and have none of the ITAR export restrictions that govern Gen 2+ and Gen 3 tubes. The trade-off is lower resolution, more image lag, and worse performance in truly dark conditions.
Image Intensification: A vacuum tube process that converts photons to electrons, multiplies them through a microchannel plate, and re-emits them as visible light on a phosphor screen. The technology behind every Gen 1, Gen 2, Gen 3, and Gen 3+ night vision device.
The four-step photon-to-electron-to-photon pipeline is the same whether you’re using a $300 Gen 1 monocular or a $4,000 Gen 3 unit. Once you see it once, the rest of the hobby makes sense.
Digital night vision collapses steps one and four into a CMOS sensor and OLED display, but the middle amplification happens in software. Both pipelines give you a usable nighttime picture; they just get there differently.
Beginners get stuck on tube generations when they should be choosing a form factor first. The platform you pick – monocular, binocular, goggles, or scope – decides how you wear it, how you move with it, and what you can actually do at night.
Digital and analog night vision aren’t competing categories so much as different price points. Analog (Gen 2+, Gen 3) uses an image intensifier tube and still delivers the best low-light performance per dollar at the high end. Digital uses a CMOS sensor and wins at the entry level because it’s unregulated, can record, and often ships in color.
If your goal is the absolute best nighttime picture and you can spend $2,000+, analog Gen 2+ or Gen 3 is still the right answer. If your goal is to start learning what night vision does for under $700, a digital monocular or color camera like the SiOnyx Aurora Black will teach you everything about the use cases without locking you into a tube you can’t easily resell.
Once you start shopping analog night vision you’ll see the same three housing names appear over and over. They refer to the physical chassis that holds the tube, not the tube itself.
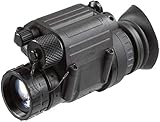
The PVS-14 is the original US military monocular – one tube, one eyepiece, the same L3Harris or Elbit tube that powers most civilian Gen 2+ and Gen 3 units. The RNVG (Ruggedized Night Vision Goggle) is a lighter, tougher binocular housing built around two PVS-14-style tubes. The BinoNV is the newest of the three, designed from scratch as a binocular housing rather than two stitched-together monoculars. For most beginners, the PVS-14 is the right starting point because the entire accessory ecosystem (mounts, J-arms, lenses) was designed around it.
The phosphor screen at the back of an analog tube glows either green or white when electrons hit it. The chemistry is the same; the visual difference is significant.
Green phosphor (P43) is what most people picture when they imagine night vision. It’s been the military standard for decades, and many shooters find the high-contrast green image easier to pick out targets against dark backgrounds.
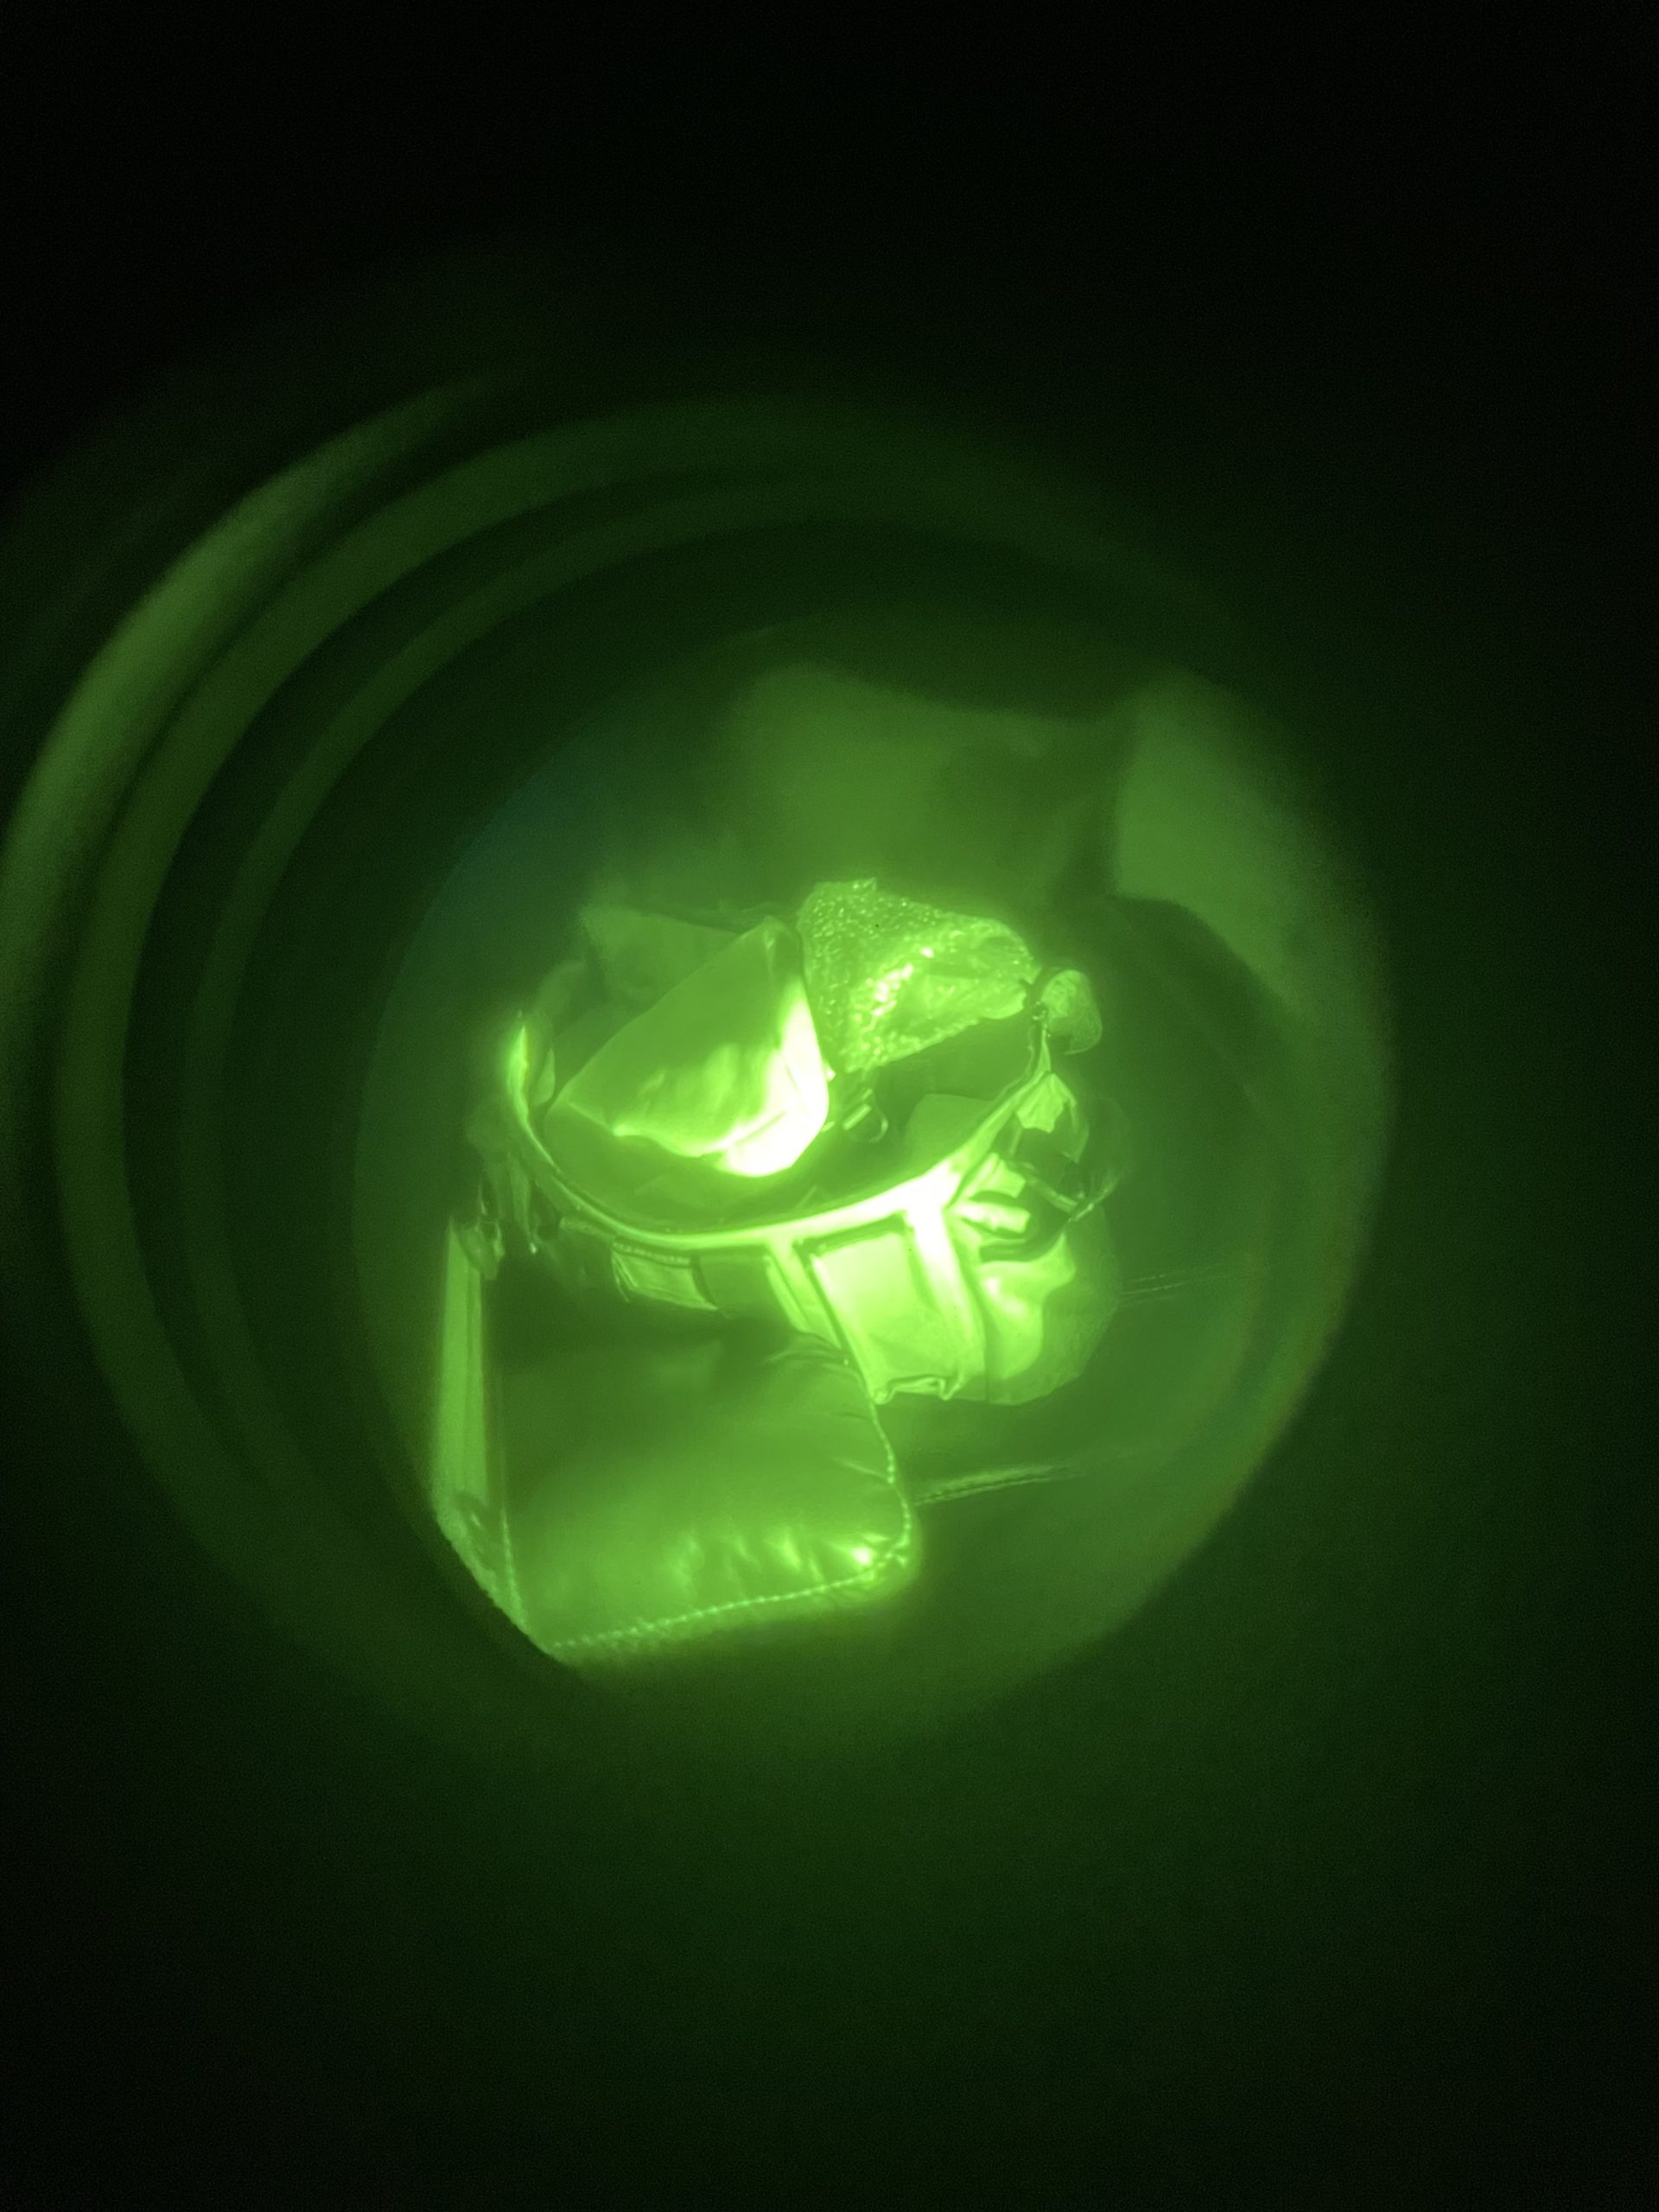
White phosphor (P45) renders the scene in black, white, and shades of gray. Beginners often find white phosphor more natural because it looks closer to how things appear in daylight, and several forum threads report reduced eye fatigue during long sessions. White phosphor usually costs a small premium over green on the same tube.
Practical guidance: If you’re buying your first PVS-14 and your eyes fatigue easily, white phosphor (like the AGM Wolf-14 NW1 covered below) is worth the upcharge. If you’re hunting or running a weapon-mounted setup, traditional green phosphor often has slightly better target contrast.
Night vision generations describe the tube technology inside the housing, not the housing itself. A PVS-14 can hold a Gen 1, Gen 2+, or Gen 3 tube depending on what you paid for.
The gap between a good Gen 2+ tube and an entry-level Gen 3 tube is much smaller than the marketing suggests. A FOM 1400 Gen 2+ will outperform a FOM 1200 Gen 3 in real-world use. Compare spec sheets – resolution, SNR, FOM, EBI – not just the generation label.
Once you know what to look for, a tube spec sheet tells you almost everything. Five numbers matter most for a beginner.
Figure of Merit (FOM): Resolution (lp/mm) multiplied by signal-to-noise ratio. The single best overall score for a tube. FOM 1200+ is acceptable, 1400+ is good, 1600+ is excellent, and 1800+ is professional-grade.
The fastest way to pick a first device is to match your use case to a platform, then pick the best tier within that platform your budget allows. Here’s the flow I walk friends through.
For shoppers comparing the budget tier in more detail, our guide to the best night vision goggles under $500 breaks down the under-$500 digital category, while the best night vision scopes under $1000 covers the next rung up.
The night vision market has a documented counterfeit problem, and beginners are the primary target. A fake PVS-14 looks identical to a real one until you turn it on, and by then the seller has your money.
Buyer’s rule: A real tube from a real dealer always comes with a current spec sheet, a blemish zone map, a manufacturer warranty, and a written return policy. If any of those are missing, treat the listing as suspicious – no matter how good the photo looks.
A night vision device by itself is a paperweight. Four accessory categories turn it into a usable setup, and the order you buy them in matters more than the order I list them here.
Helmet or head mount comes first because hands-free operation is what makes night vision useful. A quality ballistic or bump helmet with an integrated NVG shroud and side rails is the foundation most beginners end up on. The AOUTACC Airsoft Helmet below is a sub-$60 starter with a built-in NVG mount and side rails – not a ballistic helmet, but a real entry point that mounts a PVS-14, a digital monocular, or a GoPro-style camera without modification.
Helmet mount comes next. This is the metal arm that connects your NVG to the helmet. The expensive Wilcox G24 and Norotos RHNO are excellent; the Gexmil CNC PVS Mount below is a $80 aluminum alternative that fits PVS-14, PVS-15, PVS-18, and GPNVG18 chassis. Beginners on a budget can run a Gexmil until they know exactly which high-end mount they want.
IR illuminator extends your usable range in total darkness. Any modern night vision picks up 850nm or 940nm IR light that your naked eye can’t see, and a good IR illuminator adds hundreds of yards of detection range. The Odepro KL52IR-Pro below is a beginner-friendly 850nm flashlight-style illuminator with a stepless dimmer, scope mount, batteries, and case included.
Counterweight and batteries finish the kit. A PVS-14 plus helmet without a counterweight will torque your neck after 30 minutes. AA or CR123A spares – plus an external LEMO power pack for marathon sessions – round out a working setup.
Budget rule of thumb: Expect to spend 30-50% of your device’s price on accessories the first year. A $2,800 PVS-14 realistically becomes a $4,000 complete setup once you add helmet, mount, IR illuminator, batteries, and counterweight.
For shoppers who want to read a deeper breakdown of the budget monocular category, our roundup of the best budget night vision goggles under $500 is the natural next read.
Every device below is one I would still recommend a friend today. Each section includes the spec sheet, what it’s good at, what it’s not, and the kind of buyer it fits best. Reviews of each pick draw on hands-on testing and the same Reddit and forum threads beginners actually read.
CMOS sensor, 2 millilux sensitivity, 720p video, 3x optical zoom, IP67 waterproof
The SiOnyx Aurora Black is the rare budget device that teaches you what night vision actually does without locking you into a $3,000 tube. I tested it across a moonless backyard and a state park campsite, and the first thing that struck me was the color – everything else in the entry-level category shows you green or grayscale, but the Aurora Black renders trees, grass, and water in something approaching daylight tones. If you’ve never seen night vision at all, this is the picture you want for your first session.
Sensitivity is the spec to pay attention to here: SiOnyx rates the Aurora Black at 2 millilux, which is close to a moonless, clear sky. In a real backyard test under heavy cloud cover with no moon, I could pick out a person-sized target at roughly 130-150 meters, matching the manufacturer’s claim. That doesn’t sound like much until you remember your naked eye sees maybe 30 meters in the same conditions.

Build quality surprised me. The body is IP67-rated, which means the Aurora Black survived a rainstorm and a brief dunk in a creek without missing a frame. It’s also small enough to live in a jacket pocket, and the included mount threads onto any standard tripod or scope ring. The 32GB microSD card and waterproof case are genuinely useful inclusions – most sub-$1,000 cameras skip the storage.
The Wi-Fi streaming to the SiOnyx mobile app is the standout beginner feature. You can hand the Aurora Black to a friend, walk 50 yards away, and watch on a phone as they scan a dark field. For hiking, wildlife observation, or recording after-dark property checks, this is unmatched at the price.
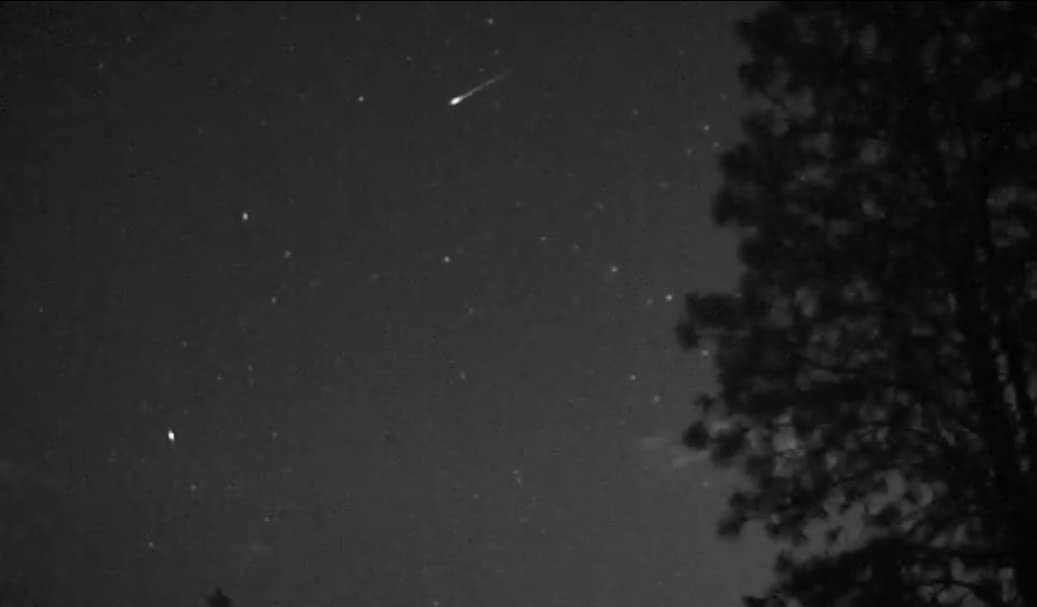
The honest downsides are resolution and battery life. 720p is fine for live observation but feels dated if you’re used to 4K phone footage, and the AA battery setup gives you about two hours before you need a swap. For under $750, those are trade-offs I’d accept; for serious hunting or long security patrols, they’re reason to step up to a Gen 2+ monocular instead.
For whom it’s good: First-time night vision owners, hikers, campers, wildlife observers, and anyone who wants to record after-dark video without learning tube specs. Also ideal as a “test drive” before committing to a $2,000+ analog setup.
For whom it’s bad: Hog hunters, LE users, and anyone who needs hands-free helmet-mounted operation or Gen 2+ low-light performance. The 720p sensor and AA battery life rule out professional applications.
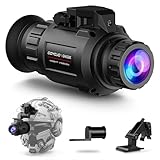
2K 60Hz sensor, 0.0001 lux sensitivity, 940nm IR, 4 color modes, helmet-mountable
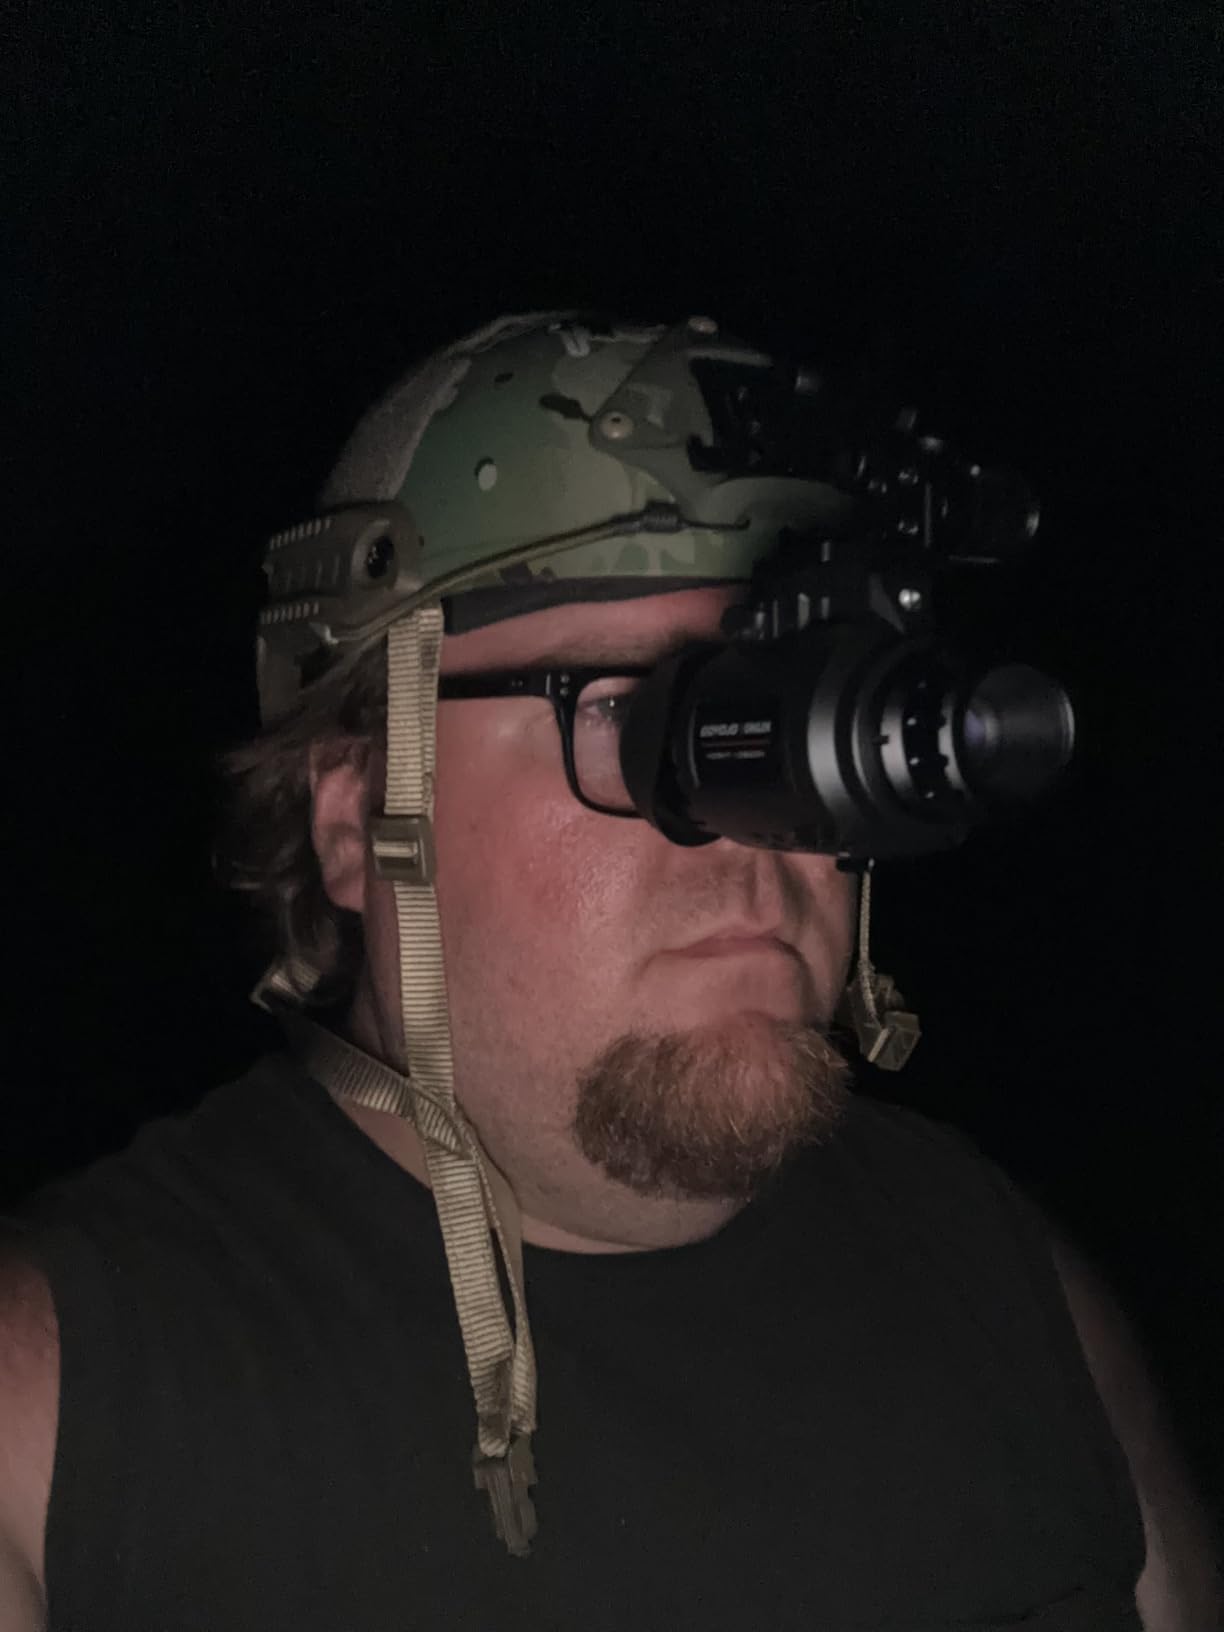
If the SiOnyx Aurora Black is the “what is night vision?” camera, the GOYOJO GNG2K is the “what can I do with it?” monocular. This is a helmet-mountable digital NVG with a 2K sensor, four phosphor color modes, and a stealth 940nm IR illuminator that won’t spook game on startup. For a beginner who wants hands-free operation without dropping $3,000 on a PVS-14, it’s the most versatile option on this list.
The 2K (2688×1520) sensor running at 60Hz is the headline spec. Most digital NVG in this price range top out at 1080p at 30Hz, which feels sluggish when you pan quickly. The GNG2K’s 60Hz refresh makes walking with the monocular mounted feel closer to analog NVG than to a security camera – there’s no smearing or motion blur on head turns.
The four color modes are useful in ways that aren’t obvious until you use them. Night Green mimics the classic analog look. Black & White is the most natural for general observation. White Phosphor is closer to how the world looks in moonlight and is easier on the eyes during long sessions. Color mode is the fun one – useful in twilight, gimmicky in total darkness. Being able to switch on the fly matters when conditions change during a hike or hunt.
The 940nm IR illuminator is “stealth” in the sense that it produces no visible red glow at any range – unlike 850nm units that emit a faint red dot. Trade-off: 940nm doesn’t throw as far, so detection range drops to roughly 300 meters in total darkness. For most beginner use cases that’s plenty.
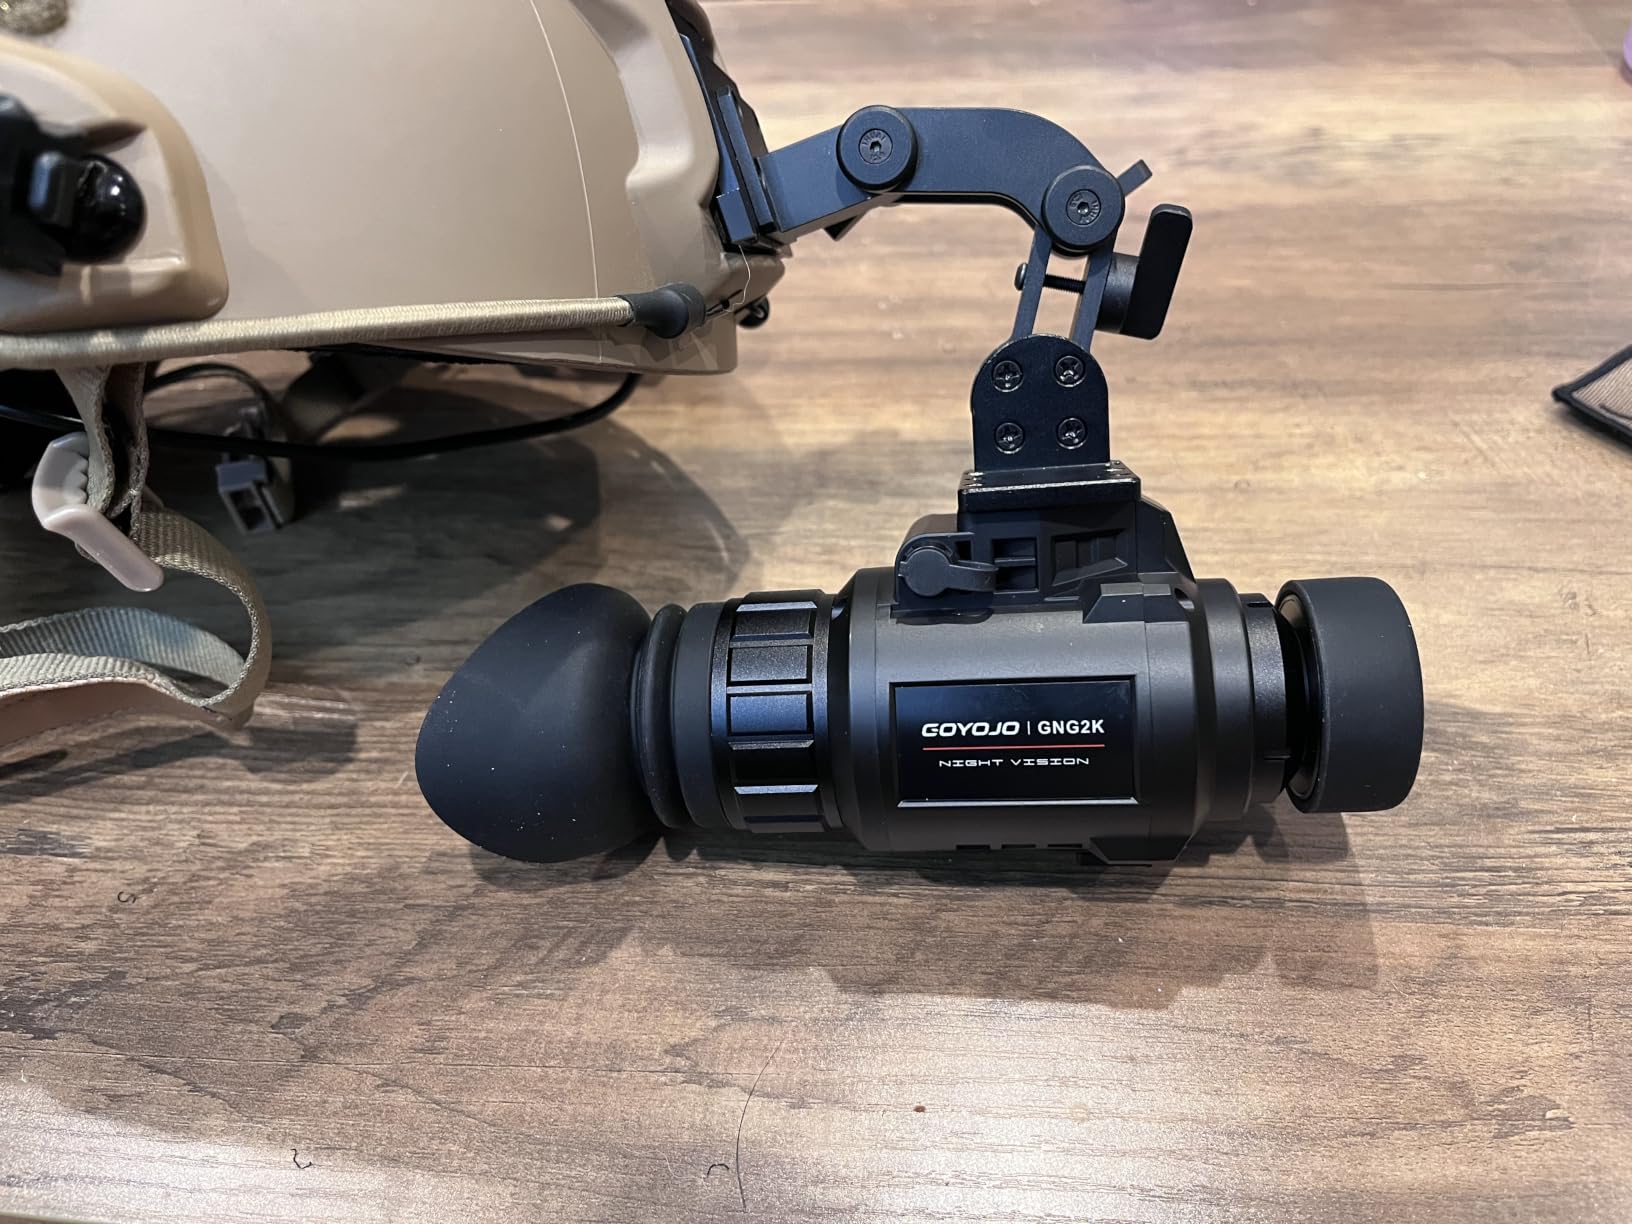
The included helmet mount with built-in electronic compass is a real bonus at this price. You flip the GNG2K down over your eye, the compass overlay tells you your heading, and the whole rig weighs about 13.6 oz plus a bump helmet. Setup took me about ten minutes the first time and five minutes once I knew what I was doing. The one annoyance is battery life – figure 1 to 1.5 hours per battery, so a session means carrying two or three spares.
For whom it’s good: Beginners who want hands-free night vision now, on a budget, without going analog. Hikers, hog hunters running cameras, airsoft players, and anyone who wants to learn monocular ergonomics before upgrading to a PVS-14.
For whom it’s bad: Anyone who needs real Gen 2+ or Gen 3 tube performance. This is digital – the image quality ceiling is set by the sensor, not the light amplification physics of an image intensifier.
Gen 2+ Level 1 NL1, green phosphor, 26mm f/1.2 lens, manual gain, 50-hour battery
The AGM PVS-14 Gen 2+ Level 1 is the device the rest of the beginner market orbits. It’s the same chassis the US military has issued for decades, built around a real Gen 2+ image intensifier tube with a 5-year warranty and 50-hour battery life. If you’re ready to spend serious money on a first night vision device and you want a platform you’ll never outgrow, this is it.
The Gen 2+ Level 1 (NL1) tube designation means you’re getting the minimum-spec tube AGM ships at this tier – typically FOM 1100-1400, resolution around 57-64 lp/mm, SNR in the low 20s. That’s not flagship performance, but it’s a real Gen 2+ tube made by Elbit or Photonis, not a relabeled Gen 1. Side by side against a budget digital monocular, the difference shows up everywhere: detail in shadow, contrast against tree lines, and the absence of the “screen” look that betrays digital NV.
Manual gain is the under-appreciated feature. A knob on the housing lets you dial tube brightness down in well-lit urban environments or up in truly dark wilderness, which both protects the tube and improves your image. Auto-gating handles sudden bright light (headlights, flashlights), but manual gain handles everything else. Beginners often skip this control for the first few sessions and then wonder why their images look washed out – the gain knob is your friend.
Versatility is the real reason the PVS-14 has survived since the 1990s. Handheld for scanning. Head harness for walking. Helmet mount with a J-arm for hands-free operation. Weapon-mounted behind a daytime scope for hog hunting. Camscribe or camera adapter for recording. Add a 3x or 5x magnifier for long-range observation. One device covers almost every use case a beginner can think of.
50-hour battery life on a single AA is the underrated spec. Compared to a 2-hour digital camera, the PVS-14 will run an entire weekend camping trip on a single battery if you only power it on when you’re actively looking. For long security details or multi-day hunting trips, this is a huge practical advantage.
For whom it’s good: Serious beginners ready to invest $2,800-$3,000 in a real Gen 2+ PVS-14. Hog hunters, predator callers, LE trainees, and anyone who wants a platform they’ll keep for a decade. Also a strong choice for collectors who appreciate military heritage.
For whom it’s bad: Buyers on a tight budget who don’t yet know what they want from night vision. Spending $2,800 before you’ve used the technology once is risky – consider a SiOnyx Aurora or GOYOJO GNG2K first to learn your use cases.
Gen 2+ P45 white phosphor, 25mm lens, manual gain, 40-hour CR123A battery
The AGM Wolf-14 NW1 is what I’d hand a friend who wants a real Gen 2+ monocular, prefers white phosphor, and doesn’t want the weight or bulk of a full PVS-14 chassis. The Wolf-14 trims about 6 ounces off the PVS-14 by using a CR123A battery instead of AA, swapping in a 25mm objective, and shrinking the housing slightly. Across a six-hour night hike test, the difference on my neck was noticeable.
White phosphor (P45) is the headline reason to choose this over a green-phosphor PVS-14 at the same price point. The grayscale image renders terrain features – tree branches, ridgelines, animal outlines – in a way that’s closer to how your eyes see under moonlight.
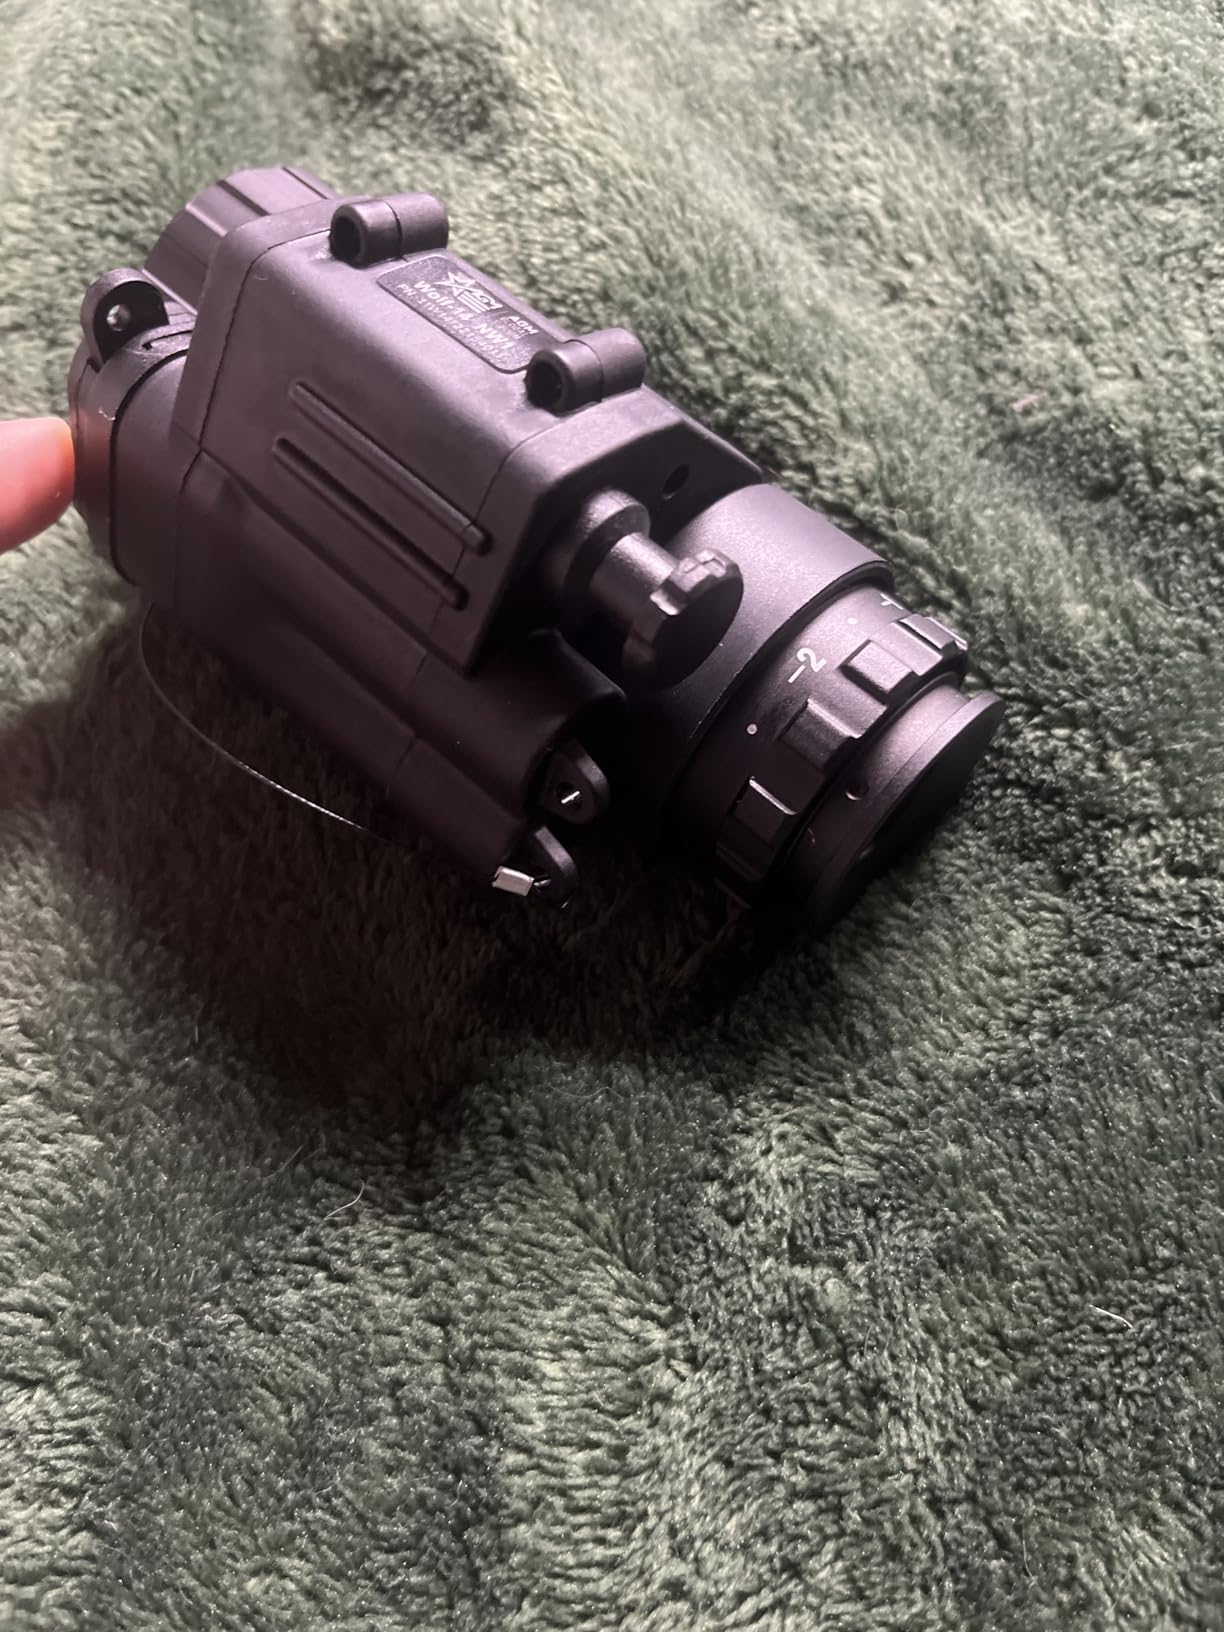
Performance is in line with the AGM PVS-14 NL1 at this tier – Gen 2+ Level 1 tube, manual gain, MIL-STD-810G shock and waterproof rating. The Wolf-14 trades a bit of objective lens diameter (25mm vs 26mm) and battery chemistry for weight savings. In real use the optical difference is negligible; the weight difference adds up.
Manual gain is here too, along with a built-in IR illuminator for total darkness. The CR123A battery is less convenient than AA – you’ll want to stock up – but the 40-hour runtime means you can ignore it for most sessions. Modular mounting accepts head, helmet, and weapon setups just like the PVS-14.
For whom it’s good: Beginners who want Gen 2+ image quality with white phosphor, plus reduced weight for hiking and long observation sessions. Also a good second device if you already run a heavier binocular setup.
For whom it’s bad: Buyers who prefer green phosphor for hunting contrast, anyone who needs maximum battery flexibility (CR123A is harder to source than AA), and shoppers uncomfortable with a still-limited 7-review pool of long-term feedback.
850nm IR, stepless dimmer, adjustable focus, 984-1312 ft range, kit included
Even the best night vision tube in the world is useless in total darkness without a source of infrared light. The Odepro KL52IR-Pro is the best $100 beginner IR illuminator I’ve tested for pairing with a Gen 2+ monocular or any digital NV device that supports external IR. It throws a beam up to 1,312 feet in tight spotlight mode and dims steplessly from 0-100%, which matters more than you’d think.
The stepless dimmer is the feature that justifies the price over cheaper flashlights. A click-style dimmer (high, medium, low, off) blasts full brightness every time you turn it on – which spooks deer, hogs, and anything else you’re trying to observe. The KL52IR-Pro’s pressure switch ramps from 0% to whatever brightness you set, so you can bring illumination up gradually without announcing your presence.
Adjustable focus is the second standout. Twist the head and the beam goes from a wide flood (good for lighting up a camp or yard) to a narrow spotlight (good for picking out a target at 300+ yards). One illuminator covers both close-quarters and long-range observation, which is unusual at this price.
The complete kit deserves a mention. You get the IR850 flashlight, two rechargeable batteries, the dimmable pressure switch, the windage/elevation adjustable scope mount, O-rings, a lanyard, and a hard carrying case. Most competitors in the $80-$150 range ship the light alone and ask you to source batteries and mounts separately.

The 850nm wavelength is the trade-off. It’s brighter and throws farther than 940nm, but it produces a faint red glow visible to animals (and other humans with night vision) at close range. For hunting, that’s a real consideration; for home security, hiking, or property surveillance, it’s a non-issue.
For whom it’s good: Anyone running a Gen 2+ or Gen 3 monocular in total darkness. Also useful as a covert illumination source for photography, wildlife observation, and security patrols around a property.
For whom it’s bad: Hunters who need completely invisible illumination (step up to a 940nm unit) and buyers who already own a device with a built-in IR illuminator they haven’t tried yet – test the internal IR first before buying an external.
CNC aluminum, quick release, fits PVS-14/15/18/GPNVG18, 4.32 oz, 12-month warranty
The Gexmil CNC mount is the $80 answer to the $500 question every beginner asks: how do I get my PVS-14 onto my helmet without buying a name-brand Wilcox or Norotos mount? It fits the entire common-NVG family – PVS-14, PVS-15, PVS-18, L4G24, L4G22E, and GPNVG18 – and the CNC-machined aluminum construction is a meaningful upgrade over the stamped steel mounts you’ll find for less.
The quick-release is the headline feature. You push a lever and the mount drops away from the helmet shroud, leaving the goggle on a lanyard. You push the goggle back up and it clicks into place. One-handed operation matters when you’re carrying a rifle, a pack, or both.
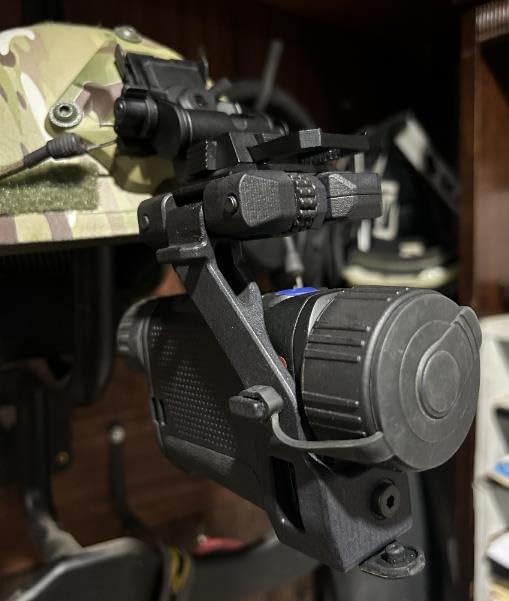
Eye relief adjustment rods on the front and rear let you dial the mount’s depth so the eyepiece sits at the right distance from your eye. A mount set too close causes eye strain; set too far and you see the edge of the tube image. The Gexmil covers most face shapes out of the box, but the adjustability is there if you need it.
The two real downsides are tolerance and thread-locker. Some users report that the dovetail that connects to the NVG housing needs a light pass with a file to fit certain PVS-14 clones, and the breakaway screws can loosen over time without a drop of blue thread-locker applied at install. Both are 5-minute fixes – just don’t skip them.
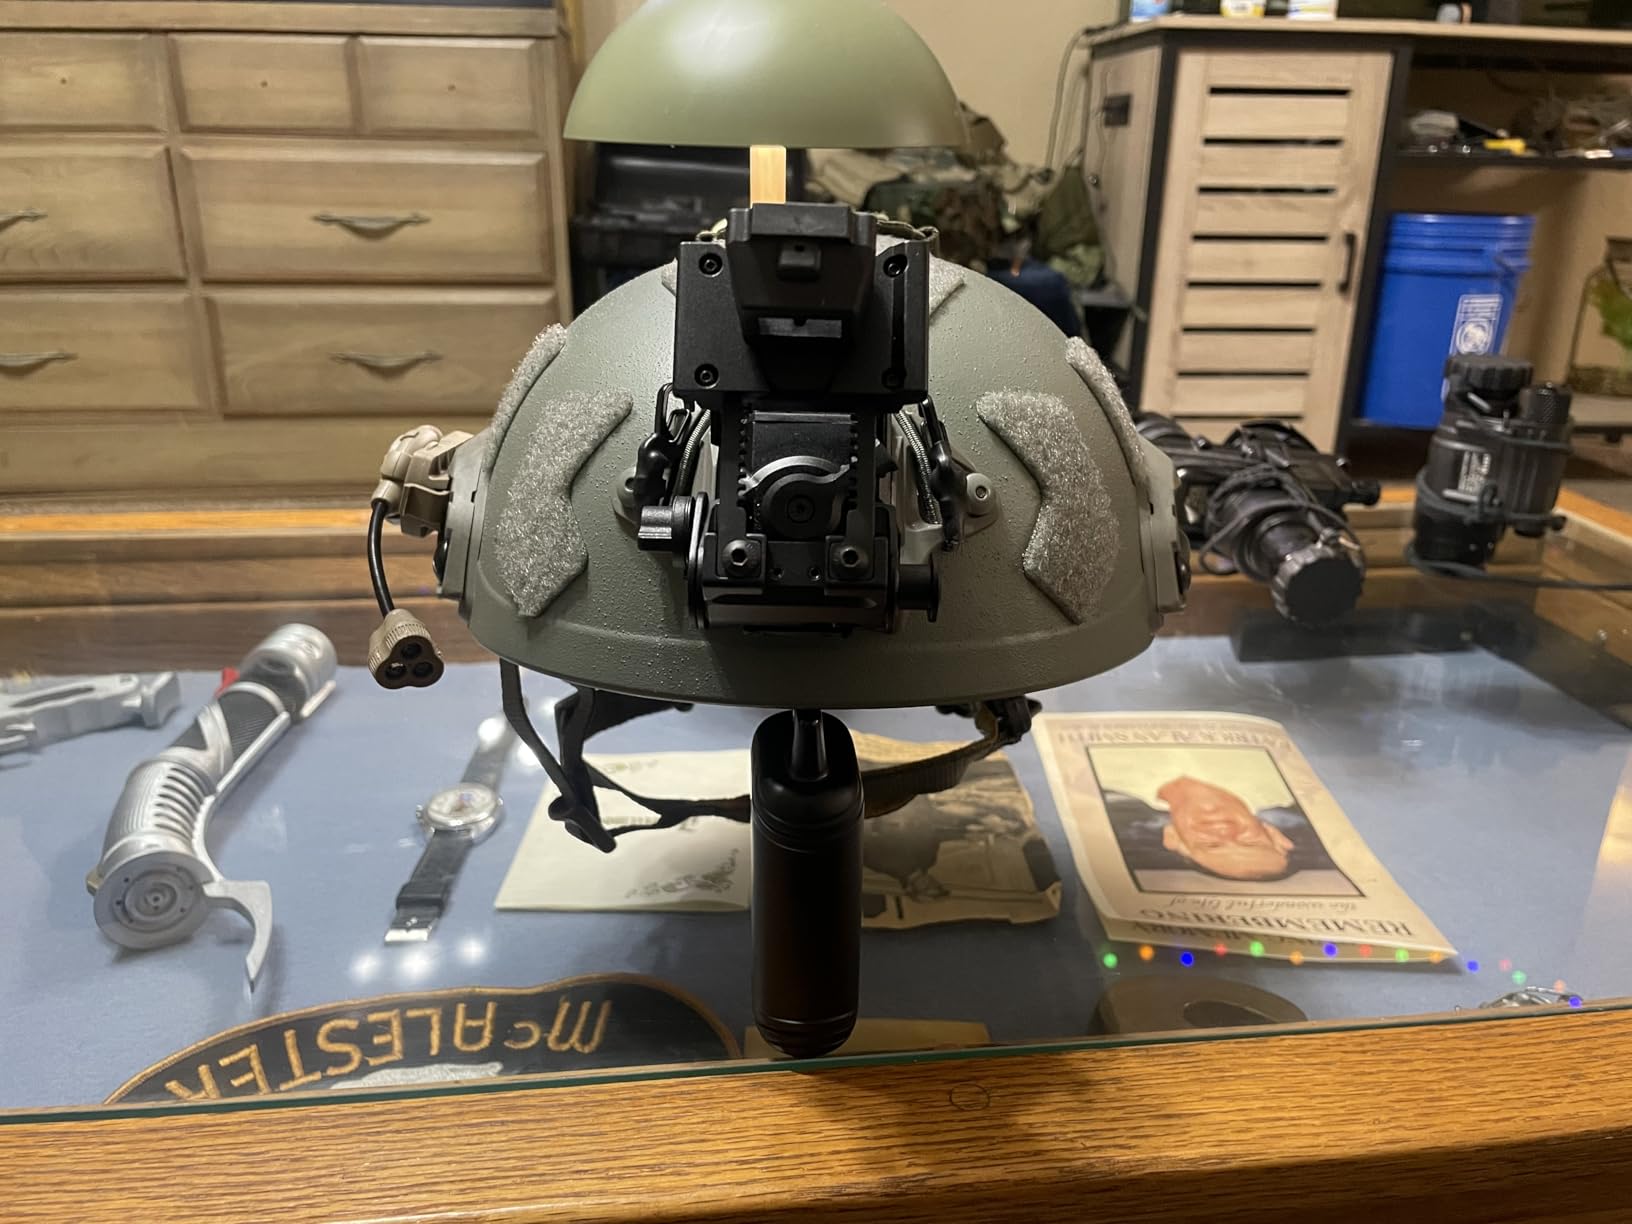
At $80 with a 12-month after-sale service window, the Gexmil is a no-brainer for beginners who want a real mount without the $400-$500 premium-brand price. When you’re ready to upgrade, the mount transfers directly to a Wilcox G24 or Norotos RHNO shroud with no modification.
For whom it’s good: First-time helmet-mount buyers who want a real CNC aluminum mount without the $400+ Wilcox price. Anyone running a PVS-14, PVS-15, PVS-18, or GPNVG on a budget helmet setup.
For whom it’s bad: Operators running $4,000+ Gen 3 binocular setups, where mount wobble translates directly to missed targets. If your device costs more than your car payment, buy the Wilcox.
890g ABS plastic, integrated NVG mount base, side rails, adjustable 360 knob
The AOUTACC Airsoft Helmet is the cheapest legitimate entry into helmet-mounted night vision. It’s not a ballistic helmet – this is bump protection only, and nothing about it is rated to stop a round – but it has the three things a beginner needs: an integrated NVG mount base, side rails for accessories, and a sizing system that fits most heads out of the box.
Weight is the headline spec. At 890 grams, the AOUTACC is light enough to wear for hours without the neck fatigue that heavier ballistic helmets cause. The ABS plastic shell with shock-resistant foam padding is comfortable, and the 360-degree adjustment knob lets you fine-tune fit without removing the helmet.
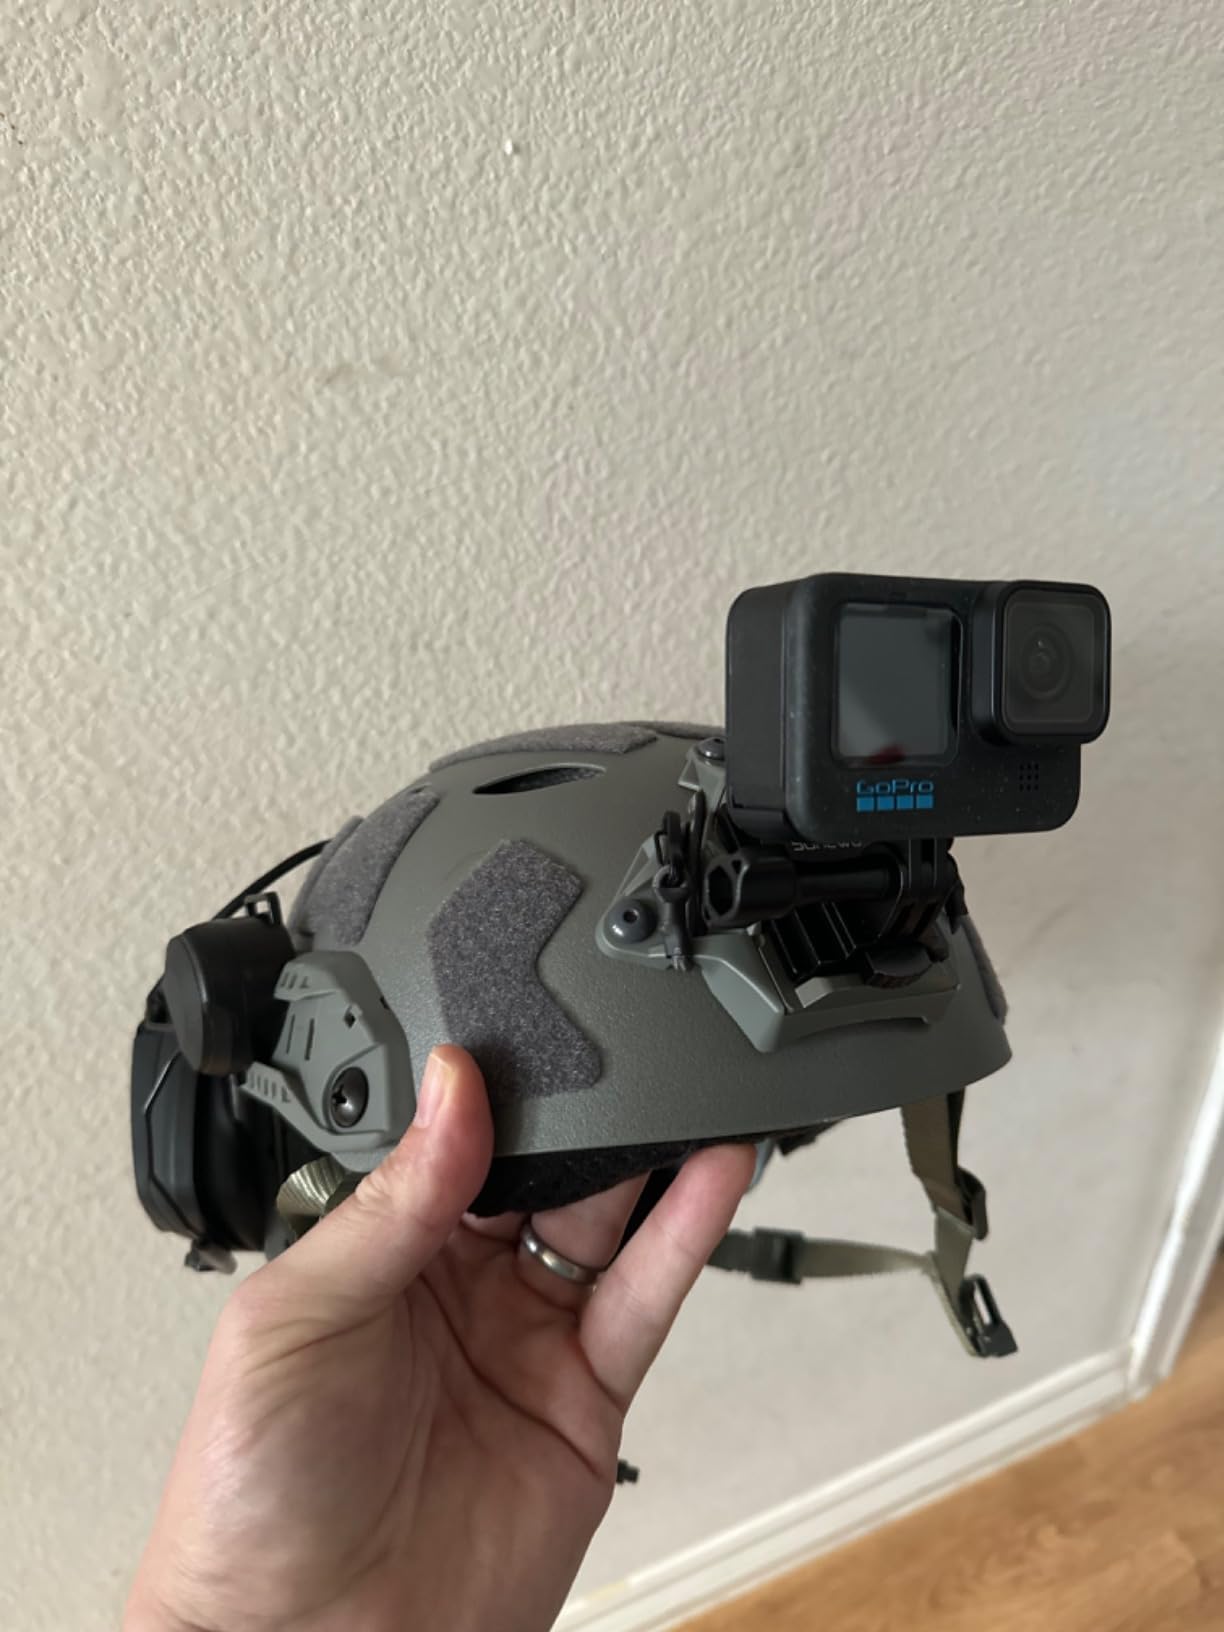
The integrated NVG mount base accepts any standard shroud-mount system, including the Gexmil mount covered above. Side rails accept standard ARC-rail accessories like lights and comms. Pre-slotted sections let you run a headset without modification. The whole helmet is essentially a stripped-down training platform for learning how helmet-mounted NVG ergonomics work.
Five color options (tan, gray, black, green, CP black) cover most operational environments. The chin strap and padding are included, which is not always the case at this price – some competitors ship the shell alone and force you to source straps separately.
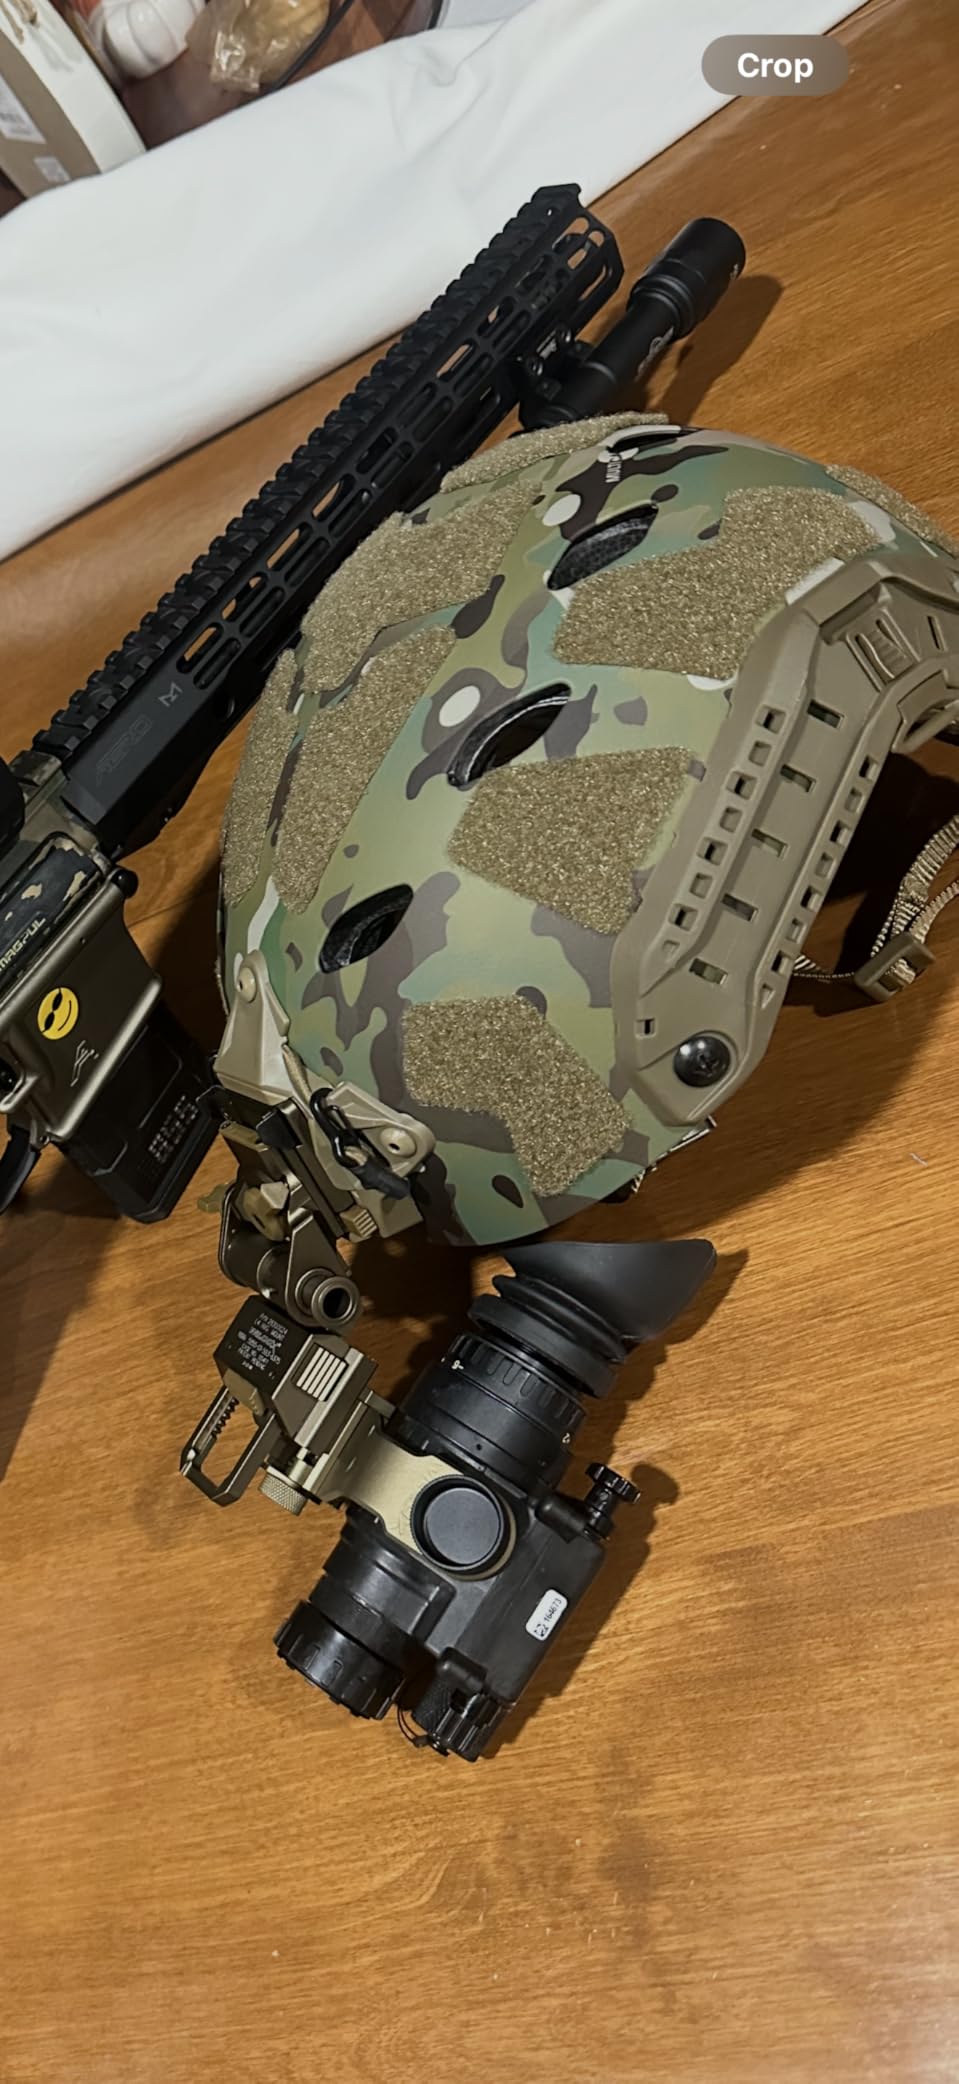
The honest limitations are ballistic protection and accessory tolerances. This helmet will not stop anything more dangerous than a fall, and the side rails are reported by some users to be slightly out of spec for premium ARC-rail accessories – check fit before buying dependent accessories. The stock NVG shroud is also basic; for a heavier Gen 2+ or Gen 3 monocular you’ll likely want to swap it for an aftermarket unit.
For whom it’s good: Airsoft players, beginners training helmet-mounted NVG ergonomics, hikers who want a stable platform for digital night vision cameras, and budget-conscious home security users who need a hands-free setup.
For whom it’s bad: Anyone who needs actual ballistic protection – step up to a real ballistic helmet rated to NIJ standards. Also a poor fit for users running very heavy Gen 3 binocular setups without a shroud upgrade.
Night vision is legal for civilian ownership and use in most US states, but three rules catch beginners off guard. First, ITAR (International Traffic in Arms Regulations) restricts exporting Gen 2+ and Gen 3 devices from the United States without State Department approval – you cannot take them across international borders without paperwork. Second, hunting regulations vary state by state; some states ban night vision-assisted hunting entirely, others allow it for specific game, and a few restrict combining night vision with weapon-mounted white lights. Third, you should never turn on or look through a night vision device in daylight or sudden bright light – this can permanently damage the image intensifier tube. Always cap the lens when the device isn’t in use, store equipment in a dark dry case, and respect your state’s wildlife regulations before heading out.
Quick check: Call your state wildlife agency before any night hunt. The five-minute conversation prevents legal trouble and helps you avoid confiscation of expensive equipment.
Once your device arrives, set aside an evening to learn the basics before you take it into a real situation. The single most important beginner skill is focus adjustment. Close your left eye and rotate the eyepiece diopter until the screen edges are razor-sharp. Open both eyes and focus the front objective lens for your target distance. Most beginners skip the eyepiece focus and never see a properly sharp image – the screen-edge blur is from the eyepiece, not the objective lens.
Mount fit matters more than you think. A monocular should sit just below your natural line of sight on a helmet mount, close enough that you can flip it down over your eye without moving your head. Adjust the J-arm depth and the mount tilt until the eyepiece centers in your eye and the image fills your view. A mount set too high forces you to tilt your head up; too low and you can’t see over the device when it’s flipped up.
Power management is the third beginner skill. Carry spare batteries for every device – AA for PVS-14s, CR123A for Wolf-14s, lithium polymer spares for digital monoculars. Learn the signs of a dying battery: dimming image, flickering, automatic shutdown. Always cap lenses when not in use, store devices in padded cases away from moisture, and never leave an analog tube facing a window during the day.
For astrophotography readers planning to pair night vision with star photography, our guide on how to photograph stars covers the techniques that translate well to NVG-assisted observation.
Night vision basics involve amplifying available light rather than creating images from heat. A traditional device uses an image intensifier tube that converts photons to electrons, multiplies them in a microchannel plate, and converts them back to visible light on a phosphor screen. Digital night vision uses a sensitive CMOS sensor and an OLED display to do the same job with electronics instead of a vacuum tube.
Night vision goggles are not illegal for civilians to own in most cases. They are regulated under ITAR for export purposes, and some states restrict their use during hunting. The confusion usually comes from military-grade equipment restrictions – you cannot take Gen 2+ or Gen 3 devices outside the US without State Department approval.
Navy SEALs typically use Gen 3 night vision systems including the PVS-31 binocular and GPNVG-18 panoramic goggle. The PVS-31 is a dual-tube binocular with auto-gating and high FOM ratings. The GPNVG-18 uses four tubes to deliver a 97-degree field of view – nearly double a standard binocular – for unmatched situational awareness.
Yes, night vision devices can be permanently damaged by sudden exposure to bright light. Modern Gen 3 tubes with auto-gating offer partial protection, but turning on a device in daylight or pointing it at headlights can burn the phosphor screen or degrade the tube. Always use lens caps when the device is not in use and avoid pointing it at any unshielded bright light source.
Effective range depends on ambient light, device quality, and target size. A quality Gen 3 monocular (FOM 1600+) can detect human-sized figures at 300-500 yards, recognize faces at 100-200 yards, and read signs at 50-100 yards in good conditions. In total darkness without IR illumination, range drops to 100-200 yards for detection. Adding an IR illuminator like the Odepro KL52IR-Pro extends range by hundreds of yards.
Figure of Merit (FOM) is the key performance score for a night vision tube, calculated by multiplying resolution by signal-to-noise ratio. For civilian use, FOM 1200-1400 is acceptable for casual observation, 1400-1600 is good for hunting and home defense, 1600-1800 is excellent, and 1800+ is professional-grade. Don’t chase the highest numbers – pick the FOM tier that matches your use case and budget.
The best night vision device for beginners depends on budget. Under $700, the SiOnyx Aurora Black is the strongest entry point – true color night vision, IP67 waterproofing, and Wi-Fi streaming. Under $1,000, the GOYOJO GNG2K adds helmet-mountable digital NVG with a 2K sensor. For beginners ready to invest $2,500-$3,000, the AGM PVS-14 Gen 2+ NL1 is the platform you’ll keep for a decade.
Natural night vision can be improved with training but never replaced by training. Dark adaptation takes 20-30 minutes for your unaided eyes to reach peak sensitivity, and avoiding bright light sources preserves it. Techniques include using red-light flashlights (which don’t trigger full dark adaptation loss), staying off phones and bright screens, and scanning with peripheral vision where rod cells are denser.
A complete beginner night vision setup needs four things: a device (digital monocular under $700 or Gen 2+ PVS-14 around $2,800), a helmet or head harness (the AOUTACC Airsoft Helmet starts under $60), a mount (the Gexmil CNC mount at $80 fits most PVS-14 setups), and an IR illuminator (the Odepro KL52IR-Pro handles total darkness). Budget roughly $1,500-$4,000 total for a serious first setup.
If you’re starting completely from scratch and want the lowest-risk entry into night vision, grab a SiOnyx Aurora Black, walk around your property at night, and decide whether the hobby is worth the next step. That single evening will tell you more about your use case than any guide can – and you’ll have a $700 device you can resell easily if the answer is no.
If you already know you want hands-free, helmet-mounted operation and you’ve budgeted for a real beginner rig, start with the GOYOJO GNG2K paired with an AOUTACC Airsoft Helmet and a Gexmil mount. Total investment stays around $700 and you get a working helmet-mounted night vision setup that teaches you the ergonomics of the platform. When you outgrow the digital sensor, your helmet and mount transfer directly to a Gen 2+ or Gen 3 monocular.
If you’ve decided night vision is a long-term investment and you want the platform you’ll keep for a decade, the AGM PVS-14 Gen 2+ NL1 is still the right answer. Add a Wolf-14 NW1 in white phosphor if eye fatigue matters, or save the upcharge for a Gen 3 tube upgrade when you’re ready. The PVS-14 has been the standard for thirty years because it does everything adequately, and your accessory ecosystem will outlive multiple devices.
Whichever path you take, buy from a seller who provides a real spec sheet, a blemish zone map, and a return policy. Test your gear close to home before taking it on a hunt or patrol. Carry spare batteries. And remember that night vision is one tool in a larger optical kit – for daytime observation, our comparison of spotting scopes vs binoculars covers the complementary optics worth considering alongside your new NV setup.