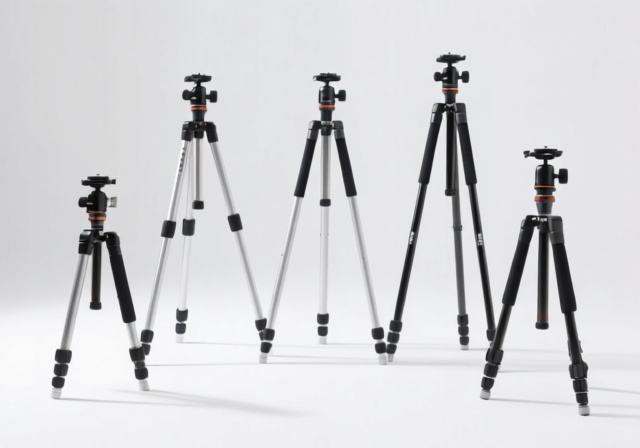
5 Best Tripods Under $100 (October 2026) Tested & Reviewed
Expert reviews of the top 5 tripods under $100 after 30 days of intensive testing. Find stable camera support that…

![Forced Perspective Photography: Complete Guide [cy]](https://revellphotography.com/wp-content/uploads/2026/09/featured-update-4130-1788715906427.jpg)
That viral image of a tourist casually “supporting” the Leaning Tower of Pisa with one hand didn’t come from Photoshop wizardry. It came from a simple positioning trick that any photographer can learn in an afternoon. Forced perspective photography turns the camera’s two-dimensional frame into a playground for the mind, where everyday scenes suddenly appear to defy the laws of physics, scale, and gravity.
The technique itself is older than the camera itself. Renaissance painters understood the principle centuries before photography existed, using carefully planned vanishing points to trick the eye. Modern photographers simply translate that same art of visual deception into a digital medium. When two objects sit at different distances from the lens, the closer one naturally appears larger, and our brains accept the resulting scale relationship without question.
This guide breaks down everything you need to start creating forced perspective photos that genuinely fool viewers. From choosing the right lens to advanced composite techniques used in Hollywood productions, you’ll find actionable steps rather than vague theory. Whether you’re shooting with a flagship mirrorless camera or just the phone in your pocket, the core principles remain the same.
Forced perspective photography is a visual storytelling technique that exploits how the human brain interprets depth. When you place two subjects at different distances from the lens and align them precisely within the frame, the closer subject appears disproportionately large compared to the farther one. The resulting image suggests a relationship between the two subjects that cannot exist in the real world.
The most famous historical example is the classic tourist photo at the Leaning Tower of Pisa, where an outstretched thumb and forefinger appear to pinch the entire monument. That single gag has been replicated millions of times around the world, yet each successful shot requires genuine technical understanding, not just luck.
The psychology behind the illusion matters just as much as the geometry. Our visual system relies on learned cues, like overlapping objects, atmospheric haze, and relative size, to estimate distance. Forced perspective deliberately overwhelms these cues by controlling the size relationship between subjects. Once the brain accepts the false scale, the illusion holds, and viewers may not realize they’ve been tricked until they study the image more carefully.
Depth Cues: Visual signals our brain uses to judge distance, including relative size, linear perspective, occlusion, and texture gradient. Forced perspective manipulates these cues to create convincing scale distortions.
What makes the technique so appealing is its accessibility. No special lenses, no expensive lighting kits, and no advanced editing skills are required. A basic camera, an interesting idea, and patience during the alignment process will produce results that outperform many heavily edited photographs.
A successful forced perspective image is the product of careful choreography. Every element, from the spacing between subjects to the height of the camera, must be deliberately chosen. Skip any of these steps and the illusion usually falls apart.
Quick Summary: Sketch your concept first, then position the distant subject far enough away to allow dramatic size differences. Place the near subject close to the lens, find the precise camera position where the illusion aligns, use a narrow aperture for deep focus, and refine through repeated test shots.
Camera settings influence how convincingly your illusion reads. The wrong aperture or focal length can flatten the depth relationship and expose the trick. The settings below cover the most common shooting scenarios.
Aperture: Set your camera to f/8 through f/16 for maximum depth of field. Start at f/11 and adjust based on how far apart your subjects are. Wider apertures such as f/2.8 or f/4 will blur one of your subjects and immediately undermine the illusion.
Shutter Speed: Use 1/125s or faster when your subjects are moving. For static setups with a tripod, 1/60s is usually sufficient. Faster shutter speeds also help when handheld, preventing motion blur that breaks the illusion.
ISO: Keep ISO between 100 and 400 for the cleanest image. Higher ISO values introduce noise that can distract from a clean forced perspective composition. In low light, increase ISO only after opening the aperture as far as f/8 will allow.
Focal Length: Wide-angle lenses (24 to 35mm) exaggerate the size difference between subjects, making foreground objects loom dramatically. Standard 50mm lenses produce more natural-looking illusions. Avoid telephoto lenses, which compress perspective and minimize the forced perspective effect.
Modern smartphones are surprisingly capable of producing forced perspective shots. The built-in computational photography handles exposure automatically, but a few manual tweaks dramatically improve results.
Avoid portrait mode. The artificial background blur it produces destroys the depth relationship that makes forced perspective work. Instead, use the standard photo mode and tap to set your focus point precisely where you want it.
Enable grid lines in your camera app. The rule of thirds grid helps position subjects precisely and verify alignment. Many photographers also use the grid to keep the horizon level, which prevents unintentional vertical distortions.
Skip the digital zoom entirely. Cropping in the camera app reduces resolution and image quality. Walk closer to your subject instead, or shoot from a different position to achieve the framing you want.
A small flexible tripod, like a GorillaPod, makes phone-based forced perspective much easier. It stabilizes the camera while you move subjects into position, and it keeps your camera locked at the precise alignment you found.
Pro Tip: Tap and hold on your phone screen to lock AE/AF (auto exposure and focus). Then drag the brightness slider to fine-tune exposure without losing the focus lock.
Getting both subjects tack sharp is the trickiest part of forced perspective. The hyperfocal distance technique solves this elegantly. Focus on a point roughly one-third of the way between your nearest and farthest subjects, then stop down to f/8 or narrower. The resulting depth of field often covers the entire scene.
For extreme subject separation where depth of field alone cannot cover the scene, try focus stacking. Capture multiple frames focused at different distances, then blend them in Photoshop, Lightroom, or a dedicated stacking app. Each frame contributes the sharpest portion of the scene, producing a final image with front-to-back clarity.
Remember that depth of field extends roughly twice as far behind the focus point as in front of it. Use this asymmetry by focusing slightly closer to your foreground subject when the gap between subjects is unusually wide.
The ideas are organized by difficulty so you can build skills progressively. Each concept has been tested in real shooting scenarios, and the tips below will help you avoid the most common pitfalls.
1. Holding the Sun or Moon – Frame your hand so the sun or moon appears to rest between your thumb and forefinger. A longer focal length (200mm or more) makes the celestial body appear larger relative to your hand. Golden hour offers the warmest light for this classic shot.
2. Crushing a Building – Stand far back from a recognizable building and extend your fist toward it. Align your hand so it appears to crush or push over the structure. Buildings with distinctive features, like clock towers or unique rooftops, work best.
3. Miniature People – Have a friend stand far in the background while you place small toys or figurines close to the camera. The toys will appear life-sized while the person looks miniature. Choose a person who blends with the background environment for stronger effect.
4. Drinking from a Giant Bottle – Hold a regular beverage bottle 1 to 2 feet from the lens while a friend stands far away pretending to drink from it. A wide-angle lens (24mm) exaggerates the bottle’s apparent size. Match the angle of the bottle to the angle of the person’s head.
5. Stepping Into a Picture – Print a large photograph and place it on the ground. Position the camera so the printed image appears to be a portal, then step “into” it from a precise angle. Seamless paper or large-format prints produce the cleanest results.
6. Levitating Objects – Have a hidden assistant lie on the ground out of frame, holding an object above your head with a stick or wire. The object will appear to float when viewed from the camera angle. Coat hangers, fishing line, and small grip arms work well for hidden support.
7. Size Reversal – Make a tall person appear small while a shorter person looks tall by reversing their typical distances from the camera. The taller person stands far back, the shorter person stands close to the lens. Coordinate poses so the eye reads the reversed scale naturally.
8. Toy Car Racing – Place toy cars on a road in the foreground while real cars pass in the background. The composition suggests toy cars racing alongside full-size vehicles. Shoot from a low angle to match the perspective of the toy cars.
9. Giant Food – Position food items very close to the lens while people in the background interact with oversized cutlery or props. The exaggerated food size works especially well for social media content where playful imagery performs strongly.
10. Weather Manipulation – Use a spray bottle, fan, or smoke machine to simulate weather effects while people in the background react to your “weather control.” Use a fast shutter speed to freeze water droplets clearly.
11. Multiple Forced Perspectives – Combine two or more illusion techniques in a single image. For example, one person appears to hold a building while another appears to stand on the moon. Careful planning and several test shots are required to make all the relationships work simultaneously.
12. Forced Perspective with Reflections – Incorporate puddles, mirrors, or glass surfaces to add a second layer of illusion. The reflected image can show a different scale relationship than the direct view, creating complex, multi-layered compositions.
13. Impossible Architecture – Make buildings appear to bend, lean impossibly, or float by combining forced perspective with extreme angles. Shooting from ground level with a wide-angle lens can dramatically distort tall structures.
14. Group Forced Perspective – Coordinate a group of people to create a single shared illusion. Each person’s role in the composition must be choreographed, including their pose, gaze direction, and distance from the camera.
15. Time-Lapse Forced Perspective – Capture a series of forced perspective images showing a transformation over time, such as the sun slowly “slipping” from someone’s grasp. Combine the frames into a video or animated GIF for a striking final result.
Even experienced photographers get tripped up by the same handful of issues. The tips below address the most frequent failure points so you can avoid the trial-and-error phase that frustrates most beginners.
Patience drives results. Successful forced perspective rarely happens on the first try. Most professional photographers budget 15 to 25 attempts per concept. The illusion requires precise alignment, and small adjustments take time to evaluate on the camera’s rear screen.
Lighting consistency seals the illusion. When the foreground subject is in shadow and the background subject is brightly lit, viewers immediately sense something is off. Try to shoot during soft light hours like overcast days or golden hour, when light quality is consistent across the scene.
Manual focus prevents autofocus errors. Autofocus systems often pick the closer or more contrasty subject, leaving the other blurred. Switching to manual focus and using focus magnification on the rear screen gives complete control over which element appears sharpest.
Keep the concept simple. One clear illusion reads more convincingly than a busy scene trying to do too much. Pick a single visual joke and execute it well, rather than stacking multiple forced perspective ideas into one confusing frame.
Time Saver: The most common mistake is insufficient separation between subjects. Double the distance you think you need, then adjust from there. More separation means more dramatic and believable scale.
Mistake 1: Wrong camera height – Shooting from standing eye level often exposes the trick, especially in urban scenes. Drop the camera to a low position, raise it above head height, or place it at the level of the foreground subject for stronger results.
Mistake 2: Inconsistent shadows – When shadows fall in different directions on your subjects, the illusion collapses. Plan your shots when the sun is high enough to minimize shadow angles, or use artificial lighting to control shadow direction.
Mistake 3: Insufficient depth of field – Wide apertures create selective focus that gives away the trick. Stop down to f/8 or smaller, and verify on the rear screen that both subjects appear acceptably sharp before moving on.
Mistake 4: Obvious scale references – Including familiar objects of known size, like a coin, a car, or a doorknob, near your subjects gives viewers an anchor that breaks the illusion. Position these reference objects carefully, or remove them entirely from the frame.
Mistake 5: Unnatural subject poses – Forced, awkward poses draw attention and reveal the staging. Direct your subjects to hold relaxed, believable positions. If a pose looks painful, it will look fake in the photograph too.
Once the basics feel second nature, these advanced techniques open up creative possibilities that go well beyond simple optical tricks. They require more planning and often involve post-processing, but the results stand apart from typical smartphone illusions.
Composite forced perspective combines multiple exposures into a single finished image. By photographing the same person or object in different positions and blending the results, you can create illusions impossible to capture in one frame, such as someone appearing multiple times at different scales within the same scene.
The technique requires a tripod-mounted camera, consistent lighting between frames, and a steady hand in Photoshop. Mask the subject from each exposure and blend them onto a single background, paying attention to edge transitions and shadow matching. Done well, the composite is indistinguishable from a single frame.
Look for natural lines, curves, and shapes that reinforce the illusion. Roads, fences, and pathways create leading lines that draw the eye toward the trick. Shadows on pavement or grass can act as visual anchors that make the false scale feel intentional rather than accidental.
Urban environments with strong architectural elements offer particularly rich opportunities. Repeating windows, repeating columns, or repeating arches in the background can echo the scale of a foreground subject, making the impossible relationship feel cohesive.
While the illusion itself should come from in-camera technique, subtle post-processing can polish the result. Adjust white balance and exposure on the foreground and background subjects independently to unify lighting. Use the dodge and burn tools to emphasize the focal illusion without overdoing it.
Avoid heavy manipulation. The goal is enhancement, not digital fabrication. Forced perspective images that look heavily edited tend to lose the playful charm that makes the technique so popular on social media. The most shareable illusions look like lucky snapshots rather than labored composites.
Important: Over-editing forced perspective images often introduces digital artifacts, halos, or unrealistic lighting that betray the trick. Keep post-processing restrained and let the in-camera illusion do the heavy lifting.
Beyond personal projects, forced perspective has serious commercial value. Advertising agencies use it to make small products appear monumental in campaigns. Fine art photographers employ the technique to explore themes of perception, memory, and reality. Film productions rely on forced perspective in scenes like the Hobbit films, where actors of different sizes appeared to interact believably through careful set design and camera placement.
Real estate and architectural visualization also benefit from forced perspective. A small model photographed with forced perspective techniques can convey the scale of a proposed building before construction begins. Wedding photographers use the technique for playful couple portraits, and event photographers use it for branded social media content.
For photographers interested in expanding their creative range further, exploring complementary techniques like low angle photography techniques pairs naturally with forced perspective. The two approaches share a focus on perspective manipulation and can be combined for dramatic effect in a single image.
Forced perspective photography is a technique that creates optical illusions by strategically placing subjects at different distances from the camera. Objects closer to the lens appear disproportionately large compared to distant ones, producing impossible-looking scenes that challenge normal perceptions of size and scale.
Use aperture priority mode with f/8 to f/16 for maximum depth of field, keeping both subjects sharp. Set ISO to 100 to 400 for clean image quality. Choose a wide-angle lens (24 to 35mm) for exaggerated effects or a 50mm lens for natural results. Focus one-third of the way between subjects for optimal sharpness.
Sketch your concept first, then position the background subject 15 to 25 feet away. Place the foreground subject 1 to 3 feet from the camera. Find the precise alignment by slowly moving the camera until the illusion works in the viewfinder. Use a narrow aperture, focus between subjects, and refine through multiple test shots.
Forced perspective works by exploiting how our brains interpret depth cues. Objects closer to the camera appear larger, while distant objects appear smaller. By carefully controlling camera angle, subject distance, and focal length, photographers manipulate these size relationships to create illusions that defy normal scale expectations.
Yes, modern smartphones produce excellent forced perspective results. Use the standard photo mode rather than portrait mode, enable grid lines for alignment, avoid digital zoom, and consider a small tripod for stability. Tap to focus between subjects and lock AE/AF for consistent exposure.
Common causes include insufficient distance between subjects, wrong camera height, inconsistent lighting, shallow depth of field, and obvious scale references like cars or doorknobs. Shadow direction also matters. Small adjustments in camera position, wider separation, and consistent lighting usually solve most problems.
Forced perspective photography rewards those who treat it as a craft rather than a trick. The technique combines straightforward geometry with creative problem-solving, and the learning curve flattens quickly once you understand the underlying principles. Every concept in this guide, from the simplest holding-the-sun gag to advanced composite illusions, builds on the same foundation of camera placement, subject distance, and careful alignment.
Start with beginner ideas like pinching the moon or crushing a recognizable building. Move to intermediate concepts once those feel routine. Save advanced challenges, including composites and reflections, for when your eye can reliably judge scale relationships across the frame. The progression feels natural because each stage builds the spatial awareness needed for the next.
For more photography inspiration and creative techniques, browse our photography guides collection. When you’re ready to upgrade your gear for more ambitious forced perspective work, our photography equipment reviews roundup covers the tools that pair well with perspective-heavy shoots. Both resources complement the techniques covered here and help you build a complete creative photography toolkit.
Pick one idea from this guide, grab your camera, and try it this week. The first attempt may not look perfect, but the second or third will likely surprise you. Forced perspective is one of the few photography techniques where the gap between beginner and experienced work shrinks dramatically with a bit of focused practice, and the resulting images consistently make people stop, smile, and ask, “How did you do that?”

![Best Microscope for iPhone [cy]: Complete Photography Guide](https://revellphotography.com/wp-content/uploads/2026/09/featured-update-1121-1789494332484.jpg)