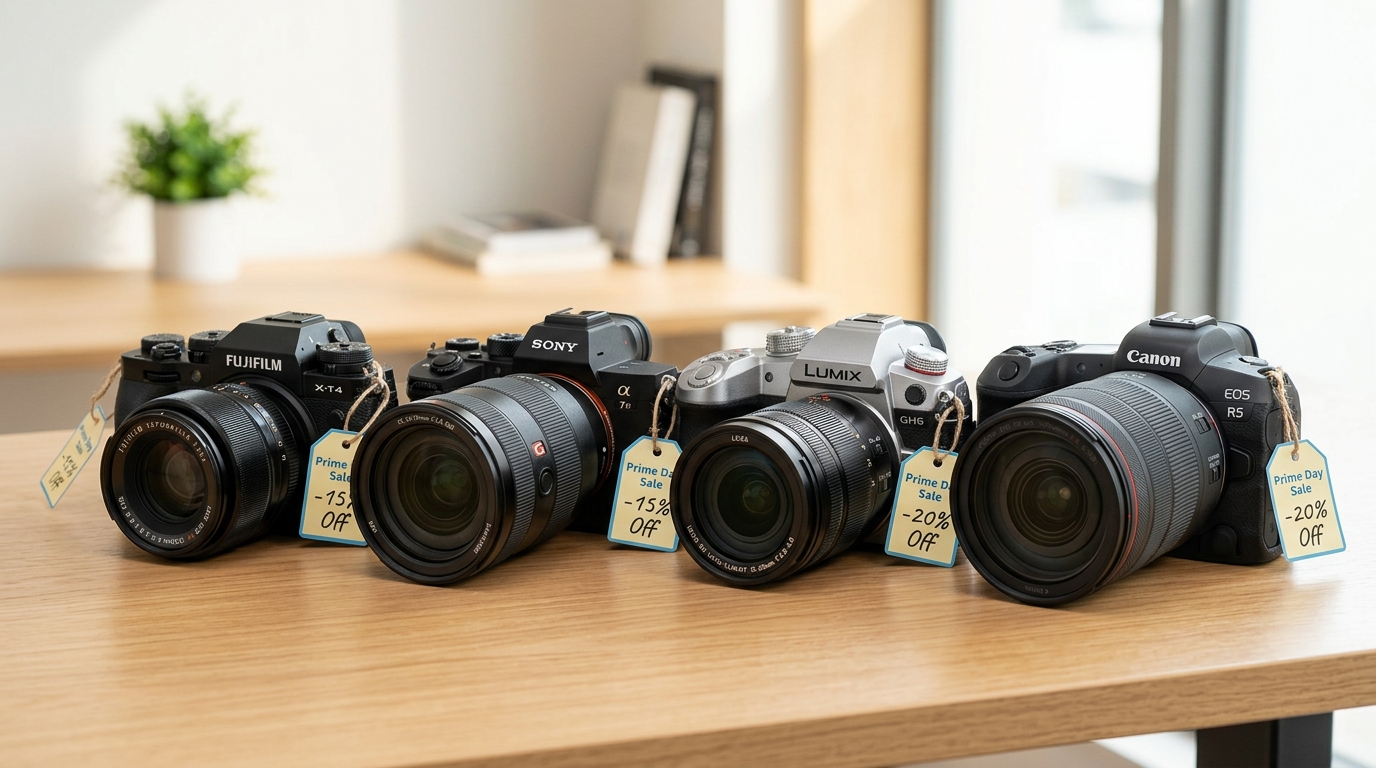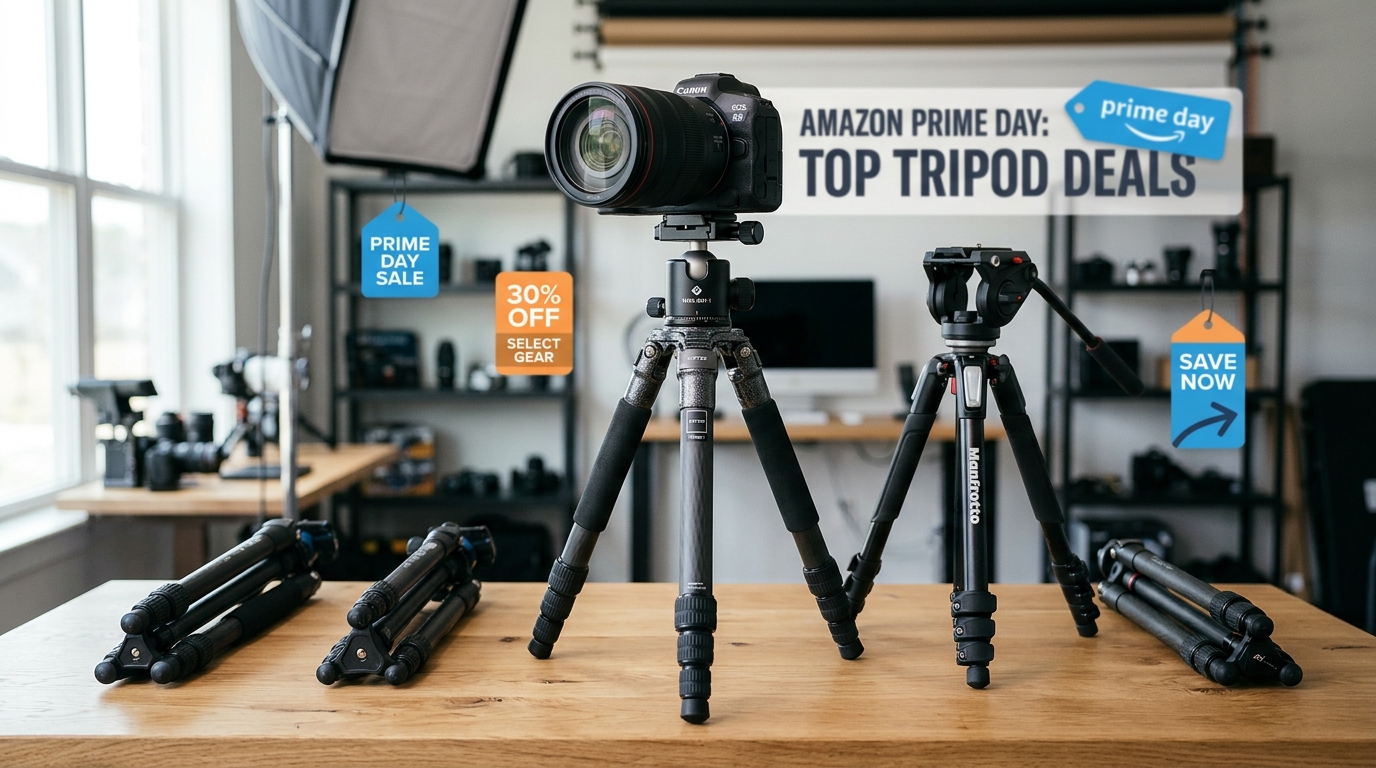
10 Best Prime Day Tripod Sales (July 2026): Top Deals on Camera Supports
Prime Day is one of the best times of the year to score a quality tripod at a fraction of…
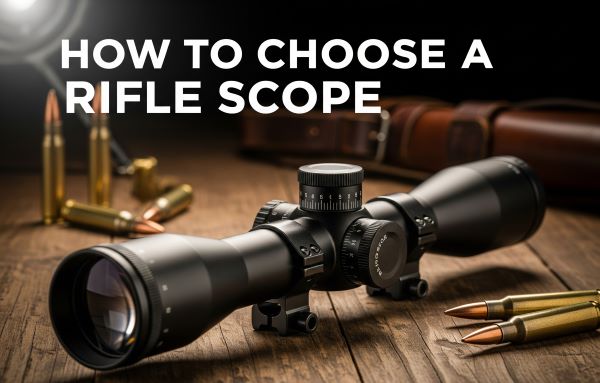
The rifle scope market explodes with choices each year, leaving shooters drowning in specifications they do not understand. A 3-9×40 costs the same as a 4-16×50, but the differences between them determine whether you make a clean hit or a missed opportunity. The wrong optic turns a precision rifle into a frustrating liability.
Choosing a rifle scope in 2026 means navigating advanced features like first focal plane reticles, ballistic turrets, and side focus parallax adjustments that did not exist a decade ago. Yet the fundamentals have not changed. Your scope still gathers light, magnifies your target, and provides an aiming point. Understanding how these basics work lets you cut through marketing noise and select optics that match your actual needs.
This guide covers everything from exit pupil calculations to mounting height requirements. You will learn why a 4×12 scope outperforms a 3×9 for certain applications, whether a 100-yard zero beats a 200-yard zero for your hunting setup, and why LPVO scopes have become the preferred choice for AR-style rifles. The goal is straightforward: help you select a scope that performs when it matters most.
Rifle scope fundamentals form the foundation for every purchasing decision. Skipping this section leads to expensive mistakes that proper knowledge could prevent.
A rifle scope is an optical sighting device that uses a series of lenses to magnify your target and present a precise aiming point through a reticle system. The design replaces the traditional three-point alignment required by iron sights, letting you focus on placing the reticle exactly where you want the bullet to strike.
Light enters through the objective lens at the front, passes through the erector system which flips the image right-side up, and reaches your eye through the ocular lens at the rear. Variable power scopes add a magnification ring that changes how much the erector system enlarges the image, providing flexibility that fixed power scopes cannot match.
Modern scopes incorporate multi-coated lens surfaces that reduce light loss and nitrogen or argon purging that prevents internal fogging. These technologies trickled down from military contracts, meaning budget scopes in 2026 often outperform premium models from twenty years ago.
Scope anatomy breaks down into several critical components that directly affect performance:
Main Tube: The body of the scope, typically 1 inch or 30mm in diameter. Larger tubes provide more internal adjustment range, though marketing claims about light transmission benefits are often exaggerated.
Turrets: The windage (horizontal) and elevation (vertical) adjustment knobs. Quality turrets produce audible clicks and return to zero reliably. Exposed target turrets suit competitive shooters who adjust frequently, while capped hunting turrets protect against accidental changes in the field.
Objective Lens: The front lens that determines light-gathering capacity. Larger objectives gather more light for low-light performance but require higher mounting positions, which can compromise cheek weld and shooting comfort.
Ocular Lens: The rear lens where you place your eye. This houses the reticle in second focal plane scopes and includes a diopter adjustment ring for focusing the reticle to your specific vision.
Experienced shooters repeatedly confirm that a mediocre rifle with an excellent scope outshoots an excellent rifle with a mediocre scope. The scope is the critical link between your skill and the target, making all other investments secondary.
Quality scopes maintain zero through temperature changes, rough transport, and thousands of rounds of recoil. They deliver bright, clear images during the low-light conditions when big game moves most actively. The ability to dial precise corrections for distance and wind separates capable optics from budget disappointment.
The traditional advice to spend as much on your scope as your rifle still applies, though today’s competitive market means spending sixty to seventy percent of your rifle cost on optics typically yields the best balance of performance and value.
Magnification numbers on scope boxes contain specific information that most buyers ignore. Understanding these specifications prevents costly mistakes and ensures you select appropriate optics for your intended use.
Scope specifications follow a consistent pattern that tells you exactly what the optic provides. In a 3-9×40 scope, the first numbers (3-9) indicate the magnification range. At 3x power, objects appear three times closer than to the naked eye. At 9x power, they appear nine times closer.
The “x” symbol simply means “times magnification,” while the final number (40) represents the objective lens diameter in millimeters. This 40mm objective determines how much light can enter the scope, directly affecting performance in low-light conditions.
Variable scopes like 3-9x provide flexibility for different scenarios. Dial down to 3x for quick shots in dense cover, then zoom to 9x for precision work at distance. Fixed power scopes like 4x or 6x offer simplicity and inherent reliability but sacrifice versatility for that simplicity.
Fixed power scopes dominated the market for decades, and they still offer genuine advantages that variable scopes cannot replicate. With no moving parts in the erector system, fixed scopes are inherently more durable and typically deliver better optical quality per dollar spent.
Variable power scopes have largely taken over the market because their versatility outweighs the trade-offs. A quality 3-9x or 4-12x handles everything from twenty-five yard shots to four hundred yard precision work. The added complexity, weight, and potential failure points matter less than the flexibility gained.
For specialized applications, fixed power remains the superior choice. Dangerous game hunters often select fixed 1-4x scopes because absolute reliability matters more than versatility. Rimfire shooters frequently prefer fixed 4x or 6x models for their sharp optics and forgiving parallax settings at reasonable prices.
Here is where most rifle scopes for beginners go wrong. More magnification is not automatically better. Excessive magnification often hurts accuracy more than it helps. Consider real-world requirements:
1-4x Magnification: Perfect for dense woods, moving targets, and shots under 200 yards. This range excels for home defense, dangerous game, and timber hunting where quick target acquisition matters more than extreme precision.
3-9x Magnification: The most versatile choice, covering ninety percent of hunting situations. From twenty-five-yard brush shots to three hundred-yard cross-canyon opportunities, this range handles it all without compromise.
4-12x or 4-16x Magnification: Ideal for western hunting, long-range target work, and situations where most shots exceed 200 yards. The 4x bottom end preserves close-range flexibility while offering substantial reach.
5-25x and Higher: Specialized tools for precision shooting beyond 600 yards. Unless you consistently shoot at extreme distances, this much magnification becomes a hindrance rather than an advantage.
Is 4×12 scope better than 3×9? The answer depends entirely on your intended use. A 4-12x scope provides higher maximum magnification and works better for shots beyond 300 yards, while a 3-9x scope offers a wider useful range at lower magnification and typically performs better in close-range scenarios. For general hunting where you encounter both brush-country close shots and longer-range opportunities, the 3-9x covers more situations. For dedicated western hunting or target shooting at known distances, the 4-12x provides useful additional reach.
Understanding how magnification affects your sight picture helps you make informed decisions for your specific discipline. The relationship between power, field of view, and target clarity follows predictable patterns.
The following 4-16×50 scope range chart shows optimal magnification settings for various distances:
| Distance | Minimum Useful Mag | Optimal Mag | Maximum Practical Mag |
|---|---|---|---|
| 25 yards | 1x | 2-3x | 4x |
| 50 yards | 1x | 3-4x | 6x |
| 100 yards | 2x | 4-6x | 9x |
| 200 yards | 3x | 6-9x | 12x |
| 300 yards | 4x | 9-12x | 16x |
| 400 yards | 6x | 12-16x | 20x |
| 500 yards | 8x | 14-18x | 24x |
| 600+ yards | 10x | 16-24x | 32x |
These are guidelines based on typical conditions. Environmental factors, target size, and shooting position all influence optimal magnification choices in the field.
Understanding 12x magnification at 100 yards helps visualize real-world performance. At this setting, a one hundred yard target appears as it would to the naked eye at just 8.3 yards, roughly twenty-five feet away.
For practical reference, a standard 8-inch target at 100 yards fills about the same visual space as a dinner plate held at arm’s length when viewed through 12x magnification. This level of detail reveals individual bullet holes in paper targets and allows precise hold points on game animals.
However, 12x also magnifies your movement. Every tremor, heartbeat, and breath becomes dramatically apparent. Without proper shooting support like a rest or bipod, excessive magnification can decrease accuracy by making it harder to maintain a steady hold on target.
Field of view decreases as magnification increases, following a predictable mathematical relationship. Understanding this prevents tunnel vision issues in the field.
Typical FOV measurements at 100 yards:
These numbers vary by scope design, but the inverse relationship remains constant. When tracking moving game or scanning for targets at unknown distances, lower magnification with its wider field of view proves invaluable.
Matching your scope to its primary purpose ensures satisfaction and performance. Different shooting disciplines demand specific characteristics that generic scopes cannot provide.
New shooters often feel overwhelmed by options and unfamiliar terminology. A streamlined approach eliminates confusion and builds foundational knowledge.
Start with a quality 3-9x40mm scope from a reputable manufacturer. This configuration provides enough magnification for most situations while remaining manageable for inexperienced shooters. The 40mm objective delivers good light transmission without requiring extra-high rings.
Focus on these beginner-friendly features:
Avoid these common beginner traps:
Low Power Variable Optic (LPVO) scopes have revolutionized AR-style rifle optics since their introduction. These scopes typically offer 1-4x, 1-6x, or 1-8x magnification and fill a specific niche that neither traditional hunting scopes nor high-power tactical optics address.
The LPVO advantage lies in its bottom-end specification. At 1x power, these scopes provide a sight picture nearly identical to a red dot optic, allowing both-eyes-open targeting for fast close-quarters engagement. The difference is that LPVOs also offer variable magnification for shots beyond point-blank range.
Modern 1-6x and 1-8x LPVOs have become the default choice for AR-platform rifles used in both tactical applications and hunting. The wider field of view at low magnification makes them superior to standard 3-9x scopes for moving targets and transition shooting between multiple targets.
Key considerations when selecting an LPVO include:
Popular LPVO choices include the Vortex Spitfire 1-6x, Primary Arms 1-6x SLx, and Leupold VX-Freedom 1-4x. These optics balance performance and value while providing the versatility AR shooters demand.
Different game animals and hunting environments demand specific scope characteristics. Matching your optic to your quarry prevents performance shortfalls in critical moments.
Whitetail Deer (Eastern Woods): A 2-7x or 3-9x scope with a wide field of view excels in thick cover. Most shots occur under 150 yards, making moderate magnification ideal. Choose models with excellent low-light performance for dawn and dusk activity when deer move most.
Western Big Game: Mule deer, elk, and antelope often require longer shots across open country. A 4-12x or 4-16x scope provides necessary reach while maintaining versatility. Side parallax adjustment becomes important beyond 250 yards for precise shot placement.
Dangerous Game: Reliability trumps features when facing animals that fight back. Fixed 1-4x or low-range variables (1-6x) with heavy-duty construction ensure quick target acquisition and absolute dependability under extreme stress.
Varmint/Predator: Prairie dogs and coyotes demand precision at varying ranges. High magnification scopes (5-25x or 6-24x) with target turrets and fine reticles allow surgical accuracy on small targets at extreme distances.
Competitive shooting pushes equipment to its practical limits, demanding features rarely needed for hunting. Understanding these specialized requirements prevents overspending on unnecessary capabilities.
Benchrest Competition: Maximum magnification (25-50x) reveals minute aiming points and wind indicators. Large objective lenses (56mm+) and ultra-fine reticles define this category. Weight becomes irrelevant when shooting from stable positions.
Practical/Tactical Matches: Versatility rules in dynamic competitions. First focal plane scopes in the 3-18x or 5-25x range with exposed turrets allow quick adjustments. Reticles with measurement marks help gauge distance and calculate wind holds.
F-Class/Long Range: Precision at 600-1000 yards requires repeatable adjustments and superior glass. Scopes in the 8-32x range with precise tracking and high-quality turrets dominate this discipline.
Modern tactical scopes blend military-inspired features with civilian accessibility. These optics excel for precision shooting while offering the durability required for hard use.
Key tactical features include:
Popular configurations range from compact 1-8x LPVO scopes for carbines to massive 5-25x models for extreme distance work. Match your choice to realistic engagement distances rather than theoretical maximums.
Making informed decisions requires understanding how different models compare. This rifle scope comparison chart examines popular options across price categories for 2026.
Budget optics have improved dramatically, delivering reliable performance for most hunting and target shooting needs:
| Model | Magnification | Features | Street Price | Best For |
|---|---|---|---|---|
| Vortex Crossfire II | 3-9×40 | V-Plex reticle, capped turrets | $149 | General hunting |
| Leupold VX-Freedom | 3-9×40 | Duplex reticle, twilight lens system | $249 | Low-light hunting |
| Nikon Prostaff 5 | 3.5-14×40 | BDC reticle, side focus | $279 | Versatile use |
| Primary Arms Classic | 4-14×44 | Mil-dot reticle, exposed turrets | $229 | Target shooting |
These entry-level options prove that quality optics do not require thousand-dollar budgets. Focus on clear glass and reliable tracking over unnecessary features.
This price range offers the best value for serious shooters. Premium features become available without premium prices:
| Model | Magnification | Features | Street Price | Best For |
|---|---|---|---|---|
| Vortex Viper PST II | 3-15×44 | EBR-4 reticle, exposed turrets | $649 | Long-range hunting |
| Leupold VX-3HD | 3.5-10×40 | CDS turret, twilight lens | $549 | Western hunting |
| Athlon Ares BTR | 4.5-27×50 | First focal plane, zero stop | $699 | Precision rifle |
| Burris Veracity | 3-15×50 | Ballistic Plex E1, side focus | $599 | All-around use |
Mid-range scopes often provide ninety percent of premium scope performance at half the cost. They are ideal for dedicated hunters and competitive shooters who demand more than budget optics offer.
Top-tier optics deliver uncompromising performance in demanding conditions. When failure is not an option, these scopes justify their investment:
| Model | Magnification | Features | Street Price | Best For |
|---|---|---|---|---|
| Nightforce NX8 | 2.5-20×50 | First focal plane, ED glass | $1,900 | Tactical/hunting |
| Swarovski Z5 | 3.5-18×44 | Ballistic turret, HD glass | $1,400 | Premium hunting |
| Zeiss V4 | 4-16×44 | External turret, T* coating | $999 | Precision hunting |
| Leupold Mark 5HD | 3.6-18×44 | First focal plane, M5C3 turrets | $1,999 | Competition |
Premium scopes excel in optical clarity, mechanical precision, and long-term durability. Professional hunters and serious competitors often find the investment worthwhile over a lifetime of use.
Considering performance per dollar spent, these models stand out in the current market:
Best Overall Value: Athlon Optics Argos BTR Gen 2 3-18×50 ($350) – Incredible features including first focal plane and lifetime warranty at a budget price point.
Best Hunting Value: Leupold VX-3HD 3.5-10×40 ($549) – Premium glass and proven reliability from America’s oldest scope manufacturer.
Best Target Value: Primary Arms GLx 4-16×50 FFP ($499) – First focal plane precision with excellent turrets at roughly half the typical price of comparable models.
Best Budget Pick: Vortex Diamondback Tactical 4-12×40 ($229) – Exposed turrets and clear glass backed by Vortex’s unbeatable VIP warranty.
The reticle and turret system determines how you aim and make adjustments. Understanding these systems prevents costly mistakes and improves field performance.
Reticle choice significantly impacts your shooting experience. Each system offers distinct advantages for specific applications:
BDC (Bullet Drop Compensator): Designed for specific cartridges, BDC reticles feature hash marks corresponding to bullet drop at set distances. They are fast and intuitive but less precise than measured systems. Ideal for hunters who want quick holdovers without mental calculations.
MOA (Minute of Angle): Based on angular measurement, 1 MOA equals approximately 1.047 inches at 100 yards. Most American shooters grow up with MOA, making it familiar and intuitive. MOA scopes typically adjust in 1/4 MOA clicks, providing fine adjustment capability for precision work.
MRAD (Milliradian): Metric-based angular measurement where 1 mil equals 3.6 inches at 100 yards. MRAD systems excel for ranging and holdovers because the mathematics are simpler – everything works in base 10. Most military and competitive shooters now prefer MRAD for its consistency.
Choose the system that matches your shooting partners and available training resources. Mixing MOA scopes with mil reticles creates unnecessary confusion during stress-filled moments in the field.
Focal plane placement affects how your reticle behaves at different magnifications:
Second Focal Plane (SFP): The reticle stays the same size regardless of magnification. This means reticle measurements are only accurate at one magnification setting (usually maximum power). SFP scopes offer bold, easy-to-see reticles at low power but require remembering which magnification matches your reticle subtensions.
First Focal Plane (FFP): The reticle grows and shrinks with magnification changes, maintaining consistent measurements throughout the zoom range. FFP excels for ranging and holdovers at any magnification but can appear too fine at low power or too thick at maximum magnification.
For most hunting applications, SFP works perfectly and costs less than equivalent FFP models. Competitive and tactical shooters often prefer FFP for its measurement consistency across all magnifications.
Turret design dramatically affects field usability:
Capped/Hunting Turrets: Protected by removable caps, these turrets prevent accidental adjustment during transport. Most hunters zero their rifle and rarely touch the turrets again, making capped designs ideal. They are lower profile and snag-free for woodland hunting.
Exposed/Target Turrets: Designed for frequent adjustment, exposed turrets allow quick elevation and windage changes without removing caps. Target shooters and long-range hunters who dial for distance prefer exposed turrets. Look for locking mechanisms to prevent accidental movement during physical activity.
Ballistic/Custom Turrets: Some manufacturers offer turrets calibrated to your specific load and conditions. These CDS (Custom Dial System) or ballistic turrets provide distance markings instead of MOA/mil values, simplifying long-range shot execution.
Proper mounting ensures your scope performs as designed. Understanding sizing and compatibility prevents frustrating installation issues that degrade accuracy.
Main tube diameter affects several factors:
1-inch Tubes: The American standard offers wide compatibility with rings and mounts. Most hunting scopes use 1-inch tubes, providing adequate adjustment range for typical applications. They are lighter and require less ring height.
30mm Tubes: European-influenced design providing approximately twenty percent more adjustment range. The larger tube allows more elevation adjustment for extreme long-range shooting. Contrary to marketing claims, 30mm tubes do not inherently transmit more light – that depends on lens design and coatings.
34mm/35mm Tubes: Specialized competition and tactical scopes increasingly use these ultra-large tubes for maximum adjustment range. Unless shooting beyond 1000 yards regularly, the extra size and weight rarely justify the benefits.
Objective lens diameter impacts mounting height and light transmission:
32-40mm Objectives: Compact and lightweight, these mount low on the rifle for optimal cheek weld. Perfect for hunting rifles where fast handling matters more than maximum light gathering.
42-44mm Objectives: The sweet spot for versatility, balancing light transmission with reasonable mounting height. This size works well with low to medium rings on most rifles without compromise.
50mm Objectives: Popular for long-range and low-light applications, these require medium to high rings. The extra light gathering helps during dawn and dusk hunting periods when game is most active.
56mm+ Objectives: Specialized scopes for extreme low light or high magnification use. These massive objectives require high or extra-high rings, potentially compromising shooting position and rifle handling.
Selecting proper ring height ensures comfortable shooting position and adequate barrel clearance:
To calculate minimum ring height needed:
Common combinations:
Always verify clearance before final tightening. The scope should clear the barrel by at least 1/8 inch while allowing a comfortable cheek position against the stock.
Eye relief – the distance between your eye and the ocular lens for a full field of view – critically affects both safety and comfort:
Standard Eye Relief (3.5-4 inches): Suitable for most centerfire rifles with moderate recoil. This distance provides a safety margin against scope eye from recoil.
Long Eye Relief (4.5-5 inches): Essential for magnum cartridges and lightweight rifles. The extra distance prevents the scope from hitting your eye during heavy recoil.
Extended Eye Relief (9-12 inches): Designed for scout rifles, handguns, and dangerous game rifles. These specialized scopes mount forward of the action for rapid target acquisition with minimal eye relief tolerance requirements.
Critical Eye Relief: Scopes with narrow eye relief tolerance (less than 3 inches of usable range) prove frustrating in field positions. Look for generous eye boxes that maintain full field of view across a wide distance range.
Modern scopes offer numerous features beyond basic magnification. Understanding which features matter for your application prevents overpaying for capabilities you will never use.
Lens coatings dramatically impact optical performance, especially in challenging light conditions:
Coated: Single layer on some lens surfaces. Basic protection providing minimal benefit – avoid unless budget severely constrains your options.
Fully Coated: Single layer on all air-to-glass surfaces. Minimum acceptable standard for hunting optics, improving light transmission to around eighty percent.
Multi-Coated: Multiple layers on some surfaces. Good compromise providing 85-87% light transmission at moderate cost.
Fully Multi-Coated: Multiple layers on all surfaces. Premium treatment achieving 90-95% light transmission. Essential for serious low-light hunting and maximum clarity in all conditions.
Beyond basic coatings, premium scopes feature specialized treatments like hydrophobic coatings (water-shedding), scratch-resistant exterior coatings, and anti-reflective coatings reducing lens flare in bright conditions.
The exit pupil is a critical specification that determines how much light reaches your eye. It is calculated by dividing the objective lens diameter by the magnification setting.
Exit Pupil Formula: Exit Pupil = Objective Lens Diameter / Magnification
For example, a 4-12×50 scope at 12x magnification produces a 4.17mm exit pupil (50 / 12 = 4.17). At 4x magnification, the same scope produces a 12.5mm exit pupil (50 / 4 = 12.5).
A larger exit pupil creates a brighter image and provides a more forgiving eye box. For low-light hunting, an exit pupil of 5-7mm is considered minimum, while 7-9mm provides excellent performance in dawn and dusk conditions.
Human eyes dilate to approximately 7mm in dark conditions. Any exit pupil larger than your dilated pupil size provides no additional benefit since the eye cannot gather more light than its physical aperture allows.
Parallax occurs when the reticle and target image are not on the same focal plane, causing apparent reticle movement when you shift your head position:
Fixed Parallax: Most hunting scopes under 12x are parallax-free at 100 or 150 yards. This works perfectly for typical hunting ranges without added complexity or cost.
Adjustable Objective (AO): Older design placing parallax adjustment on the objective bell. Functional but awkward to reach from shooting position, especially when prone.
Side Focus/Side Parallax: Modern solution putting parallax adjustment on the left turret housing. Convenient access allows fine-tuning without breaking your shooting position.
For shots under 250 yards, fixed parallax rarely causes problems. Beyond that distance or when shooting small targets, adjustable parallax becomes valuable for precision work where aiming errors translate directly into missed shots.
Illuminated reticles seem appealing but serve specific purposes that most shooters do not need:
Advantages:
Disadvantages:
Unless you specifically hunt in dark timber or need rapid engagement capability, illumination adds expense without proportional benefit to your shooting.
Your scope must withstand environmental challenges in the field:
Waterproofing: All quality scopes feature O-ring seals preventing moisture intrusion. Look for IPX7 rating (submersible to 1 meter) as minimum protection against rain and accidental submersion.
Fog-proofing: Nitrogen or argon purging eliminates internal fogging from temperature changes. Essential for hunting where you move between warm vehicles and cold conditions throughout the day.
Shock Resistance: Quality scopes withstand repeated recoil through robust internal construction. Look for reinforced erector systems and solid one-piece tubes that maintain alignment under stress.
Temperature Stability: Extreme temperatures affect point of impact. Premium scopes minimize thermal shift through careful material selection and engineering that maintains zero across temperature ranges.
Durability testing varies by manufacturer, but reputable brands typically test to military specifications including drop tests, temperature cycling, and thousands of recoil cycles without point of impact shift.
For those seeking deeper understanding, these advanced concepts separate casual shooters from precision marksmen who demand optimal performance from their equipment.
Optical glass quality dramatically affects image clarity and color fidelity:
Standard Glass: Basic optical glass provides acceptable performance for most applications. Minor color fringing and reduced sharpness become noticeable at higher magnifications and in challenging light.
HD (High Definition) Glass: Marketing term for improved optical formulations reducing aberrations. Provides noticeably sharper images with better contrast and color accuracy.
ED (Extra-low Dispersion) Glass: Fluorite or specialized glass minimizing chromatic aberration. Colors appear more natural with exceptional edge sharpness. Most beneficial above 12x magnification where aberrations become most apparent.
European vs Asian Glass: While country of origin once indicated quality reliably, modern manufacturing makes this distinction less relevant. Focus on actual optical performance rather than origin stories.
High-end glass shines in challenging conditions – looking into shadows from bright fields, distinguishing game in thick cover, or resolving fine detail at extended range where budget optics struggle.
A scope’s ability to adjust precisely and return to zero defines its mechanical quality:
Box Test: Shoot a group, adjust 10 MOA up, shoot, adjust 10 MOA right, shoot, continue until you complete a square pattern. Final group should overlap the first if tracking is perfect.
Tall Target Test: At 100 yards, shoot a group, dial up 20-30 MOA, shoot again. Measure actual versus indicated movement to verify click values are accurate throughout the adjustment range.
Return to Zero: After extensive adjustment, return turrets to original zero. Point of impact should match original zero within 1/4 MOA for quality scopes.
Quality scopes track within two percent of indicated values and return to zero precisely after adjustment. Budget scopes often require “settling” shots after adjustment or exhibit significant tracking errors that compound over multiple adjustments.
Modern turret innovations prevent common field errors that cost shooters their zero at critical moments:
Zero Stop: Mechanical system preventing adjustment below your zero setting. After dialing for long shots, simply spin the turret down until it stops at zero. Invaluable for stress situations where you need to return to a known zero quickly.
Zero Lock: Various systems preventing accidental turret movement. Some use locking rings, others require lifting to turn, and premium models offer push-button locks for instant protection.
Revolution Indicators: Visual markers showing how many turret revolutions you have dialed. Critical for extreme elevation adjustments exceeding one revolution where you must track your total adjustment.
These features add cost but prove invaluable for field shooting where quick, error-free adjustments matter. The difference between a zero stop and no zero stop becomes apparent the first time you need to return to zero under pressure.
Parallax adjustment location affects usability in the field:
Adjustable Objective (AO): Older system requiring reaching forward to the objective bell. Inconvenient from prone positions and adds forward weight that affects rifle balance.
Side Focus (SF): Modern placement on the turret housing allows adjustment without breaking position. Often includes ranging capability through yardage markings that align with specific distances.
Side focus universally provides better ergonomics for field use. The only advantage of AO systems is potentially lower cost on budget models, which rarely justifies the usability trade-off.
Learning from others’ errors saves both money and frustration. These mistakes plague both beginners and experienced shooters who should know better.
The belief that more magnification equals better accuracy ruins more shots than any other misconception. Excessive magnification hurts accuracy in multiple ways:
Amplified Movement: Every tremor, heartbeat, and breathing motion becomes dramatically visible. What looks like a steady hold at 9x becomes a dancing reticle at 25x that makes precise aiming impossible.
Reduced Field of View: High magnification creates tunnel vision, making target acquisition slower and follow-up shots difficult when you cannot see surrounding area.
Mirage Distortion: Heat waves between you and the target become overwhelming above 15x on warm days, making precise aiming impossible even with perfect form.
Light Loss: Higher magnification reduces exit pupil size and available light, creating dim images exactly when you need brightness most for accurate shot placement.
Fight magnumitis by choosing versatile mid-range magnification and practicing field positions at various power settings to understand what works for your specific situation.
Large objective lenses promise superior light gathering but carry hidden costs that can degrade your shooting experience:
Mounting Height Issues: Big objectives require tall rings, raising the scope far above the bore. This creates uncomfortable head position and increases point of impact shifts from cant errors.
Weight and Balance: A 56mm objective scope can weigh over 30 ounces, making rifles unwieldy for extended carries. Forward weight bias slows target acquisition and increases fatigue.
Unnecessary in Daylight: Unless hunting exclusively at dawn and dusk, the light-gathering advantage disappears. A quality 40mm scope provides identical daylight performance with better handling characteristics.
Choose objective size based on actual low-light needs rather than theoretical advantages that marketing departments emphasize. The difference between 40mm and 50mm objectives is imperceptible in most hunting conditions.
Poor installation negates even premium optics. Common mounting mistakes include:
Misaligned Rings: Rings that do not align perfectly stress scope tubes, causing erratic adjustments or internal damage that ruins accuracy permanently. Always lap rings or use alignment tools during installation.
Over-tightening: Crushing the scope tube distorts internal mechanisms. Use torque wrenches and follow manufacturer specifications exactly for proper installation.
Loose Screws: Under-tightened mounts cause mysterious zero shifts that frustrate shooters. Blue thread locker and proper torque prevent wandering zeros over time.
Wrong Height: Improper ring height forces awkward head positions, reducing accuracy and causing neck strain. Your natural position should center your eye perfectly in the scope without effort.
Smart money management gets better equipment that performs when you need it:
Package Deal Scopes: Rifle and scope combos rarely include quality optics. That “free” scope often is not worth mounting. Budget separately for quality glass that actually performs.
Feature Over Function: Paying for unnecessary features like illumination or extreme magnification while compromising on glass quality and mechanical reliability.
Ignoring Used Markets: Quality scopes retain value well. A used premium scope often outperforms new budget options at similar prices when you know what to look for.
Skipping Mounts: Saving twenty dollars on rings to mount a five hundred dollar scope is false economy. Quality mounts are essential for consistent performance and zero retention.
Follow this systematic approach to select your ideal scope without costly mistakes that beginners commonly make.
Before browsing catalogs, honestly assess how you will use this scope eighty percent of the time:
Questions to Answer:
Write down your answers. This exercise prevents feature creep and focuses your search on scopes that excel at your actual needs rather than theoretical scenarios.
Establish a total optics budget including:
Allocate funds proportionally:
Stretching to reach the next quality tier often provides dramatic improvement. The difference between four hundred and six hundred dollar scopes exceeds the gap between two hundred and four hundred dollar options.
Your rifle characteristics influence scope selection requirements:
Light Recoiling Rifles (.223, .243): Can use shorter eye relief and lighter construction. Ideal for higher magnification varmint scopes where weight savings matter.
Standard Cartridges (.308, .30-06): Require robust construction and 3.5-4 inch eye relief. The sweet spot for versatile 3-9x or 4-12x scopes that handle most hunting situations.
Magnum Rifles (7mm Mag, .300 Win Mag): Demand premium construction and extended eye relief. Consider recoil-absorbing features and extra-strong mounting systems that handle repeated heavy recoil.
Dangerous Game Rifles (.375 H&H, .458): Reliability trumps features. Low magnification with bombproof construction essential for confidence when facing dangerous animals.
Whenever possible, examine scopes in person before purchasing:
Optical Tests:
Mechanical Tests:
Many retailers offer demo programs or liberal return policies. Take advantage of these to ensure compatibility before committing your funds to a specific model.
Professional installation costs less than replacing a damaged scope:
DIY Installation Tips:
Professional Installation Benefits:
After installation, invest ammunition in proper zeroing. A 100-yard zero works for most applications, but verify your trajectory at actual hunting distances to ensure point of impact matches your expectations.
Is it better to zero at 100 or 200 yards? The answer depends on your typical hunting scenario. A 100-yard zero provides a flat trajectory out to approximately 250 yards with minimal bullet drop, making it ideal for woods hunting where most shots occur under 150 yards. A 200-yard zero places your peak trajectory point at 200 yards with bullet drop becoming noticeable beyond that distance. For western hunting where shots commonly exceed 200 yards, the 200-yard zero offers flatter trajectory in the 100-300 yard range. Many hunters prefer a 100-yard zero for versatility, while dedicated long-range shooters choose 200 yards for their specific application.
Decades of combined experience distilled into actionable advice that speeds your learning curve significantly.
Range testing tells only part of the story. Field testing reveals real-world performance that bench shooting cannot reveal:
Position Testing: Practice shooting from realistic field positions including kneeling, sitting, and off-hand. Your perfect bench zero might need adjustment for field shooting where positions are less stable.
Environmental Testing: Use your scope in rain, snow, and temperature extremes before hunting season. Discover any weaknesses while you can still address them without deadline pressure.
Low-Light Sessions: Visit the range at dawn or dusk to understand actual low-light performance. Marketing claims often exceed what the scope actually delivers in the field.
Tracking Verification: Shoot at multiple distances to verify your ballistic data matches real-world performance. Environmental factors including altitude and temperature affect trajectories more than most shooters realize.
Document all findings in a data book for future reference. Patterns in your personal shooting data help identify scope limitations before they cause problems in hunting situations.
Proper maintenance extends scope life and maintains optical performance:
Regular Cleaning:
Storage Best Practices:
Annual Inspection:
Professional service every five to ten years maintains optimal performance for decades of reliable use.
Recognizing upgrade timing prevents both premature spending and frustrating limitations:
Upgrade Indicators:
Poor Upgrade Reasons:
Upgrade when current equipment genuinely limits your shooting development or hunting success, not because newer models exist.
Strategic purchasing creates a versatile collection that covers every shooting scenario:
Foundation Pieces:
Expansion Strategy:
Investment Protection:
Video content explaining scope concepts can accelerate your learning. Many manufacturers and shooting channels produce excellent tutorial videos demonstrating magnification effects, reticle usage, and zeroing procedures. Supplementing written guides with video content provides visual explanations that written descriptions cannot replicate.
Common questions from shooters at every experience level answered concisely.
For 100-yard shooting, 4-6x magnification provides optimal performance. This allows precise shot placement while maintaining a wide field of view. Even 2-3x works well for larger targets. Competition shooters might prefer 8-10x for tiny targets, but this exceeds most hunters’ needs. Military snipers often use fixed 10x scopes for shots exceeding 1000 yards, proving moderate magnification suffices with proper technique.
While theoretically possible with enough adapters, practical limitations exist. Rifles have different rail systems (Picatinny, Weaver, Dovetail) requiring compatible rings. Heavy recoiling rifles demand robust scopes designed for punishment. Scout rifles need extended eye relief scopes, while rimfire rifles benefit from parallax adjustment set for closer ranges.
Hunting scopes prioritize lightweight construction, capped turrets, and second focal plane reticles for simplicity. They excel in low-light with user-friendly features for quick shots. Tactical scopes emphasize repeatability, exposed turrets, and first focal plane reticles for ranging. They’re built heavier for hard use with features supporting precision shooting. Neither is inherently better – each excels in its intended role.
Budget at least 50% of your rifle’s value for optics, more if possible. A $300 scope on a $600 rifle creates a balanced system. Spending $1000 on a rifle with a $100 scope wastes the rifle’s potential. Quality optics retain value better than rifles. A premium scope transfers between rifles and lasts decades with proper care.
While iron sights work for close-range deer hunting, scopes provide significant advantages. They extend effective range, improve shot placement, and excel in low light when deer move most. Even basic 3-9x scopes transform shooting capability. The improved precision reduces wounded animals and increases hunting success. For ethical hunting beyond 100 yards, scopes become nearly essential.
The answer depends on your intended use. A 4-12x scope provides higher maximum magnification and works better for shots beyond 300 yards, while a 3-9x scope offers a wider useful range at lower magnification and typically performs better in close-range scenarios. For general hunting where you encounter both brush-country close shots and longer-range opportunities, the 3-9x covers more situations. For dedicated western hunting or target shooting at known distances, the 4-12x provides useful additional reach.
A 100-yard zero provides a flat trajectory out to approximately 250 yards with minimal bullet drop, making it ideal for woods hunting where most shots occur under 150 yards. A 200-yard zero places your peak trajectory point at 200 yards with bullet drop becoming noticeable beyond that distance. For western hunting where shots commonly exceed 200 yards, the 200-yard zero offers flatter trajectory in the 100-300 yard range. Many hunters prefer a 100-yard zero for versatility, while dedicated long-range shooters choose 200 yards.
Choosing the right rifle scope does not require an engineering degree. Understanding your specific needs and matching them to appropriate features gets you to the right optic every time. Focus on quality glass, reliable mechanicals, and magnification suited to your actual shooting distances rather than theoretical specifications.
Remember the 80/20 rule: you will use twenty percent of your scope’s capability eighty percent of the time. Choose models that excel in your primary application rather than chasing theoretical versatility. A quality 3-9×40 scope handles most shooting situations better than a complicated 5-25×56 tactical scope you do not understand.
Start your scope journey with proven entry-level options from reputable manufacturers. As your skills develop, upgrade strategically based on identified limitations rather than marketing hype. Most importantly, invest time behind your chosen scope practicing fundamentals. No amount of technology replaces proper technique and consistent practice in the field.
Ready to mount your first quality scope? Start with a recommended beginner configuration and discover how proper optics transform your shooting experience. Your targets and game animals will show the difference that quality glass and appropriate magnification make when you need them most.