Best Scopes Under $100 2025: Honest Budget Optics Guide
Expert reviews of the top 8 rifle scopes under $100. Find reliable budget optics with real testing data and quality…
I remember my first time trying to zero a rifle scope. After 20 wasted shots and growing frustration, I almost gave up. Learning to properly sight in your scope shouldn’t be this difficult. The process of sighting in a rifle scope (zeroing) is aligning your scope’s point of aim with the bullet’s point of impact at a specific distance, ensuring accurate shooting.
Mastering this skill transforms your shooting experience. You’ll hit targets consistently, save money on ammunition, and build confidence in your equipment. I’ve helped dozens of beginners zero their scopes, and every single one succeeded once they understood the proper process.
This guide walks you through everything you need to know, from essential equipment to troubleshooting common problems. Whether you’re a hunter preparing for season or a range enthusiast seeking precision, these steps work for any rifle and scope combination.
Having the right tools makes zeroing dramatically easier. Trust me – I learned this the hard way when I showed up to the range with just my rifle and ammo.
⏰ Budget Tip: Total basic setup costs about $100-200. You can rent rests and spotting scopes at many ranges to save money initially.
Before adjusting anything, you need to understand what you’re working with. Different scopes operate differently, and knowing your equipment prevents costly mistakes.
When understanding different types of rifle scopes, you’ll encounter two main reticle placements: first focal plane (FFP) and second focal plane (SFP). For beginners, SFP scopes are more forgiving and typically cheaper.
Elevation Turret: Top dial that adjusts bullet impact up/down
Windage Turret: Side dial that adjusts bullet impact left/right
Reticle: The crosshairs or aiming point inside your scope
Most scopes use either MOA (Minute of Angle) or Mil (Milliradian) adjustments. Here’s what matters:
Check your scope manual or turret markings. Most hunting scopes use MOA with 1/4 MOA clicks (4 clicks = 1 inch at 100 yards).
Point of aim (POA) is where your crosshairs sit. Point of impact (POI) is where the bullet actually hits. Your goal is making POA = POI.
Follow these steps exactly. Don’t skip or rush – precision comes from proper process, not speed.
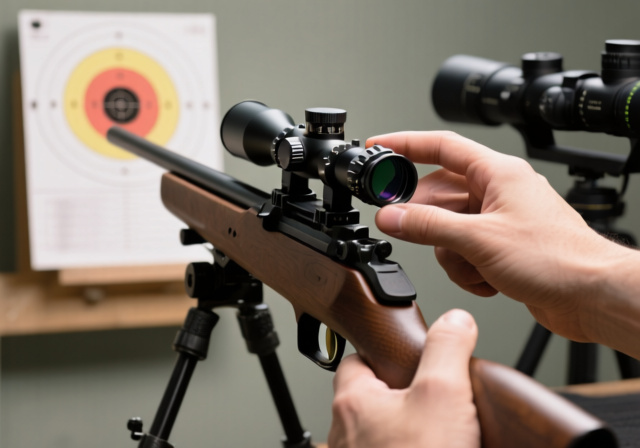
Everything starts with proper mounting. I can’t stress this enough. A poorly mounted scope will never hold zero consistently.
Position the scope for proper eye relief – typically 3-4 inches from your eye. Too close, and you’ll get scope bite (recoil hitting your eyebrow). Too far, and you lose field of view.
Use a torque wrench if available. Most scope rings need 15-25 inch-pounds of torque. Uneven pressure causes tracking issues. I once spent hours chasing a zero problem only to find my rings were unevenly tightened.
Bore sighting aligns your scope roughly with your barrel, saving ammo and time.
Visual bore sighting method:
This gets you on paper at 25 yards. Laser bore sighters work too, but batteries die when you need them most. I prefer the visual method – it’s reliable and teaches you more about alignment.
Start close. 25 yards ensures you hit paper and saves frustration. I once watched a beginner waste 30 rounds trying to hit paper at 100 yards first.
Set up a large target with a clear aiming point. Use a solid rest – no offhand shooting while zeroing.
Fire 3-shot groups, not single shots. Single shots tell you nothing about consistency. Groups reveal your actual zero. Wait 2-3 minutes between groups to prevent barrel heat affecting accuracy.
Take your first 3-shot group. Note where it hits relative to your aiming point.
Measure how far your group is from center left/right. At 25 yards, adjustments are more forgiving.
Remember this rule: Adjust the scope toward the miss.
If shots hit right of center, turn windage turret counter-clockwise (typically marked “L”). If shots hit left, turn clockwise (marked “R”).
Each click moves impact 1/4 inch at 100 yards. At 25 yards, that’s 1/16 inch per click. Calculate your adjustment needed and apply.
Example: 4 inches right at 25 yards = 16 inches at 100 yards = 16 MOA = 64 clicks.
✅ Pro Tip: Many scopes have “slipping scales” – loosen top screws, set turret to zero, retighten. This makes returning to zero easier later.
Apply the same principle for up/down adjustments. High shots need the elevation turret turned counter-clockwise (usually marked “DOWN”). Low shots need clockwise turns (“UP”).
Again, each click moves impact 1/4 inch at 100 yards. Calculate based on your 25-yard results.
After adjustments, fire another 3-shot group. Don’t adjust after every shot – let groups tell the story. Chasing single shots wastes ammo and creates confusion.
Once centered at 25 yards, move to 100 yards. Your 25-yard zero should be close, but expect minor adjustments.
Use a spotting scope for target observation to save walks downrange.
Fire 3-shot groups, adjusting based on group center, not individual shots. Remember – at 100 yards, each click moves impact 1/4 inch directly.
Continue shooting groups and making adjustments until your groups center on the aiming point. Most hunting scopes zero best 1-2 inches high at 100 yards for optimal trajectory.
Once zeroed, fire one final 5-shot group to confirm consistency. All shots should group within 2-3 inches at 100 yards for hunting accuracy.
Document your zero in your notebook. Note:
– Distance zeroed
– Ammo type used
– Weather conditions
– Final turret settings
Take a photo of your target and turret settings. This helps verify zero shifts over time.
⚠️ Important: Always zero with the exact ammo you’ll use for hunting or shooting. Different ammo can shift impact by several inches even at 100 yards.
The “best” zero distance depends on your intended use. There’s no one-size-fits-all answer.
25-yard zero: Good for close-range hunting (under 100 yards). Minimal holdover needed at typical woods ranges.
100-yard zero: Most common choice. Easy to remember and works well for general shooting.
200-yard zero: Popular with long-range hunters. Maximizes point-blank range but requires understanding holdovers at closer distances.
I recommend a 100-yard zero for beginners. It’s versatile and easy to verify at most ranges.
After helping new shooters zero dozens of scopes, I see the same mistakes repeatedly. Avoid these and save yourself frustration.
Single shots mean nothing. Shoot 3-5 shot groups minimum before making adjustments. Otherwise you’re just chasing random variations.
Your body movement creates more error than your rifle. Use a solid rest, maintain consistent position, and minimize movement.
Zero with practice ammo, hunt with premium loads, and wonder why you miss. Always zero with what you’ll actually shoot.
At different distances, your reticle can appear to move relative to the target. Adjust parallax (if your scope has it) or keep your eye consistently positioned.
Wind affects bullets more than beginners realize. Even light breezes move bullets several inches at 100 yards.
Loose mount bases cause zero shifts. Check all screws before each zeroing session.
Most hunting rifles shoot 2-3 MOA groups with factory ammo. Don’t expect 1/4 MOA performance from a standard hunting setup.
The correct zeroing point depends on your intended use. For most hunters, a 100-yard zero with the point of impact 1-2 inches high provides optimal trajectory. This setup allows point-and-shoot accuracy out to about 200 yards with minimal holdover.
Sighting in (zeroing) means aligning your scope’s reticle so bullets hit where the crosshairs aim at a specific distance. This involves mounting the scope properly, bore sighting initially, then shooting groups and making precise windage and elevation adjustments until point of aim matches point of impact.
The most common mistakes include adjusting after every shot instead of using groups, poor shooting positions, using different ammo for zeroing than actual use, ignoring wind effects, loose mounting hardware, and expecting unrealistic accuracy from standard hunting rifles.
3-9×40 indicates magnification range and objective lens size. The scope zooms from 3x to 9x magnification, and the objective lens (front lens) is 40mm in diameter. Larger objective lenses gather more light for better low-light performance but add weight and require higher mounting.
Start at 25 yards to get on paper, then move to your intended zero distance. 100 yards is most common and practical. Hunters who primarily shoot under 150 yards might prefer a 50-yard zero, while long-range shooters often choose 200 yards.
Common issues include loose scope mounts, damaged scope, incorrect mounting alignment, exceeding the scope’s adjustment range, or poor shooting technique. Check all hardware first, then verify your scope isn’t damaged. Sometimes a different scope base or rings are needed for proper alignment.
Laser bore sighters can save time but aren’t necessary. Visual bore sighting works just as well and doesn’t rely on batteries. If you use a laser, verify it’s working properly and don’t trust it completely – always confirm with live fire.
Basic equipment costs $100-200 if buying everything new. However, most ranges provide rests and targets, so you might only need ammo ($20-30). Gun stores often offer zeroing services for $50-100 if you prefer professional help.
Zeroing your scope is just the beginning. Consistent practice builds the skills needed for accurate shooting in real conditions.
Practice shooting from different positions – not just bench rest. Learn your holds at various distances. Keep a log book of your shooting sessions and any zero changes.
Remember that environmental factors affect zero. Extreme temperature changes can shift impact by several inches. Check your zero when conditions change significantly.
For more advanced information on first focal plane vs second focal plane reticles and other scope features, explore our comprehensive guides. The right knowledge combined with practice makes you a better shooter.
Take your time, follow these steps precisely, and don’t get frustrated. Every expert was once a beginner. With patience and proper technique, you’ll achieve a reliable zero that improves your shooting accuracy dramatically.