Hunting Rangefinder Terms: Complete Glossary 2026
Master hunting rangefinder terminology with our comprehensive A-Z glossary. Understand ARC, TBR, angle compensation, and essential terms for accurate shooting.

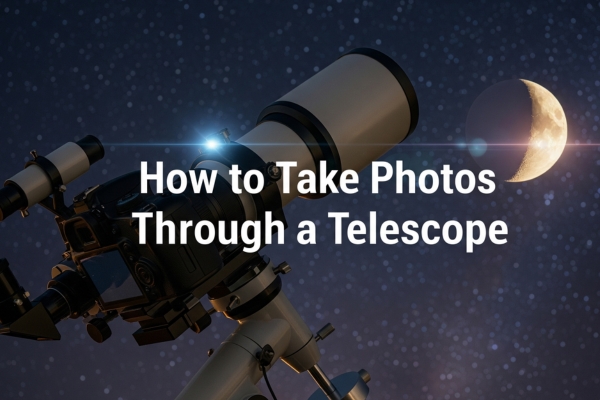
To take photos through a telescope, point your camera into the eyepiece (afocal method) or attach it directly to the telescope body using a T-ring and T-adapter (prime focus method). Smartphone cameras work well for Moon and bright planets, while DSLRs, mirrorless cameras, and dedicated astronomy cameras capture deeper detail and faint deep-sky objects.
The night sky has always invited a second look. Tonight, with a telescope and any camera you already own, you can turn what you see into something you keep. The barrier to entry is lower than most beginners expect. Your phone, your telescope, and a few minutes of patient alignment are enough to produce a crater-sharp Moon shot on your very first try.
This refreshed 2026 guide walks you through three proven methods (afocal, prime focus, and eyepiece projection), the equipment each one needs, and the camera settings that bring out lunar craters, planetary detail, and faint nebulae. You will also learn when tracking matters, how lucky imaging sharpens planets, what autoguiding solves, and which free software finishes the job. By the end, you will have a working plan for your first photo and a clear path forward as your skills grow.
What you’ll learn:
Astronomers have developed three reliable ways to capture images through a telescope, and each one suits a different camera and a different target. Choosing the right method early saves hours of frustration and lets you focus on framing, focusing, and exposure instead of fighting your gear.
Afocal photography is the simplest entry point because you photograph the image the eyepiece has already produced. You hold or mount your camera lens directly over the eyepiece, and the telescope’s optics do the magnifying. No lens removal, no internal adapters, and no permanent modifications are required.
This technique works with anything that can focus at a few inches from its lens: smartphones, point-and-shoots, camcorders, action cameras, and even a DSLR with a lens attached. Because the eyepiece stays in place, you can switch from looking through the telescope to photographing through it in seconds. Most first-time Moon shots that go viral on social media start here.
The trade-off is alignment. Getting the camera lens centered on the eyepiece exit pupil takes patience, especially at high magnification where the sweet spot shrinks to a few millimeters. Universal smartphone adapters with fine adjustment screws solve most of this struggle, and many beginners are surprised how sharp their results become once the camera is centered.
Prime focus photography replaces the camera lens entirely with the telescope itself. You thread a camera-specific T-ring onto the DSLR or mirrorless body, screw a T-adapter into your telescope’s focuser, and join the two. Light now travels directly from the telescope’s objective to the camera sensor, with no eyepiece in the way.
The reward is full light-gathering power. Every millimeter of your telescope’s aperture feeds the sensor, which is what makes prime focus the standard method for faint nebulae and galaxies. Sharpness, color fidelity, and resolution all improve compared to afocal work because the optical path is shorter and there is one less glass surface to degrade the image.
The trade-off is commitment. You need a camera with interchangeable lenses, an adapter matched to both the camera brand and your focuser, and enough back-focus clearance to reach focus. Beginners who plan to grow into deep-sky imaging should learn prime focus first because it scales gracefully from wide-field Milky Way shots with small refractors to high-resolution galaxy work with longer focal lengths.
Eyepiece projection places an eyepiece between the telescope and the camera, projecting a magnified image directly onto the sensor. It is the most specialized of the three methods but the only way to push magnification high enough for fine lunar crater rims, Saturn’s Cassini Division, or Jupiter’s Great Red Spot.
The setup needs a projection adapter that holds the eyepiece at a variable distance from the camera sensor. Many adapters slide in and out, which effectively gives you a continuously variable Barlow. This flexibility is the whole point: you trade convenience for the ability to frame tiny subjects large on the sensor without resorting to extreme optical-path extensions.
Two accessories sharpen results in this configuration. An infrared (IR) blocking filter placed ahead of the camera reduces atmospheric heat shimmer on refractors, and an atmospheric dispersion corrector (ADC) counteracts the prismatic color fringes that appear when planets sit low on the horizon. Pairing these with lucky imaging (covered later) is what separates decent planetary work from exceptional planetary work.
Before diving into equipment and settings, compare the three methods side by side. This table summarizes what each one demands, what it does best, and where it tends to break down.
| Method | Equipment Needed | Best Targets | Difficulty | Typical Image Scale |
|---|---|---|---|---|
| Afocal | Any camera, optional smartphone adapter | Moon, bright planets, terrestrial | Beginner | Low to medium |
| Prime Focus | DSLR/mirrorless, T-ring, T-adapter | Deep-sky objects, wide fields, Moon | Intermediate | Medium to high |
| Eyepiece Projection | DSLR/mirrorless, projection adapter, eyepiece | Lunar craters, planetary detail | Advanced | Very high |
Match the method to the camera you already own. If you only have a phone, afocal is your starting line. If you own a DSLR or mirrorless and want to grow, learn prime focus first and add eyepiece projection later.
You do not need a fortune to start telescope photography, but choosing the right gear for your camera prevents the most common beginner frustrations. The categories below cover smartphones, interchangeable-lens cameras, and dedicated astronomy cameras so you can decide where to invest first.
Modern phones have changed what is possible at the eyepiece. Today’s flagships combine large sensors, fast lenses, and on-device computational photography that can pull detail out of surprisingly dim subjects. A stable adapter is the single most useful accessory you can buy.
Universal smartphone adapters such as the Celestron NexYZ use three independently adjustable knobs to center your phone’s lens over the eyepiece. They fit phones between roughly 2.4 and 3.6 inches wide and clamp onto standard 1.25-inch eyepieces. Budget adapters work, but the fine adjustment on premium models saves real time at high magnification.
Two accessories are worth adding once you have an adapter:
Interchangeable-lens cameras unlock prime focus and eyepiece projection. The required gear is straightforward and works across brands, though the T-ring must match your specific camera mount.
The minimum kit for prime focus photography:
For eyepiece projection, add a projection adapter that clamps onto your eyepiece and threads onto the camera’s T-ring. Variable-distance adapters are more flexible because they let you tune magnification to your target and sensor size.
Dedicated astronomy cameras are built for one job: capturing faint light through a telescope. They use Sony, ON Semi, or similar CMOS sensors with high quantum efficiency, low read noise, and often active cooling that drops sensor temperatures 30°C or more below ambient. Cooled sensors produce dramatically less noise during long exposures.
Two families dominate the hobbyist market. Planetary cameras such as the ZWO ASI224MC, ASI462MC, and QHY5III462C output high-frame-rate video that pairs with lucky imaging. Deep-sky cameras such as the ZWO ASI533MC Pro, ASI2600MC Pro, and QHY268C output long-exposure stills and benefit from cooling, filter wheels, and controlled gain.
These cameras require a computer. Free capture software like FireCapture, SharpCap, and NINA controls exposure, gain, frame rate, and download directly to disk. The learning curve is steeper than a DSLR, but the per-pixel image quality is the highest you can achieve at the amateur level.
Each camera type has a slightly different mounting procedure, but the underlying logic is the same: align the optical path, lock everything down, and verify focus before you shoot. Take your time on the first attempt; after two or three setups the motions become automatic.
Start with a low-power eyepiece (around 20-25mm focal length) for a wide field of view and forgiving alignment. Aim the telescope at the Moon or a bright planet so you can see the image clearly during setup.
Universal adapter method (recommended):
Phone-specific tips: Modern phones with multiple rear lenses will switch lenses mid-zoom and ruin your framing. Lock your camera app to its widest (1x) lens, or use a manual app like NightCap or Open Camera that exposes all lens and ISO controls. The Sky at Night smartphone astrophotography guide covers this trap in detail.
Prime focus photography with a DSLR removes both the camera lens and the telescope eyepiece. The two halves of the system then connect through a T-ring and T-adapter. The process is mechanical, but small mistakes lead to out-of-focus or vignetted frames, so follow the order.
Installation process:
Enable mirror lock-up on DSLRs that have it to suppress the tiny vibration from the mirror flipping. Combine with a 2-second self-timer or remote release for the sharpest possible frames.
Eyepiece projection adds an extra component that holds both an eyepiece and your camera in line. The optical path becomes longer and heavier, so balance and stability deserve extra attention.
Before mounting the camera, check that your mount can handle the additional weight and that your counterweights still balance the system end-to-end. A poorly balanced setup drifts during long exposures and produces trailed stars. Once you confirm balance, follow these steps:
For planetary work, add an IR blocking filter in front of the camera to reduce atmospheric heat haze, and consider an atmospheric dispersion corrector if the planet sits below about 35° altitude. These two accessories transform low-altitude planetary shots from soft to sharp.
Settings change dramatically depending on whether you are imaging a bright Moon, a tiny planet, or a faint nebula. The starting points below come from years of amateur practice and work across most camera brands, though you should fine-tune them for your local sky conditions.
The Moon is brighter than most beginners expect. Automatic camera modes see a dark sky and overexpose the surface into a white blob, which is why manual mode is essential. Start with these proven settings and adjust based on your histogram.
| Moon Phase | ISO | Shutter Speed | Aperture (if applicable) |
|---|---|---|---|
| Crescent | 100 | 1/60s | f/8-f/11 |
| Quarter | 100 | 1/125s | f/8-f/11 |
| Full | 50-100 | 1/250s | f/11 |
Focus using Live View at 10x magnification, targeting the lunar terminator (the shadow line between light and dark hemispheres) where contrast is highest. The NASA Lunar Photography Guide recommends shooting in RAW for maximum processing flexibility. Capture the same frame at three exposures (one stop apart) so at least one comes out perfectly exposed.
Shoot when the Moon is high in the sky. Low-altitude Moon light passes through more atmosphere, which softens detail and adds color fringes. The Moon is also slightly bigger near the horizon (the famous Moon illusion), but the seeing is worse, so aim for altitude above 30° whenever you can.
Planets are tiny but bright. The modern approach is to record high-frame-rate video and stack the best frames later, a technique called lucky imaging. A single still exposure will rarely beat a stacked video of the same target because atmospheric turbulence constantly changes the view.
Starting settings for video capture (DSLR or dedicated camera):
Stack your video using AutoStakkert or RegiStax. These free tools rank frames by sharpness, keep the top 10-20%, and combine them into a single image that dramatically exceeds any one frame. The result reveals Jupiter’s cloud bands, Saturn’s Cassini Division, and Mars’s surface markings during a good opposition.
Deep-sky objects (galaxies, nebulae, and star clusters) demand long exposures to collect their faint light. Without a tracking mount, your exposures are limited by the rate Earth rotates, but even short tracked exposures reveal objects completely invisible to the eye.
Untracked (alt-az or static tripod):
Tracked (equatorial or GoTo mount):
Dark frames (frames taken with the lens capped at the same exposure and temperature) subtract sensor noise during stacking. Capture at least 10-20 dark frames per session; they are the single biggest upgrade to your deep-sky image quality. The Sky & Telescope Deep Sky Imaging Guide walks through the full processing workflow for beginners.
Planetary imaging reached its modern form with lucky imaging, and dedicated CMOS astronomy cameras are the tools that make it shine. Unlike a DSLR, these sensors read out hundreds of frames per second with very low noise, which lets you freeze moments of steady atmosphere and discard the rest.
The ZWO ASI224MC and ASI462MC remain the most popular entry-level planetary cameras. Both record uncompressed AVI or SER video files at 100+ fps, which AutoStakkert grades by quality. Higher-end cameras such as the ASI6200MC and ASI2600MM Pro add active cooling and larger sensors for deep-sky work. QHYCCD offers comparable cameras (QHY5III462C, QHY268C) with similar capture workflows.
Software like FireCapture and SharpCap controls the camera, displays a real-time histogram, and saves raw frames to disk. For best results, record at least 90 seconds of video per target, then stack the top 10-20% of frames in AutoStakkert and sharpen the result in RegiStax or Astra Image. A complete planetary session rarely takes more than a few minutes of capture time, but the results can rival professional observatories.
Sky transparency and atmospheric seeing are the two conditions that matter most for image quality, and beginners confuse them constantly. Transparency describes how clear the air is (haze, clouds, moisture). Seeing describes how steady the air is (turbulence, jet stream, ground heat).
High transparency with poor seeing gives crisp stars but blurry planets. Poor transparency with good seeing gives fuzzy stars but sharp planetary detail. Most imaging targets benefit from one or the other more strongly, which is why planetary work can succeed under bright suburban skies while deep-sky imaging truly requires dark, transparent air.
Rate your sky using the Bortle scale (1 = pristine dark site, 9 = inner-city sky). Even a Bortle 5 or 6 backyard is enough for lunar and planetary work; deep-sky imaging improves dramatically as you drop into Bortle 3 or below. Apps such as Light Pollution Map and Clear Outside forecast both seeing and transparency for your exact location.
Choosing targets that match your gear is the fastest way to consistent results. A 4-inch refractor under a suburban sky can outperform a 10-inch reflector on a wobbly mount in a light-polluted backyard, simply because the targets are well chosen. Match the object to the optics, and the rest follows.
Untracked mounts (alt-az, Dobsonian, simple camera tripod) limit you to bright objects that tolerate short exposures. The Moon reigns supreme here, because its brightness forgives imperfect tracking, and it shows new detail every night. Even basic smartphones capture impressive lunar shots through modest telescopes.
Bright planets also work without tracking, especially with lucky imaging. Jupiter shows cloud bands and the Great Red Spot at opposition, Saturn reveals its rings clearly with the Cassini Division visible in good seeing, Mars displays surface features during opposition, and Venus shows phase changes through its orbit.
Small telescopes and camera lenses excel at wide-field imaging, framing objects that would barely fit in larger scopes’ fields of view. These targets pair well with short focal length refractors or DSLR + lens wide-field rigs.
A tracking mount unlocks faint deep-sky objects that require minutes of total integration. Once polar alignment is solid, you can build up signal over long sessions and reveal nebulae, galaxies, and clusters that never appear in single exposures.
Beginner-friendly deep-sky targets (30-60 second exposures): Orion Nebula core region (M42), Lagoon and Trifid Nebulae (M8, M20), globular clusters (M13, M22), and bright galaxies (M81, M82).
Intermediate targets (2-5 minute exposures): Whirlpool Galaxy (M51), Eagle Nebula (M16), Rosette Nebula, and Leo Triplet galaxies.
Advanced targets (10+ minute exposures, often narrowband): Horsehead Nebula, faint emission nebulae, distant galaxy groups, and narrowband filter subjects.
The mount matters more than the telescope for serious imaging. A mediocre scope on a great mount outperforms a great scope on a shaky mount almost every time. Budget accordingly: aim to spend 50-60% of your imaging system total on the mount, with the rest split between the optical tube and the camera.
Alt-azimuth mounts handle visual work and short planetary video but cannot track the sky’s rotation, which causes field rotation on long exposures. Manual equatorial mounts track in one axis with perfect polar alignment, supporting short exposures. Motorized equatorial mounts extend that to 30-60 second unguided exposures. Go-To equatorial mounts with autoguiding handle multi-minute sub-exposures for serious deep-sky imaging.
Choose mounts rated for at least 1.5x your total equipment weight for visual use, or 2x for photography. This headroom ensures smooth tracking, longer periods between corrections, and reduced periodic error that creates trailed stars on long exposures.
Alt-azimuth mounts track in two perpendicular axes, which means they can keep a target centered but cannot match the rotation of the sky. During long exposures, stars in the corners of the frame trace small arcs around the center. The result is field rotation, where stars look like little curved streaks instead of pinpoints.
Field rotation only matters for exposures longer than about 30-60 seconds at typical focal lengths, which is why alt-az mounts work fine for lunar and planetary video but frustrate deep-sky photographers. Equatorial mounts solve this by aligning one axis with Earth’s rotational pole, so tracking in that single axis cancels sky rotation entirely.
Even good equatorial mounts drift slightly over time, and any uncorrected drift becomes star trails during long exposures. Autoguiding is the practice of using a second small camera and software to lock onto a guide star and send tiny correction signals to the mount many times per second.
Two autoguiding setups dominate. A guidescope is a small refractor (typically 50-80mm) mounted on top of the main telescope with its own dedicated guide camera. An off-axis guider (OAG) uses a prism that picks off light from the edge of the main telescope’s image circle, eliminating flexure between two separate optical tubes.
Free software called PHD2 reads the guide camera frames, finds a star, and pulses the mount to keep that star pinned to a single pixel. With PHD2 running, 5-minute and even 10-minute sub-exposures become routine on modest mounts. NINA and Sequence Generator Pro offer similar closed-loop control with more automation, including dithering and target sequencing.
Autoguiding is not mandatory for your first year of imaging. Start with 30-second sub-exposures and stack 30-50 of them. Add autoguiding when you reach a point where 30-second subs feel too short or where flexure between your guidescope and main scope becomes your limiting factor.
Every astrophotographer faces the same handful of frustrations. Identifying them quickly turns a wasted night into a productive one, and most fixes cost nothing.
Camera shake ruins more telescope photos than any other factor. Tiny vibrations magnify through long focal lengths, creating blurred stars and soft planetary edges. Several habits eliminate nearly all shake.
Overexposure ruins lunar photos more than any other single error. Automatic modes see a dark sky and overcompensate, blowing the surface into a white disc. Manual mode gives you control; a histogram tells the truth.
A properly exposed Moon image shows the histogram peak in the middle third, not pushed against the right edge. If the peak rides the right edge, reduce ISO, shorten the shutter speed, or both. Modern cameras have a “highlight warning” or “blinkies” feature that flashes overexposed areas in playback; turn it on. Slight underexposure always recovers better than overexposure during processing.
Focus is the make-or-break step of telescope photography. Autofocus hunts endlessly in darkness, so manual focus is non-negotiable. A few habits guarantee sharper results:
Refocus periodically as the night cools. Telescope optics shift focus slightly with temperature, and a session that started sharp often drifts within an hour.
Phones introduce a handful of issues that cameras never do. Modern flagships switch rear lenses mid-zoom, which can break your framing silently. Lock the camera app to its 1x widest lens, or use a manual app like Open Camera, NightCap, or ProCam that exposes all controls. Vignetting (dark corners) happens when the phone’s field of view is wider than the eyepiece exit pupil; switch to a longer focal length eyepiece or zoom in slightly.
App switching during long exposures drains battery and interrupts focus. Switch to airplane mode before you start, plug into a power bank if your session runs longer than 30 minutes, and clean your lens with a microfiber cloth before every shoot. These small habits separate first-attempt frustration from consistent results.
Not every telescope excels at photography. Optical design, focal ratio, and focuser quality all influence what you can capture. Match the scope to the targets you want most, and your other gear will fall into place around it.
Refractor telescopes traditionally dominate astrophotography because of their simple, maintenance-free design. Quality apochromatic (APO) refractors deliver sharp, high-contrast images with no central obstruction, which makes them the default choice for wide-field deep-sky imaging. Triplet ED or APO designs in the 70-102mm range cover most beginner deep-sky targets comfortably.
Newtonian reflectors offer more aperture per dollar and remain the most affordable way to capture faint galaxies and nebulae. They require periodic collimation and a coma corrector for edge-to-edge sharpness. Compound telescopes (Schmidt-Cassegrain and Maksutov-Cassegrain) pack long focal lengths into compact tubes, which makes them excellent for planets and lunar work but slow (f/10 or higher) for deep-sky imaging. Focal reducers drop the focal ratio to f/6.3 or f/7 and turn these scopes into usable deep-sky instruments at the cost of some optical correction.
Raw telescope photos rarely look impressive straight from the camera. Astrophotography depends on processing to pull out faint detail, suppress noise, and reveal color that the human eye cannot see through the eyepiece. The good news is that excellent free and paid tools exist for every step.
Every astrophoto benefits from a few standard adjustments applied in order: crop and rotate to remove edge vignetting and frame your subject; set Levels to stretch contrast into the available range; use Curves to enhance midtone detail without blowing highlights; correct color balance for any light pollution or moonlight casts; apply noise reduction to smooth background grain without erasing detail; finish with sharpening at a small radius to crisp details without amplifying noise.
Free tools such as GIMP, darktable, and RawTherapee handle every step above for RAW files. Adobe Lightroom and Photoshop add a more polished workflow at a subscription cost. For lunar photos, remember that telescopes often show inverted or mirrored views; flip and rotate the image until north is up and the terminator matches your eye view of the Moon.
Stacking is the secret weapon of astrophotography. The principle is simple: random noise appears differently in every frame, while real celestial signal stays constant. Stacking software aligns and averages many frames, reinforcing real signal and canceling noise. Even 10-20 sub-exposures show dramatic improvement over any single frame.
Free tools that cover most workflows include Deep Sky Stacker (Windows, the standard for nebulae and galaxies), Sequator (Windows, friendly interface for starry landscapes), AutoStakkert (Windows, planetary and lunar video alignment), RegiStax (Windows, wavelet sharpening after planetary stacking), Siril (cross-platform, complete pipeline from stacking to color), and GraXpert (cross-platform AI denoising that has become a 2025-2026 staple). Paid powerhouse PixInsight remains the choice for advanced users who need precise control, scripting, and noise reduction that free tools cannot match.
You can capture a satisfying telescope photo on your first attempt if you keep the setup simple. The Moon is the perfect first target: bright, detailed, and forgiving of mistakes. Use the checklist below to avoid the most common beginner pitfalls.
Smartphone: telescope set up and pointed at the Moon, 20-25mm eyepiece installed, smartphone adapter (or hand-held for a quick test), Bluetooth remote or self-timer, and a lens cleaning cloth.
DSLR or mirrorless: T-ring matched to your camera brand, T-adapter matched to your focuser, fully charged battery and a formatted memory card, remote shutter or self-timer, and a red flashlight to preserve dark-adapted vision.
| Target | Method | ISO | Shutter | Notes |
|---|---|---|---|---|
| Moon | Smartphone | Auto or 100 | Auto or 1/125s | Tap to focus on terminator |
| Moon | DSLR | 100 | 1/125s | Manual mode essential |
| Planets | Video | 800-1600 | 1/30-1/60s | Stack frames later |
| Bright DSO | DSLR | 1600 | 30s | Requires tracking |
“I can’t see anything through my camera”: confirm the eyepiece is in focus with your eye first, verify the camera is centered over the eyepiece, and try a bright terrestrial target in daylight to confirm the rig works.
“Everything is blurry”: let the telescope cool to ambient temperature for 30 minutes, use a self-timer or remote to avoid shake, and focus on a bright star using Live View at 10x magnification.
“The Moon is too bright”: switch to manual exposure mode, reduce ISO to 50-100, and increase shutter speed to 1/250s.
NASA’s Astronomy Picture of the Day archive is a great place to find inspiration for your next target after you have mastered the Moon.
Once the basics feel routine, advanced techniques lift your work into professional territory. The upgrades below have the largest impact per hour of effort.
Filters transform what is possible from light-polluted skies. They block unwanted wavelengths or isolate specific emission lines where nebulae shine.
Light pollution reduction filters (LPR or CLS) block sodium and mercury streetlight spectra. UV/IR cut filters tighten focus and reduce chromatic aberration on refractors. Narrowband filters (Ha, OIII, SII) isolate specific emission lines for emission nebulae. Solar filters are certified filters required for any Sun observation or photography.
Narrowband filters are especially powerful from urban locations because they transmit only the wavelengths where nebulae emit light, making them essentially immune to moonlight and streetlight pollution. Many city-based astrophotographers now produce Hubble-quality images from their backyards with nothing more than a small refractor, a tracking mount, and a narrowband filter.
Earth’s atmosphere acts as a weak prism. When a planet sits low on the horizon, red and blue wavelengths refract by slightly different amounts, smearing the planet into a tiny rainbow. An ADC is a pair of adjustable prisms that you rotate to cancel this effect.
ADCs matter most for planets below about 35° altitude. At higher altitudes the atmosphere adds little dispersion and an ADC is unnecessary. For Mars, Jupiter, and Saturn near opposition, which can stay high in the sky for hours, an ADC is rarely worth the setup time. For Saturn at solar conjunction or Mercury and Venus against a bright twilight sky, an ADC makes the difference between a sharp image and a soft one.
A few minutes of planning save hours of wasted setup. Free tools forecast weather, predict target visibility, and help you pick the best window each night.
Stellarium (free, desktop and mobile) shows the real-time sky from your location and when targets rise and set. SkySafari is a comprehensive mobile planetarium with telescope control on some mounts. PhotoPills calculates Moon phases, positions, and golden and blue hour times. Clear Outside delivers detailed astronomical weather forecasts including seeing and transparency. Light Pollution Map shows Bortle ratings and helps you discover dark sites.
Plan around these factors each session: a new moon favors deep-sky work while a bright moon favors planetary; target altitude peaks at meridian crossing around local midnight; atmospheric seeing is usually best after midnight when ground heat dissipates; allow 30-60 minutes for the optics to reach ambient temperature; and dew increases through the night, so bring a dew heater for the objective and finder.
Astrophotography is overwhelmingly safe, but the one exception is the Sun. Solar light focused through a telescope can blind you in a fraction of a second and destroy a camera sensor even faster. Treat solar imaging with absolute seriousness.
Permanent eye damage and blindness occur instantly from unfiltered telescope viewing of the Sun. Never look through any telescope pointed at the Sun without a certified solar filter mounted on the front of the telescope. The same rule applies to cameras; focused sunlight will damage or destroy an unprotected sensor in seconds.
Certified white-light solar filters reveal sunspots and surface granulation. Hydrogen-alpha filters show dramatic prominences, filaments, and flares but cost significantly more. Herschel wedges offer another safe alternative for refractor owners, splitting the light path so most of the Sun’s energy is diverted out of the telescope before reaching the eyepiece or camera.
Yes, you can photograph through virtually any telescope, though some designs work better than others. Even basic department-store refractors and small Dobsonians allow crisp Moon photography using a smartphone held to the eyepiece. Refractors and catadioptric scopes tend to produce the cleanest prime-focus images because they lack a central obstruction. Newtonian reflectors need a coma corrector for sharp corners and benefit from periodic collimation. Quality optics and a stable mount improve results across the board, but the most important variable is the photographer, not the telescope.
No, expensive cameras are not necessary when you start. Modern smartphones capture impressive Moon photos and bright planets through any telescope, and a $20 universal adapter gets most of the way there. Older entry-level DSLRs in the $200-400 range work excellently for deep-sky imaging once you add a T-ring and T-adapter (about $40 combined). Dedicated astronomy cameras ($300-500) outperform DSLRs for planetary video and faint deep-sky work but require a computer. Start with what you own, then upgrade based on the targets you actually chase.
The 500 rule is a simple formula for finding the longest exposure you can shoot without star trails on a static tripod. Divide 500 by your focal length in millimeters; the result is your maximum exposure in seconds. A 50mm lens allows 10 seconds, a 200mm lens allows 2.5 seconds, and a 1000mm telescope allows about 0.5 seconds. The rule assumes a full-frame sensor; for crop sensors multiply the result by your crop factor (typically 1.5-1.6). It is a starting point, not a law; better polar alignment and wider lenses allow slightly longer exposures.
The Moon is by far the easiest target for telescope photography. Its brightness allows short exposures with any camera, eliminating tracking requirements entirely. The Moon also offers endless detail that changes nightly as the terminator sweeps across new craters and mountains, and the forgiving exposure latitude means even imperfect settings produce recognizable results. Bright planets (Jupiter, Saturn, Venus) come next in difficulty and require video stacking for sharp detail. Faint deep-sky objects are the hardest because they demand long exposures, accurate tracking, and stacking.
Star trails form when Earth’s rotation moves the stars across the frame during a long exposure. Three approaches solve this in order of complexity. First, use the 500 rule: divide 500 by your focal length in millimeters to find your maximum untracked exposure in seconds. Second, mount your camera on a tracking equatorial mount that follows the sky’s rotation; this extends usable exposures to minutes. Third, add autoguiding for multi-minute exposures on faint deep-sky objects. Wide-field Milky Way shots can use shorter focal lengths and the 500 rule alone, while long focal length deep-sky imaging essentially requires tracking.
Lucky imaging is the practice of recording high-frame-rate video of a target and stacking only the sharpest frames. Earth’s atmosphere constantly distorts the view of planets and the Moon, but those distortions are brief; in any 90-second capture, several hundred milliseconds will be unusually still. By recording at 100+ fps, grading frames by sharpness, and combining the best 10-20%, lucky imaging produces planetary images sharper than any single exposure can achieve. The technique became routine in amateur astrophotography with the arrival of affordable CMOS cameras like the ZWO ASI224MC and software like FireCapture, AutoStakkert, and RegiStax.
Taking photos through a telescope is one of the most rewarding hobbies you can pick up. The techniques scale gracefully: tonight’s smartphone Moon shot costs nothing beyond the adapter you may already own, while next month’s deep-sky imaging pushes you toward a tracking mount, longer exposures, and the rewarding process of stacking dozens of frames into a single clean image of a nebula thousands of light-years away.
The biggest leap is always the first one. Get outside tonight, point your telescope at the Moon, and capture a single frame you can show someone tomorrow. That one image is what turns telescope photography from something you read about into something you do.
Your first-session checklist:
When you are ready to grow, pick one upgrade at a time: a better adapter, a DSLR with a T-ring, a tracking mount, autoguiding, or a dedicated astronomy camera. The order matters less than the consistency. Astrophotography rewards patience above all else, and the night sky will be waiting every time you look up.
Clear skies, and welcome to the hobby.