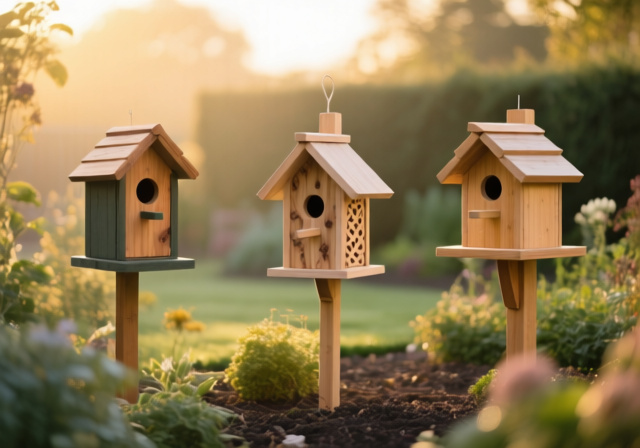
Best Birdhouses 2026: 10 Top-Rated Houses Tested & Reviewed
Expert reviews of the top 12 birdhouses tested over 3 breeding seasons. Find the perfect house for bluebirds, wrens, and…

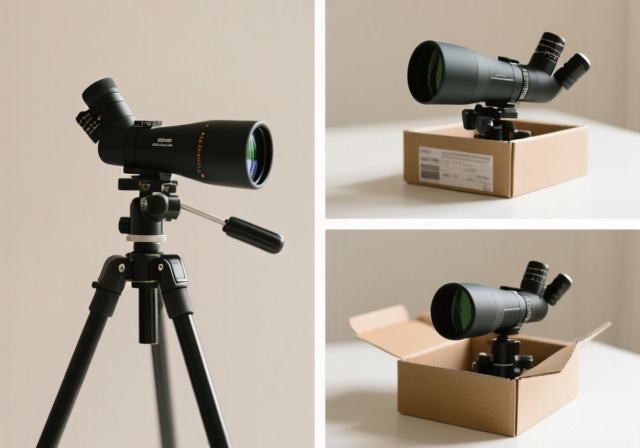
If you picked up a spotting scope sometime in the last year, you’re far from alone. Optics sales in 2026 continue to climb as more birders, hunters, and shooters discover the difference between squinting at a distant silhouette and actually seeing feather details, antler points, or bullet holes at hundreds of yards.
This guide reflects what’s working right now in the field in 2026, from carbon fiber tripods under $400 to flagship models from Vortex, Swarovski, Leupold, and Zeiss with ED glass and argon-purged tubes. The fundamentals below have not changed, but the gear, the techniques, and the way people use spotting scopes have all moved forward.
Learning how to use a spotting scope is mostly about undoing habits you picked up from binoculars and riflescopes. The magnification is higher, the field of view is narrower, and the tripod does most of the work your hands used to do. Master those three ideas, and you will skip months of frustration. By the end of this beginner’s guide, you will know how to set up a spotting scope, how to aim it without losing your target, how to focus at any distance, and how to choose the right magnification for birds, game, or targets.
Quick Reference: Mount on a stable tripod, start at the lowest magnification (15-20x), locate your target using a landmark, then zoom in gradually while refocusing. Most beginner frustration comes from skipping the landmark step.
A spotting scope is a small, tripod-mounted telescope built for daytime use. It delivers 15x to 60x magnification through a single eyepiece, with objective lenses typically between 50mm and 85mm. That single eyepiece is what makes a spotting scope different from binoculars: more magnification, narrower field of view, and a stable platform for studying a specific subject.
Light enters through the large front (objective) lens, gets flipped right-side-up by internal prisms, and exits through the eyepiece at a comfortable viewing angle. The objective lens diameter matters: an 80mm lens gathers roughly 75% more light than a 60mm lens, which is why scopes with larger objectives produce brighter images at dawn and dusk.
Modern scopes from Vortex, Swarovski, Leupold, and Zeiss add extra-low dispersion (ED) glass to cut color fringing, multi-coating on every air-to-glass surface to boost contrast, and argon or nitrogen purging so internal fogging becomes a non-issue. Entry-level scopes use BK-7 or BAK-4 prisms; BAK-4 is the better choice because it transmits more light to the edges of the field.
Objective Lens: The front lens that gathers light. Larger diameters (80mm, 85mm) mean brighter images, especially in low light. Smaller diameters (50-60mm) keep the scope compact and light enough for backpacking.
Think of a spotting scope as the bridge between binoculars and an astronomical telescope. It is powerful enough to read the lettering on a duck band at 200 yards but portable enough to carry on a multi-mile hunt. Binoculars scan; spotting scopes study. The trade-off is real, and it is the reason most serious birders and long-range shooters carry both.
This is one of the most common questions beginners ask, and it has a clear answer once you understand what each optic does best. A 10×42 binocular shows you a wide field at modest magnification, which is perfect for finding subjects. A spotting scope shows you a tiny field at high magnification, which is perfect for studying them.
Reach for the spotting scope when you need to identify a small or distant subject, confirm a field mark, judge antler points, or read bullet impacts at 300 yards or more. Reach for binoculars when you are moving through habitat, scanning tree lines, or watching fast-moving flocks. Most experienced birders, hunters, and shooters carry both and use them as a team. Our full spotting scope vs binoculars comparison breaks down the numbers in detail.
The short version: a spotting scope buys you detail at the cost of speed. Binoculars buy you speed and context at the cost of detail. If you spend more time staring at a single bird or target than walking and searching, you will benefit from a scope. If you spend more time walking and searching than staring, save the money.
Setup is the single biggest factor separating frustrating sessions from productive ones. The tripod and head matter as much as the scope itself. A premium scope on a flimsy tripod is a wasted investment; a mid-range scope on a rigid carbon fiber tripod will outperform it in the field every time.
A good rule of thumb that holds up in 2026: spend roughly 30 to 40 percent of your total budget on the tripod and head. If your scope and tripod together cost $1,000, plan on $300 to $400 for support. Skimping here is the most common mistake new users make, and it shows up in every forum thread about shaky views and missed targets.
Carbon fiber tripods are popular in 2026 for good reason: they weigh about 30% less than aluminum for the same stiffness, which matters when you are hiking miles into a glassing spot. Aluminum tripods cost less and work fine for vehicle-based viewing or short walks.
The head controls how the scope moves. The two main types are pan heads and ball heads. A pan head uses separate knobs for left-right and up-down movement, which makes precise tracking easier once you have a target. A ball head moves freely in any direction, which speeds up scanning but is harder to control at high magnification.
For birding and general use, a fluid pan head or a video head gives the smoothest results. For hunting and target shooting where you lock onto a specific area, a ball head with a separate pan base works well. Either way, the head should be rated to support at least the weight of your scope plus some margin.
Locate the 1/4-20 mounting socket on the bottom of your scope. It usually has a small alignment pin that drops into a matching hole on the tripod plate. This pin keeps the scope from rotating on the plate, which is critical for high-magnification viewing.
Align the socket, drop the pin, and tighten the mounting bolt firmly. Do not over-tighten: you want it secure enough to survive a gust, but loose enough to remove without tools. Give the mounted scope a gentle shake to confirm there is no play.
Position the scope so the focus knob falls on the side of your dominant hand. Right-handed users get the knob on the right; left-handed users get the knob on the left. This small detail saves countless awkward reaches during long sessions.
Not every session requires a full tripod setup. A window mount clamps to a partially rolled-down car window and provides a stable platform for viewing from a parked vehicle. Birders and hunters on western trips rely on this method because it sets up in seconds and lets you stay low-profile while glassing open country.
Window mounts work best with straight-through spotting scopes, since angled eyepieces force you to twist into an uncomfortable position. They are not as stable as a quality tripod, but for short viewing sessions or quick scans they are unbeatable for convenience. Keep one in your vehicle and you will find yourself using your scope far more often than you would otherwise.
Time Saver: Mark your preferred tripod leg extensions with a strip of tape. In the field, you set up at the right height in seconds instead of guessing.
Follow this sequence every time you set up. It mirrors the workflow that professional guides, waterfowl hunters, and digiscopers use in the field in 2026, and it is the fastest way to find targets without the trial-and-error most beginners go through.
This sequence respects how human vision works at high magnification. Starting wide lets your brain orient itself, and each step of zoom confirms where you are before the field of view shrinks further. Skipping steps works in open country with a fixed target; it almost never works with live subjects.
Aiming a spotting scope is the single most common beginner frustration, and it shows up constantly in r/birding and birding forum threads. The cause is simple: high magnification shrinks the field of view so much that a tiny misalignment means you are looking at empty sky. The fix is also simple, and it does not require any special skill.
Start at the lowest magnification. Find your target with your eyes or binoculars first. Pick a fixed reference point right next to or just behind the target. Sight along the scope body, not the eyepiece, and align that reference point with the center of the lens. Only then look through the eyepiece. The target will be in or near your field of view almost every time.
If you cannot see the target through the eyepiece, do not increase magnification hoping to find it. That only makes the problem worse. Go back to minimum zoom, re-aim using the landmark method, and try again. Two or three passes are normal when you are learning. After a few sessions, finding your target becomes second nature.
Reddit and birding forum regulars often describe the same breakthrough moment: they stopped trying to aim by looking through the eyepiece and started aiming along the body of the scope. This single habit eliminates 90 percent of the “where did it go” frustration that sends beginners back to binoculars.
Eye relief is the distance your eye can sit from the eyepiece while still seeing the full field of view. Most spotting scopes offer 15-20mm of eye relief, which is enough for eyeglass wearers when the eyecup is twisted down. If you do not wear glasses, extend the eyecup fully to block stray light and give your eye a stable reference point.
Getting eye relief wrong is the cause of black crescents or vignetting at the edges of the view. Adjust by moving your head slightly closer or farther from the eyepiece until the full circular image appears sharp from edge to edge. For more on this, see our guide on using binoculars with glasses, which covers the same principles.
Once the basics feel natural, these techniques will noticeably improve the quality of your views. Each one comes up in 2026 optics forums and on social channels run by Swarovski, Vortex, and Leica, and they are worth adding to your routine as soon as you have the basics dialed in.
On hot afternoons, the air between you and your target refracts light unevenly, creating the wavy “shimmer” effect that ruins high-magnification views. The shimmer is most noticeable above pavement, open fields, and rocky terrain. Cool air over water produces much less of it.
The fix is to drop magnification and wait. Most observers switch from 60x down to 20-30x when shimmer is bad, and they plan their serious viewing for the first two hours after sunrise or the last two hours before sunset. Atmospheric stability is often more important than the optics in your hands.
Sharing a spotting scope with a group requires a slightly different approach. Focus the scope for someone with average vision, then have each viewer step up to the eyepiece individually and adjust their head position slightly forward or back to accommodate any focus difference.
Angled scopes are easier for groups because viewers of different heights can all look through the eyepiece comfortably. Straight scopes require height adjustment for each person. Our angled vs straight spotting scope guide covers the trade-offs in detail.
Following a bird in flight or a moving buck is a real skill. The trick is to stay at lower magnification (20-30x) and use smooth, deliberate panning motion. At 60x, even small tripod movements send the target out of view, which is why experienced birders rarely go above 40x for moving subjects.
Practice by tracking cars on a distant road or joggers on a far hillside. Build the muscle memory before you try to track live wildlife. Many trackers also use a fluid video head, which dampens the jerky motion that pan heads tend to produce at high magnification.
Different activities call for slightly different techniques. The same scope setup that works for a sea watch will frustrate you on a long-range shooting line, and vice versa. The good news is that the core skill of finding and following a subject is the same across all three.
Birding rewards patience. Scan with binoculars to find the subject, then bring the scope up for identification. Most birders keep their scope at 20-30x for general observation, zooming to 40-60x only when they need to confirm a specific field mark like a wing bar or eye ring.
Position yourself with the sun at your back to maximize brightness and contrast. Early morning is best, when birds are active and the air is still. For shorebirds and waterfowl, angled scopes keep you comfortable when looking downward. For forest interior work, straight scopes make it easier to acquire birds through gaps in the foliage.
Flagship birding scopes from Swarovski (ATX/STX), Vortex (Razor HD), and Zeiss (Victory Harpia) all use ED glass to suppress color fringing, which is what makes subtle field marks readable at distance.
Hunters use spotting scopes for two main tasks: glassing open country to find game, and judging animals once spotted. When glassing, work in a systematic pattern: divide the landscape into sections, and work from the farthest visible point toward you. Move from ridgeline to ridgeline, not randomly across the slope.
For trophy evaluation, 40-60x is helpful for assessing antler configuration at distances beyond binocular range. But remember that atmospheric stability often limits effective magnification to 30-40x, regardless of what your scope is rated for. Plan your stalk or approach after glassing, not before.
For backcountry hunters carrying everything on their backs, compact spotting scopes under 30 ounces are now genuinely good, and a quality carbon fiber tripod adds little weight. Leupold’s SX-4 Pro Guide HD and Vortex’s Razor HD 13-39×56 are popular picks in 2026 for the weight-to-performance balance.
Pro Tip: Practice identifying landmarks at known distances. This skill dramatically speeds up target acquisition when you are working against a time crunch in the field.
Spotting scopes change target shooting by showing bullet impacts at distances where iron sights and even some riflescopes fall short. For most rifle work between 300 and 1,000 yards, 20-40x magnification gives the best balance of field of view and detail.
Position the spotting scope 10-15 degrees off your firing line, slightly to the side. This prevents recoil vibration from disturbing your view and lets you transition quickly between spotting and shooting. Focus at the distance you expect to see impacts before you start shooting, and keep both eyes open for fastest target acquisition.
For 1,000-yard work, a 60x eyepiece is helpful, but you will need a stable tripod and a quality scope with ED glass. Budget at least a full second between shots to allow the image to settle, and resist the urge to refocus unless the impact area clearly changed distance.
Spotting scopes are not designed for astronomy, but they deliver surprisingly good lunar and planetary views in a pinch. The moon resolves craters and mountain shadows at 40-60x, Jupiter’s Galilean moons are easy to see, and Saturn’s rings appear at higher magnification under steady air.
Limitations matter: terrestrial scopes lack the large apertures, equatorial mounts, and anti-reflection coatings optimized for deep-sky work. A 90mm spotting scope will not show the Orion Nebula the way a 6-inch Dobsonian will. For casual lunar and planetary observation, however, a spotting scope is a capable and portable option, especially if you already own one.
Digiscoping, which is the practice of photographing through a spotting scope with a phone or camera, has matured into a serious technique in 2026. The optics you already own produce images that match or beat entry-level camera setups, and modern phone adapters make alignment much easier than it was a few years ago.
There are three main approaches. Phone adapters clamp your smartphone over the eyepiece and align its lens with the scope’s exit pupil. DSLR or mirrorless cameras mount via a T-adapter and a camera-specific scope adapter, which produces the sharpest results but adds bulk. Action cameras (GoPro and similar) work for video but rarely match phone or DSLR quality for stills.
For most beginners, a universal phone adapter is the right starting point. Look for models that adjust for both phone size and eyepiece diameter, since eyepieces vary from 35mm to 50mm or more. Brands like Celestron, Gosky, and Nova make well-reviewed adapters in the $30-80 range. Premium options from Swarovski and Zeiss use bayonet mounts that snap on in seconds.
Use this workflow for the best results:
Patience matters. Even experienced digiscopers take 20 to 30 shots to get one keeper, especially at higher magnifications. A remote shutter or phone timer prevents camera shake, and shooting in good light with low magnification always produces better results than trying to push the magnification in poor conditions.
The real advantage of digiscoping is that you are using optics worth hundreds or thousands of dollars through hardware you already own. For birders and hunters in 2026 who want to document sightings without buying a long telephoto lens, digiscoping is hard to beat on cost and convenience.
Even experienced users run into problems. The good news is that the most common issues have well-known fixes. The trick is to identify the cause quickly so you can adjust instead of fighting the optic for the rest of the session.
Quick Summary: Most spotting scope problems come from three sources: unstable tripod setup, starting at too high magnification, or incorrect focus technique. Check those first before suspecting the optic itself.
If your image sharpens at low power but blurs when you zoom in, the cause is almost always atmospheric conditions. Heat waves, dust, and humidity all become more visible at higher magnifications. No optic, no matter how expensive, can fix air that is shimmering.
Real-world tests by Kowa, Swarovski, and other major optics brands confirm that reliable bird identification is typically limited to 50-150 meters, even with premium ED glass. Beyond that, you are working with image hints rather than crisp details. Drop to 20-30x and wait for cooler air in the morning or evening. A premium scope in poor conditions will lose to a budget scope in good conditions every time.
If the blur appears at all magnifications, check tripod stability first. Tighten every lock, hang nothing from the tripod, and consider weighting the center column in wind. A loose leg or a hanging camera bag will produce a wobble that looks like optical blur.
Spending ten minutes searching for a target you know is there is the classic beginner experience. The fix is always the same: go back to lowest magnification, find the target with your eyes, and use the landmark method. Do not increase magnification hoping to find it; that only narrows the field of view further.
Practice on stationary targets first: street signs, distant buildings, treetops. Build the targeting skill before you attempt to find small, moving wildlife. Most birders spend a season or two learning target acquisition before they feel confident, and that is completely normal.
Black crescents or vignetting at the edges of your view is an eye relief problem. Adjust the eyecup up or down, and move your head slightly closer or farther from the eyepiece until the full circular image is visible. The right distance is usually within 5mm of where the eyecup naturally sits.
Glasses wearers should keep the eyecup twisted down and bring their glasses as close to the eyepiece as possible. If you have a strong prescription, consider removing your glasses and using the scope’s dioptric adjustment to compensate. Many spotting scopes provide enough dioptric range to correct mild vision differences.
Dim images have a few possible causes. First, check that every lens cap is removed. Next, consider the time of day: even scopes with ED glass and 85mm objectives struggle at dawn and dusk. Cloud cover reduces available light by 50% or more, so on overcast days you will need to stay below 40x.
Clean lenses make a real difference. A single fingerprint can reduce light transmission by 5%, and dust buildup cuts contrast noticeably. Use a soft brush or air blower first, then a microfiber cloth with proper lens cleaning solution for smudges. Avoid paper towels and clothing, which can scratch the anti-reflective coatings that scopes from Vortex, Swarovski, and others spend a premium to apply.
Vibration with a tripod in place usually points to a tripod that is too light, wind exposure, or vibration traveling through the ground. Add weight to the center column or hang a small pack from the tripod hook to dampen oscillation. In wind, lower the center column and find a natural windbreak such as a vehicle, rock, or tree line.
If the shake appears only when you touch the focus knob, lighten your touch. Heavy-handed focusing is a common source of vibration at high magnification, and the fix is simply a lighter finger. Dual-speed focus knobs help, since the fine adjustment is much more sensitive than the coarse adjustment.
Choosing between angled and straight spotting scopes is one of the most common decisions buyers face. The table below summarizes the main trade-offs based on what experienced users in forums and 2026 optics retailers consistently report.
| Feature | Angled Eyepiece | Straight Eyepiece |
|---|---|---|
| Best for | Birding, group viewing, long sessions | Hunting, target shooting, vehicle use |
| Target acquisition | Slower, must compensate for offset | Faster, intuitive pointing |
| Comfort | Easier on neck and back at higher angles | Better at lower angles, awkward looking up |
| Tripod height | Lower tripod sufficient | Tripod must be at eye level |
| Group sharing | Excellent, multiple heights work | Limited, must adjust tripod for each viewer |
| Window mount use | Awkward, forces twisted posture | Natural fit |
| Window mount | Limited | Excellent |
| Weight distribution | Heavier eyepiece end | More balanced |
| Price parity | Same as straight in most model lines | Same as angled in most model lines |
The general recommendation from guides, optics retailers, and birding instructors: choose angled for birding and general nature observation, choose straight for hunting, target shooting, and vehicle-based viewing. For a deeper comparison, see our full angled vs straight spotting scope guide.
The numbers represent magnification range and objective lens diameter. 20-60x means the scope magnifies from 20 times to 60 times your naked-eye view. 80mm is the front lens diameter, which controls how much light the scope gathers. Larger objective lenses (80mm or 85mm) produce brighter images in low light, while smaller ones (50-60mm) keep the scope compact and light.
Reliable bird or game identification is typically limited to 50-150 meters (about 55-165 yards), even with premium ED glass. You can detect large movement much farther, often out to 1,000 yards or more, but identifying species, counting antler points, or reading fine details usually tops out around 150 meters. Atmospheric stability, target size, and your scope’s optical quality all set the practical limit.
In perfect conditions with a 20-60×85 spotting scope, you can identify a large bird at 500-800 yards or read license plates at 300-400 yards. For most practical observation, however, atmospheric conditions and target size limit useful viewing to 200-400 yards. Magnification beyond 40-50x rarely improves detail because the air itself becomes the bottleneck.
Spotting scopes use larger objective lenses and a single eyepiece at higher magnification, which is why they require a tripod for stability. This design delivers 5-10x more magnification than typical binoculars but sacrifices portability and field of view. Use binoculars for scanning and finding, then switch to a spotting scope for detailed study of a specific subject.
Reach for a spotting scope when you need to identify small or distant subjects, judge antler points, or read bullet impacts at 300+ yards. Reach for binoculars when you are moving through habitat, scanning tree lines, or watching fast-moving flocks. Most experienced birders, hunters, and shooters carry both and use them as a team.
Start at the lowest magnification. Find the target with your eyes or binoculars, then pick a fixed reference point right next to it. Sight along the body of the scope (not through the eyepiece) and align that reference point with the lens center. Drop your eye to the eyepiece, and the target should be in or near your field of view. If you cannot see it, do not zoom in; go back to minimum magnification and re-aim.
Angled scopes are more comfortable for extended viewing, better for group sharing, and easier when looking upward at birds in trees. Straight scopes are more intuitive for target acquisition and work better from vehicles or prone positions. Most birders prefer angled; most hunters and target shooters prefer straight.
Yes, with limitations. A spotting scope shows lunar craters, Jupiter’s Galilean moons, and Saturn’s rings clearly. However, terrestrial scopes lack the large apertures and coatings that dedicated astronomy telescopes have. For casual lunar and planetary observation, a spotting scope is a capable and portable option. For deep-sky viewing, a purpose-built astronomy telescope is a better investment.
Plan on at least $300 for a usable entry-level setup including both scope and tripod. Quality kits from Vortex, Celestron, and similar brands start around $500-600, and premium models from Swarovski, Zeiss, and Leica run $2,000 and up. Allocate 30-40% of your budget to a quality tripod; support gear matters as much as the scope itself.
Use a soft brush or air blower to remove dust first. For smudges, apply lens cleaning solution to a microfiber cloth (never directly to the lens) and wipe gently in circular motions from center to edge. Never use paper towels, tissues, or clothing, which can scratch the anti-reflective coatings. A lens pen designed for optics is a good field option for quick smudge removal.
Shake with a tripod in place usually points to a tripod that is too light, wind exposure, or vibration traveling through the ground. Add weight to the center column via a hook and pack, lower the center column in wind, and find a natural windbreak. If the shake only happens when you touch the focus knob, lighten your touch; heavy-handed focusing is a common source of vibration at high magnification.
Mastering a spotting scope in 2026 is mostly a matter of building good habits. Spend your first few sessions on easy targets: street signs, distant buildings, or large trees. Build confidence with stationary subjects before you start chasing live birds or hunting open country. The skills transfer directly, and you will make far fewer beginner mistakes when conditions get tough.
Remember the golden rule that holds up in every forum thread, field guide, and optics review: stability first, then clarity. No amount of expensive glass can overcome a wobbly tripod. Invest in a quality tripod and head, and your viewing experience will improve dramatically regardless of whether you are using a budget scope or a $3,000 Swarovski.
For those ready to upgrade their equipment, our guides to spotting scopes vs binoculars, angled vs straight spotting scopes, and compact spotting scopes cover the buying decisions in detail. Each one will help you choose the right optic for the kind of viewing you actually do.
The spotting scope community in 2026 is generous with knowledge. Do not hesitate to ask experienced users for tips, visit a local optics retailer to test scopes in person, and join a birding or shooting club to learn from people who use these tools daily. With the techniques in this guide and regular practice, you will soon be identifying distant birds, judging game at long range, and reading bullet impacts with confidence.
![What Is A Prism Scope: Complete Guide [cy]](https://revellphotography.com/wp-content/uploads/2026/09/featured-update-4794-1789230406771.jpg)