
Rifle Scope Objective Lens Diameter: Complete Guide 2026
Complete technical guide to rifle scope objective lens diameter. Learn how to choose the right size for your shooting needs,…

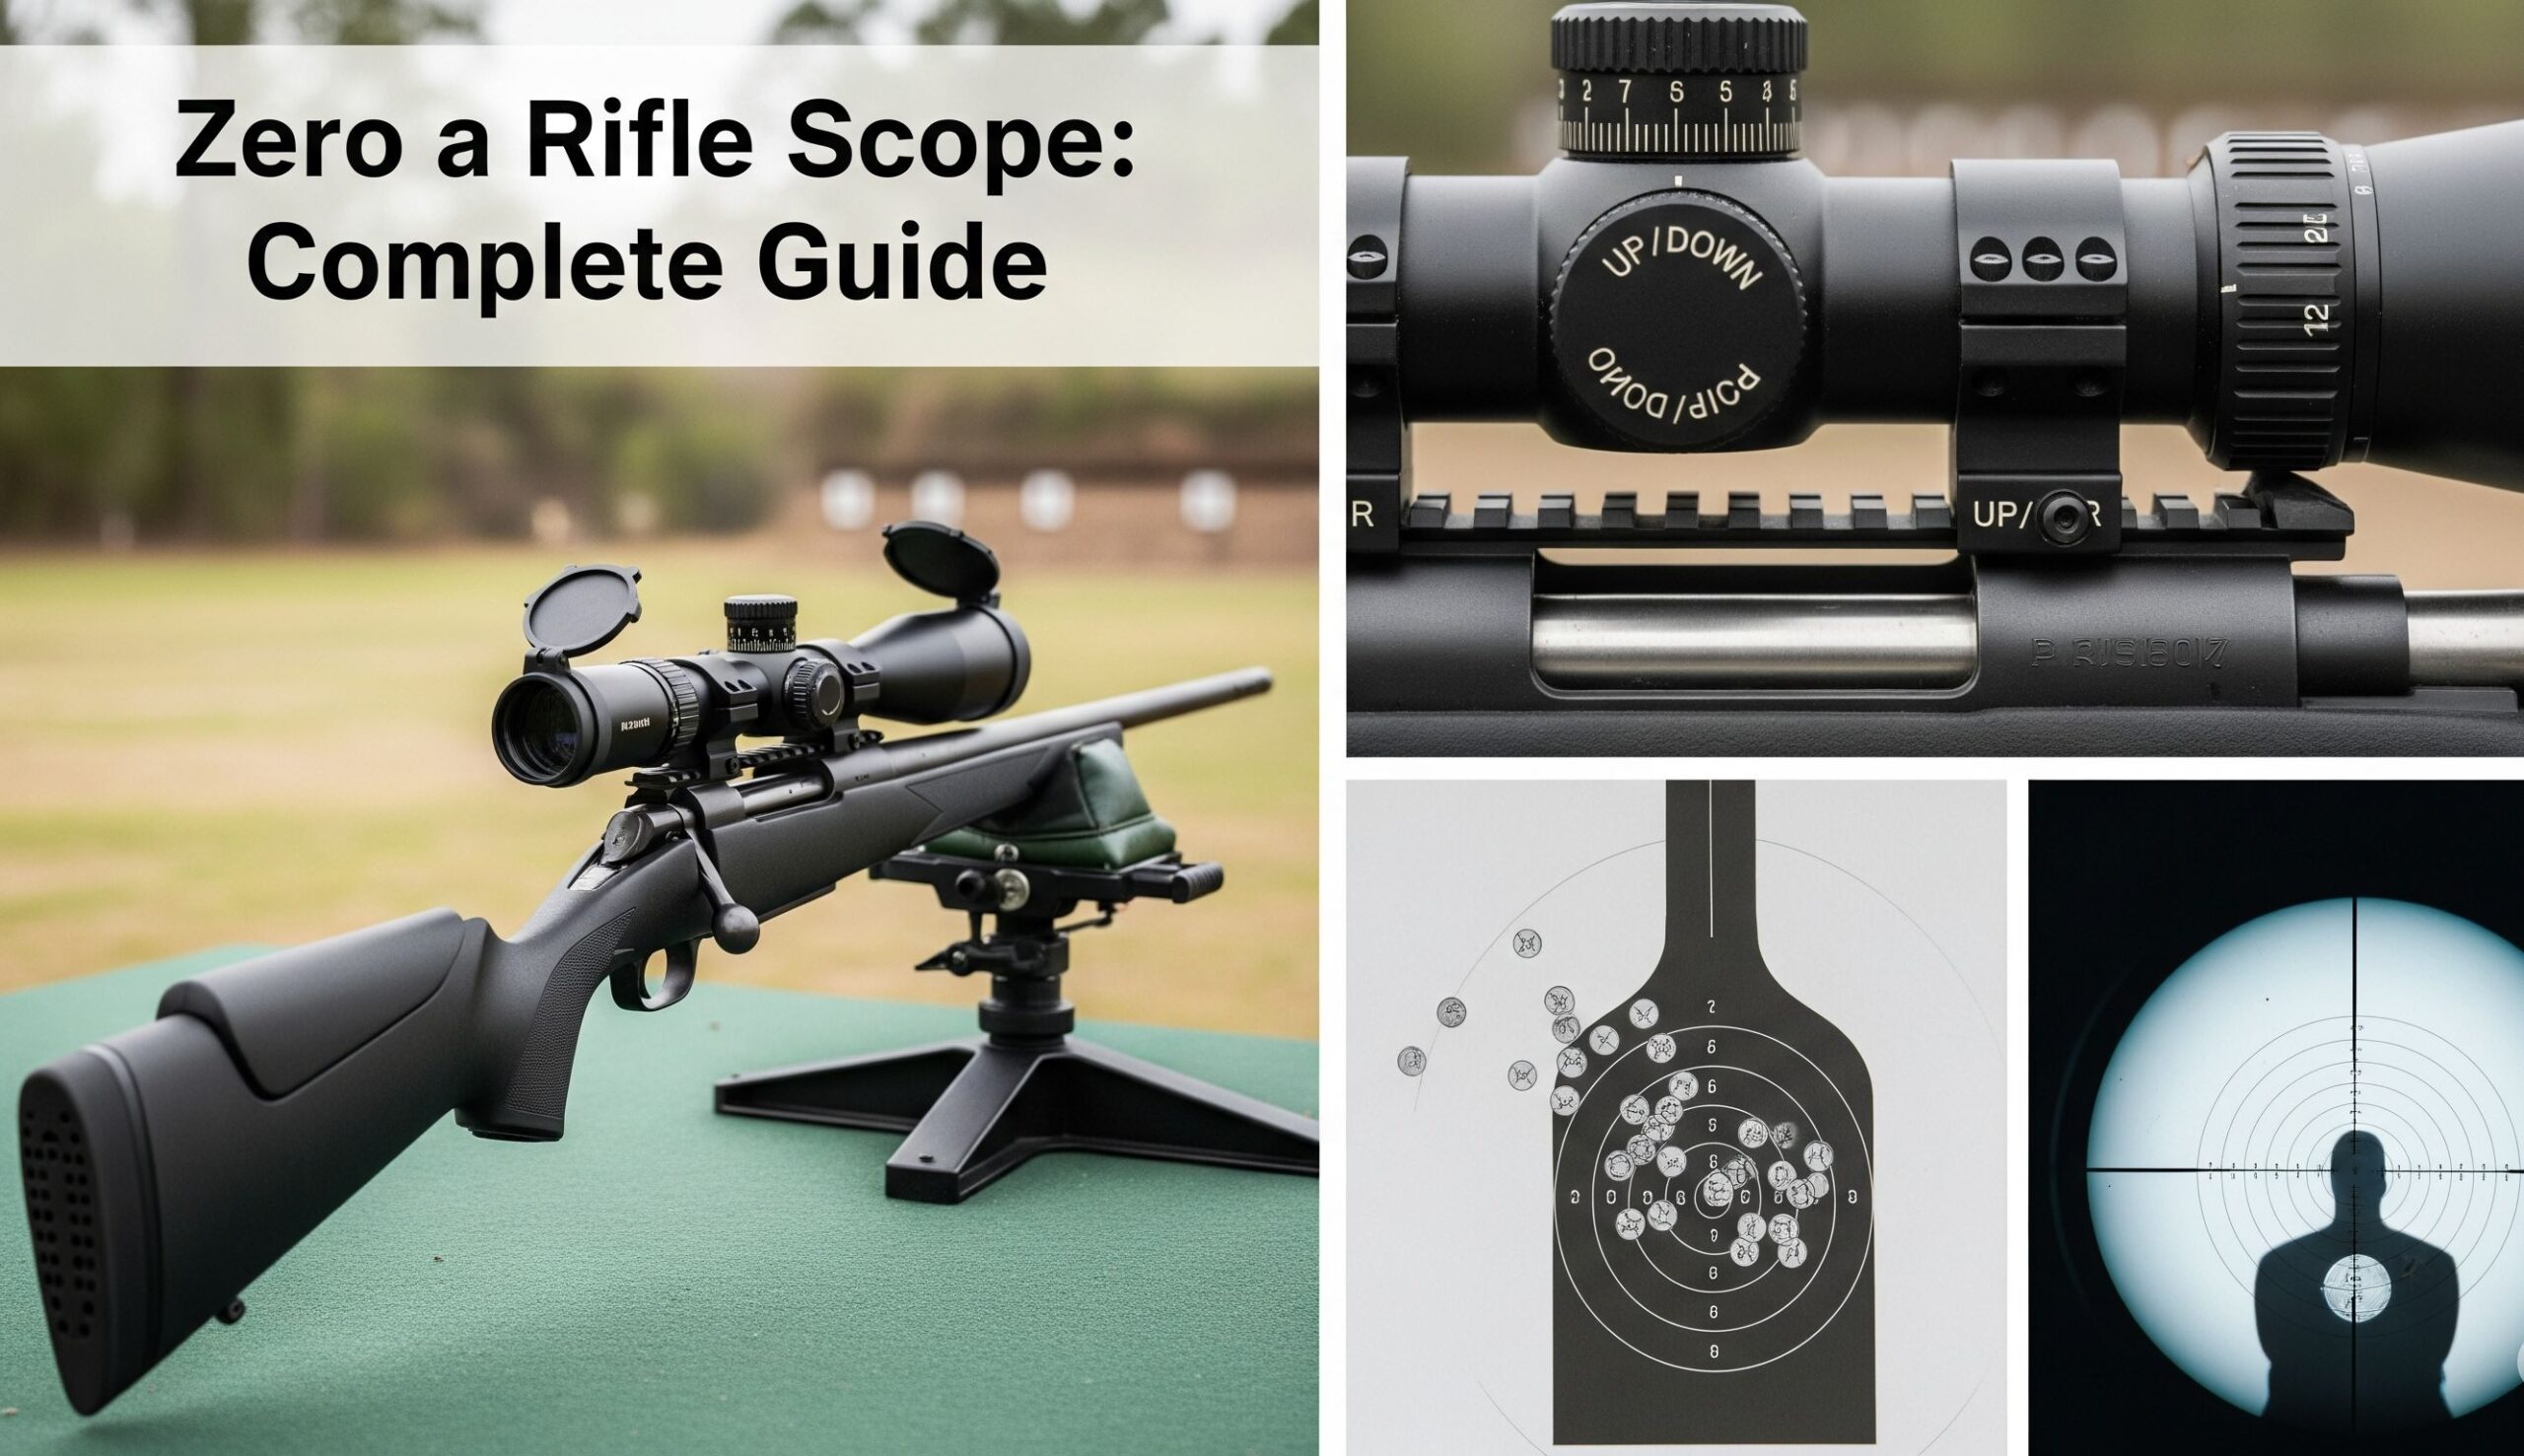
Every shooter faces that moment at the range: you’ve got your rifle setup, quality ammunition, and a solid rest, but your shots are hitting nowhere near where you’re aiming. The ability to properly zero a rifle scope separates frustrated shooters from confident marksmen who can consistently place shots exactly where intended. This comprehensive guide breaks down the zeroing process into clear, actionable steps that work for any rifle platform, from bolt-action hunting rifles to modern sporting rifles.
Learning how to zero a rifle scope isn’t complicated, but it does require understanding a few fundamental concepts. The process aligns your scope’s optical line of sight with your bullet’s actual point of impact at a specific distance. Without this alignment, even the most expensive equipment will fail to deliver accuracy. In 2026, zeroing technology has evolved significantly, yet the core principles remain unchanged. Whether you’re a hunter preparing for season, a competitive shooter dialing in your setup, or a new AR owner learning your optic, this guide covers everything from basic terminology to advanced zeroing techniques.
Zeroing a rifle scope means adjusting your optic so that the point of aim (where your crosshairs are aligned) matches the point of impact (where your bullet actually strikes) at a specific distance. This adjustment compensates for the physical offset between your scope and barrel, along with the natural arc of your bullet’s trajectory.
The physics behind zeroing involves two separate lines: your line of sight through the scope, and the bullet’s path from the bore. These lines start at different points because your scope sits above your barrel. As the bullet travels downrange, gravity pulls it into an arc. Your scope’s adjustments align these lines at your chosen zero distance, ensuring that what you see is what you hit.
Before diving into the zeroing process, it’s important to understand the language shooters use when discussing scope adjustments. These terms appear throughout this guide and in shooting communities worldwide.
The debate between MOA and MRAD systems is common in shooting circles, but both accomplish the same goal: they provide a consistent way to measure and adjust your scope. The key difference lies in the math and how adjustments are calculated.
MOA (Minute of Angle) is based on degrees of a circle. One minute is 1/60th of a degree. At 100 yards, 1 MOA equals 1.047 inches (often rounded to 1 inch). This imperial system makes mental math easier for American shooters accustomed to inches. Most hunting scopes use MOA adjustments, typically in 1/4 MOA increments.
MRAD (Milliradian) is a metric-based system where 1 MRAD equals 3.6 inches at 100 yards, or 1 centimeter at 10 meters. MRAD scopes typically adjust in 0.1 MRAD clicks, which equals 0.36 inches at 100 yards. This system is preferred by tactical and long-range precision shooters because it scales more cleanly with metric range estimation.
For most hunting and general shooting applications, MOA works perfectly fine. If you plan to pursue long-range precision shooting or use mil-dot reticles for range estimation, MRAD offers advantages. The important thing is understanding which system your scope uses and doing the math correctly when making adjustments.
Here’s a practical example: if you’re shooting 3 inches high at 100 yards with a 1/4 MOA scope, you need 12 clicks of downward adjustment (3 inches divided by 0.25 inches per click). With a 0.1 MRAD scope, the same 3-inch correction would require approximately 8 clicks downward.
Before heading to the range for zeroing, review these critical safety protocols. An improperly zeroed rifle isn’t just inaccurate—it can be dangerous if you’re compensating for missed shots in unsafe ways.
Having the right equipment before you arrive at the range saves time, ammunition, and frustration. While you can zero a scope with minimal gear, proper tools make the process significantly more efficient and accurate.
Modern technology offers several tools that can significantly streamline the zeroing process and get you on paper faster:
Follow these detailed steps to achieve a precise zero on your rifle scope. This method works for all rifle types—bolt-action, semi-auto, lever-action, and modern sporting rifles—though specific adjustments may vary based on your equipment.
Before zeroing, ensure your scope is properly mounted. Correct eye relief (typically 3-4 inches) prevents scope bite from recoil. The scope must be level with your rifle—any cant causes horizontal drift at longer ranges. Use a bubble level on your scope’s turret cap to verify it’s perfectly horizontal. Check that all mounting screws are torqued to manufacturer specifications, usually 15-25 inch-pounds for rings and 25-35 inch-pounds for bases.
Bore sighting gets you “on paper” before firing your first shot, saving ammunition and frustration. For bolt-action rifles, remove the bolt and look through the bore at a target 25 yards away. Center the target in the bore, then adjust your scope to center the reticle on the same point without moving the rifle. For semi-autos and other rifles where you can’t see through the bore, use a laser bore sighter or visual bore sighting by aligning the barrel with the target and adjusting the scope accordingly.
Starting at 25 yards is smart even if your ultimate zero distance is farther. Fire a 3-5 shot group at the center of your target, aiming at the exact same point each time. Don’t adjust between shots—you want to see your rifle’s natural group size and dispersion. Allow your barrel to cool between shots if firing multiple groups rapidly. After firing, examine where your group center is relative to your aim point.
Most scopes adjust in 1/4 MOA (Minute of Angle) increments. At 100 yards, 1 MOA equals approximately 1 inch. At 25 yards, the math changes: 1 click = 1/16 inch of movement, meaning 16 clicks equal 1 inch. Count the squares on your target grid to determine how many inches you need to move, then calculate the required clicks. Remember the adjustment direction: turn the elevation turret the direction indicated on the scope (usually “U” or “UP” to move impact up, “D” or “DOWN” to move it down). For windage, “L” moves impact left and “R” moves it right.
Pro tip: if you’re struggling to remember which way to turn turrets, use this memory aid: turn the adjustment screw toward the direction you want the bullet to go. If you’re hitting low, turn the elevation turret so the top moves toward you (usually clockwise on the top turret). This chases the bullet hole.
After getting centered at 25 yards, move to your intended zero distance. Repeat the process of firing a 3-5 shot group and making adjustments. Most shooters find that 25-yard zero gets them very close at 100 yards, often within 2-3 inches. Make final adjustments at your chosen distance. Fire a final confirmation group to verify your zero is solid before considering the process complete.
Not every shooter has access to a traditional shooting bench. The good news is that you can achieve an accurate zero from alternative positions using proper technique. The key is consistency—whatever position you use must be repeatable.
Prone position with a bipod is the most stable alternative to bench rest. Extend your bipod legs fully and pull the rifle firmly into your shoulder. Use a rear bag under the stock’s toe for additional stability. This position closely mimics field shooting positions and gives excellent results.
Sitting position with shooting sticks or a backpack as a rest works well for hunting rifles. Position your support so the rifle’s forend rests naturally without requiring you to hold it up. Your support hand should pull the rifle into your shoulder, not push it away.
For zeroing at indoor ranges with limited distance, use the 25-yard approach and calculate your zero at distance. Many scopes have ballistic reticles or holdover marks that let you confirm your zero at longer distances even when restricted to shorter ranges.
The golden rule for non-bench zeroing: if you can’t get consistent groups, your position is the problem, not the rifle. Work on your stability before blaming the equipment. A good zero from a stable field position is often more practical than a bench zero that doesn’t translate to real-world shooting.
Choosing the right zero distance depends on your intended use and typical engagement ranges. Each distance offers distinct advantages and trade-offs that affect your shooting in 2026. Understanding ballistic trajectory helps you select the optimal zero for your specific needs.
A 25-yard zero serves specific purposes well. It’s ideal for close-range hunting in dense woods where shots rarely exceed 75 yards. Home defense applications benefit from this zero since most defensive encounters occur within this distance. It’s also the standard starting point for initial sight-in before moving to longer distances.
With most rifle calibers, a 25-yard zero will have you shooting slightly high at 100 yards (typically 2-4 inches) and back on target around 200-250 yards, depending on your cartridge. This creates a “point blank” zero where you can hold center on targets from contact distance out to your maximum point blank range without significant holdover.
The 50-yard zero offers excellent versatility across a wide range of shooting scenarios. It provides minimal holdover required from 0-200 yards with most common calibers. This zero is popular for tactical applications and versatile hunting scenarios where shot distances vary unpredictably.
When you zero scope at 50 yards effectively, your point of impact will be approximately 1.5 inches high at 100 yards and return to zero around 200 yards with most common calibers like .223, .308, and 6.5 Creedmoor. This creates a forgiving trajectory that keeps you within vital zone accuracy across typical hunting ranges.
The traditional 100-yard zero provides predictable trajectory for long-range shooting. With this zero, all holds beyond your zero distance are “holdover”—there’s no confusion about holding under, which can happen with mid-range zeros. It’s the standard for most western hunting applications where shots may exceed 200 yards.
Long-range precision shooters almost universally use a 100-yard zero as their baseline. This makes calculating adjustments for longer distances straightforward since you’re always dialing for additional drop. It also simplifies ballistic calculations and dope card creation.
A scope zeroing chart helps visualize bullet trajectory at different distances. These charts show how your bullet’s path relates to your line of sight, helping you understand holdover requirements at various ranges. Here’s how to interpret the data for common zero distances with .223/5.56 NATO ammunition:
| Distance (yards) | 25-Yard Zero | 50-Yard Zero | 100-Yard Zero |
|---|---|---|---|
| 25 | 0″ | -0.9″ | -1.5″ |
| 50 | +1.3″ | 0″ | -0.8″ |
| 100 | +2.8″ | +1.5″ | 0″ |
| 200 | 0″ | -1.8″ | -8.5″ |
| 300 | -9.2″ | -9.5″ | -23.4″ |
The chart shows how a 50-yard zero provides the flattest trajectory across the most common shooting distances (0-200 yards), while a 100-yard zero requires significant holdover at longer ranges but offers the most predictable adjustments for precision shooting. Understanding these trajectories helps you choose the right zero for your specific application.
Sometimes you need to reset your scope to mechanical zero, especially when mounting on a new rifle, after significant adjustments, or if you’ve lost track of your zero. Finding mechanical zero ensures you have maximum adjustment range in all directions for future zeroing.
This centers your scope mechanically, providing maximum adjustment range in all directions for future zeroing. After finding mechanical zero, most shooters mark this position with tape or a paint pen for future reference. Some scopes feature resettable turrets that can be zeroed after sight-in, allowing you to return to your zero by simply dialing to the marked index line.
Rifle scope technology has evolved dramatically in 2026, with smart optics offering features that seemed like science fiction just a decade ago. While no true “self-zeroing” scope exists yet—meaning a scope that zeros itself without any user input—modern systems dramatically simplify and accelerate the zeroing process.
Sig Sauer’s BDX (Ballistic Data Exchange) system represents the cutting edge of consumer smart scopes. These scopes pair with a smartphone app and laser rangefinder to automatically calculate and display holdover dots based on your specific ammunition and environmental conditions. While you still need to perform an initial traditional zero, the system then handles all long-range calculations automatically.
The Burris Eliminator IV and V series feature built-in laser rangefinders that display the exact aiming point for your target’s distance. After zeroing at 100 yards, the scope uses internal ballistic data to light up LED holdover points on the reticle. You simply place the illuminated dot on your target and fire—no manual calculations required.
Products like the Axeon Absolute Zero use dual lasers to eliminate hold error during zeroing. The system projects two laser points that maintain their relative position. You fire a shot, adjust your scope to align with the impact point while the lasers keep your rifle perfectly positioned, then confirm with a second shot. This dramatically reduces the ammunition and time required for zeroing.
Similarly, the Wheeler Professional Reticle Leveling System helps ensure perfect scope alignment during mounting, which reduces the need for extensive zeroing adjustments. Proper alignment from the start means fewer clicks needed to achieve zero.
Modern thermal scopes like Pulsar and Trijicon models feature one-shot zero functions that digitally capture your first shot’s impact and automatically adjust the reticle position. The scope’s software recognizes the shot signature relative to your aim point and shifts the electronic zero accordingly. While still requiring you to fire, the process is much faster than traditional mechanical adjustments.
Some advanced digital scopes now offer multiple zero profiles that you can save and switch between. This allows different zeros for different ammunition loads or shooting conditions—all stored in the scope’s memory and selectable with a button press. No more turret adjustments or confusion about which zero you’re currently using.
While these technologies are impressive, they all still require that initial traditional zero. The smartest scope in the world can’t compensate for a poorly mounted optic or improper shooting technique. Consider these advanced options as enhancements to, not replacements for, fundamental zeroing skills.
One often-overlooked factor in zeroing is barrel temperature. As you fire shots during the zeroing process, your barrel heats up and expands slightly. This thermal expansion can shift your point of impact, especially with thinner sporter-weight barrels common on hunting rifles.
For accurate zeroing, allow your barrel to cool between groups. A good rule of thumb is to wait 2-3 minutes between 3-5 shot groups, or until the barrel feels only slightly warm to the touch. In hot weather, you may need to wait longer or use a fan to accelerate cooling.
Be aware of “cold bore” versus “warm bore” shifts. Some rifles, particularly some precision rifles, will shoot to a different point of impact with the first shot from a cold barrel versus subsequent shots from a warm barrel. Document your zero condition so you know whether you’ve zeroed for cold bore or warm bore, and plan accordingly for your first shot in the field.
Competition shooters often zero with a warm barrel since that’s the condition their rifle will be in during matches. Hunters typically zero for cold bore since that’s how their rifle will be when taking that first shot at game. Match your zeroing conditions to your actual shooting conditions for best results.
A common question among new shooters is whether magnification affects zero. The short answer: no, magnification does not change your point of impact, provided your scope is properly designed and manufactured. Your zero holds true across the entire magnification range.
However, there’s an important distinction between first focal plane (FFP) and second focal plane (SFP) reticles. With FFP scopes, the reticle appears to grow and shrink as you change magnification. This means the reticle’s mil-dot or MOA hash marks remain accurate at any magnification for range estimation and holdover.
With SFP scopes, the reticle size stays constant while the target image grows and shrinks. This means your reticle’s hash marks are only accurate for range estimation at one specific magnification (usually the highest power). Your zero remains the same, but using the reticle for holdover requires being at the correct magnification.
For zeroing purposes, you can use any magnification that provides a clear, comfortable sight picture. Most shooters prefer using the mid to upper range of their scope’s magnification for zeroing, as this provides the most precise view of the target. Just ensure you maintain consistent cheek weld and eye position throughout the zeroing process, as parallax error can affect your perceived point of aim more at higher magnifications.
Understanding how to apply your zero in real-world situations is crucial for consistent accuracy. Different shooting disciplines require different approaches to zeroing based on typical engagement distances and conditions.
For hunting, consider your typical shot distances and environment. Dense eastern woods hunters often use a 25-yard zero for shots under 100 yards. Mixed terrain hunters benefit from a 100-yard zero that provides predictable holdover for occasional longer shots. Western hunters pursuing game in open country often zero at 200 yards or beyond to minimize holdover at typical engagement distances.
Remember that environmental factors like temperature and altitude can shift your zero, especially at longer ranges. A rifle zeroed in summer heat may shoot differently in cold winter weather. Hunters should confirm their zero before each season and note the conditions when zeroing was performed.
Competitive shooters zero based on their discipline’s requirements. 3-Gun competitors typically use a 50 or 100-yard zero for versatility across diverse stages. Precision Rifle Series competitors almost always use a 100-yard zero with detailed dope cards for longer distances. F-Class shooters are often zeroed at the competition distance since all shots are at known ranges.
Match shooters also pay careful attention to “zero confirmation” before matches. A single cold bore shot at the zero distance verifies that conditions haven’t changed since the last zeroing session. This confirmation shot is critical when match placement depends on first-round hits.
For defensive rifles, a 50-yard zero provides optimal performance at typical engagement distances while maintaining effectiveness to 200 yards. This zero minimizes holdover across the 0-200 yard range, which covers most defensive scenarios. Some tactical shooters prefer a 100-yard zero for simplicity and predictability, accepting that closer shots may require holding slightly low.
Defensive shooters should also zero with the ammunition they actually use for defense, not practice ammunition. Different loads can have significantly different points of impact, and you need to know exactly where your defensive rounds will strike.
Achieving a solid zero is an accomplishment, but properly documenting and maintaining that zero ensures your accuracy continues. Post-zero procedures are just as important as the zeroing process itself, especially for serious shooters who need consistent performance over time.
Create a zero log that documents critical information: date of zeroing, ammunition type and lot number, temperature, weather conditions, zero distance, and final turret settings. This information helps troubleshoot future issues and understand how environmental changes affect your particular rifle.
Consider investing in zero stops or scope caps with marked reference points. Zero stops physically prevent your turrets from dialing below your established zero, making it easy to return to your baseline after making temporary adjustments. Marked turrets allow you to quickly verify you’re at your zero without counting clicks.
After zeroing, perform a thorough cleaning and inspection of your rifle. Check all mounting screws and torque them to specification. Inspect rings, bases, and action screws for looseness. Document any findings in your zero log so you can track issues over time.
Finally, establish a regular zero confirmation schedule. Many shooters confirm their zero before hunting season, after any significant impact to the rifle, when changing ammunition lots, or periodically throughout the shooting season. A single confirmation shot at your zero distance quickly verifies that everything is still aligned properly.
Even experienced shooters encounter zeroing challenges. The key is systematic troubleshooting rather than random adjustments. Here are solutions to common issues that arise during the zeroing process:
| Problem | Likely Cause | Solution |
|---|---|---|
| Can’t get on paper at 100 yards | Scope mounted incorrectly or bore obstruction | Start at 10 yards, check mount screws and bore, verify rings are tight |
| Groups won’t stay consistent | Loose mount, inconsistent ammo, poor technique | Check all screws, use match ammo, improve fundamentals, allow barrel cooling |
| Zero shifts between sessions | Temperature changes, loose components, different ammo | Re-torque all screws to spec, note temperature when zeroing, use same ammo lot |
| Clicks don’t track properly | Scope quality issue or internal damage | Perform box test, may need scope service or replacement |
| Running out of adjustment travel | Mounts not aligned, wrong base configuration | Check mount alignment, consider tapered base or offset rings |
| Shots group well but in wrong place | Consistent shooter error or scope position issue | Verify cheek weld, eye relief, shoulder position, check scope level |
| Zero changes with different ammunition | Normal ballistic variation | Zero with ammunition you’ll actually use, or document zeros for different loads |
| Shots string vertically during zeroing | Barrel heat, inconsistent hold, mirage | Allow cooling time, maintain consistent pressure, use sunshade if available |
| Groups open up after initial shots | Barrel fouling, barrel heating, shooter fatigue | Document cold bore vs warm bore impact, take breaks, clean if necessary |
| Zero shifts when changing magnification | Parallax issue or scope quality problem | Adjust parallax correctly for distance, may indicate scope defect |
The most common mistake shooters make when troubleshooting is changing too many variables at once. If your zero seems off, change only one thing at a time and test again. This systematic approach identifies the actual problem rather than masking symptoms with compensating adjustments.
Regular practice ensures your zero remains true and helps identify any shifts early. These drills also build confidence in your equipment and your ability to confirm zero quickly in the field.
Before each range session or hunt, fire one cold bore shot at your zero distance. This single shot verifies that your zero hasn’t shifted since your last session. If it’s within 1 inch of center, your zero is confirmed. If not, investigate why before proceeding. This quick check takes only a few minutes but can prevent missed shots when they matter most.
This essential test verifies your scope’s tracking accuracy: 1) Fire 3 shots at center. 2) Dial up 10 MOA (or 3 MRAD), fire 3 shots. 3) Dial right 10 MOA, fire 3 shots. 4) Dial down 10 MOA, fire 3 shots. 5) Dial left 10 MOA, fire 3 shots.
You should have 5 distinct groups forming a square, with the final group back at center. If the final group doesn’t return to center, your scope has tracking issues. Perform this test annually or whenever you suspect scope problems. It’s also excellent practice for dialing adjustments and understanding angular measurement.
Document your zero under different conditions to build a comprehensive understanding of your rifle’s performance. Test with cold bore versus warm bore, in different temperature conditions, and from various shooting positions. If you use a suppressor, zero with and without it to document the shift. Record all this data in your logbook for future reference.
Understanding how your rifle behaves in different conditions makes you a more adaptable shooter. You’ll know exactly how much your zero shifts from summer to winter, or what effect shooting from a different position has on your point of impact. This knowledge is invaluable for making quick adjustments in the field.
The best zero distance depends on your intended use. For general hunting and shooting, a 100-yard zero is standard and most common. A 50-yard zero provides excellent versatility from 0-200 yards with minimal holdover. Choose your zero based on your typical engagement distances and hold preferences.
Check your zero before hunting season, after any impact to the rifle, when changing ammunition types or lots, and periodically throughout the shooting season. Many experienced shooters fire a single confirmation shot before important events or hunts. Any time accuracy seems off, verify your zero first.
Yes, you can zero from any stable position. Prone with a bipod, sitting with shooting sticks, or using a backpack as a rest all work effectively. The key is consistency and stability in your position. A good zero from a stable field position is often more practical than a bench zero that doesn’t translate to real-world shooting.
Different ammunition has varying velocities, bullet weights, and ballistic coefficients. Each combination creates a unique trajectory and point of impact. Always zero with the exact ammunition you plan to use, or document separate zeros for different loads. Even different lots of the same ammunition can shift impact.
Zero your rifle in the same condition you’ll use it. If you typically shoot with a fouled bore, zero that way. Some rifles show point-of-impact shifts between clean and fouled bores. Document whether your zero is for clean or fouled barrel so you know what to expect.
You can zero at any magnification—magnification does not affect your zero. Most shooters prefer mid to high magnification for precise aiming. Use whatever magnification gives you a clear, comfortable sight picture. Just maintain consistent cheek weld and eye position throughout the process.
Some scopes have a pull-to-adjust feature on turrets. Pulling the turret out allows you to make adjustments, while pushing it back in locks the settings. This prevents accidental adjustments. Other scopes have exposed turrets that always adjust. Check your scope’s manual to understand your specific turret system.
No, these are different zeros. A 25-yard zero will shoot high at 100 yards (typically 2-4 inches with most calibers). However, you can use a 25-yard zero to establish a preliminary zero before moving to 100 yards for final confirmation. The 25-yard start saves ammunition while getting you on paper.
Successfully zeroing your rifle scope is the foundation of accurate shooting, but it’s only the beginning. The principles covered in this guide—understanding trajectory, making precise adjustments, and documenting your settings—apply whether you’re using a traditional hunting optic or the latest smart scope technology from 2026. Remember that zeroing is not a one-time event but an ongoing process that requires periodic verification and adjustment.
Keep detailed records of your zero under different conditions, including temperature, altitude, ammunition lot, and date. This data becomes invaluable for making quick adjustments in the field and understanding how your rifle behaves across various environments. Consider investing in quality tools like torque wrenches, bubble levels, and bore sighters—these investments pay dividends in accuracy and confidence.
As you gain experience, you’ll develop your own preferences for zero distance, shot group size, and verification procedures. Trust the process and resist the temptation to chase every shot. Consistent zeroing requires patience and attention to detail, but the reward is the confidence that comes from knowing exactly where your bullet will strike when you press the trigger.
Whether you’re a hunter preparing for the upcoming season, a competitive shooter dialing in for a match, or a new rifle owner learning your equipment, proper zeroing is the skill that separates frustration from satisfaction. Practice these techniques, document your results, and approach each zeroing session with the patience and precision it deserves. Your accuracy depends on it.
![Rifle Scope Parallax Adjustments: Complete Guide [cy]](https://revellphotography.com/wp-content/uploads/2026/09/featured-update-5315-1789865033761.jpg)

![Best Night Vision Scope for Hunting [cy]: Complete Guide](https://revellphotography.com/wp-content/uploads/2026/09/featured-update-586-1789816612312.jpg)