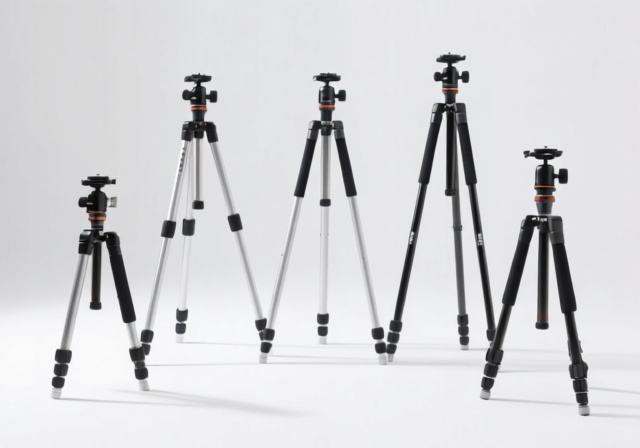
5 Best Tripods Under $100 (September 2026) Tested & Reviewed
Expert reviews of the top 5 tripods under $100 after 30 days of intensive testing. Find stable camera support that…

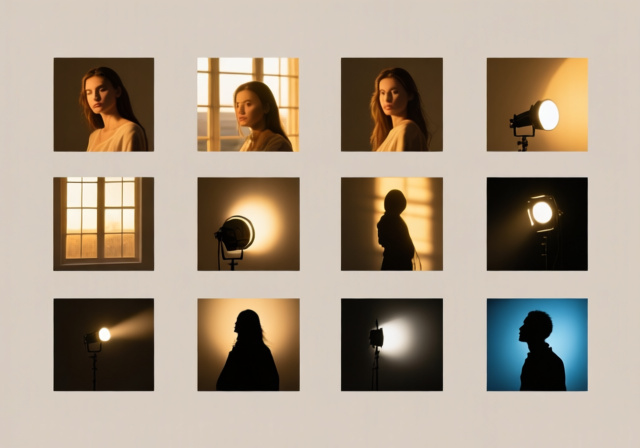
Ask any working photographer what separates a forgettable snapshot from a wall-worthy image, and the answer almost always points in the same direction: light. After tens of thousands of frames shot in basements, kitchens, deserts, and parking lots, I’ve come to believe that light photography ideas aren’t about buying gear – they’re about training your eye to see illumination as a raw material you can shape.
This updated guide collects the techniques I actually use in 2026, from pocket-sized phone shoots in a coffee shop to multi-hour outdoor sessions chasing the last light of the day. You’ll find 15+ practical light photography ideas, a fresh cheat sheet for camera settings, five named portrait lighting patterns, and a no-fluff plan for putting it all into practice this week.
If you want a broader set of photography tips and guides, the rest of the site goes deep on night, landscape, and portrait workflows. Treat this article as the bridge between your current skill level and the photographer who can walk into any room and instantly see where the light is, where it’s going, and how to use it.
Every light photography idea in this guide is built on four core properties: direction, quality, intensity, and color. Direction is where the light comes from – front, side, top, or behind your subject. Quality tells you whether the light is hard (small source, sharp-edged shadows) or soft (large source, feathered shadows). Intensity is the raw brightness hitting your sensor, and color is the temperature measured in Kelvin (K) that gives your image its emotional temperature.
Why does this matter? Because light is the only element a photograph cannot exist without. It sets exposure, builds mood, sculpts faces, defines texture, and steers the viewer’s eye. The moment you understand how these four properties interact, every scene becomes a controllable studio.
Color Temperature (Kelvin): Lower numbers (2500-3500K) look warm and amber – tungsten bulbs, candlelight, late golden hour. Mid-range (4500-5500K) is neutral daylight. Higher numbers (7000-10000K) look cool and blue – shade, blue hour, overcast sky. Set your white balance to the matching Kelvin to keep colors natural.
Many beginners ask about the 80/20 rule in photography – the idea that 80% of a great image comes from 20% of the input (typically light, composition, and timing). The practical takeaway: spend your energy chasing great light and a clean composition, and the camera, lens, and editing become supporting players rather than the headline.
Before diving into techniques, here’s the working vocabulary every photographer should recognize. Mastering these named types of light is what separates a beginner from someone who can name exactly what’s happening in any frame.
| Type of Light | What It Looks Like | Best Used For |
|---|---|---|
| Natural Light | Sunlight, window light, ambient daylight | Portraits, landscapes, lifestyle |
| Front Light (Flat) | Light aimed directly at the subject | Even, shadowless records (real estate, food) |
| Backlight | Light coming from behind the subject | Silhouettes, rim glow, hair light |
| Side Light | Light at 90 degrees to the subject | Texture, drama, dimension |
| Soft Light | Large source, gradual shadow transitions | Flattering portraits, beauty, products |
| Hard Light | Small source, sharp shadow edges | Drama, graphic shapes, texture |
| Rim Light | Light wrapping the subject from behind | Separating subject from background |
| Loop Lighting | Small nose shadow pointing down at the lip | Classic, flattering portrait |
| Butterfly Lighting | Light directly in front and above, symmetrical shadow under the nose | Beauty, fashion, glamour |
| Rembrandt Lighting | Triangle of light on the cheek opposite the source | Moody, cinematic portraits |
| Low Key Lighting | Predominantly dark, high contrast, minimal fill | Mystery, drama, film noir |
| High Key Lighting | Bright, low contrast, minimal shadows | Fashion, beauty, commercial, airy portraits |
Print this list or save it on your phone. When you walk into a scene, scan the light and try to name what you’re seeing. Naming the light is the first step to controlling it.
Natural light is free, beautiful, and available to every photographer. These eight techniques are the ones I lean on most often, organized by time of day and weather condition.
Golden hour happens twice a day – roughly the hour after sunrise and the hour before sunset, when the sun sits within 6 degrees of the horizon. The exact window shifts by latitude and season, so check an app like PhotoPills or Sun Surveyor for your local times. The light is warm (around 3000-3500K), directional, and soft enough to flatter every subject.
Set your white balance to “cloudy” or manually dial in 5500K to keep skin tones natural. The long shadows you get at this hour are gold for storytelling – they lead the eye through the frame and add a cinematic depth that midday light cannot match.
Window light has been powering professional portraits for over a century. Pull your subject 1-3 feet away from a large window, rotate them 30-45 degrees toward the source, and watch the falloff do the sculpting for you. A north-facing window in the northern hemisphere gives the most consistent, soft light all day. A south-facing window in winter is similarly flattering.
Use a white poster board on the shadow side to bounce light back into the face. This is the same trick pros use with a $300 reflector, and the result is the same for a fraction of the cost.
Clouds are a giant 100-mile-wide softbox. Overcast light is even, shadowless, and approximately 6500-7500K – slightly cool, which means skin tones render beautifully without the harsh contrast of direct sun. Don’t pack your camera on gray days. Head outside and shoot.
Overcast conditions are especially kind to outdoor portraits, flower photography, and product shots where you want texture and color, not drama. If the light feels flat, try introducing a backdrop with darker tones to give the eye somewhere to land.
Open shade – the kind under a tree canopy, a building overhang, or a covered porch – gives you the best of both worlds. The light is filtered and soft, but the open sky still acts as a giant fill source bouncing back into the shadow side of your subject. Avoid heavy, dappled shade that drops light spots on faces; the patterns read as visual noise in portraits.
Place the sun behind your subject and meter for the face. You’ll get a glowing rim around the head and shoulders, lifted dust and pollen, and a sense of separation that front light simply cannot create. Backlighting is one of the most powerful light photography ideas for both portraits and nature work.
If the contrast is too much, add a reflector or use exposure compensation +1 to +2 stops to lift the face. The background will blow out a little – that’s the point. It directs attention exactly where you want it.
Light filtering through leaves, blinds, or curtains creates patterns that are inherently photogenic. Use them for environmental portraits, food styling, and product shots. Position your subject in patches of light and shadow so the contrast tells a story.
For faces, dappled light can be distracting and unflattering. Use it instead on hands, hair, fabric, or the ground beneath the subject. Let the pattern be the hero.
Light-colored pavement, sand, water, and snow all act as natural reflectors. On sunny days, position your subject near these surfaces so the sky bounces soft, even light into the shadows. This is the cheapest fill light in the world, and you don’t have to carry anything.
Blue hour is the 20-40 minutes after sunset (and before sunrise) when the sun sits 4-8 degrees below the horizon. The sky shifts to a deep cobalt, around 8000-10000K, while artificial lights – streetlamps, building windows, signs – punch through with warm amber contrast. Use a tripod, set ISO 100-400, and let the long exposure (1-30 seconds) do the work.
For deeper low light photography techniques and night shooting strategies, the dedicated guide to photographing stars walks through the long-exposure settings and gear choices that make blue hour work sing.
These five named patterns are the foundation of studio lighting for beginners. Once you can recognize and recreate them, you can walk into any room and intentionally produce a recognizable style rather than hoping the light cooperates.
Place the key light directly in front of the subject, slightly above eye level, angled down. The result is a small, symmetrical shadow under the nose that looks like a butterfly. It sculpts cheekbones, emphasizes eyes, and is the classic look for beauty and glamour work. Use it with a reflector below the chin to soften the under-eye shadows.
Move the key light to roughly 45 degrees to the side and 45 degrees above eye level. You’ll see a triangle of light form on the cheek opposite the source, no wider than the eye and no longer than the nose. Named after the painter who used it constantly, this pattern adds depth and a painterly quality. It flatters most face shapes and is the workhorse of cinematic portraits.
Loop lighting is the small step between flat front light and Rembrandt. Position the light 30-45 degrees off-axis and slightly above eye level. A small loop-shaped nose shadow drops toward the corner of the mouth but does not connect with the cheek shadow. It’s the safest, most universally flattering pattern and is where most portrait sessions should start.
Move the light 90 degrees to the side of the subject. The face divides cleanly into a lit half and a shadow half. Split lighting is bold, dramatic, and unforgiving – it brings out every texture and line. Use it for character studies, musicians, athletes, and anyone whose face you want to treat like a landscape.
These are variations on the side-light position. Turn the subject’s face slightly off-camera. The side of the face turned toward the camera is “broad lighting” – it makes narrow faces look fuller. The side turned away from the camera is “short lighting” – it slims round faces and adds mystery. Combine short lighting with Rembrandt and you have one of the most cinematic looks in portraiture.
Once you’ve mastered the basics, these creative techniques add personality and storytelling. Each one rewards experimentation – take 20 frames and pick the one that surprises you.
Place your subject in front of a bright background – sunset sky, bright window, illuminated wall – and meter for the highlights. The subject goes pure black, which forces the viewer to read shape and posture instead of expression. Silhouettes are powerful for group photos at sunset, lone trees on ridgelines, and dancers in doorways.
Go one step further than a full silhouette. Let the brightest part of the rim light wrap around and just barely illuminate a cheek, a shoulder, or a hand. Partial silhouettes carry the mystery of pure silhouette but add a hint of context. They’re especially striking for couples, athletes, and anyone in motion.
Look for scenes where one small area is lit and everything around it is dark – a shaft of sun through a window onto a floor, a streetlamp catching a single subject on an empty street, a candle on a dark table. The eye has nowhere else to look, which is the entire point. Shoot wide open (f/1.8-f/2.8) to dissolve the surroundings into soft darkness.
Lens flare is no longer a flaw to be cleaned up. Position your camera so the sun is just out of frame, or partially in frame, and let the streaks and orbs add atmosphere. Shoot at f/2.8 or wider for pronounced ghosting. Modern lenses often include coatings that minimize flare – older manual-focus lenses give you the cinematic “anamorphic” look straight out of camera.
Stop down to f/11-f/16 and any point light source – the sun peeking through trees, a streetlamp, a candle – becomes a star. The number of points on the star is determined by your lens’s aperture blade count. Even-bladed apertures make round stars; odd-bladed apertures make pointed stars. This is one of the easiest light photography ideas to deploy the next time you’re out at golden hour.
Rain just ended? Head outside. Wet pavement turns into a black mirror, doubling every neon sign, headlight, and streetlamp. Shoot from a low angle with the camera nearly touching the ground to emphasize the reflection. This is one of the most cinematic cityscapes you can make without special gear.
String lights, Christmas lights, or fairy lights at the back of the frame, shot wide open, become soft, glowing orbs. This is the heart of bokeh photography. Place the lights at least 6-10 feet behind your subject, use a fast prime (50mm f/1.8 or 85mm f/1.8), and the out-of-focus highlights will take on shapes determined by your aperture blades.
Shadows are not the absence of light – they’re a second subject waiting to be composed. Long shadows at golden hour lead the eye through the frame. Architectural shadows create geometry. The shadow of a person holding a leash can become the photograph, with the dog as a supporting player. Train yourself to see the shadow before you see the subject.
Place a light source behind your subject to create a glowing outline along the hair, shoulders, and arms. Rim lighting separates the subject from the background – particularly powerful against dark or busy backdrops. Outdoors, the setting sun does this for free when your subject is 10-20 feet in front of you.
Look for natural reflectors – white walls, metal surfaces, puddles, even a friend’s white shirt. These bounce light back into your subject’s shadows, often with a different color and softness than the key light. A simple white poster board is a $3 emergency reflector that you can fold into any bag.
Use colored gels on flashes, LED panels with RGB control, or simply colored bulbs in household lamps. Complementary colors (blue and orange, teal and red) create instant cinematic tension. A single colored light from behind can transform a mundane portrait into something that looks like a movie poster.
Light painting is one of the most fun light photography ideas because you are the light source. The recipe is simple: a tripod, a dark space, a long exposure (5-30 seconds), and a flashlight, LED, sparkler, or anything that glows. Here are five named techniques to start with.
Stuff fine-grade steel wool (0000 from any hardware store) into a metal kitchen whisk attached to a steel cable. Light it on fire, spin it in a circle, and the burning fibers throw off showers of sparks that streak through the frame. Use a 30-second exposure at f/8, ISO 100, with a person in the frame as a silhouette. Safety first: do this on open pavement, away from anything flammable, with a fire extinguisher on hand, and never alone.
Set a 15-30 second exposure, point a flashlight at the camera, and write words or draw shapes in the air. The letters appear floating in space. Reverse the writing if you want it readable to the viewer. This is one of the easiest light painting photography ideas to try at home with a DSLR, mirrorless camera, or even a phone with a long-exposure app.
Attach an LED to the end of a string, swing it in a circle, and you create a glowing orb floating in mid-air. Vary the speed of your swing and the exposure length to get thinner rings or fuller, more three-dimensional spheres. Multi-colored LEDs produce layered, rainbow orbs that look almost digital.
Programmable LED wands (Pixel Stick, MagiDeal) let you load images or patterns that the wand displays as it moves through the frame during a long exposure. The result looks like a hologram. It’s a more advanced light painting photography idea, but the learning curve is shallow and the visual payoff is enormous.
Crack a chemical glow stick and wave it in patterns. The pale green and pink colors make beautiful, soft trails – especially for portraits where the subject’s face is briefly lit by the stick as it passes. The exposure runs 10-30 seconds at f/5.6, ISO 400, with the photographer painting light onto the subject from one side.
For more advanced creative photography techniques and projects, the rest of the site is full of step-by-step walkthroughs you can follow at your own pace.
You don’t need a $2,000 strobe to get studio-quality results. Here’s the gear ladder I recommend, starting with what you already have.
One light source, positioned 45 degrees to the side and slightly above eye level, creates classic loop lighting – the most universally flattering pattern for portraits. Start with one speedlight, LED panel, or even a clamp light with a daylight bulb. Move the light around the subject and watch how the shadows on the face change. Distance matters: the closer the light, the softer it becomes.
Two matching table lamps on either side of a subject give you symmetrical, soft light for headshots. One lamp at 45 degrees gives you loop lighting. A lamp directly overhead with a lampshade creates a quick butterfly. The key is consistency: use the same wattage and color temperature bulbs in all your lamps so the light mixes cleanly.
Turn a cardboard box into a softbox. Stretch a white shower curtain or piece of parchment paper across the front. Tape aluminum foil to the inside of a pizza box for a snappy reflector. Mount a $2 piece of white foam board to a clamp and you have a fill card. None of these are pretty, but they work as well as the $200 version.
Never aim a bare speedlight at a face. The light is harsh, the falloff is ugly, and your subject will blink in every frame. Bounce the flash off a white ceiling or wall, or slip a $5 diffuser cap over the head. A folded tissue held with a rubber band is the cheapest diffuser in existence, and it does the job in a pinch.
Settings are how you tell your camera what to do with the light you’ve found. The table below is the starting point for each technique. Adjust from here based on your subject, sensor size, and personal style.
| Technique | Aperture (f-stop) | Shutter Speed | ISO | White Balance |
|---|---|---|---|---|
| Golden Hour Portraits | f/1.8 – f/4 | 1/250 – 1/500 | 100 – 400 | 5500K or Cloudy |
| Window Light Portraits | f/2 – f/4 | 1/125 – 1/250 | 200 – 800 | 5000K |
| Blue Hour Cityscapes | f/8 – f/11 | 2 – 30 sec (tripod) | 100 – 400 | 4500K |
| Light Trails / Star Trails | f/8 – f/16 | 10 – 30 sec | 100 – 200 | 3800K (tungsten) |
| Light Painting | f/5.6 – f/11 | 15 – 30 sec Bulb | 100 – 400 | 3800K |
| Steel Wool | f/8 – f/11 | 15 – 30 sec | 100 – 200 | 3800K |
| Starburst Sun | f/11 – f/16 | 1/250 – 1/500 | 100 – 200 | 5500K |
| Low Light Handheld | f/1.4 – f/2.8 | 1/60 minimum | 800 – 3200 | Auto / RAW |
| Overcast Portraits | f/2 – f/4 | 1/200 – 1/400 | 200 – 400 | 6500K |
| Studio Rembrandt | f/5.6 – f/8 | 1/125 – 1/250 | 100 – 200 | 5500K |
Shoot RAW whenever light gets tricky. JPEG throws away 70% of the data your sensor captures; RAW keeps it all, which means you can rescue shadows, tame highlights, and fix white balance after the fact. The 30 extra megabytes per file are worth it.
Phone cameras in 2026 are remarkable little machines. The iPhone 17 Pro and Google Pixel 9 Pro now ship with sensor-shift stabilization, computational RAW, and night modes that rival entry-level mirrorless bodies from a decade ago. Here is how to use the hardware and software you already carry.
Move past the stock camera app when light gets tricky. Halide and ProCam for iOS, and Manual Camera or Camera FV-5 for Android, give you full manual control over shutter speed, ISO, white balance (with Kelvin input), and RAW capture. The Lightroom Mobile app also includes a competent built-in camera with manual controls. These apps matter for long exposures, light trails, and any low-light scene where the stock app refuses to drop the shutter speed below 1/15s.
The built-in LED is harsh, blue, and aimed straight at the subject. Instead, use a small USB-C or Lightning LED panel mounted on the phone’s hot shoe adapter, or simply position the subject near a window and turn off the flash. Many vloggers also carry a $15 Lume Cube or similar pocket LED that clips to the phone, giving you diffused, color-adjustable fill light.
Modern portrait modes on the iPhone 17 Pro and Pixel 9 Pro use computational depth to simulate narrow apertures. Pair portrait mode with directional window light or golden hour backlight, and you can mimic Rembrandt, loop, and butterfly lighting patterns. Apple’s Photographic Styles and Google’s Real Tone let you tune color temperature and skin-tone rendering before you even press the shutter.
Stabilize the phone against a wall, a railing, or a mini tripod. Activate Night Mode and let the multi-second exposure collect light. Tap to focus on your subject and lock exposure by long-pressing on the screen. If the phone offers ProRAW, use it – the extra dynamic range is huge for rescuing deep shadows in low light. A common PAA question, “how to take low light photos on phone,” has the same answer: more stability, more seconds, lower ISO, and use whatever manual override your phone offers.
The right tool at the right time matters more than expensive tools. These are the workhorses I keep in my bag.
Every photographer runs into these issues. Here is how the pros solve them.
Move into open shade, use a diffuser, or embrace the harsh light for high-contrast artistic images. Position subjects with the sun behind them and use fill flash or reflectors to lift the face. The “trigger squeeze” technique from low-light work – take up the slack on the shutter button, exhale, hold, release – applies here too, since the contrast compresses your shutter speed.
When daylight pours through a window and tungsten lamps fill the rest of the room, you end up with two competing color temperatures (around 5500K and 2700K). Set your white balance manually for the dominant source, or use color correction gels on the mismatched light to bring them into alignment. The simplest fix: turn off the offending lamps and shoot with daylight only.
Use reflectors to fill shadows, reposition the subject to where the light is more even, or expose for the highlights and lift the shadows in post. Modern sensors have 14+ stops of dynamic range – if the highlights aren’t blown, you can almost always rescue the shadow side.
Move your light source to the side. Side lighting at 90 degrees creates the most dimensional, dramatic effect. If the light is overhead and flat, get lower – shoot from below or move the subject to where the light rakes across them at a sharp angle.
Use spot metering on your subject’s face, dial in +1 to +2 stops of exposure compensation, or add fill flash/light to balance the exposure between subject and background. The histogram is your friend here – if the brightest part of the background is touching the right edge but not crushing, you’ve nailed it.
I’ve made every one of these mistakes. Save yourself the time and skip ahead.
Each season shifts the sun’s path, the color of the light, and the kinds of light photography ideas that work best. The dates below use Northern Hemisphere conventions; reverse them if you shoot south of the equator.
The vernal equinox on March 20 marks the start of longer days and softer golden hours. Spring light has a clarity that comes from low humidity and moderate sun angles. Cherry blossoms, magnolias, and tulips backlit by afternoon sun are some of the easiest dramatic shots you can make. Golden hour runs roughly 6:00-7:00 AM and 7:30-8:30 PM at mid-latitudes, shifting earlier in March and later in June.
Long days mean golden hour compresses but never disappears. The summer solstice on June 21 is the year’s longest day – sunset pushes past 8:30 PM at most latitudes, giving you a long blue hour to work with. Midday light is harsh, so shoot in open shade or under canopies. Storms during summer afternoons create dramatic skies and frequent rainbows – keep a camera in the car.
The autumnal equinox on September 22 starts the season of low-angle golden light. Fall colors pop in warm afternoon light, and the lower sun creates long, dramatic shadows through trees. The “magic hour” gets noticeably longer as the season progresses. The first frost in late October adds a prismatic sparkle to early-morning light that’s worth getting up for.
The winter solstice on December 21 brings the year’s shortest day and lowest sun angle. The sun barely climbs above the horizon, which means golden hour light stretches across a much wider window than summer – sometimes 90 minutes of warm light around sunrise and sunset. Snow acts as a giant reflector, bouncing light up into shadows and giving you a free fill light. Winter light is often crisp and slightly cool, with deeper blue shadows that respond beautifully to a small amount of white balance warming.
Start with natural light – shoot during golden hour for warm tones, use window light for portraits, and embrace overcast days for soft, even illumination. Practice seeing light as your primary creative tool: notice the direction, quality, intensity, and color temperature of the light around you. Master a reflector, learn one named pattern like Rembrandt or loop lighting, and shoot RAW so you can adjust white balance and exposure in post.
The 80/20 rule (Pareto principle) suggests that 80% of a photograph’s impact comes from 20% of the variables – typically light, composition, and timing. The practical takeaway: invest your effort in finding great light, simplifying the frame, and being present for the decisive moment, rather than obsessing over gear, resolution, or post-processing tricks.
The four core properties of light are direction (front, side, back, top), quality (hard or soft), intensity (bright or dim), and color (measured in Kelvin, from warm 2500K to cool 10000K). Mastering how these four properties interact gives you complete control over mood and exposure in any scene. Many photographers also add a fifth property – texture or pattern – when discussing dappled or shaped light.
Soft, directional light from a large source is most flattering. Window light from a north-facing window, overcast skylight, or a big softbox at 45 degrees gives smooth shadow transitions and minimizes skin texture. Golden hour light is warm and directional but not harsh. Avoid direct midday sun, which creates dark raccoon-eye shadows under the brows and nose.
Soft light comes from large light sources relative to the subject and creates gradual shadow transitions with no sharp edges. Examples include overcast sky, large windows, big softboxes, and bounced light. Hard light comes from small or distant sources and creates sharp-edged, well-defined shadows. Examples include direct sun, bare flash, and bare bulbs. Soft light flatters faces; hard light reveals texture and drama.
Use contrast and direction. Side lighting at 90 degrees splits the subject into light and shadow. Backlighting creates silhouettes and rim glow. Low light angles produce long, raking shadows. Hard light creates bold, graphic shadow patterns. Add a colored gel for cinematic tension, or use shadows themselves as compositional elements.
Start with what you already have: window light, household lamps, and a white foam board reflector. A 5-in-1 reflector (around $15) is the best first purchase. Add a small LED panel (around $18) for portable artificial light. DIY modifiers – shower curtain diffusion, foil-wrapped cardboard, tissue-paper flash diffusers – cost almost nothing. Master natural light before investing in strobes.
Use a wider aperture (f/1.4 to f/2.8), raise ISO carefully (start at 800-1600), and slow shutter speed as much as your hands allow – 1/60s is the practical handheld minimum. Stabilize against a wall or use a tripod for longer exposures. Use night mode on phones and shoot RAW on dedicated cameras to preserve shadow detail. Embrace a little grain as part of the aesthetic.
Stabilize the phone against a wall, railing, or mini tripod. Activate Night Mode and let the multi-second exposure collect light. Tap to focus on your subject, then long-press to lock exposure. Use a manual camera app like Halide, ProCam, or Lightroom Mobile to set ISO and shutter speed yourself. Shoot in ProRAW or RAW when possible for maximum editing flexibility.
Look at the shadow edges – soft, feathered shadows mean soft, flattering light, while sharp, defined shadows mean hard light. Notice the direction the light is coming from, then decide if that direction flatters your subject. Check the color temperature by eye: amber light feels warm, blue light feels cool, neutral light feels clean. Train yourself to scan for light before scanning for subjects.
Reading about light is the easy part. The growth happens in the field, in the moments between the last frame and the next one. Here’s a concrete 30-day practice plan you can start tonight – no special gear, no travel, no excuses.
Spend five minutes a day simply looking at the light. Pick a window and watch the shadow line move across the floor over the course of an hour. Note the color temperature, the direction, and the quality. This builds the eye training that photographers call “light awareness” – the ability to read a scene the way a musician reads a room.
Pick a single subject (a face, a coffee mug, a houseplant) and a single light source (a window, a lamp, a speedlight). Spend an hour moving the light and the subject relative to each other. Shoot 100 frames. Save the best three. Repeat the same exercise next week with a different subject.
Pick one technique from this guide – silhouette, light painting, Rembrandt portrait, blue hour, whatever calls to you – and shoot it in three different locations. Notice how the context changes the result. This is the difference between understanding a technique and owning it.
Choose a small, focused project: “Portraits in window light,” “Light trails in my city,” “One week of golden hour.” Edit ruthlessly down to your ten strongest images. Sequence them. Show them to someone whose opinion you respect. Ship the work.
If you want a deeper dive into a specific area, the rest of the site covers low light, golden hour, camera settings, and portrait workflows in detail. The most useful next step is also the simplest: pick one of the techniques above and shoot it before the end of the week. The rest follows from there.
Drawing on my own photography experience and credentials, the patterns that produce the most growth are consistent practice, honest editing, and a willingness to keep showing up even when the light doesn’t cooperate. Share your light photography experiments in the comments below – I’d love to see what you make.