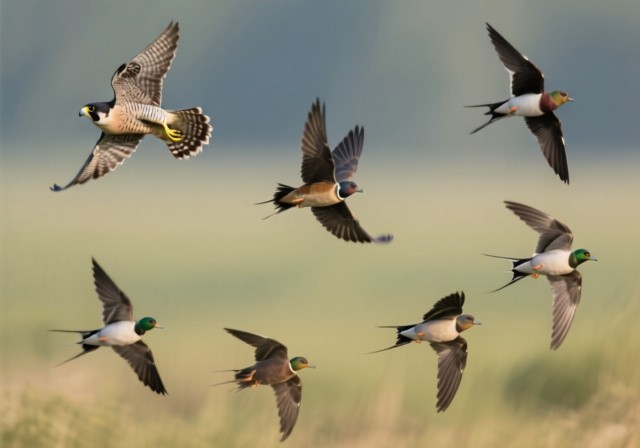
How Fast Do Birds Fly: Complete Guide 2025
Discover the incredible world of bird flight speeds, from 20 mph songbirds to 240 mph peregrine falcons. Expert insights for…
Ever stared at a blank canvas wondering how to transform your emotions into powerful visual stories? Conceptual photography might be your perfect medium. After helping hundreds of photographers discover their creative voice, I’ve found that the biggest obstacle isn’t technical skill—it’s believing your ideas are worth expressing.
Conceptual photography is a form of image making focused on illustrating an idea, emotion, or story through carefully constructed photographs that go beyond simple documentation to convey deeper meaning. This artistic approach transforms ordinary scenes into extraordinary narratives that speak directly to the viewer’s imagination.
What makes conceptual photography so powerful is its ability to communicate what words cannot express. Whether you’re exploring personal identity, social issues, or abstract emotions, this genre gives you complete creative freedom to bring your vision to life. Plus, you don’t need expensive equipment to get started—just creativity and willingness to experiment.
In this comprehensive guide, I’ll share everything you need to know about conceptual photography, from understanding the core principles to executing complex ideas with minimal resources. We’ll explore techniques used by masters like Cindy Sherman and Gregory Crewdson, break down 50+ creative ideas categorized by difficulty level, and provide a step-by-step workflow for your first conceptual project.
By the end of this article, you’ll have not just inspiration, but practical tools to transform your abstract ideas into compelling visual narratives that resonate with viewers on an emotional level.
Conceptual photography works by starting with a clear concept or idea, then using composition, lighting, props, and editing techniques to visually communicate that concept to viewers. Unlike traditional photography genres that focus on capturing reality as it exists, conceptual photography creates reality to serve a specific artistic vision.
The key distinction lies in intention. While a landscape photographer might capture a beautiful sunset for its aesthetic appeal, a conceptual photographer might use that same sunset to represent endings, change, or the passage of time. Every element in a conceptual photograph serves the central idea—from colors and props to lighting and posing.
Think of conceptual photography as visual poetry. Just as poets use words and metaphors to evoke emotions, conceptual photographers use visual elements to create meaning. The beauty of this approach is its accessibility. Whether you’re shooting with a professional DSLR or your smartphone, what matters most is your concept and creative execution.
Conceptual Photography: A genre where the idea or concept takes precedence over the subject itself, using visual elements to communicate abstract thoughts, emotions, or narratives.
Studying the work of established conceptual photographers is one of the best ways to develop your own style. These artists have shaped the genre with their unique approaches and innovative techniques:
Cindy Sherman revolutionized self-portraiture through her “Untitled Film Stills” series, using costume and makeup to explore identity and gender roles. Her work teaches us that conceptual photography doesn’t always need elaborate sets—sometimes a single character can tell a powerful story.
Gregory Crewdson creates cinematic, large-scale photographs that resemble movie stills. Working with crews of up to 60 people, he orchestrates every detail to construct psychological narratives. While his production scale is massive, we can learn from his meticulous attention to lighting and atmosphere.
Nicholas Bruno transforms his sleep paralysis experiences into surreal, dream-like images. His work demonstrates how personal struggles can become powerful artistic material. Bruno often uses simple props and natural locations, proving that compelling conceptual photography doesn’t require a Hollywood budget.
Kirsty Mitchell’s “Wonderland” series began as a response to her mother’s death and evolved into an elaborate fantasy world. Her dedication to hand-crafting props and costumes shows how patience and craftsmanship can elevate conceptual work.
What unites these photographers is their commitment to clear concepts and consistent execution. Each has developed a distinctive visual language that serves their artistic vision—something we should all strive for in our work.
Mastering these techniques will give you the tools to bring any concept to life. I’ve organized them from camera-based methods to post-processing tricks, with budget-friendly alternatives for each:
Double Exposure: Combine two images in one exposure to create dreamlike effects. Many modern cameras have this feature built-in, but you can also achieve it in post-processing. This technique works brilliantly for concepts involving memory, duality, or the passage of time.
Motion Blur: Use slow shutter speeds (1/15s or slower) while moving your camera or subject intentionally. This creates ethereal effects perfect for expressing movement, time, or emotional states. Experiment with different speeds and directions to find what works for your concept.
Reflection Photography: Utilize mirrors, water, glass, or other reflective surfaces to create layered imagery. Reflections can literally show multiple perspectives or symbolize self-reflection and duality. Try combining your subject with their reflection for powerful metaphorical impact.
Selective Focus: Use wide apertures (f/1.8-f/2.8) to isolate your subject and create dreamy backgrounds. This technique draws attention to specific elements while creating atmosphere through bokeh. Perfect for concepts involving isolation, focus, or clarity.
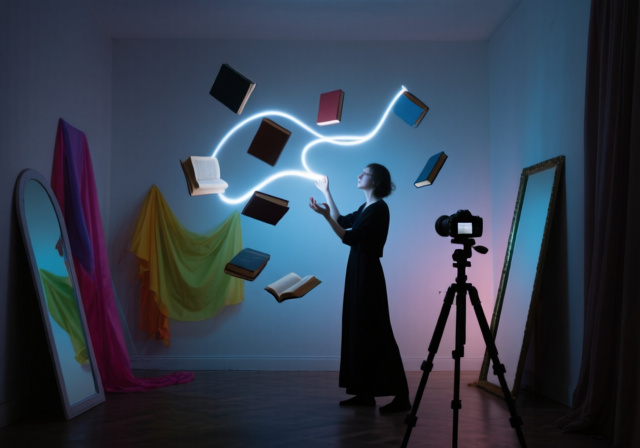
Levitation Photography: Create floating subjects by combining multiple shots in Photoshop. Take one photo of your environment and another with your subject on a stool or chair, then mask out the support. This surreal technique never fails to create wonder and works for concepts about freedom, dreams, or breaking boundaries.
Color Manipulation: Adjust colors to evoke specific emotions or enhance your concept. Cool tones often create melancholy or mystery, while warm tones suggest energy or happiness. Don’t be afraid to use unnatural colors—conceptual photography isn’t about realism.
Composite Imaging: Combine elements from multiple photos to create impossible scenes. This technique requires patience but allows complete creative control. Start with simple composites and gradually increase complexity as you gain confidence.
Quick Summary: Start with one technique that matches your concept. Levitation for freedom themes, double exposure for memory, or color manipulation for emotional impact. Master each technique before combining them.
Negative Space: Use empty areas to emphasize isolation, freedom, or focus. A tiny subject against vast emptiness can communicate loneliness or liberation depending on context and mood.
Symbolic Props: Choose objects that represent abstract ideas. A clock for time, butterflies for transformation, or mirrors for self-reflection. The key is selecting props that enhance your concept without being too obvious.
Rule of Thirds (and When to Break It): While the rule of thirds creates balanced compositions, deliberately breaking it can create tension or discomfort—useful for certain emotional concepts.
I’ve categorized these ideas by difficulty level and theme, drawing from real photographer experiences and successful concepts. Start with beginner ideas and gradually work your way up as you gain confidence.
Feeling inspired but overwhelmed? Don’t worry. Every master started somewhere. Here’s a step-by-step process to create your first conceptual photograph, based on what I’ve learned from helping beginners succeed:
Start with an emotion or idea you want to express. Don’t overthink it—simple concepts often work best. Some beginners start with feelings like “loneliness,” “freedom,” or “growth.” Write down three emotions you’ve experienced strongly this week.
Next, brainstorm visual symbols for your chosen emotion. For “loneliness,” you might think of empty spaces, single chairs, or shadows. For “freedom,” consider open doors, birds, or people jumping. List at least 5 visual ideas without judging them.
Look at your list and choose the most achievable idea with your current resources. Remember, conceptual photography doesn’t require expensive equipment or exotic locations. Your bedroom, backyard, or local park can work perfectly.
Create a simple shot list: What props do you need? What time of day works best for lighting? Do you need a model (self-portraits work great for beginners)? Write down everything, then simplify—remove anything non-essential to your concept.
Set up your scene and take test shots. Pay attention to composition, lighting, and how elements interact. Don’t worry about perfection at this stage—focus on capturing the essence of your idea.
Take multiple variations: different angles, distances, and lighting conditions. Digital photography allows unlimited experimentation, so use this freedom to explore possibilities. I recommend shooting at least 20 variations of your concept.
Upload your images and select the strongest one. Basic edits like contrast, brightness, and color adjustments can dramatically enhance your concept. Don’t be afraid to make dramatic changes—conceptual photography values impact over realism.
If you’re comfortable with Photoshop or similar software, try simple composites or effects. But remember: powerful concepts often need minimal editing. The idea should drive the technique, not the other way around.
After reviewing thousands of beginner conceptual photos, I’ve noticed these recurring issues:
✅ Pro Tip: Create a concept journal where you sketch ideas, write thoughts, and collect inspiration. Review it weekly—even old ideas can spark new creativity.
Conceptual ideas in photography are creative concepts that communicate abstract thoughts, emotions, or narratives through visual imagery. These ideas go beyond documenting reality to express deeper meanings, using props, lighting, composition, and editing techniques to convey specific messages or evoke emotional responses from viewers.
Conceptual photography with limited resources focuses on creativity over equipment. Use everyday objects as props, natural lighting from windows, free editing apps like Snapseed or GIMP, and your smartphone camera. Start with simple concepts that don’t require elaborate sets, use DIY solutions like homemade reflectors (white cardboard), and focus on strong ideas that can be executed with minimal elements. Many successful conceptual photographers began with just a camera and imagination.
The essential equipment for conceptual photography includes: any camera (smartphone works fine), a tripod (essential for long exposures and composites), basic lighting (natural window light or inexpensive LED lights), props relevant to your concept, and photo editing software (free options like GIMP or mobile apps work well). Advanced equipment like professional lighting, backdrops, and high-end cameras can enhance quality but aren’t necessary for creating compelling conceptual images.
Find inspiration by: keeping a dream journal and recording your subconscious thoughts, exploring emotions you’ve recently experienced, reading poetry and literature for metaphorical ideas, studying paintings and other art forms, walking in nature and observing patterns, browsing Pinterest and Instagram with specific keywords, participating in photography challenges, and experimenting with random word combinations to spark unexpected connections.
A good conceptual photograph successfully communicates its intended idea or emotion to viewers, creates emotional impact, demonstrates thoughtful execution, maintains visual coherence between all elements, presents a unique perspective or interpretation, shows technical competence that serves the concept rather than distracts from it, and invites viewers to think or feel something beyond what’s literally shown in the image.
The time varies significantly based on complexity: Simple conceptual photos might take 1-2 hours from idea to final image, intermediate projects typically require 4-8 hours including planning and editing, and complex conceptual photography can take days or even weeks, especially if it involves elaborate props, multiple locations, or advanced compositing. Remember that conceptual photography values impact over speed—take whatever time your concept needs to be executed properly.
Conceptual photography is a journey of self-discovery as much as it is about creating images. Through my years of practice and teaching, I’ve learned that the most powerful conceptual photographs come from authentic emotions and clear intentions. Don’t worry about creating masterpieces immediately—focus on expressing your unique perspective.
Start today. Choose one simple idea from the beginner list above, grab whatever camera you have, and create something meaningful. Remember that Cindy Sherman started with basic equipment and simple concepts before developing her iconic style. Your creative voice matters, and conceptual photography gives you the perfect medium to share it with the world.
For more inspiration and techniques, explore our night photography techniques to add atmospheric elements to your conceptual work, or visit our main photography guides for additional creative approaches. Remember, every professional was once a beginner—your journey starts with that first conceptual photograph.
Now go create something extraordinary. Your ideas are waiting to be seen.