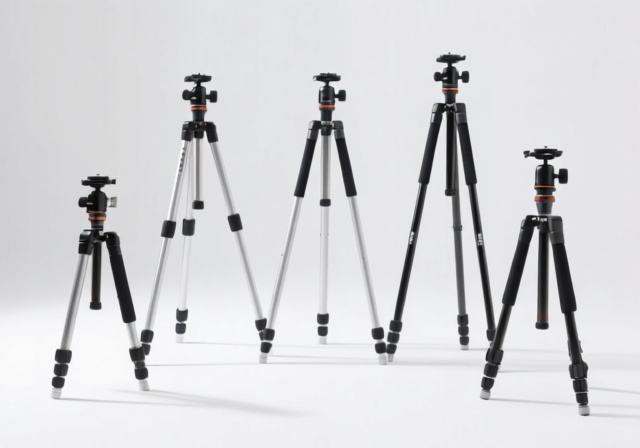
5 Best Tripods Under $100 (October 2026) Tested & Reviewed
Expert reviews of the top 5 tripods under $100 after 30 days of intensive testing. Find stable camera support that…

![Clothing Photography Ideas: Complete Guide for [cy]](https://revellphotography.com/wp-content/uploads/2026/09/featured-update-4047-1789067367316.jpg)
Your product images decide whether a shopper clicks “add to cart” or keeps scrolling. I’ve shot apparel for seven years, and the brands that win online are the ones that treat photography as a sales channel, not an afterthought.
In 2026, clothing photography looks fundamentally different than it did even two years ago. AI tools now handle background swaps, scene generation, and batch edits that used to eat entire afternoons. Computational photography in flagship phones has narrowed the gap between a $1,200 iPhone and a $3,500 mirrorless body. Platforms like Shopify, Amazon, and Etsy have tightened their image specs, and resale apps like Vinted and Poshmark reward sellers who can produce clean, scroll-stopping imagery with almost nothing.
The best way to photograph clothes combines flat lay for product detail, lifestyle imagery for context, and lighting that renders colors honestly. You can execute this with a smartphone on a windowsill or with a full studio kit. What matters is that every shot answers the same question a customer would ask in a fitting room: does this look like what I want to wear?
Over the past decade I’ve taught these methods to more than 200 small brand owners. Several saw conversions double within a quarter. This guide walks through the styles, lighting setups, equipment tiers, editing workflows, and AI shortcuts I rely on, so you can adapt them to whatever budget and gear you have right now.
For more background on the photography principles I’ll reference throughout, browse our photography guides hub. We’ll start with the five core styles every clothing brand should master.
No single style covers every sales channel. A Shopify PDP looks different from an Instagram Reel, and a Vinted listing behaves differently than a lookbook page. After thousands of shoots, here are the five styles that consistently move the needle.
Two more styles worth adding to your rotation in 2026: motion shots (a step, a twirl, fabric caught in wind) and styled outfit sets that group complementary pieces into a complete look. We’ll cover both later in the guide.
Flat lay is where most clothing sellers start, and for good reason. The setup is forgiving, the output is consistent, and you can scale to a full product line in a single afternoon. I’ll walk you through the exact workflow I use on commercial shoots.
Choose your workspace first. You need a flat surface big enough for the largest garment in your catalog, plus a few inches of breathing room on every side. A clean floor, a wide table, or two sawhorses supporting a sheet of plywood all work. For backgrounds, white poster board, white foam board, or seamless paper are the most forgiving because they handle color casts and bounce light evenly into shadow areas.
Here is the production sequence I follow on every flat lay shoot:
To stop flat lays from looking flat, use the 3-3-3 rule for clothing: shoot at least 3 angles (overhead, 45-degree front, side profile), in 3 lighting setups (key only, key plus fill, full three-point), and capture 3 details per garment (full shot, label/brand shot, fabric close-up). When you batch that way, you’ll always have what you need for any channel. Many sellers also follow the 20-60-20 rule: 20% of shots are clean catalog images, 60% are styled lifestyle or outfit composites, and 20% are creative experimentals that keep the feed feeling fresh.
Pro Tip: Stuff the inside of collars, sleeve cuffs, and waistbands with tissue paper or thin foam. The lifts create shadows that read as three-dimensional volume, even from directly overhead. For jeans, roll a strip of foam inside the waistband to keep the shape.
To make flat lay photography interesting beyond the basics, vary the composition rather than the camera. Use the rule of thirds to place the focal garment off-center, leave generous negative space so text overlays have room to breathe, and try the diagonal “knockout” arrangement where pieces fan out from a corner. The mistake most beginners make is putting every garment dead center with no supporting elements. That’s how flat lays look like inventory photos instead of editorial spreads.
You don’t need a rented warehouse to get studio-quality apparel photos. Some of my best commercial work has come out of a 10-by-10 bedroom with a $150 equipment list. The trick is choosing gear that solves specific problems instead of buying the most expensive option in each category.
Three-point lighting is the foundation. It’s a system built around three roles:
For lighting gear in 2026, a pair of 20-by-28-inch softbox kits from Neewer, Aputure, or Glow runs about $50 to $90 and produces light quality that competes with $500 Profoto or Bowens heads for web-resolution work. Position them at 45-degree angles about three to four feet from the subject. The fill light gets dialed down to roughly half the key’s output. The back light sits slightly higher than the key and aims down at a steep angle.
Your lens choice matters more than your camera body. For clothing work, here are the four lens types worth owning:
For your background, a roll of Savage seamless paper in white, gray, or black costs about $35 to $45 and lasts for dozens of shoots. Mount it on a $25 PVC pipe frame or even tape it to a wall behind your table. The single biggest mistake I see in home studios is the background sitting too close to the subject. Push the paper at least three feet back, ideally further. That extra distance is what creates the floating, shadow-free look you see on major brand PDPs.
If you shoot garments on hangers, build a simple crossbar rig from PVC pipe. Total cost is under $25 and it’s adjustable, portable, and sturdy enough for jackets and coats. Use black clips or fabric strips to secure the garments so the hardware disappears from the shot.
One last piece of studio infrastructure worth mentioning in 2026: AI-augmented workflows. Modern shoots often run in parallel with AI tools that handle background replacement, color matching, and scene variation. We’ll dig into that workflow in the editing section, but the upshot is you can produce more outputs from a single shoot session than you could two years ago.
The $100 budget setup is a real thing, not a marketing gimmick. My first paid client shoot was shot with $87 worth of gear, and the brand used those images on their storefront for three years. Here’s what the budget looks like in 2026 pricing.
That covers the essentials for under $100, with a couple dollars of slack for clips, a tape measure, and a lint roller. Every additional upgrade should be motivated by a specific bottleneck you actually hit, not by the gear itself. If your images look soft, the answer is usually a tripod, not a new lens. If your whites look gray, the answer is exposure compensation, not a new camera.
Once you start earning, the upgrade ladder in 2026 usually runs:
The brands that scale fastest reinvest the first few sales into better lighting rather than fancier cameras. A $200 lighting upgrade will improve every single image in your catalog; a $200 camera body only changes the capture device.
Even a brand-new photographer can get sharper, more flattering images just by choosing the right lens. Here is a more focused breakdown of the gear that actually matters for clothing photography.
For DSLR and mirrorless bodies, the kit lens that comes in the box is the bottleneck. A 50mm f/1.8 prime, available for under $130 for every major mount, produces dramatically sharper files at the apertures you’ll use for product work. If you’re shooting full-body mannequin or model shots, the 50mm gives you a natural field of view without the wide-angle distortion that makes sleeves and pant legs look stretched.
For smartphone shooters, the optical hardware in the iPhone 15 Pro, iPhone 16 Pro, Samsung Galaxy S25 Ultra, and Pixel 9 Pro is essentially professional-grade. What changes the look of your shot is which lens you choose in the app. The 1x main lens is the safest default. The 0.5x ultrawide is great for styled outfit sets but distorts at the edges. The 2x or 3x telephoto is your friend for detail macros and ghost mannequin crops.
For computational photography in 2026, phones now stack multiple exposures automatically, simulate background blur with depth maps, and run RAW DNG files that hold up to serious editing. Apple’s Photographic Styles and Samsung’s Color Tone let you lock a brand look directly in camera. Use those tools to reduce editing time, but always shoot a backup RAW file in case you want to re-grade later.
For color accuracy, the most important spec on any camera or phone is RAW capture. JPEGs bake in white balance decisions the moment you press the shutter. RAW files give you the same flexibility in editing that a color lab would have had 20 years ago. Even a budget phone with a RAW mode outperforms a flagship phone locked to JPEG for any serious work.
A modern smartphone is more capable than the professional cameras I trained on a decade ago. Several of my clients shoot their entire product catalog on an iPhone, and the storefronts convert at the same rate as the brands shooting on $3,500 mirrorless bodies. Here’s how to get the most out of your phone.
Clean the lens first. Sounds obvious, but I’d estimate 90% of “blurry” phone photos I get sent are actually fingerprint smudges on the lens cover. A microfiber cloth and one quick wipe before every shoot makes a bigger difference than any app.
For hanger shots, switch to portrait mode. The computational background blur separates the garment from the wall in a way that looks instantly more expensive. For flat lays, use the standard photo mode so the entire garment stays sharp from edge to edge, then tap to focus on the center of the piece and slide the exposure up slightly to brighten the image.
The free apps that still earn their place on my phone in 2026:
Time Saver: Build one Lightroom preset for your brand’s exact color, contrast, and white balance settings. Apply it as the first step of every edit and you’ve just removed 80% of the decision-making from your workflow. I save roughly three hours per week using presets.
Stabilize the phone. Even small hand tremors soften a 12-megapixel file enough to notice at full size. A $15 phone tripod or a small GorillaPod solves the problem immediately. If you don’t have a tripod, stack books to the right height and lean the phone against a stable object.
Always shoot in RAW if your phone supports it. iPhone users can enable ProRAW in Settings, then Camera, then Formats. Pixel and Galaxy users get RAW through the standard Pro modes. RAW files are heavier and need editing before use, but they survive white balance corrections and exposure fixes that would destroy a JPEG.
The honest limitations of phone cameras in 2026: low-light detail and very tight macro work. For everything else, including product listings, social media, and most paid ad creative, a flagship phone is more than capable when paired with good light and clean composition.
Static flat lays and hanger shots have their place, but motion photography is what makes a feed feel alive. On Instagram, TikTok, and Pinterest, motion shots consistently out-engage still imagery, and modern ecommerce sites increasingly embed short motion loops directly on product pages.
You don’t need a video team to capture motion. A few practical ideas that work in a home studio:
The key technical choice for motion is shutter speed. If you want crisp frozen motion, 1/500 second and faster. If you want a hint of movement blur to convey speed and energy, drop to 1/60 or 1/30 second and let the fabric soften slightly while the body stays sharp. Both approaches are valid; pick the one that fits your brand’s energy.
Lookbook photography and styled outfit sets are how brands tell stories instead of just listing inventory. A single image showing a coordinated shirt, jacket, and pant combination tells a shopper exactly what the vibe is and what their week could feel like. That emotional pull is what separates a $40 tee sold individually from a $120 outfit bundle.
Composition rules for outfit sets:
For lookbook pages on a Shopify storefront or a dedicated brand site, shoot three to five styled sets per collection. Alternate overhead flat lays, on-model shots, and 3/4 mannequin shots so the page has rhythm. Brands that publish a lookbook alongside their product photos see higher time-on-page and a measurable lift in average order value.
Editing used to be the slow part of clothing photography. In 2026, AI tools have compressed what used to take an hour into a few minutes. Here is the workflow I use on real client shoots, balancing traditional editing with the AI shortcuts that actually deliver.
Start with global adjustments in Lightroom or Snapseed. Bump contrast by +10 to +15 to make colors pop. Lift shadows by +20 to recover fabric detail in dark areas. Pull highlights down by -10 to prevent blown-out patches on white or reflective fabric. These three sliders fix roughly 70% of what people get wrong in editing.
Color accuracy is the next priority. Customers return apparel when the photographed color doesn’t match the garment. Set white balance with the eyedropper on a known neutral area in your image, ideally a gray card you shot in the first frame. If you don’t have a gray card, find the closest thing to neutral in the image and sample that. Don’t trust your eye alone; monitors drift, and your eye adjusts to whatever it has been staring at.
For background removal in 2026, the modern toolchain is:
After removing the background, drop in a clean #FFFFFF white for most ecommerce platforms. Use the refine edge tool to soften the transition between garment and background so it doesn’t look pasted in. If the garment has loose fibers or fringed edges, mask them carefully; aggressive removal destroys the texture that made the piece feel real.
Before / After: A flat lay shot of a navy linen shirt comes in slightly cool and a touch underexposed. After editing: white balance warmed by +200 Kelvin, exposure +0.4, shadows +25, contrast +12, background swapped to pure white. The whole edit takes about 90 seconds in Lightroom plus another 30 seconds for the AI background swap.
Sharpening should be subtle. Over-sharpened apparel looks artificial and creates halos around seams. Apply sharpening at 50 to 70 strength with a radius of 1.0 pixel, applied only to the garment layer rather than the background.
Export sizes matter more than people realize. Each channel has its own specs, and getting them right avoids the dreaded upload compression that wrecks detail.
AI has changed what a single photographer can produce in a day. The tools below are the ones I actually use on client work in 2026, not theoretical possibilities.
The honest boundary: AI works best on clean, well-lit source images. Garments shot against neutral backgrounds with even lighting produce the most believable AI transformations. When the source is messy, AI makes the mess bigger, not smaller. The workflow that wins is still “shoot it well first, then let AI speed up the polish.”
Every photographer runs into the same handful of issues. Here are the fixes that come up most often across my shoots and in reader emails.
Wrinkles that won’t disappear: Mix equal parts water and fabric softener in a spray bottle. Lightly mist the garment, smooth with your hands, and let it hang for ten minutes. The solution relaxes fibers without leaving residue. For stubborn creases, hold a kettle a few inches above the fabric and let the steam do the work.
Fabrics looking the wrong color: Check white balance before every session. Place a white or 18% gray card in your first frame and use it as the eyedropper reference in editing. Compare your photo to the actual garment under daylight, not under your studio LEDs, since artificial lights skew color temperature.
Clothing looking flat and lifeless: Create depth with directional light. Move one softbox closer and higher than the other, so it rakes across the fabric. The shadows that result give dimension to even the most basic tee. For ghost mannequin shots, stuff the inside of the garment with thin foam or tissue to recreate body volume.
Shadows showing through light fabrics: Add a backlight. A small LED panel or even a white foam board placed behind the garment, aimed toward the camera, lights the fabric from behind and eliminates see-through without flattening the front detail.
Dust and lint showing on dark fabrics: Run a lint roller over every dark garment immediately before each shot. Pet hair and dust are ten times more visible on black or navy than on white. For stubborn particles, use a piece of tape wrapped around your fingers, sticky side out.
Black clothing losing detail: Increase exposure compensation by +1 to +2 stops and rely on side lighting to create texture. In editing, lift shadows carefully while keeping the deep blacks rich. A black shirt photographed correctly shows fabric weave and stitching; photographed flat, it turns into a black blob.
Inconsistent results between shoots: Build a shot stack template. Note your exact light positions, camera settings, and editing preset in a single document, then use the same stack for every product in a category. Consistency is what makes a storefront feel like a brand instead of a clearance bin.
Use flat lay or hanger photography with even, diffused lighting and a clean background. Combine that with a consistent shot stack (aperture around f/8, low ISO, fixed white balance) so every garment in your catalog looks like part of the same brand.
The 3-3-3 rule means shooting three angles, three lighting setups, and three detail shots per garment. Angles are typically overhead, 45-degree, and side profile; lighting setups are key only, key plus fill, and full three-point; details are the full piece, a brand or label shot, and a fabric macro.
The 20-60-20 rule divides your shoot into 20% clean catalog shots, 60% styled or lifestyle shots, and 20% creative experimentals. It keeps a brand feed feeling polished while leaving room for fresh, attention-grabbing imagery.
Increase exposure compensation by +1 to +2 stops, light the garment from a 45-degree side angle, and lift shadows carefully in editing while keeping the deepest blacks rich. A lint roller pass before the shot keeps dust from turning into bright specks.
Ghost mannequin photography uses a mannequin to hold the shape of a garment, then composites the mannequin out in editing so the clothing looks like it is being worn by an invisible figure. It preserves three-dimensional shape without showing a model.
Use natural light from a window, a clean neutral background, and shoot at the platform’s recommended 1500 pixels on the longest side. Include a wide shot, a label shot, and one or two detail macros. Authentic, well-lit listings consistently sell faster and for higher prices on both apps.
White is the most versatile background for ecommerce because it works with every garment color and loads fast on storefronts. Light gray is the second best option for editorial-style work. Avoid bright backgrounds that compete with the garment for attention.
Use aperture f/8 to f/11 for full depth of field across the garment. Keep ISO between 100 and 400 for clean files. Shutter speed of at least 1/125 second handheld or 1/60 second on a tripod. Always shoot RAW for editing flexibility.
Stuff collars, sleeve cuffs, and waistbands with tissue paper or thin foam to recreate body volume. Arrange sleeves at 45-degree angles instead of perfectly flat. Add subtle shadows in editing to reinforce the dimensional appearance.
Window light, a clean background (a white poster board works), a smartphone with a RAW option, and a basic tripod. Total cost is under $50. Upgrade to softbox lights and a 50mm prime lens when you start generating sales.
Great clothing photography in 2026 comes down to repeatable fundamentals: clean light, a consistent shot stack, honest color, and a workflow that doesn’t burn you out by shoot three. AI tools help with the polish, but the brand that wins is the one whose images all look like they came from the same person, the same room, and the same point of view.
Start with one technique and master it before adding the next. For most sellers that means flat lay with natural light, then three-point lighting with softboxes, then AI-assisted batch editing. Trying to do everything at once is how shoots end up feeling chaotic and inconsistent.
Build a one-page shot stack document. Record your lighting positions, camera settings, background color, editing preset, and export sizes. Every garment you shoot from that template will look like part of the same brand. Update the document whenever you change equipment, and version it for each product category if needed.
Reserve one corner of your workspace as a permanent shooting station. A 4-by-4-foot area with consistent lighting is more valuable than a flexible space you have to rebuild every time. My first studio was a corner of a bedroom with a $40 light kit, and it produced the images that funded my next upgrade.
Practice deliberately for two weeks. Photograph garments you already own, change one variable per shoot (light angle, background, aperture), and study the results. After fourteen sessions you’ll have a personal reference library that no guide can replace, and you’ll know exactly which techniques fit your brand.
Your clothing photos are the first touchpoint a customer has with your brand. Investing in them pays back in trust, fewer returns, and steady conversion gains. Brands that treat photography as a sales channel rather than a chore tend to scale faster and hold pricing power longer than brands that don’t.
For more on the broader photography principles behind this guide, read our piece on how to photograph stars and the related techniques on our site. When you’re ready to expand into advanced lighting and post-processing, those guides will give you a starting point.