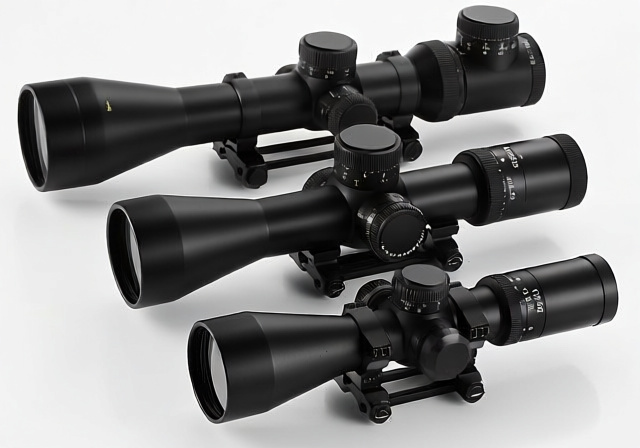
What Do The Numbers On A Rifle Scope Mean: Complete Guide 2025
Understanding rifle scope numbers removes the mystery from choosing optics. Learn what magnification and objective lens diameter mean for your…
I remember my first time with a spotting scope – spent 20 minutes trying to find a hawk that was obviously perched right there in the tree. The frustration was real, but that experience taught me what every beginner needs to know: using a spotting scope isn’t intuitive, but it’s learnable.
Using a spotting scope requires proper tripod setup, starting at low magnification to locate targets, then gradually zooming in while adjusting focus – a simple process that transforms distant specks into detailed observations.
After helping hundreds of beginners master their optics, I’ve discovered that most struggles come from the same few mistakes. This guide will walk you through everything from basic setup to advanced techniques, saving you the frustration I went through.
You’ll learn to set up your equipment like a pro, find targets in seconds instead of minutes, and adapt your techniques for birding, hunting, or target shooting. We’ll cover common problems that cause 90% of beginner frustration and solutions that experienced users swear by.
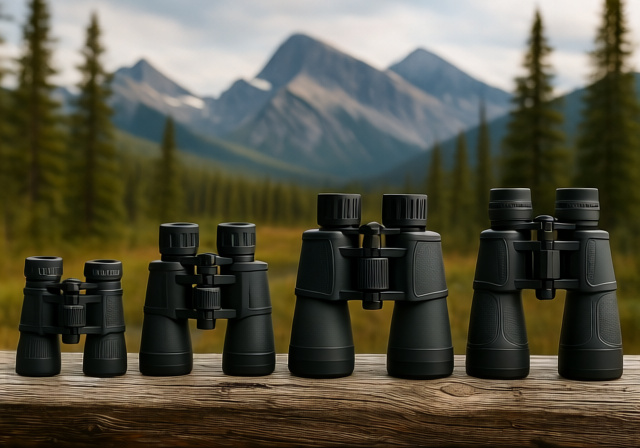
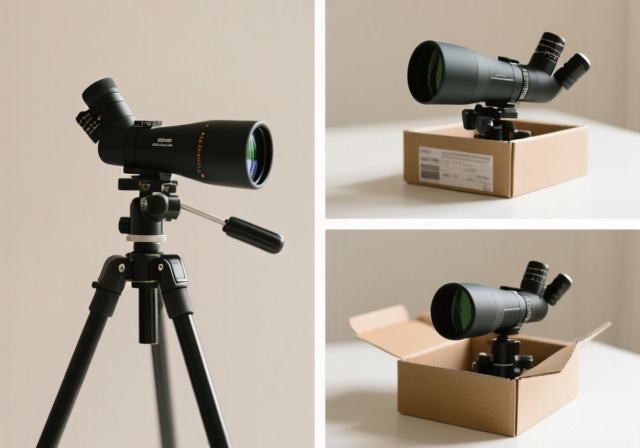
A spotting scope is essentially a small telescope designed for daytime viewing, providing magnification from 15x to 60x or more through a single eyepiece. Unlike binoculars, spotting scopes mount on tripods for rock-steady observation of distant objects.
The magic happens inside: light enters through the large objective lens (typically 60-85mm), bounces off prisms that correct the image orientation, then magnifies through the eyepiece. This design delivers 5-10x more magnification than binoculars while maintaining image clarity.
Think of it as the bridge between binoculars and a full telescope – powerful enough to see feather details on a bird 200 yards away, but portable enough to carry into the field. While binoculars excel at scanning wide areas, a spotting scope vs binoculars comparison shows scopes dominate for detailed observation of specific targets.
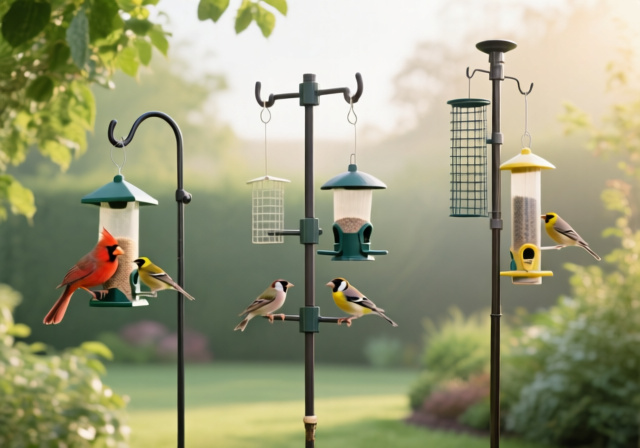
Objective Lens: The large lens at the front that gathers light – bigger numbers (like 80mm) mean brighter images in low light.
Proper setup determines 80% of your success with a spotting scope. I’ve seen expensive scopes rendered useless by wobbly tripods, while modest setups delivered amazing views simply because they were stable.
Your tripod is the foundation of your entire system. Don’t make the mistake I did – spending $800 on a scope but cheaping out on the tripod. Experienced users consistently recommend spending 30-40% of your total budget on a quality tripod.
The mounting plate is your scope’s connection to stability. Here’s how to do it right:
First, locate the tripod mounting socket on the bottom of your scope – it’s usually a 1/4-inch socket with a small pin hole. Align your tripod’s mounting plate with this socket, ensuring the pin drops into the hole.
Tighten the mounting bolt firmly but don’t overtighten – you want it secure enough to handle wind gusts but removable without tools. I always give the mounted scope a gentle shake to verify there’s no wobble.
Position the scope so the focus knob is easily accessible from your viewing position. If you’re right-handed, place the knob on the right side. Lefties will prefer the opposite. Small adjustments now prevent awkward reaching later.
⏰ Time Saver: Mark your preferred tripod leg extensions with tape for instant setup in the field. No more guesswork about height!
Follow these steps in order every time for consistent results. I’ve taught this exact sequence to dozens of beginners, and it transforms their experience from frustrating to fantastic.
This sequence works because it respects how our vision system operates. Starting wide lets your brain orient itself, then gradually narrowing your field of view builds confidence as details emerge.
If you wear glasses, proper eye relief adjustment is crucial. Most spotting scopes offer 15-20mm of eye relief – the distance your eye can be from the eyepiece while still seeing the full field of view.
Twist down the eyecup if you’re wearing glasses, or extend it fully if you’re not. The right position prevents black circles at the edges of your view and reduces eye strain during extended sessions. This adjustment is similar to what’s needed when using binoculars with glasses.
Once you’ve mastered the basics, these pro techniques will dramatically improve your viewing experience. I picked these up from years in the field and wish someone had taught me them earlier.
On hot days, heat waves can make distant objects appear blurry or distorted. This atmospheric effect worsens at higher magnifications. The solution? Use lower magnification during the warmest parts of the day, or aim for morning and late afternoon viewing when temperatures are cooler.
Professional wildlife photographers sometimes use heat shimmer to their advantage – the distortion can actually make animals appear to “shimmer” artistically. But for identification and observation, minimize magnification until the image stabilizes.
Sharing your spotting scope with others requires some technique to avoid constant refocusing. Here’s how experienced guides do it:
First, focus the scope for someone with average vision. Then, instead of passing the entire setup, have each viewer approach the scope individually. Most people can accommodate slight focus differences by moving their head position slightly forward or back.
For angled vs straight spotting scopes, angled designs make group viewing much easier – they don’t require everyone to adjust their height to look through the eyepiece.
Following birds in flight or moving animals challenges even experienced users. The key is staying at lower magnification (20-30x maximum) and using smooth, deliberate movements.
Loosen the pan head on your tripod just enough for fluid motion. Too tight, and you’ll jerk the scope. Too loose, and vibrations will make viewing impossible. Practice tracking cars or distant walkers to build muscle memory before trying to track wildlife.
Different activities demand slightly different approaches. Here’s how to optimize your technique for each major application.
Birding rewards patience and practice. Start by scanning with binoculars to locate birds, then use the spotting scope for identification. Most birders keep their scope at 20-30x for general observation, only zooming to 50-60x when they need to see specific field marks.
Early morning light offers the best viewing conditions – birds are active and the air is cool and clear. Position yourself with the sun at your back to maximize image clarity and avoid glare.
For shorebirds and waterfowl, angled scopes excel – you can view birds at water level without awkward contortions. Forest birding often benefits from straight scopes for easier target acquisition through dense vegetation.
Hunters use spotting scopes for two main tasks: glassing terrain and judging game. When glassing large areas, systematic patterns work best – divide the landscape into sections and examine each thoroughly.
I recommend starting at the farthest visible point and working your way closer. This approach helps you spot movement or unusual shapes that might indicate game. Use a notebook to map promising locations for closer investigation.
For trophy judging, 40-60x magnification helps assess antler size and configuration at distances beyond binocular range. But remember – atmospheric conditions often limit effective magnification to 30-40x regardless of your scope’s capabilities.
✅ Pro Tip: Practice identifying landmarks at various distances. This skill dramatically speeds up target acquisition when every second counts.
Spotting scopes revolutionize target shooting by showing bullet impacts at distances where iron sights become useless. For most rifle shooters, 20-40x provides the ideal balance of magnification and field of view.
Position your spotting scope slightly offset from your shooting position – about 10-15 degrees to the side. This prevents recoil vibrations from disturbing your view and allows quick transition between spotting and shooting.
Focus at the distance where you expect to see impacts, then fine-tune once you start shooting. The key is staying focused on the target area rather than searching wildly – impacts will appear within your field of view if your setup is correct.
Digiscoping – attaching your phone to capture images through the eyepiece – has revolutionized wildlife photography. It’s not as simple as holding your phone up to the eyepiece though.
Universal phone adapters provide the most reliable connection. Look for models with adjustable clamps that accommodate different phone sizes and eyepiece diameters. The key is achieving perfect alignment between your phone’s camera lens and the scope’s eyepiece.
Start with your phone’s camera app and the scope at low magnification. Center the circular image in your screen, then gradually increase zoom while maintaining alignment. Most phones struggle above 30x magnification – image quality degrades due to digital zoom limitations.
Patience pays off. Even professionals take 20-30 shots to get one perfect image. The advantage? You’re capturing images through optics worth thousands of dollars using equipment you already own.
Even experienced users encounter issues. Here are solutions to the most common problems I’ve encountered in the field over the past decade.
Quick Summary: Most spotting scope problems stem from three sources: unstable tripod setup, starting at too high magnification, or incorrect focus technique.
If your image sharpens at low power but blurs when you zoom in, several factors could be at play. Most common? Atmospheric conditions. Heat waves, haze, and dust in the air all become more apparent at higher magnifications.
The solution? Wait for better conditions or stay at lower magnification. No amount of equipment can overcome poor atmospheric conditions. I’ve seen $5000 scopes outperformed by $500 models simply because conditions favored the lower power viewing.
Also check that your tripod is completely stable. Tighten every lock, remove any hanging bags or accessories that could vibrate, and consider adding weight to the center column if wind is an issue.
The single most common beginner frustration is spending ten minutes searching for something that should be obvious. The solution is always the same: return to lowest magnification and use the landmark method.
Practice with easy targets – street signs, distant buildings, large trees. Build your targeting skills with stationary objects before attempting to find small, moving wildlife. Many beginners give up before developing this crucial skill.
Seeing black circles or crescents at the edges of your view indicates incorrect eye relief. Adjust the eyecup position or move your eye slightly closer or farther from the eyepiece until the full circular image appears.
Glasses wearers often struggle with this – consider removing your glasses if your prescription isn’t severe. Many spotting scopes provide enough dioptric adjustment to compensate for mild vision corrections.
If your image appears dim or dark, several factors might be responsible. First, check that all lens caps are removed (it happens more often than you’d think). Then consider the time of day – even the best optics struggle in low light conditions.
Cloud cover significantly reduces available light and affects image brightness. On overcast days, you might need to stay below 40x magnification regardless of your scope’s capabilities.
Clean lenses make a huge difference. Use proper lens cleaning solution and microfiber cloth – never paper towels or clothing which can scratch coatings. A single fingerprint can reduce light transmission by up to 5%.
The numbers represent magnification range and objective lens size. 20-60x means the scope can magnify from 20 to 60 times, while 80mm is the diameter of the front lens in millimeters. Larger objective lenses (like 80mm) gather more light for brighter images in low conditions.
Effective viewing distance depends on conditions and target size. In perfect conditions, you can identify a large bird at 500-800 yards or read license plates at 300-400 yards. But atmospheric conditions often limit practical use to 200-400 yards for detailed observation.
Spotting scopes use larger objective lenses and higher magnification through a single eyepiece, requiring tripod mounting for stability. This design provides 5-10x more magnification than typical binoculars but sacrifices portability and wide field of view for extreme detail at distance.
Angled scopes are more comfortable for extended viewing, better for group sharing, and easier when looking upward (like at birds in trees). Straight scopes are more intuitive for target acquisition and better for viewing from vehicles or prone positions. Consider our angled vs straight spotting scope guide for detailed comparison.
While possible, spotting scopes aren’t ideal for astronomy. They’re designed for daytime viewing with coatings optimized for terrestrial use. Entry-level astronomy telescopes provide better performance for similar prices. However, a spotting scope can show moon craters and bright planets in a pinch.
Expect to spend at least $300 for a usable entry-level setup, including both scope and tripod. Quality options start around $500-600, with premium models exceeding $2000. Remember to allocate 30-40% of your budget to a quality tripod – it’s more important than having the most expensive scope.
Use a soft brush or air blower to remove dust first. For smudges, apply lens cleaning solution to a microfiber cloth (never directly to the lens) and wipe gently in circular motions from center to edge. Never use paper towels or clothing which can scratch lens coatings.
Image shake usually indicates an insufficient tripod or windy conditions. Check that all tripod locks are tight and consider adding weight to the center column. In wind, use lower magnification and find natural windbreaks. Sometimes simply touching the focus knob can induce vibration – use a lighter touch.
Mastering a spotting scope takes practice – don’t expect perfection on day one. I recommend spending your first few sessions with easy targets: distant buildings, street signs, or large trees. Build your confidence before heading into the field where opportunities are fleeting.
Remember the golden rule: stability first, then clarity. No amount of expensive optics can overcome a wobbly tripod. Invest in quality support gear, and your viewing experience will improve dramatically regardless of your scope’s price tag.
For those ready to invest in equipment, check out our recommendations for compact spotting scopes if portability is your priority, or consider straight vs angled designs based on your primary use case.
The spotting scope community is generous with knowledge – don’t hesitate to ask experienced users for tips. Most remember their own frustrating beginnings and are happy to help newcomers avoid the same mistakes. With these techniques and regular practice, you’ll soon be identifying distant birds, judging game, or spotting bullet impacts with confidence.