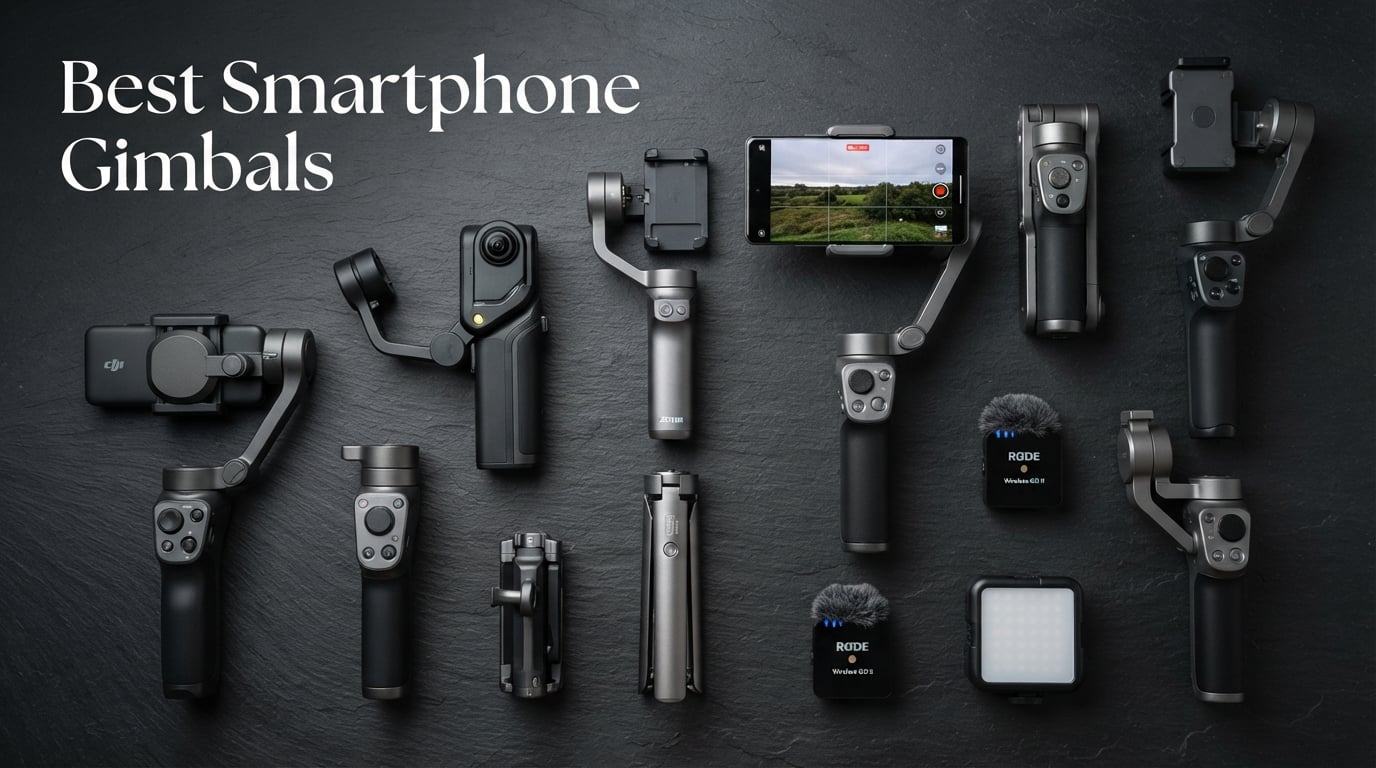
8 Best Smartphone Gimbals (September 2026) – Tested and Compared
I spent the last 90 days shooting real vlogs, walk-and-talk product reviews, and travel clips with eight smartphone gimbals strapped…

I have shot the moon hundreds of times over the past decade, and the same handful of questions keep coming up from readers: which ISO, which aperture, which shutter speed. The truth is, the best moon photography camera settings come down to a tight combination of manual mode, low ISO, a mid-range aperture, and a fast shutter speed. Once those four are dialed in, the rest is just framing and patience.
Over the past two years I have tested the Looney 11 rule on every phase from waxing crescent to full moon, shot handheld and on tripod, with DSLRs, mirrorless bodies, and smartphones. The recommendations below reflect what actually worked, not what just looks good on paper.
This guide walks through the exact settings I use, why each one matters, and how to adapt them whether you are holding a 600mm super-telephoto or an iPhone. If you are new to our site, you may also enjoy our moon facts guide for the science behind what you are photographing, and our look at camera trends to see how the latest gear fits lunar work.
The moon is one of the brightest objects in the night sky, but it also moves faster than you might think. That combination tricks every automatic camera mode into producing a glowing white blob with no surface detail.
Autoexposure reads the dark sky around the moon and tries to brighten the whole frame, which overexposes the lunar surface and blows out the craters. Autofocus hunts back and forth on a bright disc against black sky and lands soft far more often than sharp.
Manual mode removes both problems. You set the exposure yourself based on known light, and you lock focus manually on the craters. That single switch is the most important step in learning how to photograph the moon.
If you want a fast answer for a full moon shot with a telephoto lens on a tripod, this is the combination that works in 90 percent of situations I shoot in the field:
These settings are the baseline. From here we walk through what each control does and how to adjust for different phases, partial eclipses, and handheld shooting.
The exposure triangle drives every moon photo you take. Each of the three legs has a specific job, and understanding the job is more useful than memorizing numbers.
The moon is bright. A low ISO keeps noise out of the dark sky and lets the lunar surface record clean texture. I default to ISO 100 on every moon shot and only raise it if I am shooting handheld in the deep blue hour, or stacking many short exposures.
Higher ISO values work fine on modern full-frame sensors, but they trade shadow noise. The black background of a night sky is exactly where noise shows up first, so starting at ISO 100 saves you editing time later.
Most telephoto lenses are sharpest between f/8 and f/11, which conveniently happens to be exactly where the moon sits on the Looney 11 scale. Apertures wider than f/5.6 lose edge sharpness on most lenses, and apertures narrower than f/16 introduce diffraction that softens fine craters.
If your lens is sharpest at f/6.3 (many modern zooms are), use f/6.3. If it is sharpest at f/8, use f/8. Do not stop down past f/16 for moon work unless you are trying to stretch depth of field in a wide landscape.
The moon moves about its own diameter every two minutes when seen from Earth. That motion shows up as a soft edge in your image when shutter speeds drop below 1/125 second with a 400mm lens, and it gets worse as focal length grows. A full moon at 600mm needs at least 1/250 second to freeze that motion.
My rule of thumb for handheld moon shots: shutter speed should be at least 1 divided by the focal length in mm. So 400mm needs 1/400 second, 600mm needs 1/600 second. On a tripod you can drop a stop or two because the platform removes your body movement.
The cleanest approach is to set ISO 100, pick an aperture in the f/8 to f/11 range, and let the shutter speed land wherever the meter says the moon is correctly exposed. If the meter suggests 1/60 second at ISO 100 and f/8, that is too dark a sky or wrong phase, not a sign you need a higher ISO.
The moon reflects sunlight, so it follows roughly the same exposure rules as a sunlit landscape at noon. That is the insight that lets the Looney 11 rule work, and it is the single most useful fact to remember about lunar exposure.
The Looney 11 rule is a quick shortcut for exposing the moon on a clear night without metering. The rule says: set your aperture to f/11 and use a shutter speed that is the reciprocal of your ISO.
At ISO 100, that means f/11 and 1/100 second. At ISO 200, f/11 and 1/200 second. At ISO 400, f/11 and 1/400 second. The math cancels the moon’s brightness so the lunar surface lands at roughly middle gray, the same as a sunlit scene.
Why it works: the moon is roughly the same brightness as a gray card lit by direct sunlight, and sunlight on Earth at noon follows the Sunny 16 rule (f/16 at the reciprocal shutter for ISO 100). The Looney 11 rule shifts the aperture one stop wider to account for light loss through the atmosphere at night.
It is a starting point, not a law. Crescent moons are dimmer, so I open up to f/8 or use a slower shutter. Supermoons are slightly brighter, so I close to f/11 and use 1/125 second. For partial eclipses, the shadowed portion needs 4 to 8 stops more exposure than the lit portion, which is why eclipse photography is its own craft.
Forum threads are full of posts like “my moon shots are soft” and “the moon looks wavy in my photos.” Both problems almost always come back to focus and shutter speed, not glass quality. The Sony A6400 user with the 70-350mm lens who asked on Reddit how to get sharper results was almost certainly dealing with focus, not lens weakness.
The fastest way to nail sharp focus is to stop relying on autofocus and switch to manual focus with magnified Live View. Here is the workflow I use on every shoot.
Switch your camera to manual focus. Activate Live View on the rear screen. Zoom in digitally to 5x or 10x on the terminator, the line where light meets shadow on the moon. Slowly rotate the focus ring until individual craters snap into focus. Take a test shot and check the rear LCD at maximum zoom. Adjust and repeat if needed.
The terminator gives you strong shadow detail that makes focusing easier than focusing on the bright full disc, where everything is bright and contrast is low. A quarter moon or a waxing gibbous moon is the easiest target for focusing practice.
Autofocus systems look for contrast edges. A bright disc against a black sky has only one edge, and the AF system has to choose between locking on that edge and going past. The result is hunting, focus drift, and shots that look slightly soft even when the camera thinks it nailed focus.
Manual focus removes that variable entirely. Once you have it set, switch to manual focus and leave it alone between shots. The moon does not move closer or farther during a session, so your focus stays valid.
Every moon shot benefits from a tripod, and a good tripod is the single most underrated piece of gear in lunar photography. A flimsy tripod vibrates in the wind and turns your 600mm lens into a shaking telephoto that blurs every shot.
I use a sturdy aluminum or carbon fiber tripod with a ball head rated for at least twice the weight of my largest lens. For a 600mm f/4 super-telephoto, that means a head rated for at least 15 pounds. For a 200mm lens, almost any quality tripod will do.
This is the single most debated topic in moon photography forums, and the answer depends on the lens. Modern stabilized lenses generally handle tripod use fine and can be left on. Older stabilization systems, especially first-generation IS or VR, can introduce micro-vibrations when locked against a tripod and may produce softer images.
My default is to turn stabilization OFF when the camera is locked on a sturdy tripod. If I am shooting handheld, I leave stabilization ON. If in doubt, shoot two versions of the same frame with stabilization on and off and compare at 100 percent on a monitor.
Pressing the shutter button with your finger moves the camera enough to soften moon images at 600mm. A remote shutter release or the camera’s 2-second timer eliminates that vibration.
On Canon and Nikon bodies, the 2-second timer is usually enough. On Sony and Fuji mirrorless, I prefer a wireless remote because the electronic shutter can introduce rolling shutter at long focal lengths.
Focal length controls how big the moon appears in your frame and how much surface detail you can resolve. Short lenses make the moon look small in the frame. Long lenses fill the frame with craters.
For full-disc moon shots that show the moon as a recognizable disc with some craters, 200mm to 300mm works well on a full-frame sensor. For crater detail that lets viewers see the lunar surface as terrain, 400mm to 600mm is the sweet spot. Beyond 800mm you start fighting atmospheric turbulence more than you gain resolution.
Photographers who shoot the moon rising behind a building or a person and make the moon look enormous are not using special lenses. They are using long focal lengths (often 400mm or longer) and positioning themselves far from the foreground subject.
The trick is perspective compression. A 400mm lens from a mile away makes a foreground tree and a distant moon look like they are the same size in the frame. Move closer to the tree with a wide lens and the moon shrinks to a dot. Our forced perspective photography guide covers this in more detail.
Metering mode matters more than most moon photographers realize. The default evaluative or matrix metering reads the whole frame and averages toward the dark sky, which underexposes the moon.
Switch to spot metering and place the meter on the moon only. The camera will ignore the dark sky and meter for the lunar surface. This single switch fixes most of the “moon came out too dark” complaints I see in forums.
The rear LCD is too bright to judge exposure accurately in the dark. Trust the histogram instead. For a correctly exposed full moon shot, the histogram should peak in the right third (highlights) without clipping the right edge. If the histogram touches the right edge, you are overexposing and losing crater detail.
If the histogram sits too far to the left, open up one stop by slowing the shutter, widening the aperture, or raising ISO. If it sits too far right, do the opposite.
The best moon photo opportunities require planning, not luck. Apps like PhotoPills, The Photographer’s Ephemeris, and Stellarium tell you exactly when and where the moon rises, sets, and reaches its highest point. They also show you the moon’s path against the landscape so you can plan compositions in advance.
Moonrise and moonset are the most dramatic times to shoot because the moon sits low on the horizon, where you can compose it against trees, buildings, or mountains. At those times, atmospheric haze also lowers contrast, which is why so many “huge moon” photos are taken at moonrise rather than overhead.
Full moon gives you the brightest disc but the lowest surface detail, because the sun lights the moon head-on and flattens shadows. Waxing and waning crescents and quarter moons show strong crater shadows along the terminator, which is the best phase for crater detail.
For impact craters and dramatic shadows, shoot within three days of the first or last quarter. For a classic glowing full disc, shoot within two days of full moon. For lunar eclipses, the partial and total phases each need their own exposure strategy.
After reading thousands of forum posts and answering reader questions for years, I see the same handful of mistakes over and over. Avoiding these gets you 80 percent of the way to a great moon photo.
Auto modes overexpose the moon in almost every situation. Switch to manual mode and apply the settings from earlier in this guide.
Older stabilization systems can soften tripod shots. Test both ways and pick what looks sharper on your monitor at 100 percent zoom.
The moon looks soft and wavy when it is low on the horizon because you are shooting through more atmosphere. Wait for the moon to climb at least 20 degrees above the horizon for clean craters, or embrace the softness for a stylized atmospheric look.
JPEG compresses lunar shadow detail and throws away the data you need for editing. RAW files preserve the dynamic range you need to pull crater shadows out of the noise later.
The rear LCD lies in low-light situations. Trust it for composition but not for exposure. Use the histogram to confirm you are not clipping highlights or crushing shadows.
Moon stacking is the process of combining dozens or hundreds of moon shots into one final image. Each individual frame has slightly different atmospheric turbulence, and stacking the best frames cancels that turbulence and produces a final image sharper than any single shot.
A user on the astrophotography subreddit once stacked 58 frames of a crescent moon to get a sharp final image. Another forum thread I read recently described a full moon mosaic built from 68,700 frames. Most users do not need that level of dedication, but stacking even 10 to 20 sharp frames produces visibly better results than a single shot.
Mount your camera on a tripod and frame the moon. Set your normal moon settings (ISO 100, f/8, 1/125 second). Take 20 to 50 shots in a row using a remote shutter or interval timer. Review the shots and pick the 10 to 20 sharpest. Import those frames into a stacking program like AutoStakkert or RegiStax. Align the frames and stack the best percentage. Finish the result in your regular editor with sharpening.
The reason stacking works is that atmospheric turbulence is random. Each frame has slightly different distortion, and stacking averages out that randomness, leaving only the parts of the image that stayed consistent across all frames. The result is sharper craters and cleaner shadow detail.
Phone cameras have come a long way in the past five years, and modern iPhones, Pixels, and Samsung Galaxy phones can capture surprisingly good moon shots with a few specific settings. The PAA question “how do I take a good picture of the moon with my phone camera?” shows up constantly, and most articles skip it entirely.
The trick with phones is the same as with dedicated cameras: turn off the automatic decisions and take control where you can. Phones do not give you full manual control, but they give you enough to dramatically improve moon shots.
Turn on the phone’s “Night Mode” only if it lets you set a short exposure manually. Otherwise turn it off, because long night-mode exposures of a moving moon produce blurry blobs. Tap the moon on your screen to lock focus on it. Drag the exposure slider down until the moon stops being a white blob and starts showing surface texture. Use a tripod or prop the phone against a stable surface to eliminate hand shake. Shoot in RAW if your phone supports it (Pro mode on Samsung, Lightroom mobile on iPhone).
For iPhones specifically, tap and hold the moon to lock exposure (AE/AF lock), then drag the sun icon down to darken the frame. For Pixel phones, the Astrophotography mode handles very dim stars but tends to overexpose the moon, so use the standard Night mode and tap to expose for the moon.
A clip-on telephoto lens for your phone multiplies the focal length and lets you capture crater detail that would otherwise be a small disc. Quality varies widely, so look for a 2x or 3x tele lens with multi-coated glass rather than the cheapest option on Amazon.
Post-processing is where a good moon photo becomes a great one. RAW files give you the latitude to push the lunar surface without destroying it. Most editing time on moon photos goes into three areas: shadow recovery, sharpening, and contrast.
In Lightroom or Capture One, lift the Shadows slider to bring out crater detail in the darker portions of the terminator. Pull Highlights down if any part of the lit surface is blown out. Add a moderate amount of Texture or Clarity (around 20 to 40) to bring out crater edges without amplifying noise.
For final sharpening, apply a small amount of sharpening at the end, around 60 to 80 on the Amount slider with a moderate Radius. Mask the sharpening to the lunar surface only so the dark sky stays smooth.
The moon is not pure white. It ranges from cool gray-blue to warm cream depending on atmospheric conditions. A daylight white balance (around 5200K) usually gives the most accurate lunar color. Some photographers push the white balance cooler for a stylized moon look, but for natural results stick with daylight.
ISO 100 is the best starting point for moon photography. The moon is bright enough that you do not need a high ISO, and lower ISO values keep noise out of the dark sky. Raise to ISO 200 or 400 only when shooting handheld, in deep twilight, or while stacking many short exposures.
Tap and hold the moon on your screen to lock focus and exposure, then drag the exposure slider down until surface detail appears instead of a white blob. Use a tripod or stable surface to eliminate hand shake, shoot in RAW if your phone supports it, and consider a clip-on telephoto lens for crater detail.
The Looney 11 rule says to set your aperture to f/11 and use a shutter speed that is the reciprocal of your ISO. At ISO 100 that means f/11 and 1/100 second. It works because the moon is roughly as bright as a sunlit gray card, and one stop wider than the Sunny 16 rule accounts for atmospheric light loss at night.
Switch to Manual mode, set ISO 100, choose an aperture between f/8 and f/11, and set a shutter speed between 1/125 and 1/250 second. Turn off autofocus and focus manually using magnified Live View. Mount the camera on a tripod, turn off image stabilization if your lens is older, and use a 2-second timer or remote shutter.
The moon is hard to photograph because autoexposure reads the surrounding dark sky and overexposes the lunar surface, autofocus hunts on a bright disc against black sky, and the moon moves faster than people expect. Manual mode, manual focus, and fast shutter speeds solve all three problems.
Good moon photography camera settings come down to a small set of rules: manual mode, ISO 100, aperture between f/8 and f/11, shutter speed fast enough to freeze the moon’s motion, manual focus with magnified Live View, and a tripod with image stabilization handled correctly. Once those are dialed in, the Looney 11 rule gives you a starting exposure you can fine-tune with the histogram.
From there the craft is in the details: choosing the right phase for the look you want, planning moonrise compositions with apps like PhotoPills, stacking frames for maximum sharpness, and editing RAW files to bring out crater shadows without amplifying noise. Each of these is a small step that compounds into noticeably better moon images.
Grab your camera tonight, dial in the settings from this guide, and shoot the next full moon. The combination of manual mode, ISO 100, f/8, and 1/125 second is where every great moon photo starts.