Rifle Scope Turret Systems: Complete Guide 2026
Expert guide to rifle scope turret systems - master MOA vs MIL adjustments, custom turrets, and maintenance for precision shooting.

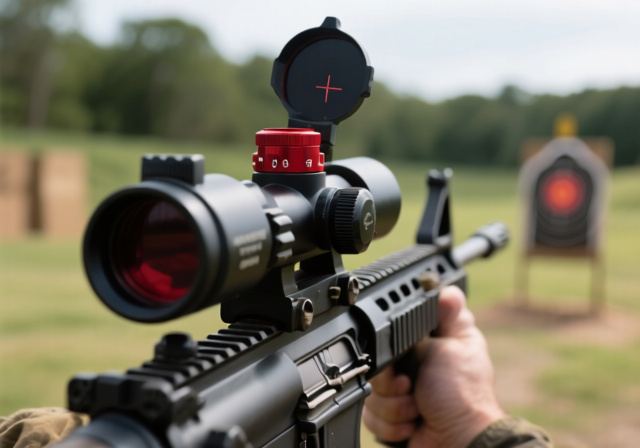
Mounting a red dot sight on your firearm is only the first step toward faster target acquisition. Without proper zeroing, that expensive optic becomes nothing more than a expensive placeholder. I learned this lesson the hard way years ago when I spent an entire range session missing targets because I assumed the dot would simply “work” out of the box.
Zeroing a red dot sight means aligning the point where the bullet impacts with where the red dot appears on your target. This process transforms your optic from a visual aid into a precision tool that genuinely improves your accuracy. Whether you are mounting a reflex sight on a pistol for self-defense, equipping your AR-15 for range practice, or adding a red dot to a shotgun for slug hunting, the zeroing process follows the same fundamental principles.
This guide walks you through the complete process from understanding basic terminology to troubleshooting common problems. You will learn why Minute of Angle measurements matter, how to choose the right zero distance for your application, and exactly which adjustments to make when your shots land off target. By the time you finish reading, you will have the confidence to zero any red dot sight correctly on any platform.
Before you touch any adjustment knob on your optic, you need to understand what zeroing actually accomplishes. At its core, zeroing creates a specific relationship between two separate points: where your red dot sits on the target and where your bullet actually strikes. When this relationship is properly established, aiming becomes intuitive and shooting becomes accurate.
The challenge lies in the fact that your barrel points in a slightly different direction than your optic. Your red dot sits above the bore, and light travels in a straight line while your bullet follows a curved trajectory affected by gravity. Zeroing accounts for both of these physical realities by creating an offset that brings your point of aim and point of impact into alignment at your chosen distance.
Point of Aim (POA): The exact spot on the target where you place the red dot
Point of Impact (POI): Where your bullet actually hits the target
Zero: The distance at which POA and POI are identical
MOA stands for Minute of Angle, and understanding this measurement system is essential for making accurate adjustments to your optic. One MOA equals approximately 1 inch at 100 yards, which means at 25 yards, one MOA equals roughly 0.25 inches. This relationship allows you to calculate exactly how many clicks your adjustment turrets need to move your point of impact by a specific distance.
Most quality red dot sights adjust in 1 MOA increments per click, though some high-precision optics offer 0.5 MOA clicks. When your shots land 4 inches high at 100 yards, you need 4 clicks of downward adjustment. At 25 yards, achieving the same 4-inch correction requires 16 clicks since each click only moves the impact by 0.25 inches at that distance.
The key principle to remember is that MOA scales with distance. A 1 MOA adjustment at 200 yards moves your impact by 2 inches, while the same adjustment at 50 yards moves it by only 0.5 inches. This scaling is why knowing your zero distance matters so much for calculating holdover at other ranges.
Your red dot sight has two adjustment controls that work independently to move your point of impact in different directions. Understanding which control affects which direction will save you significant time and ammunition at the range.
Modern reflex sights often feature tool-less adjustment knobs that allow quick changes without needing a brass punch or screwdriver. Others use traditional slotted turrets that require the adjustment tool included with your optic. Familiarize yourself with your specific model’s configuration before heading to the range.
Red dot sights come with different reticle sizes measured in MOA, and selecting the right one depends on your intended application. Smaller dots offer precision advantages for target shooting and long-range work, while larger dots provide faster acquisition for defensive applications and moving targets.
For most pistol applications, particularly concealed carry and home defense, a 3-6 MOA dot strikes the right balance. AR-15 users often prefer 3-5 MOA dots for the same reasons, though some competition shooters opt for smaller dots when accuracy at distance matters more than split-second acquisition.
Having the proper equipment before you begin zeroing makes the entire process smoother and more efficient. Rushing to the range without necessary tools leads to frustration and wasted ammunition.
Your zero distance should match your primary application and typical engagement range. Choosing incorrectly leads to constant holdover or holdunder that makes accurate shooting more difficult.
For pistol self-defense purposes: A 10-15 yard zero serves most concealed carry scenarios well. Most defensive encounters happen at close range, and this zero keeps your point of impact close to your point of aim without significant vertical adjustment needed.
For pistol competition: The standard 25-yard zero provides consistency across most competition stages and allows you to use the same hold for targets at various distances without mental calculation.
For AR-15 general purpose use: The 50-yard zero offers an excellent compromise for shooting between 0-300 yards. Your bullet trajectory remains relatively flat across this range, requiring minimal holdover adjustments.
For hunting rifles: A 100-yard zero matches most typical hunting distances and aligns with standard ballistics for common hunting calibers. This zero provides the most intuitive point-of-aim shooting for ethical harvest decisions.
Safety Reminder: Always follow fundamental firearm safety rules. Ensure your shooting range allows the distance you plan to shoot and that your backstop is adequate for containing any misses.
Three primary methods exist for zeroing your red dot sight, each with distinct advantages and limitations. Your choice depends on available equipment, time constraints, and how precisely you need to zero.
This approach involves shooting groups at your chosen distance, measuring where bullets impact, and adjusting your optic accordingly. It is the most reliable method because it accounts for every variable affecting your ammunition’s trajectory.
Advantages: Produces the most accurate final zero, accounts for ammunition ballistics, verifies your optic holds zero after adjustments, requires no special equipment beyond basic range tools.
Disadvantages: Requires the most ammunition, takes longer than other methods, demands consistent shooting fundamentals from the shooter.
Best for: Final zero confirmation after using other methods, experienced shooters who want maximum precision, verification after any optic or mounting changes.
A laser bore sighter fits into your chamber or barrel and projects a visible laser dot onto your target. You then align your red dot with this laser reference point without firing a single round.
Advantages: Saves significant ammunition, can be done safely at home with proper precautions, gets you on paper quickly at the range, fast enough for initial sight-in before fine-tuning.
Disadvantages: Requires purchasing equipment ($20-100), bore sighters may not perfectly align with your specific ammunition ballistics, still requires live fire verification.
Best for: Initial zeroing before heading to the range, shooters wanting to minimize range time, verifying your optic is fundamentally mounted correctly.
This method involves removing the bolt from your rifle and visually aligning your barrel with your target through direct observation. You then adjust your optic to match this alignment.
Advantages: Requires no equipment purchases, works for any firearm that allows bolt removal, relatively quick process.
Disadvantages: Cannot be performed on semi-automatic firearms without special tools, demands steady hands and careful alignment, accuracy depends on your visual alignment skills.
Best for: Bolt-action rifle owners, emergency zeroing situations when other methods are unavailable, initial alignment before live fire verification.
Follow these steps systematically for reliable, repeatable zeroing results. Patience during this process pays dividends in accuracy and ammunition conservation.
Stability is the foundation of accurate zeroing. Any movement between shots introduces variables that make it impossible to determine whether your optic adjustments are working correctly.
Experienced shooters often remark that insufficient rest stability causes more zeroing frustration than any other factor. Investing in proper rest equipment pays for itself in saved ammunition and time.
The first goal is simply ensuring your shots land somewhere on your target. Worry about centering later; first, prove your barrel and optic are fundamentally aligned.
If your first shot misses entirely, do not adjust your optic yet. Instead, aim your red dot directly at the bullet hole from your previous shot. Each successive shot should bring you closer to center through this “walk the target” technique.
Once you are consistently hitting paper, fire a three-shot group to establish your average point of impact. This group tells you where your optic thinks you are aiming versus where bullets actually land.
Important Note: If your groups are larger than 3 inches at 25 yards, focus on improving your shooting fundamentals before adjusting the optic. No amount of zeroing can compensate for inconsistent trigger control or poor breathing technique.
Find the center of your three-shot group by drawing lines connecting the outer two bullet holes. The intersection represents your average point of impact. Measure the distance from this center to your aiming point in both vertical and horizontal directions.
Calculation example at 25 yards:
Remember the fundamental rule: adjust your dot toward your point of impact. If shots hit high, move the dot down. If shots hit right, move the dot left.
With your calculations complete, turn your adjustment turrets to bring your point of aim and point of impact into alignment.
Note that some manufacturers, particularly Aimpoint, configure their adjustments in the opposite direction from what seems intuitive. Always test with a few shots if you are unsure about your specific model’s directionality.
After making your adjustments, fire another three-shot group from the same stable position using identical aiming technique. This group confirms whether your calculations were correct.
Expect this process to require 2-4 iterations before achieving a precise zero. Rushing this verification step often leads to frustration when your final zero proves inconsistent.
Once you achieve a satisfactory zero, record your settings and test at multiple distances to understand your point of impact at various ranges.
Even with careful technique, problems occasionally arise during the zeroing process. Understanding common issues and their solutions helps you diagnose and resolve problems quickly.
If your zero shifts between shooting sessions despite making no adjustments, the issue is typically related to mounting, batteries, or the optic itself.
Pro Tip: New optics sometimes need their turrets “exercised” before they hold zero reliably. The manufacturing lubricant inside adjustment mechanisms can cause inconsistent click feel. Fire 20-30 shots to work the lubricant before expecting perfect zero retention.
Scattered shots despite a stable rest and optic indicate the problem lies with your shooting technique rather than equipment.
When shots miss the target entirely, adjusting your optic blindly wastes ammunition and time. Use these techniques to get on paper quickly.
Not knowing which way to turn adjustment turrets is one of the most common frustrations for new red dot users.
Different firearms present unique challenges for red dot zeroing due to their design, recoil characteristics, and typical use cases.
Pistol-mounted red dots add complexity because the slide cycles during firing, creating forces that can affect optic positioning over time.
Many shooters find that pistol zeroing benefits from the co-witnessing process. By aligning your red dot with your existing iron sights at a close distance, you establish a reliable starting point before fine-tuning at your preferred zero distance.
The AR-15 platform accepts red dot sights through numerous mounting options, and each configuration affects your zeroing approach.
For AR-15 owners who plan to co-witness with iron sights, understanding the difference between absolute and lower third co-witness becomes important. Absolute co-witness positions the red dot directly in line with your iron sight picture, while lower third co-witness places the dot above the rear sight, allowing an unobstructed view of your target.
Shotguns present unique challenges because you typically zero with slugs while most shooting involves birdshot or buckshot patterns that behave differently.
Co-witnessing means aligning your red dot with your firearm’s existing iron sights, creating a backup aiming system if your optic fails. This technique has become standard practice among tactical shooters and concealed carriers alike.
When you co-witness, you position your red dot so that the dot itself, when aligned with your target, also aligns with your iron sight picture. If the red dot fails, you can still aim using the iron sights through the optic’s window.
Setting up a proper co-witness requires adjusting your optic height or using compatible mounting solutions.
Not all red dot and firearm combinations can achieve proper co-witness due to differences in mounting heights and sight geometries. Research your specific combination before purchasing mounting hardware.
Sometimes you need to establish an approximate zero without access to a firing range or desire to conserve ammunition. These methods provide a close starting point for later refinement.
Laser bore sighters fit your specific caliber and project a visible reference point from your barrel onto your target.
This technique requires removing your bolt to visually align your barrel with your target.
A properly established zero requires periodic verification to ensure it remains accurate over time and use.
Several environmental conditions can subtly affect your point of impact, particularly at longer distances.
Once you master basic zeroing procedures, these advanced techniques help you optimize your zero for specific applications.
This popular zero technique for AR-15 platforms minimizes holdover across a wide range of distances, making it ideal for general-purpose use.
The 25/300 zero works exceptionally well for shooters who engage targets at varying distances without a specific engagement range preference.
For defensive and tactical applications, the battle zero prioritizes minimal holdover at typical engagement distances while maintaining reasonable accuracy across the effective range.
Different optic manufacturers design their adjustment mechanisms differently. Understanding these variations helps you avoid frustration during the zeroing process.
Yes, absolutely. All red dot sights require zeroing to be accurate. Without proper zeroing, your point of impact will not match your point of aim regardless of your shooting skill. An un-zeroed red dot causes shots to miss consistently.
For pistols used in self-defense, 15 yards provides optimal performance for typical defensive encounters. For AR-15 platforms, 50 yards offers the best compromise for shooting between 0-300 yards. Choose your zero distance based on your primary application and typical engagement range.
Most modern red dot sights feature tool-less adjustment turrets that you turn by hand. Some models use a brass punch or included tool. The most important tool is a stable shooting rest or sandbags to ensure consistent shot placement during the zeroing process.
You can get extremely close to zero using a laser bore sighter without firing ammunition. This method projects a laser through your barrel and allows you to align your red dot with the laser reference point. However, you should always verify and fine-tune your zero with live fire at a range since bore sighters do not account for your specific ammunition ballistics.
The general rule is to adjust your red dot toward your point of impact. If shots hit high, move the dot down. If shots hit right, move the dot left. Always check your specific optic manual for direction indicators, as some manufacturers configure adjustments counter-intuitively.
Common causes include loose mounting screws that need tightening to manufacturer specifications, weak batteries causing electronic drift, damaged optics with loose internal components, or using different ammunition types than what you zeroed with. Ensure all mounting hardware is properly torqued and consider using blue Loctite on screws to prevent loosening under recoil.
Zeroing a red dot sight is a fundamental skill that every shooter should master. While the process requires patience and attention to detail, the results are worth the investment in time and ammunition. A properly zeroed red dot transforms your shooting experience, providing confidence that your point of aim will match your point of impact.
The key to successful zeroing lies in understanding the fundamentals before attempting adjustments. Knowing what MOA means, how windage and elevation interact, and why your chosen zero distance matters creates a foundation for accurate work. Rushing through the process or skipping verification steps leads to frustration and inconsistent results.
Remember that your zero requires periodic verification. Environmental factors, ammunition changes, and even normal firearm use can affect your point of impact over time. Making zero verification part of your regular range routine ensures your optic remains ready when you need it most.
Whether you are zeroing a reflex sight on a concealed carry pistol, establishing a 50-yard zero on your AR-15, or ensuring your shotgun optic holds zero with slug ammunition, the principles remain consistent. Stability during shooting, careful measurement of adjustments, and thorough verification produce reliable results that you can trust.