Smartphone Product Photography: Complete Guide for 2026
Most online sellers I’ve worked with own a camera powerful enough for studio-grade product shots. It sits in a pocket,…

Last updated: June 2026
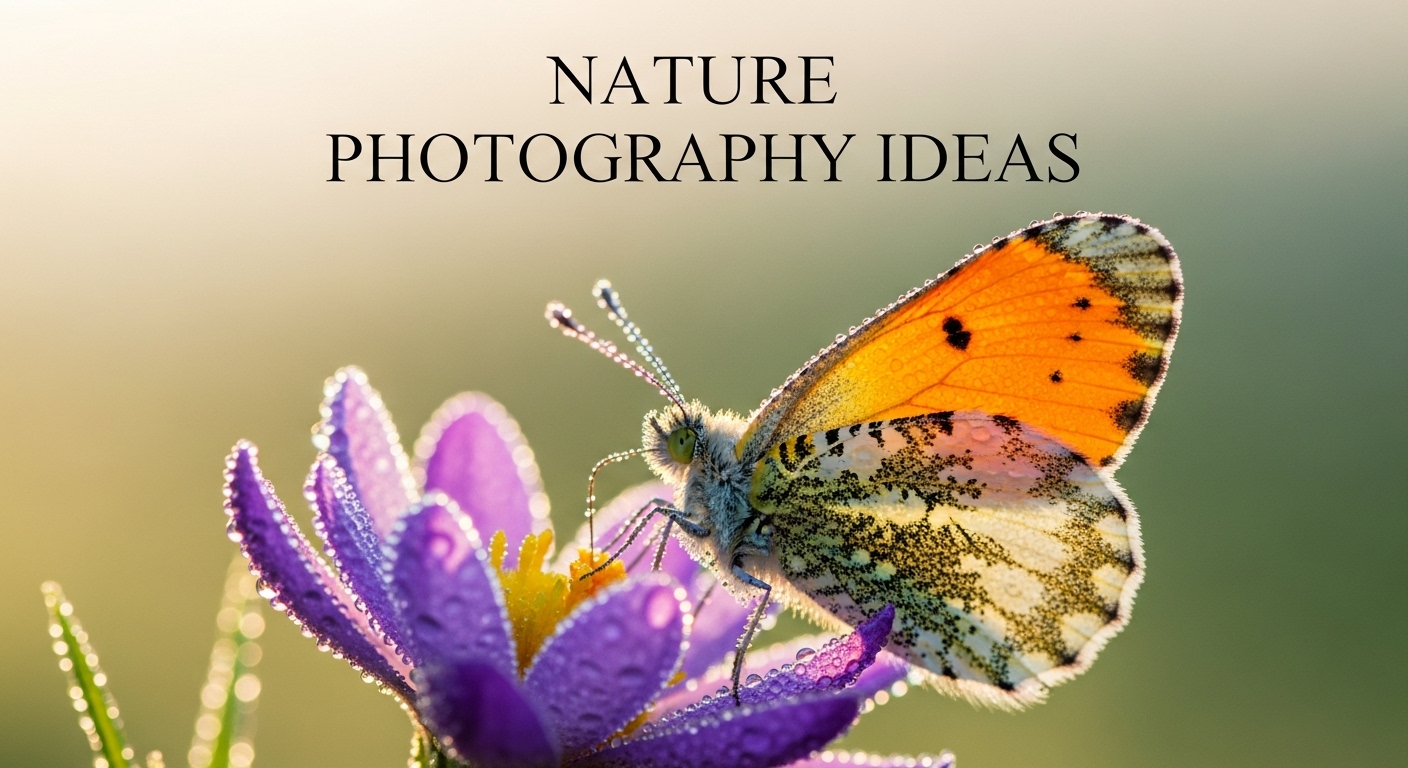
If you have ever wandered outside with a camera and wondered what to actually point it at, you are not alone. The search for fresh nature photography ideas has become one of the most common questions in online photography communities, and for good reason. Even seasoned shooters hit creative ruts when the same trail, the same park, or the same backyard keeps delivering the same frames.
Nature photography in 2026 is no longer the exclusive territory of hikers with telephoto lenses. Smartphone computational cameras, weather-sealed mirrorless bodies, and lightweight tripods have changed what is possible. This guide collects 15 creative nature photography ideas you can try this year, plus the techniques, equipment choices, and seasonal projects that turn a single afternoon outside into a year-long portfolio.
Whether you shoot with an iPhone 16 Pro Max, a Canon EOS R8, or a twelve-year-old DSLR, the ideas below are designed to spark new subjects, new compositions, and new reasons to step outside. I have tested every one of these across different seasons, and I will tell you which ones work best for beginners, which demand patience, and which can be done in slippers from your back door.
Before we dive into the full list, here is a quick reference that mirrors how top photography resources group nature subjects. Use it as a starting point when you only have an hour or want a single category to focus on for a month-long project.
Keep this list handy. When inspiration runs dry, pick a single category and spend a week exploring only that subject. Focused practice beats scattered snapshots every time.
Below are 15 nature photography ideas ordered roughly by accessibility. The first few need almost no gear, while the later ones reward patience, planning, and a slightly more serious kit. Each idea includes smartphone alternatives and a quick difficulty rating so you can pick projects that match your current skill level.
Difficulty: Easy. Gear: Any camera, including smartphones with macro mode. Best time: Early morning on still, overcast days.
The single fastest way to fall back in love with nature photography is to slow down and look at what is already around you. A backyard macro project lets you shoot daily without ever leaving home, and the resulting images look like they came from a rainforest expedition.
Start by choosing one square meter of garden or balcony and photographing it every week. You will be amazed at how a moss patch or a single fern shifts between seasons. Look for water droplets clinging to leaves, the architecture of a spider web strung between two stems, or the geometric precision of a flower’s stamens.
Smartphone shooters can take advantage of the dedicated macro modes introduced on recent phones. The Pixel 9 Pro and iPhone 16 Pro both lock focus at distances of around 8-10 cm, which is perfect for dewdrops. Add a clip-on macro lens for under $30 if you want even more magnification, and use a small LED light or a piece of white card as a reflector to fill harsh shadows.
Difficulty: Easy. Gear: Smartphone ideal. Best time: Anytime, but blue hour is magic in the city.
Living in a city is no longer an excuse. Urban nature photography is one of the most popular sub-niches for a reason: cities are full of plants, animals, and weather events hiding in plain sight. The trick is to slow your pace and treat the city like a national park.
Pick a two-block radius and challenge yourself to photograph 50 different nature subjects in a single weekend. Weeds pushing through sidewalk cracks, moss colonizing brick, peregrine falcons nesting on office towers, or starlings gathering on a wire at dusk. Each subject tells a story about resilience.
Compositionally, urban nature works because it offers built-in frames and contrasting backgrounds. Shoot through chain-link fences for texture, frame a tree against a painted wall, or use puddles after rain as foreground interest. Smartphones excel here because they are discreet, fast, and easy to draw out at the moment a bird lands nearby.
Difficulty: Medium. Gear: Weather-sealed body or rain cover. Best time: Just before, during, and immediately after storms.
Bad weather is good photography. Storm clouds, fog, rain, and snow create the kind of atmosphere that clear blue skies simply cannot match. Most amateur photographers hide indoors when the weather turns, which is exactly why weather drama shots stand out.
Fog is my personal favorite. It strips a scene to its bones, hides clutter, and turns a mundane forest path into a cinematic image. Misty mornings, especially in autumn and early winter, are perfect for moody, minimalist work. Rain creates reflections on every surface and adds saturation to leaves and petals. Snow transforms an entire landscape into a high-key minimalist study.
Safety matters more than the shot. Never photograph in active lightning, and protect your gear with a simple rain sleeve or a plastic bag with a lens hole. Smartphones are usually water-resistant enough for a quick shower, but a cheap phone dry bag adds confidence. The goal is to return home with the photo, not a fried camera.
Difficulty: Easy. Gear: Any camera, tripod helpful for long exposures. Best time: Golden hour, blue hour, rainy days.
Water is the most versatile subject in nature photography. It can be a mirror, a blur, a sculpture, or an abstract pattern. From raindrops on a window to a thundering waterfall, water gives beginners immediate wow-factor results.
For silky long-exposure waterfalls and rivers, you will want a tripod and either an ND filter or low ambient light. Many smartphones now simulate long exposure with computational modes, but a real mirrorless body with a 10-stop ND filter produces the most authentic glassy effect.
Closer to home, carry a small spray bottle to add dew to leaves and petals on dry mornings. Each droplet acts like a tiny lens that reflects an upside-down world. Photograph condensation on a cold glass, ripples in a pond, or the pattern of rain running down a windowpane. These small subjects are perfect for practicing focus stacking on a smartphone.
Difficulty: Medium. Gear: Telephoto lens or smartphone with zoom. Best time: Early morning and late afternoon.
Bird photography used to require huge lenses and exotic trips. In 2026, a single feeder, a comfortable chair, and a 300mm lens are enough to build a portfolio of compelling images. Set up a simple tube feeder or suet block within 3-4 meters of a window, give the birds a few days to acclimate, and start shooting.
Different seasons attract different species. Spring brings migrants and nesting behavior, summer delivers fledglings learning to fly, autumn hosts heavy feeding ahead of migration, and winter is when birds most reliably visit feeders. A water source nearby will multiply your visitors dramatically.
For a deeper dive into wildlife photography techniques, see our complete wildlife photography guide. For smartphone shooters, modern phones have surprisingly effective telephoto and computational zoom. Set the phone on a small tripod or monopod to steady it, lock focus on the feeder, and burst-shoot when a bird lands. Check our guide on smartphone nature photography for more.
Difficulty: Medium. Gear: Telephoto zoom ideal, smartphone workable. Best time: Dawn and dusk for mammals, all day for birds.
You do not need a safari for wildlife photography. Local parks, canals, allotments, and even churchyards host foxes, deer, herons, kestrels, and badgers if you know when and where to look. I have photographed otters on a suburban river and a sparrowhawk catching pigeons two streets from a busy high street.
The key is pattern recognition. Walk the same route at the same time of day for a week. Note which patches of brambles hold blackbirds, which fences are used as hunting perches, and where foxes cross at dawn. Patience and observation beat expensive gear every time.
Use longer focal lengths so you never need to approach an animal. The 70-300mm range on a mirrorless body, or the periscope telephoto on a flagship phone, gives enough reach for most neighborhood wildlife. Always prioritize the welfare of the animal. If your presence changes its behavior, you are too close.
Difficulty: Easy to medium. Gear: Any camera. Best time: Overcast days for even light, golden hour for backlit glow.
Flower abstracts move beyond the literal botanical record into something more painterly. Selective focus, shallow depth of field, intentional camera movement, and double exposure all turn a common daisy into an impressionistic study. The goal is mood and color, not botanical accuracy.
Try shooting through a flower toward the light to create glowing silhouettes of petals. Use focus stacking to get a sharp petal edge that fades into creamy bokeh. Multiple exposures overlay several flowers into a single surreal blossom. Even slight, deliberate camera movement during a slow shutter exposure creates an almost watercolor effect.
Smartphones do well here thanks to computational portrait modes. The 2x or 3x telephoto on recent flagships gives more flattering perspective than the wide main lens, and apps like Slow Shutter Cam add creative motion effects on demand. For post-processing inspiration, see our nature photo editing tips.
Difficulty: Easy. Gear: Any camera, polarizing filter helps. Best time: Sunrise, sunset, approaching storms.
The sky is the largest subject you will ever photograph, and it is free, dynamic, and constantly changing. Cloud formations offer their own taxonomy of shapes, from towering cumulonimbus to delicate cirrus streaks. Learning to read the sky is half the battle.
Storm clouds and sunsets are obvious winners, but overcast skies can be just as compelling when paired with strong foreground elements. A polarizing filter deepens blue skies and cuts haze, but it costs roughly two stops of light, so use it carefully at sunrise. Smartphone users can simulate the effect with editing apps or by shooting in RAW and adjusting the contrast in Lightroom Mobile.
Try including landscape elements for scale: a single tree silhouette, a distant mountain, or a windswept fence line. Or commit to a pure sky abstract by filling the frame with dramatic clouds. Time-lapse sequences of clouds racing across the frame are easier than ever on phones and reveal motion that the eye cannot detect in real time.
Difficulty: Easy. Gear: Any camera, macro lens helpful. Best time: Late summer through autumn, with frost extending the season.
Once the flowers fade, the next act begins. Hips on wild roses, haws on hawthorn, glossy holly berries, glossy blackberries, and dangling seed pods all offer jewel-box color when the rest of the landscape is going brown. The contrast of red berries against a muted background is one of the easiest ways to create a striking image.
Look closely at seed heads: teasels, poppies, honesty (lunaria), and allium pods are architectural wonders. Backlit seed heads glow like tiny lanterns at sunset, and a slight breeze becomes part of the composition if you time your shutter release. Frost on berries in late autumn extends the season by several weeks.
For smartphone shooters, shoot in RAW if your phone supports it, lock focus, and use a small reflector to bounce soft light into the dark side of the subject. A shallow depth of field from portrait mode will turn busy hedgerow backgrounds into soft washes of green or gold.
Difficulty: Medium to advanced. Gear: Mirrorless or DSLR, tripod, wide-aperture lens. Best time: New moon nights, away from city lights.
Astronomy photography used to require dedicated equipment, but modern full-frame sensors make it dramatically easier. A 20-second exposure at ISO 3200 with a 14mm f/2.8 lens will reveal thousands of stars, including the Milky Way in summer and early autumn.
Apps like PhotoPills, Stellarium, and Planit Pro help you predict moon phases, Milky Way position, and twilight times down to the minute. Use the 500 rule: divide 500 by your focal length to find the longest exposure before star trails appear. For a 24mm lens, that is around 20 seconds.
Smartphones can capture surprisingly good night skies. The iPhone 16 Pro Max and Pixel 9 Pro both have dedicated astrophotography modes that stack multiple short exposures. Mount the phone on a small tripod, enable night mode, and let it run for 30 seconds. For more advanced night sky nature photography ideas, check our detailed guide.
Difficulty: Easy. Gear: Any camera. Best time: Calm mornings, after rain, twilight.
Reflections deliver symmetry, abstraction, and a touch of surrealism. Still lakes at dawn produce perfect mirror images, while the smallest puddle becomes a stage for an entire sky. The skill is in spotting the reflective surface and finding an angle where the real and reflected worlds interact.
Move around. A few steps left or right can turn a chaotic reflection into a clean composition, or vice versa. Polarizing filters are surprisingly useful here: rotate the filter to either enhance or suppress the reflection depending on the look you want.
Urban environments offer unexpected mirrors. Glass office blocks, car hoods, polished stone, and even sunglasses can reflect nature in striking ways. Dewdrops on spider webs each contain a tiny inverted landscape. Muddy puddles after a thunderstorm become canvases for stormy skies.
Difficulty: Easy. Gear: Any camera. Best time: Even lighting, overcast days, or shaded subjects.
Patterns are everywhere once you start looking. Fractals in ferns, spirals in snail shells, hexagons in honeycombs, branching river networks, ripples in sand, and rows of planted trees all offer visual rhythm. Pattern photography works because the human brain finds repetition deeply satisfying.
Look for both large-scale patterns (a plantation of poplar trees, a field of sunflowers) and microscopic ones (the cellular structure of a leaf, pollen on a stamen). Abstract pattern photography does not need to be recognizable as a specific object. Focus on shape, rhythm, and texture instead.
Even lighting reveals patterns best. Overcast skies work well, or shoot in open shade. Backlighting makes translucent subjects glow, like the veins of a backlit leaf or the delicate structure of a flower petal. Smartphone shooters should experiment with different angles to find how the light falls across the pattern.
Difficulty: Medium. Gear: Macro lens, smartphone macro mode. Best time: Cool mornings when subjects move slowly.
Bees, butterflies, damselflies, beetles, garden spiders, and the humble snail are everywhere if you look down. Photographing small creatures is a long-standing macro tradition because subjects are abundant, they tolerate close approach, and they reward even a basic kit with detailed, characterful images.
Cool, overcast mornings are best because insects move slowly when they are cold. Dewy mornings also bring out webs in their full glory. Approach slowly, shoot at the subject’s eye level, and use a wide aperture to throw busy backgrounds out of focus. Patience beats glass here: a 90mm macro lens on an entry-level body will outperform a 100-400mm on a flagship body for this work.
Focus stacking is the secret weapon for tiny subjects. Take a series of images at different focus distances and combine them in software like Helicon Focus or the Photoshop focus-stacking tool. Smartphone users can use apps like Focus Stacker to combine several handheld shots automatically.
Difficulty: Easy to medium. Gear: Any camera, telephoto helpful. Best time: Early morning, golden hour.
A nearby pond is a complete nature photography studio. Ducks, geese, swans, herons, dragonflies, water lilies, frogs, and reflections all coexist within a few square meters. Visit the same pond through the year and you will build a complete portfolio without traveling more than a few miles.
Move slowly, crouch low, and you will be rewarded with closer approaches than you expect. Photographing a swan at water level turns a familiar bird into something cinematic. Reflections of trees in still water double the visual interest, especially on windless mornings. Bring a polarizing filter and rotate it to control the reflection.
Wildfowl are an ideal training ground for wildlife photography beginners. Larger water birds move more slowly than small songbirds, which lets you practice focus tracking, burst shooting, and exposure compensation. Pond projects are perfect for testing a new telephoto lens or pushing smartphone zoom to its limits.
Difficulty: Medium. Gear: Any camera, RAW capture. Best time: Whenever conditions support strong shape, texture, or contrast.
Black and white is not a subject, it is a treatment, and it transforms familiar nature scenes into graphic, emotional studies. Strip away color and the eye locks onto form, texture, contrast, and tonal range instead. Bark, mist, water, branches, and bone-white winter trees are all classic monochrome subjects.
For more dynamic monochrome work, try adding sun flare and atmospheric haze to the mix. Shoot toward the sun at a narrow aperture like f/16 to create a starburst, or include morning mist for soft, low-contrast scenes. Both techniques shine in black and white because color would otherwise distract from the mood.
Shoot in RAW so you can fine-tune contrast, recover shadows, and adjust the color channels to taste during conversion. Smartphone apps like Snapseed, VSCO, and Lightroom Mobile all offer excellent monochrome conversions with control over red, orange, and yellow filter effects. For a deeper editing walkthrough, see our nature photo editing tips.
Subjects are only half the story. The same leaf photographed by two different photographers can look entirely different depending on technique. The following ideas apply to every project above and will lift your work regardless of the gear you carry.
The 20-60-20 rule, popularized by National Geographic photographer Paul Nicklen, divides your shooting time into three blocks. Spend 20% on safe shots you already know will work, 60% on creative experimentation with new angles or techniques, and 20% on risk-taking that might fail spectacularly. The wild 20% is where breakthrough images live, even if most attempts miss.
I apply this rule on every shoot. Start with one or two proven compositions to confirm my settings, then push into new territory for the bulk of the session, and reserve the final minutes for a swing-for-the-fences shot. Often that last image becomes my favorite of the day.
The rule of thirds is still the best starting point. Place key elements along the imaginary lines that divide your frame into thirds, and you will rarely go wrong. Use it as a launchpad, then break it when the scene calls for centered or symmetrical composition, which is often the case with reflections and minimalist landscapes.
Leading lines, framing, and foreground interest are the other three compositional pillars. Paths, rivers, branches, and shadows lead the eye through the image. Natural frames like overhanging branches or rock arches add depth. A clear foreground subject – a rock, a flower, a clump of grass – gives the image a layered, three-dimensional feel instead of a flat background-only shot.
Golden hour, the first hour after sunrise and the last before sunset, is the obvious favorite. The light is warm, soft, low-angle, and forgiving. Blue hour, the brief window before sunrise and after sunset, gives a cool, moody alternative that suits water, mountains, and cityscapes.
Do not stop shooting at other times, though. Overcast skies create beautiful even lighting for forests and flowers, eliminating harsh shadows. Side lighting reveals texture and form in bark and stone. Backlighting creates dramatic silhouettes and rim lighting along the edge of leaves and feathers. Learn to read light as material, not just illumination.
Shoot in RAW whenever your camera or phone supports it. RAW files capture far more tonal data than JPEGs, which gives you enormous flexibility in editing. Most modern phones now shoot RAW through apps like Lightroom Mobile, Halide, or ProCam.
For most outdoor work, Aperture Priority mode (A or Av) is the right choice. It lets you control depth of field directly. Use wide apertures like f/2.8 to f/4 to blur backgrounds when isolating a single subject like a flower or a bird. Switch to narrow apertures like f/8 to f/11 for landscapes where you want everything sharp front to back.
Keep ISO as low as conditions allow, but do not be afraid to raise it. A clean ISO 1600 image is better than a blurry ISO 100 shot. For moving wildlife, set shutter priority (S or Tv) at 1/500s or faster, and let the camera choose the aperture. For long exposure water, mount the camera on a tripod, drop ISO to 100, and use a 6 to 10 stop ND filter to achieve shutter speeds of several seconds.
Respect for wildlife must always come before the shot. Use telephoto lenses instead of approaching animals. Never bait, call, or alter the environment to provoke a reaction. Nest photography in particular requires care: getting too close can cause parents to abandon young.
Follow the rule that if your presence changes an animal’s behavior, you are already too close. Learn species-specific guidelines, especially for sensitive breeding seasons. Share locations of rare species carefully, since over-visited sites can suffer habitat damage.
The same ethics apply to smartphone photographers. Digital zoom is preferable to disturbing wildlife. Stay on trails, pack out litter, and treat every creature you photograph as you would want to be treated in your own home.
Great nature photography does not require a trunkful of gear. Most of the ideas in this guide can be done with a phone, a kit lens, or a single mid-range telephoto. The table below groups gear by budget tier and includes the kind of specific model references that help you choose a real-world setup.
| Tier | Body | Key Lens | Tripod | Approx. Investment |
|---|---|---|---|---|
| Smartphone only | iPhone 16 Pro Max, Pixel 9 Pro, Galaxy S25 Ultra | Clip-on wide or macro | Ultraportable phone tripod | $0-$150 |
| Beginner mirrorless | Canon EOS R50, Nikon Z30, Sony ZV-E10 | Kit 18-45mm or 18-55mm | Basic aluminum travel tripod | $600-$1,200 |
| Enthusiast | Canon EOS R8, Nikon Z6 III, Sony a7C II | RF 100-500mm or Z 70-200mm f/4 | Carbon-fiber tripod | $2,000-$3,500 |
| Pro setup | Sony a7R V, Nikon Z8, Canon R5 Mark II | 100-400mm or 200-600mm zoom, plus 90mm macro | Carbon tripod with gimbal head | $4,000-$7,000+ |
| Factor | Smartphone | DSLR or Mirrorless | |
|---|---|---|---|
| Portability | Always in your pocket | Requires a dedicated bag | |
| Image quality | Excellent for online and small prints | Better for large prints and heavy crops | |
| Macro capability | Limited; needs clip-on lens for true macro | Native with a 90mm or 100mm macro lens | |
| Wildlife reach | Computational zoom tops out at roughly 10-15x | Telephoto zooms reach 600mm or more | |
| Low light | Computational night modes are excellent | Full-frame sensors handle high ISO with less noise | |
| Manual controls | Available through apps | Built into the camera | |
| Best for | Backyard macro, urban nature, casual projects | Wildlife, distant subjects, large prints |
For most beginners reading this, the right answer is the camera you already own. Smartphones in 2026 are powerful enough to produce portfolio-grade images. When you outgrow them, invest in lenses, not bodies. A used Canon RF 100-500mm or Nikon Z 70-200mm f/4 will outperform a brand-new entry-level body with a kit lens. For more lens recommendations, see our guide to the best lens for nature photography.
One of the easiest ways to build a portfolio is to commit to a year-long seasonal project. Visit the same local patch every week and you will discover that nature photography has no off-season. The four sections below give specific subjects, recommended settings, and tips for each part of the year.
Spring is the loudest season. Blossoming trees, fresh leaves, returning migrants, frogs and toads heading to ponds, nesting birds, and rain-heavy skies all combine into a dense photography calendar. Walk any local woodland and you will find bluebells, wood anemones, and primroses within a few minutes. Set your alarm for dawn to photograph mist rising off fields and water.
For settings, use a wide aperture like f/4 to isolate single flowers against soft backgrounds, or stop down to f/8 for whole woodland scenes. Telephoto lenses are ideal for nesting birds, but stay back and use a long focal length. Pollinator close-ups – bees on cherry blossoms, hoverflies on dandelions – work beautifully with a 90mm macro lens at 1/250s and f/8. Carry a polarizing filter to cut glare on wet leaves.
Summer is full of life. Dragonflies and damselflies patrol pond edges, butterflies feast on buddleia, swallows and swifts scream across evening skies, and the long golden hours stretch well into the working day. Dawn and dusk remain the best light, but summer offers an extra hour of usable light at either end of the day.
Macro work thrives in summer. Look for spiderlings dispersing on silk threads, freshly emerged butterflies with folded wings, and meadows full of wildflowers. Storm photography becomes more frequent in late summer, with towering cumulonimbus clouds that look spectacular at sunset. Bring rain protection and watch for lightning from a safe distance.
For settings, raise ISO to 400-800 in low evening light to keep shutter speeds above 1/200s for moving insects. A polarizing filter enhances blue skies and brings out saturation in green foliage. Stack two or three RAW exposures for high-dynamic-range sunset scenes.
Autumn is the favorite season of most nature photographers. The color palette is unmatched: ochre, rust, gold, and crimson against moody skies. Mushrooms and fungi appear in woodlands after the first rains, offering intricate macro subjects. Spiders spin dew-heavy webs across brambles, and rutting deer make for dramatic wildlife projects.
Misty mornings are nearly guaranteed in autumn. Get out early to photograph woodlands, river valleys, and farmland shrouded in fog. Backlit trees with low sun streaming through mist create painterly scenes. Watch for frost toward the end of the season, which adds sparkle to berries and seed heads.
For settings, lean into warm white balance to enhance autumn tones, or shoot RAW and adjust later. Use a polarizing filter carefully; it can over-darken warm skies. Mushroom photography benefits from a low angle and a small reflector to fill shadows under the cap. Try long exposure on rivers at peak color.
Winter strips nature back to its bones, which is exactly why photographers love it. Bare trees become graphic silhouettes, snow transforms familiar landscapes into minimalist studies, frost patterns on windows make abstract art, and bird feeders attract visitors in plain sight. The low sun angle gives long, dramatic shadows and spectacular golden hour light that lasts only minutes.
This is the season for black and white work. Misty, overcast days create low-contrast scenes perfect for monochrome conversion. Focus on texture – bark, lichen, frost patterns on leaves, and icicles. Watch for clear, cold nights with stars, since winter brings the longest astrophotography window in the northern hemisphere.
For settings, snow will trick your meter into underexposing. Add 1 to 1.5 stops of exposure compensation to keep snow white instead of gray. Watch your battery life: cold weather drains batteries fast. Keep a spare in an inside pocket. For star photography, use the 500 rule with a wide lens and tripod. For winter wildlife, dress warmly and stay still so birds approach naturally.
The golden hour, the first hour after sunrise and the last hour before sunset, provides ideal warm, soft light. Overcast days also work well for forests and flowers because the light is even and shadow-free.
The 20-60-20 rule divides shooting time into three blocks: 20% for safe shots you know will work, 60% for creative experimentation with new techniques, and 20% for risk-taking that could fail spectacularly but might produce breakthrough images.
Absolutely. Modern smartphones like the iPhone 16 Pro Max and Pixel 9 Pro shoot RAW, handle low light, and include dedicated macro and night modes. Composition and light matter far more than the camera body.
Look for nature pushing through concrete: weeds in sidewalk cracks, moss on walls, birds on buildings, and weeds in vacant lots. Slow your pace, walk the same route weekly, and treat the city like a national park.
Use Aperture Priority for most shots: f/2.8-f/4 to blur backgrounds, f/8-f/11 for sharp landscapes. Keep ISO low but raise it as needed. Use shutter speeds of 1/500s or faster for moving wildlife and several seconds for long-exposure water.
Bad weather is good photography. Storm clouds, fog, rain reflections, and snow create atmosphere that blue skies cannot. Protect your gear with a simple rain cover, focus on intimate scenes, and prioritize safety above all.
A 70-300mm or 100-500mm telephoto zoom covers most wildlife and distant landscape work. For close-ups, a 90mm or 100mm macro lens is the classic choice. Many beginners do well with a 24-200mm or 28-300mm all-in-one zoom.
Shoot in RAW for maximum flexibility. Use Lightroom Mobile, Snapseed, or VSCO for smartphone editing. Adjust white balance, recover shadows, add a touch of clarity and vibrance, and avoid over-sharpening. Convert to black and white for moody monochrome work.
Pick a single idea from this list and commit to it for the next month. Backyard macro, urban nature hunting, and the local pond project are three of the best starting points because they require no travel and deliver results quickly. As you grow more confident, layer in new projects like bird feeders, black and white studies, or a year-long seasonal series.
For next steps, dive into our related guides on wildlife photography tips, the best lens for nature photography, our full night sky photography guide, and nature photo editing tips. For broader inspiration, see our photography tips and techniques hub.
Grab your camera or phone, step outside, and start shooting. The natural world is patient, abundant, and waiting for someone to look closely. The next great frame is a short walk away.