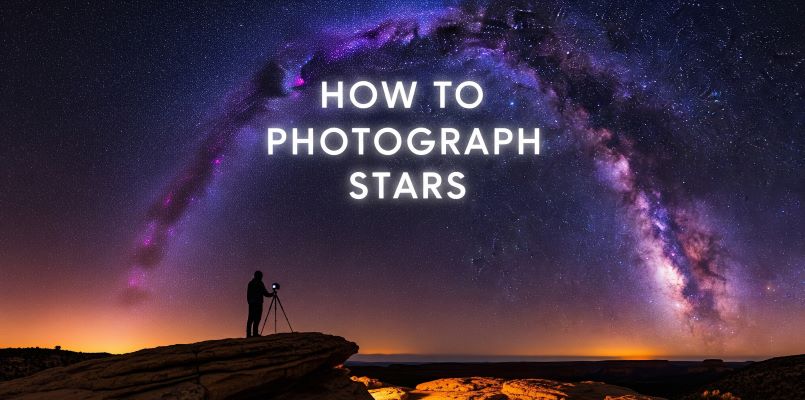
Standing under a star-filled sky ignites a primal wonder that connects us to the cosmos. Yet capturing this celestial beauty often leaves beginners frustrated with blurry dots and black frames. The secret to stunning star photography lies in mastering manual mode with specific settings: aperture at f/2.8, ISO between 1600-3200, and shutter speed of 15-30 seconds.
This comprehensive guide transforms night sky photography from intimidating to achievable. You’ll discover essential equipment, master crucial camera settings for shooting stars, learn foolproof focusing techniques, and avoid common pitfalls. Whether you’re aiming to capture the Milky Way or simply want clear shots of constellations, this roadmap takes you from complete beginner to confident star photographer.
The foundation of successful star photography starts with a camera capable of manual control. While professional gear produces superior results, any DSLR or mirrorless camera with manual mode opens the door to [internal link: night photography basics]. Your camera must allow independent control of aperture, shutter speed, and ISO to capture the faint light of distant stars.
Full-frame sensors excel at star photography due to their larger surface area and superior low-light performance. These sensors collect more light and produce less noise at high ISOs, crucial for photographing the stars at night. However, don’t let a crop sensor camera discourage you—modern APS-C cameras can produce stunning results with proper technique.
The most critical feature is good high-ISO performance. Your camera should handle ISO 1600 comfortably, with ISO 3200 being ideal for darker skies. Test your camera’s noise levels at these settings during daylight to understand its limitations before heading out under the stars.
Wide-angle lenses form the backbone of compelling night sky images. For full-frame cameras, focal lengths between 14-24mm capture expansive star fields and allow longer exposures before star trails appear. Crop sensor users should aim for 10-18mm lenses to achieve similar field of view.
Aperture proves even more crucial than focal length for star photography. An f/2.8 maximum aperture represents the sweet spot for [internal link: landscape photography lenses], balancing light-gathering ability with edge-to-edge sharpness. While f/1.4 or f/1.8 lenses collect more light, they often sacrifice sharpness and make focusing challenging.
Recommended Star Photography Lenses:
| Camera Type | Budget Option | Professional Choice |
|---|---|---|
| Full Frame | Samyang 14mm f/2.8 | Sigma 14-24mm f/2.8 DG DN Art |
| Crop Sensor | Tokina 11-16mm f/2.8 | Fujifilm 10-24mm f/4 |
A rock-solid tripod transforms star photography from impossible to achievable. Long exposures of 15-30 seconds demand absolute stability—even slight vibrations create blurry stars. Carbon fiber tripods excel by dampening vibrations better than aluminum while remaining lightweight for [internal link: outdoor photography adventures].
Your tripod must support your camera and lens combination with room to spare. A payload rating of at least double your gear weight ensures stability in windy conditions. The legs should extend tall enough for comfortable viewing angle without raising the center column, which compromises stability.
Quality ball heads make precise composition adjustments smooth and secure. Look for heads with separate panning bases and strong locking mechanisms. Arca-Swiss compatible plates streamline setup in darkness, allowing quick camera attachment without fumbling with screws.
While not essential, several accessories significantly improve your star photography experience. A remote shutter release or intervalometer eliminates camera shake from pressing the shutter button. Many cameras offer built-in 2-second or 10-second delays as free alternatives.
Extra batteries prove invaluable during long exposure photography of stars. Cold weather and extended shooting drain power rapidly—pack 3-5 spares for all-night sessions. Keep batteries warm in your pocket until needed to maximize their lifespan.
Quick Start Equipment Checklist:
Automatic modes fail spectacularly when photographing stars because cameras can’t meter in near-total darkness. Switching to manual mode for stargazing unlocks complete control over your exposure triangle. This intimidating step becomes simple once you understand each setting’s role in capturing starlight.
Start by setting your camera to Manual (M) mode and switching to RAW file format. RAW files preserve maximum image data for [internal link: post-processing tutorials], crucial for bringing out subtle star colors and Milky Way details. Disable any in-camera noise reduction—it only affects JPEGs and wastes battery life.
Turn off image stabilization on your lens or camera body. While counterintuitive, stabilization systems can introduce micro-movements during long exposures on tripods. Set your white balance to Kelvin mode between 3200-4000K for natural-looking night skies that match what your eyes perceive.
Aperture controls your lens’s light-gathering ability, making it the most critical setting for star photography. Set your lens to its widest aperture—f/2.8 provides the ideal balance between light collection and sharpness. This best exposure for star photography allows sufficient light to reach your sensor while maintaining sharp stars across the frame.
If your lens only opens to f/4, you’ll need to compensate with higher ISO or slightly longer exposures. While f/1.4 or f/1.8 lenses gather more light, they often produce soft corners and make precise focusing challenging. Many photographers find f/2.8 delivers the best overall results for night photography settings for stars.
Remember that maximum sharpness typically occurs 1-2 stops down from wide open. However, star photography demands maximum light gathering, making wide-open apertures necessary despite minor sharpness compromises. Modern lenses perform admirably at their maximum apertures, especially those designed for astrophotography.
The Earth’s rotation creates an invisible challenge—stars appear to move across the sky, creating trails in long exposures. The 500 Rule calculates the longest shutter speed before noticeable star trails appear. Simply divide 500 by your lens’s focal length to find your maximum exposure time.
500 Rule Quick Reference:
| Focal Length | Full Frame Max | Crop Sensor Max |
|---|---|---|
| 14mm | 35 seconds | 23 seconds |
| 20mm | 25 seconds | 16 seconds |
| 24mm | 20 seconds | 13 seconds |
Most photographers find 20-25 seconds works perfectly for sharp stars, though some prefer 15-20 seconds for pinpoint sharpness. The <a href=”https://www.photopills.com/calculators/spot-stars” target=”_blank”>PhotoPills Spot Stars calculator</a> provides precise calculations based on your specific camera sensor.
ISO amplifies your sensor’s sensitivity to light but introduces noise at higher values. Start with ISO 1600 as your baseline for camera settings for photographing stars. This setting balances light sensitivity with acceptable noise levels on most modern cameras.
Dark sky locations allow ISO 1600 to capture plenty of detail, while light-polluted areas might require ISO 3200 or 4000. Push your ISO only as high as necessary—there’s no benefit to overexposing star photos. Match the exposure to the darkness you observe, keeping the night sky naturally dark rather than artificially bright.
Test your camera’s high-ISO performance beforehand to understand its noise characteristics. Full-frame cameras typically handle ISO 3200-6400 well, while crop sensors perform best below ISO 3200. Remember, some noise is acceptable and can be reduced in post-processing.
Camera Settings Quick Reference Table:
| Setting | Recommended Value | Purpose |
|---|---|---|
| Mode | Manual (M) | Full control over exposure |
| File Format | RAW | Maximum editing flexibility |
| Aperture | f/2.8 | Optimal light gathering |
| Shutter Speed | 20-25 seconds | Sharp stars without trails |
| ISO | 1600-3200 | Balance of sensitivity and noise |
| White Balance | 3200-4000K | Natural night sky color |
Common Settings Mistakes to Avoid:
- Using auto ISO (creates inconsistent exposures)
- Leaving lens stabilization on (causes blur on tripod)
- Shooting JPEG only (limits editing potential)
- Pushing ISO too high unnecessarily (increases noise)
- Using too long shutter speeds (creates star trails)
Achieving sharp focus ranks among the biggest challenges in star photography. Your camera’s autofocus system fails in darkness, requiring manual focus techniques. While lenses mark infinity (∞) on their focus rings, this symbol rarely represents true infinity focus for camera settings for star photography.
Start by switching your lens to manual focus mode. Rotate the focus ring to the infinity symbol, then fine-tune slightly back. Most lenses achieve sharpest infinity focus just before the ∞ mark. This critical adjustment makes the difference between sharp pinpoints and blurry star blobs.
Modern lenses often lack detailed distance scales, making precise infinity focus challenging. Electronic focus-by-wire systems require extra patience. Make small adjustments and test each change—rushing this step guarantees disappointing results when you review images at home.
The most reliable focusing method happens before darkness falls. During daylight, set up your camera with the exact lens and focal length you’ll use for night photography. This [internal link: preparation technique] eliminates guesswork when stars emerge.
Step-by-Step Daytime Focus Method:
This preset focus point works reliably for all star photography at that focal length. The hyperfocal distance principle ensures everything from nearby foreground to infinite stars remains acceptably sharp. Create separate marks for different focal lengths if using a zoom lens.
When pre-focusing isn’t possible, Live View provides the most accurate focusing method for settings for star photography. This technique works best with bright stars or planets visible in the night sky. The Moon, while not ideal for star photography, offers an excellent focusing target when present.
Activate Live View and point your camera at the brightest star visible. Zoom the Live View display to maximum magnification (usually 10x). The star should appear as a small point of light on your screen. Carefully adjust focus until the star appears as small and sharp as possible.
Check focus across the entire frame, especially corners where wide-angle lenses often show softness. If corners appear significantly less sharp, you may need to stop down to f/4 for better edge-to-edge sharpness. This compromise requires higher ISO but delivers sharper overall results.
Visual Focus Check Guide:
Light pollution represents the greatest enemy of star photography. Cities emit a dome of light that washes out all but the brightest stars. Escaping to truly dark skies transforms your night photography from mediocre to magnificent. The difference between urban and rural skies shocks first-time dark sky visitors.
Use the <a href=”https://www.lightpollutionmap.info/” target=”_blank”>Light Pollution Map</a> to locate the darkest areas within driving distance. Look for locations marked green, blue, or black—these offer excellent star visibility. Most photographers find driving 60-100 miles from major cities provides sufficiently dark skies for impressive results.
National parks, wilderness areas, and designated Dark Sky Parks offer ideal conditions for photographing the stars at night. These locations actively preserve natural darkness through lighting ordinances. Popular dark sky destinations often have established viewpoints perfect for [internal link: landscape astrophotography compositions].
The Moon dramatically impacts star visibility, making phase planning crucial for best camera settings for stars. New moon periods provide the darkest skies, revealing thousands more stars than visible during full moon. Plan shoots within five days before or after new moon for optimal darkness.
Moon Phase Impact on Star Photography:
Beyond moon phases, timing within the night matters significantly. The darkest skies occur between astronomical twilight and dawn, typically midnight to 4 AM. Earlier evening shoots contend with lingering twilight, while pre-dawn sessions risk approaching sunrise.
Clear skies seem obvious for star photography, yet partial clouds can enhance compositions dramatically. Aim for nights with 0-50% cloud cover—completely clear skies sometimes lack visual interest. High, thin clouds catch subtle starlight colors without blocking primary subjects.
The Milky Way season runs March through October in the Northern Hemisphere, with peak visibility in summer months. During winter, Orion and other prominent constellations dominate the sky. Each season offers unique celestial subjects for long exposure photography of stars.
Check multiple weather sources for accurate forecasts. Mountain and desert locations experience rapid weather changes. Temperature drops significantly after sunset—dress warmly and bring extra layers. Dew formation poses another challenge, potentially fogging lenses during humid nights.
Modern apps revolutionize star photography planning, removing guesswork from celestial positioning. PhotoPills stands out as the comprehensive planning solution, combining sun/moon data, Milky Way positioning, and hyperfocal calculations. The Night AR mode overlays celestial objects on your camera view.
Stellarium provides detailed sky maps for any location and time. This free planetarium software shows exactly where constellations, planets, and the Milky Way appear throughout the night. Plan compositions months in advance by visualizing the night sky for specific dates.
Essential Planning Tools:
Compelling star photography transcends simply pointing your camera skyward. Incorporating strong foreground elements creates depth and context that transforms snapshots into artworks. The contrast between earthly subjects and cosmic backgrounds generates visual tension that captivates viewers.
Trees offer versatile foreground subjects, their distinctive silhouettes framing the night sky dramatically. Dead trees work particularly well, their bare branches creating intricate patterns against star fields. Position yourself to capture interesting tree shapes without cluttering the composition. Low angles often produce the most dramatic perspectives.
Mountains and rock formations provide solid anchors for ethereal star scenes. These permanent features ground your images while showcasing the vastness above. Lakes and rivers introduce reflective surfaces that double the star impact, though wind can disturb mirror-like reflections during long exposures.
Architecture adds human elements to cosmic scenes. Old barns, abandoned buildings, and ancient ruins tell stories beneath the stars. Lighthouses, bridges, and monuments create recognizable landmarks that viewers connect with emotionally. Ensure any artificial lights complement rather than overpower the stars.
The Milky Way galactic center creates the most dramatic celestial subject for night photography settings for stars. This bright core rises in the southern sky, displaying rich detail and color invisible to the naked eye. Understanding its position and movement enables powerful compositions throughout the night.
Vertical compositions emphasize the Milky Way’s towering presence, especially when it rises perpendicular to the horizon. This orientation works beautifully with tall foreground elements like trees or rock spires. Horizontal compositions capture the arc stretching across the sky, ideal for panoramic landscapes.
Milky Way Composition Guidelines:
Wide-angle lens distortion becomes a creative tool for [internal link: creative night photography]. Exaggerated perspectives make foregrounds appear larger while maintaining expansive sky views. Place interesting elements near frame edges to maximize this effect while keeping the Milky Way prominent.
Light painting adds selective illumination to foregrounds during long exposures, revealing details invisible in pure starlight. This technique bridges the exposure gap between bright stars and dark landscapes. When executed subtly, light painting enhances without appearing artificial.
Use low-powered LED flashlights with warm color temperatures around 3000K. Cool white LEDs create unnatural blue casts that clash with warm star colors. Red filters preserve night vision while adding dramatic mood. Practice your painting motions before opening the shutter.
Light Painting Best Practices:
Advanced practitioners combine multiple light sources for complex effects. Colored gels create artistic interpretations, while precise spotlighting highlights specific features. Remote-controlled lights enable painting from camera position. Remember, subtlety often produces the most natural results.
Unintended star trails frustrate beginners learning camera settings for shooting stars. These streaks appear when exposure times exceed the threshold for your focal length. Even following the 500 Rule perfectly, some trailing may occur due to atmospheric conditions or equipment limitations.
First, verify your calculations match your actual focal length and sensor size. Crop sensor cameras require shorter exposures than full frame for equivalent results. Many photographers find the 500 Rule too generous—try the 400 Rule for guaranteed sharp stars, especially with high-resolution sensors.
Check for mechanical issues causing movement. Loose tripod connections, sagging ball heads, and wind vibration all create trails. Mirror slap in DSLRs can introduce subtle shake—enable mirror lock-up or use electronic first curtain shutter. Even pressing the shutter button causes enough movement to blur stars.
Star Trail Prevention Checklist:
Soft, bloated stars indicate focus problems requiring immediate attention. This issue devastates otherwise perfect compositions, and no amount of post-processing recovers poor focus. Understanding various blur causes helps diagnose and solve focus issues quickly in the field.
Wide-open apertures often produce soft corners on budget lenses. While center sharpness might appear acceptable, edges show significant degradation. Test your lens beforehand to understand its characteristics. Stopping down to f/4 dramatically improves corner performance on most lenses.
Atmospheric conditions significantly impact star sharpness for best settings for star photography. High humidity, temperature inversions, and atmospheric turbulence blur star images regardless of perfect focus. Low elevation shoots suffer more from atmospheric interference than high-altitude locations.
Temperature changes between setup and shooting cause focus shift as lens elements expand or contract. Metal lenses show more thermal expansion than modern plastics. Refocus periodically throughout the night, especially during significant temperature drops. Some dedicated astrophotographers tape lens barrels to minimize thermal effects.
High ISO noise appears inevitable when learning how to photograph stars, yet proper technique minimizes its impact. Understanding your camera’s noise characteristics enables informed decisions balancing brightness against quality. Modern sensors handle high ISO remarkably well compared to older generations.
Underexposure amplifies noise more than high ISO itself. Ensure your histogram shows adequate data without clipping highlights. The common advice “expose to the right” applies within reason—don’t artificially brighten the night sky. Natural darkness with visible detail produces the most realistic results.
Noise Reduction Strategies:
| In-Camera | Post-Processing | Advanced |
|---|---|---|
| Optimal exposure | Luminance NR | Dark frame subtraction |
| Lowest necessary ISO | Color NR | Image stacking |
| Proper white balance | Selective masking | Cooled sensors |
For extreme noise situations, consider image stacking techniques. Capturing multiple identical frames allows [internal link: advanced processing methods] to average out random noise while preserving star detail. Even 4-8 frames significantly improve final image quality.
Shooting RAW unlocks the full potential of your star images through non-destructive editing. These files contain far more data than visible on your camera’s LCD, especially in shadow areas where Milky Way details hide. Processing RAW files reveals colors and structures invisible to the naked eye.
Import your files into Lightroom, Capture One, or your preferred RAW processor. Start with lens corrections to remove vignetting and distortion common in wide-angle lenses. These automated corrections improve overall image quality before creative adjustments begin.
Basic adjustments transform dark captures into vibrant night skies. Increase exposure slightly (usually +0.5 to +1.0 stops), lift shadows to reveal foreground detail, and carefully adjust highlights to prevent star bloating. The clarity and texture sliders enhance Milky Way structure when used sparingly.
Essential RAW Adjustments for Stars:
Light pollution creates color casts requiring targeted correction for camera settings for photographing stars. The graduated filter tool enables selective adjustments to sky regions without affecting foregrounds. Reduce orange glow near horizons while preserving natural sky colors above.
Star enhancement requires delicate balance between visibility and natural appearance. The masking tools in modern processors select stars automatically. Slight exposure increases make dim stars visible, while clarity adds definition. Avoid over-processing that creates unnatural halos or bloated stars.
Color grading transforms good images into stunning artistic interpretations. Split-toning adds subtle color to highlights and shadows separately. Cool blues in shadows complement warm oranges in highlighted areas. The <a href=”https://www.nasa.gov/image-galleries/astrophotography/” target=”_blank”>NASA Astrophotography Gallery</a> showcases natural color palettes for inspiration.
Noise reduction applies last to avoid smearing star details. Luminance noise reduction removes grain while color noise reduction eliminates random color speckles. Apply selectively using masks—foregrounds tolerate more aggressive reduction than star fields. Modern AI-powered tools excel at preserving details while eliminating noise.
The optimal camera settings for night photography combine maximum light gathering with minimal noise. Use manual mode with aperture at f/2.8, shutter speed between 20-25 seconds, and ISO 1600-3200. These settings balance star sharpness, brightness, and image quality for most situations. Adjust ISO based on sky darkness and light pollution levels.
Focus on stars using the Live View magnification method for best results. Switch to manual focus, activate Live View, and zoom to 10x magnification on a bright star. Adjust focus until stars appear as tiny pinpoints. Alternatively, [internal link: focus during daylight] on a distant object and mark the focus point with tape for reliable nighttime results.
Shoot during new moon phases or within 5 days for darkest skies. The best hours fall between midnight and 4 AM when skies reach maximum darkness. Aim for nights with minimal cloud cover, low humidity, and stable atmospheric conditions. Check astronomy-specific weather forecasts for transparency and seeing conditions.
Kit lenses can capture stars, though with limitations. Most kit lenses open to f/3.5-5.6, requiring higher ISOs to compensate for less light gathering. Use the widest focal length and aperture available, increase ISO to 3200-6400, and consider slightly shorter exposures. While results won’t match f/2.8 lenses, you can still create compelling star images.
Prevent star trails by following the 500 Rule: divide 500 by your focal length for maximum shutter speed. For sharper results, use the 400 Rule instead. A 20mm lens allows 25-second exposures on full frame cameras (500÷20=25). Ensure your tripod remains completely stable and disable image stabilization when mounted.
Mastering star photography transforms frustrating attempts into rewarding captures of our universe’s beauty. The journey from auto mode confusion to confident manual control opens creative possibilities limited only by weather and imagination. Remember the core formula: f/2.8 aperture, 20-25 second exposures, and ISO 1600-3200 provide reliable starting points for any night sky adventure.
Your first successful star photo ignites a passion that drives continuous improvement. Each session teaches new lessons about reading the night sky, perfecting technique, and pushing creative boundaries. Whether capturing the Milky Way arch or simple constellation patterns, the satisfaction of revealing invisible celestial wonders never diminishes.
Tonight’s clear sky presents your opportunity to begin. Grab your camera, escape the city lights, and point your lens toward infinity. The stars await your unique perspective—start creating your cosmic portfolio under the vast canvas above.

