Jewelry Photography Ideas: Complete Guide for Stunning Results 2025
Complete guide to jewelry photography with 20+ creative ideas, lighting techniques, and equipment recommendations for stunning results at any skill…
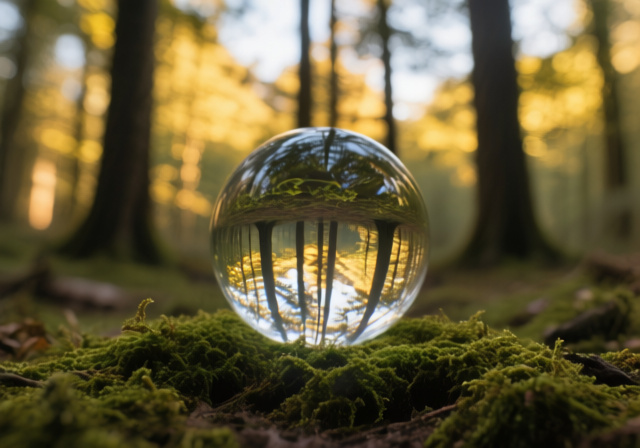
Light photography is the art and technique of using light as the primary creative element in your images. After shooting over 10,000 photos in every lighting condition imaginable, I’ve learned that understanding light completely transforms ordinary scenes into extraordinary photographs.
The difference between good and great photography almost always comes down to light. It’s not about having expensive equipment or the latest camera – it’s about seeing and manipulating light to create mood, depth, and visual interest. Whether you’re shooting with a professional DSLR or your smartphone, these light photography ideas will elevate your work immediately.
In this comprehensive guide, you’ll discover 15+ practical lighting techniques you can use today, from natural light mastery to creative effects that make viewers stop scrolling. I’ll show you how to find great light anywhere, create stunning effects with minimal equipment, and solve common lighting problems that frustrate most photographers.
For more photography tips and guides, explore our complete collection of lighting tutorials and techniques.
Light photography works by understanding four key properties: direction, quality, intensity, and color. Direction refers to where light comes from relative to your subject – front, side, or back. Quality describes whether light is hard (creating sharp shadows) or soft (creating gradual shadows). Intensity is the brightness or strength of light, while color temperature ranges from warm (golden) to cool (blue) tones.
Why is light so crucial in photography? Light determines exposure, creates mood, defines shapes and textures, establishes depth, and guides the viewer’s eye through your composition. It’s literally the paint you use to create your photographic art. Master these fundamentals, and everything else becomes easier.
Light Quality: The difference between hard light (direct sun, creating sharp, defined shadows) and soft light (overcast day, creating gentle, gradual shadows). Soft light is generally more flattering for portraits.
Natural light is the most accessible and often the most beautiful light source available. Here are proven techniques I use regularly in my photography work:
The hour after sunrise and before sunset provides warm, directional light that creates beautiful long shadows and golden tones. This is when I capture my most dramatic landscape and portrait images. The light is soft yet directional, perfect for creating depth and dimension.
Window light is the most flattering and readily available light source for indoor portraits. Position your subject facing a large window at a 45-degree angle. This creates soft, directional light that sculpts facial features naturally. I’ve shot professional-looking portraits using nothing but a north-facing window.
Cloudy days provide perfect soft lighting conditions. The clouds act as a giant softbox, eliminating harsh shadows while maintaining even illumination. This is ideal for outdoor portraits and flower photography. Don’t stay home on overcast days – they’re perfect for shooting!
Shooting in shade can produce better results than direct sunlight. Find open shade (under a tree or building) where the light is still present but diffused. This maintains the soft quality of open shade while providing even lighting on your subject.
Place your subject between you and the light source. This creates beautiful rim effects and can produce stunning silhouettes. I use this technique for dramatic portraits and nature shots. Expose for your subject’s face or use spot metering to maintain detail.
Light filtering through leaves creates interesting patterns that add visual interest. Position your subject in patches of light and shadow for dynamic compositions. Be careful with portraits – avoid dappled light on faces as it can be distracting.
Use open sky as a giant reflector. Position your subject near a reflective surface like water, sand, or light-colored pavement. The sky will bounce soft light back into shadows, reducing contrast and creating natural fill light.
The 20-30 minutes after sunset (or before sunrise) creates a blue-toned, moody atmosphere perfect for cityscapes and atmospheric shots. Use a tripod for longer exposures and embrace the deep blue tones.
For specific low light photography techniques and night shooting strategies, check out our complete guide to photographing stars and celestial objects.
These creative techniques will add artistic flair to your images and help you develop a unique style:
Create silhouettes by placing your subject in front of a bright light source and exposing for the background. This emphasizes shape and form while adding mystery and drama. Sunsets are perfect for silhouette portraits.
Instead of avoiding lens flare, use it creatively. Position your camera so light hits the lens directly at an angle. This adds warm, glowing orbs and streaks that can enhance mood. Use a wide aperture (f/1.8-f/2.8) for more pronounced flare.
Create starbursts from point light sources by using a small aperture (f/11-f/16). Streetlights, the sun, or even Christmas lights become beautiful star shapes. This works best with sharp lenses and clean front elements.
Use shadows as compositional elements. Long shadows at golden hour can lead the eye through your image. Look for interesting shadow patterns and use them to create depth and mystery in your compositions.
Position a light source behind your subject to create a glowing outline. This separates your subject from the background and adds a professional touch to portraits. Natural sun works great for outdoor rim lighting.
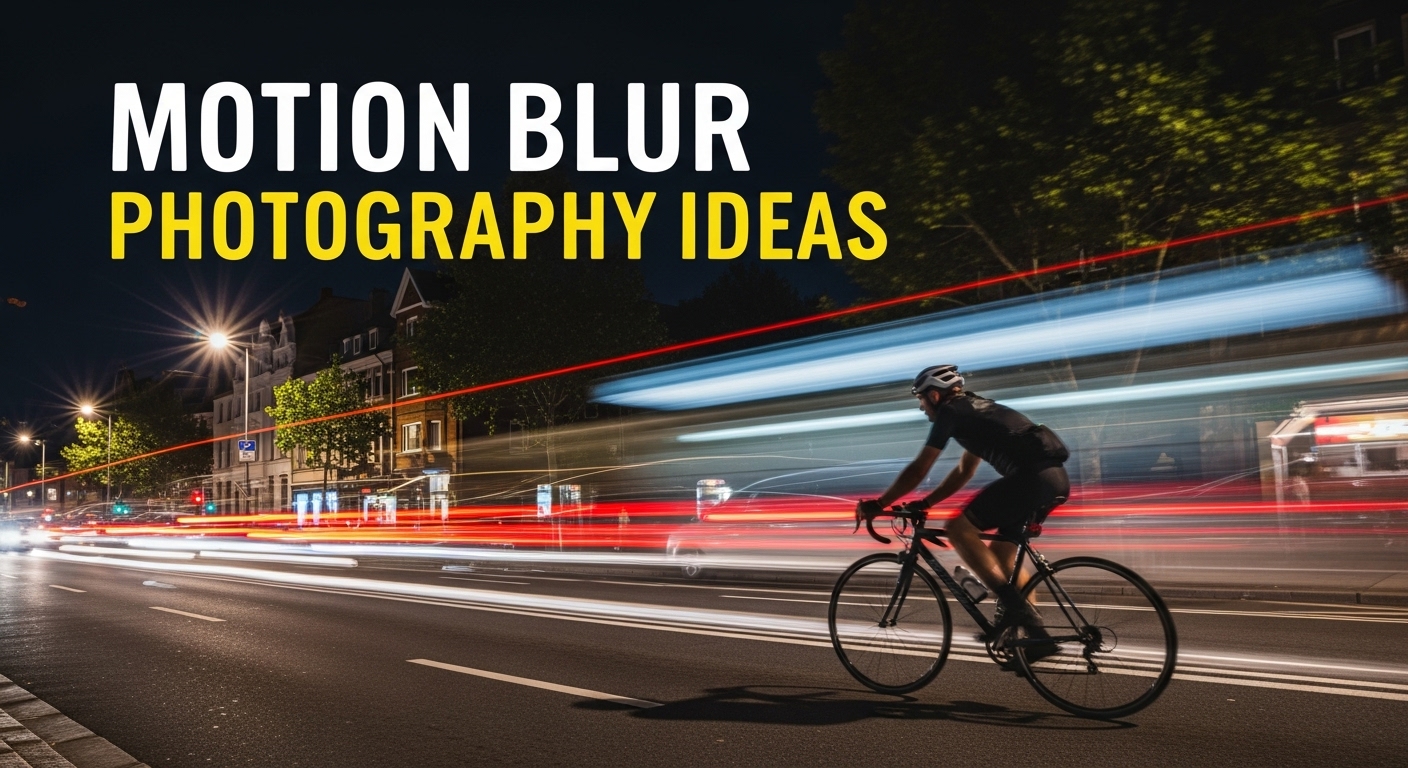
Use long exposures and move light sources through your scene. Flashlights, LEDs, or even phone screens can create light trails and patterns. Use a tripod, set ISO to 100-400, aperture to f/8-f/11, and experiment with exposure times.
Look for natural reflectors – white walls, metal surfaces, water. These bounce light back into shadows and can create interesting effects. A simple white poster board can serve as an emergency reflector.
Use colored light sources for creative effects. Golden hour provides natural warmth, blue hour creates cool tones, or use colored gels on artificial lights for dramatic color schemes.
You don’t need expensive studio equipment to create beautiful artificial light. Here’s what I recommend starting with:
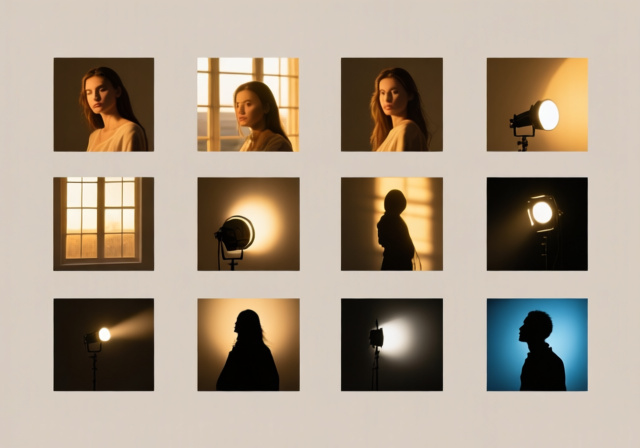
One light source can create professional-looking results when positioned correctly. Place your light at a 45-degree angle to your subject and slightly above eye level. This creates classic loop lighting that’s flattering for portraits.
Regular household lamps work great for photography. Remove lampshades for harder light or keep them for softer illumination. Position multiple lamps to create three-point lighting: key light, fill light, and backlight.
Create softboxes from white cardboard, diffusion panels from shower curtains, or reflectors from aluminum foil and cardboard. These DIY solutions cost pennies but dramatically improve light quality.
If using on-camera flash, never point it directly at your subject. Bounce it off ceilings or walls, or use a DIY diffuser like a tissue rubber-banded over the flash. This creates softer, more natural-looking light.
Mobile photography has unique challenges and opportunities for lighting:
Use manual camera apps to control exposure. Apps like ProCam X or Moment give you control over shutter speed, ISO, and white balance – crucial for challenging lighting situations.
Your phone’s built-in flash is harsh and unflattering. Instead, use a small LED light panel that attaches to your phone, or position near lamps to provide better lighting.
Most phones now offer portrait mode with studio lighting effects. Experiment with these options to simulate professional lighting setups like stage light or contour light.
For low light mobile photography, stabilize your phone against a wall or use a small tripod. Use night mode if available, or manually lower ISO and increase shutter speed for cleaner images.
You don’t need to spend much to improve your lighting:
Here are solutions to lighting issues every photographer encounters:
Solution: Find open shade, use a diffuser, or embrace the harsh light for dramatic high-contrast images. Position subjects with the sun behind them and use fill flash or reflectors.
Solution: Set white balance manually for the dominant light source, or use color correction gels to match light temperatures. Avoid mixing daylight and indoor light when possible.
Solution: Use reflectors to fill shadows, move subjects to more even light, or expose for highlights and recover shadows in post-processing.
Solution: Move your light source to the side to create shadows and dimension. Side lighting at 90 degrees creates the most dramatic effect.
Solution: Use spot metering on your subject, increase exposure compensation, or use fill flash/light to balance the exposure between subject and background.
Each season offers unique lighting possibilities:
Spring: Soft, diffuse light through new leaves. Perfect for flower photography with gentle, natural backlighting.
Summer: Long days and strong sun. Early morning and late evening provide the best light. Midday creates harsh shadows – use them creatively or find shade.
Fall: Low angle sun creates dramatic golden light. Fall colors pop in warm afternoon light. Perfect for atmospheric landscapes.
Winter: Low sun angle throughout the day creates long shadows. Snow acts as a natural reflector, creating soft, even lighting. Winter light is often cool and blue-toned.
Light photography starts with observing light quality and direction. Begin with natural light – shoot during golden hour for warm tones, use window light for portraits, and embrace overcast days for soft lighting. Experiment with backlighting for silhouettes, use reflectors to fill shadows, and practice seeing light as your primary creative tool rather than just illumination.
Soft, directional light is most flattering for portraits. Window light from a north-facing window creates perfect illumination without harsh shadows. Golden hour light (hour after sunrise/before sunset) provides warm, flattering tones. Avoid direct midday sun which creates harsh shadows under eyes and nose. Large light sources relative to your subject create the most flattering soft light.
Soft light comes from large light sources and creates gradual shadows with smooth transitions between light and dark areas. Examples include overcast sky, large windows, or studio softboxes. Hard light comes from small light sources and creates sharp, defined shadows with clear edges. Examples include direct sun, bare flash, or small LED lights. Soft light is generally more flattering for portraits.
Create dramatic lighting through contrast and direction. Use side lighting at 90 degrees to split your subject into light and shadow. Backlighting creates silhouettes and rim effects. Low light angles produce long shadows for drama. Hard light creates bold shadows and high contrast. Experiment with colored gels for mood lighting and use shadows as compositional elements to enhance the dramatic effect.
Start with what you have: window light, household lamps, and a simple reflector (white foam board works great). A 5-in-1 reflectector ($15) is the best first purchase. Add a small LED panel ($18) for portable artificial light. DIY modifiers like diffusion panels from shower curtains and reflectors from aluminum foil cost almost nothing. Master natural light before buying expensive equipment.
For low light without flash, use a wider aperture (f/1.8-f/2.8), increase ISO carefully (start at 800-1600), and slow shutter speed while keeping it hand-holdable (1/60s minimum). Stabilize against walls or use a tripod for longer exposures. Use your camera’s lowest light setting or night mode if available. Embrace grain/noise as part of the aesthetic rather than trying to eliminate it completely.
Light photography is a skill that develops with practice. Start by observing light everywhere – notice how it changes throughout the day and how it affects everything around you. Practice one technique at a time until it becomes second nature.
Remember, the best light is often the simplest. Window light has powered incredible portraits for over a century. Golden hour remains the magic time for outdoor photography. You don’t need expensive equipment to create stunning images – you need to understand and work with light.
With our photography expertise and these techniques, you’re ready to transform your images through creative lighting. Share your light photography experiments in the comments below, and remember – the best light is often the light you have right now.