Photography Trends 2025: Complete Guide to 20 Dominating Movements
Master 20 photography trends dominating [cy] - from AI-enhanced imaging to Gen Z's authentic aesthetics. Practical guide with implementation tips…
Feeling stuck in a photography rut? I’ve been there too—staring at the same familiar scenes, wondering how to create something compelling without traveling to exotic locations. After years of shooting in various outdoor settings, I’ve discovered that creativity often comes from seeing the ordinary in extraordinary ways.
Outdoor photography ideas are creative concepts and techniques for capturing compelling images in natural environments, ranging from landscape and nature photography to urban outdoor scenes and creative techniques that can be practiced in various outdoor settings.
What makes outdoor photography special is its accessibility. You don’t need expensive gear or dramatic locations to create stunning images. Sometimes the most powerful photographs come from simply paying attention to what’s already around you.
In this guide, I’ll share 21 proven outdoor photography ideas that I’ve tested and refined over thousands of outdoor shoots. These techniques work whether you’re in a city, suburb, or rural area—using just the gear you already have.
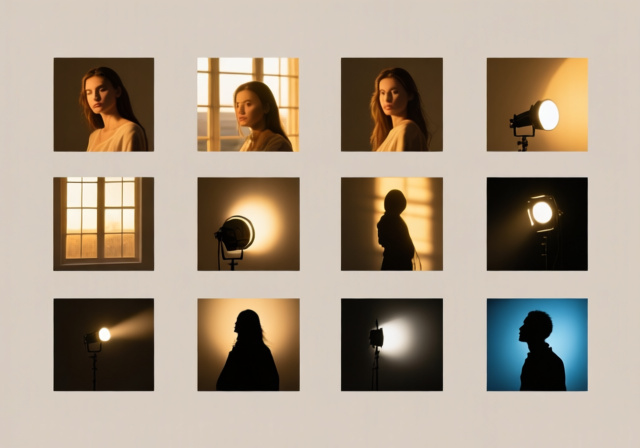
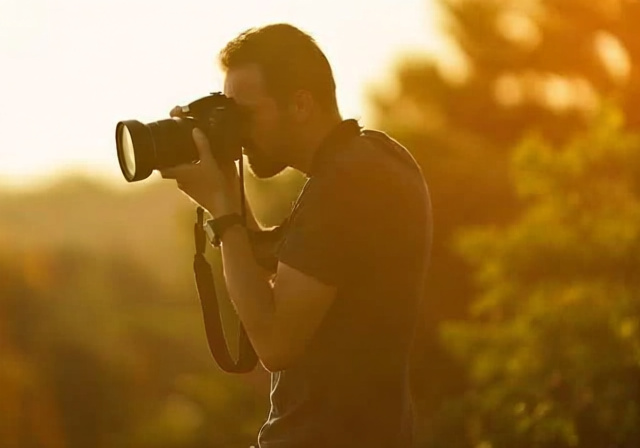
The golden hour—the first hour after sunrise and last hour before sunset—is outdoor photography’s magic time. I’ve found this lighting adds warmth and dimension that’s impossible to replicate with editing.
During golden hour, the sun sits low on the horizon, creating soft, directional light. This eliminates harsh shadows while adding depth to your subjects. For portraits, position your subject with the sun at a 45-degree angle to their face.
Pro tip: Arrive 30 minutes early. The best light often happens before the sun actually reaches your ideal position. Use a photography app like PhotoPills to track golden hour times for your location.
Backlighting occurs when your primary light source is behind your subject. While beginners often avoid this setup, I’ve found it creates some of the most dramatic outdoor images.
For nature photography, backlighting turns leaves into glowing jewels and creates rim lighting on wildlife. In portraits, it produces beautiful hair light and separation from backgrounds.
Set your exposure for your subject’s face or the darker areas, not the bright background. Use spot metering mode if your camera has it, or add +1 to +2 exposure compensation.
Cloudy days aren’t bad for photography—they’re actually ideal for certain types of shots. The clouds act as a giant softbox, creating even, flattering light perfect for portraits and close-ups.
I love overcast lighting for flower photography and outdoor portraits. The lack of harsh shadows means you can shoot at any time without worrying about unflattering light patterns.
On overcast days, look for colorful subjects that pop against the soft light. This is when red flowers, autumn leaves, and colorful clothing really stand out.
Blue hour occurs just before sunrise and after sunset, when the sky takes on deep blue tones. This creates a moody, ethereal quality that’s perfect for cityscapes and landscapes.
For architecture and urban scenes, blue hour adds drama while interior lights create warm contrast. You’ll need a tripod for these shots, as exposures typically run 2-10 seconds.
Start shooting about 20 minutes after sunset. The best blue light often appears 30-45 minutes after the sun disappears, depending on your latitude and time of year.
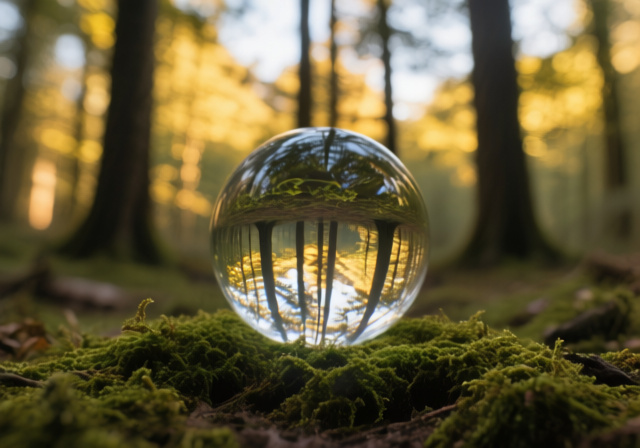
Macro photography reveals hidden details in everyday nature. You don’t need a dedicated macro lens—many standard lenses focus close enough for dramatic results.
I’ve spent entire afternoons photographing just one square meter of forest floor. Look for dewdrops on spiderwebs, texture patterns on tree bark, or the intricate structure of flowers.
For smartphone users, consider clip-on macro lenses. They’re inexpensive and can transform your phone into a capable macro camera. Remember: depth of field is extremely shallow in macro photography, so use a small aperture (f/8 or smaller) and focus carefully.
Forests offer endless opportunities for creating depth through layering. Instead of shooting straight through the trees, find compositions with multiple layers: foreground, middle ground, and background.
I use longer lenses (70-200mm) to compress these layers, creating a sense of depth that shorter lenses can’t capture. Look for paths, streams, or patterns of light that guide the eye through the frame.
Misty or foggy days are perfect for forest photography. The fog adds mystery and simplifies busy backgrounds by obscuring distant elements.
Water creates natural mirrors that double the visual impact of your scenes. Still lakes, calm ponds, and even puddles after rain can produce stunning reflections.
For perfect reflections, use a polarizing filter to reduce glare on the water surface. Position your camera as low as possible—sometimes just inches above the water—to maximize the reflective area.
Don’t ignore imperfect reflections. Rippled water can create abstract, painterly effects that are more interesting than perfect mirrors. Try longer exposures (1-2 seconds) to smooth out minor ripples while maintaining some texture.
You don’t need a safari to photograph wildlife. Urban and suburban areas host surprising diversity if you know where to look.
I’ve photographed 50+ bird species in city parks alone. Early morning is best—animals are most active and humans are few. Bring binoculars for spotting, then approach slowly with your longest lens.
For successful wildlife photography: research your subjects’ habits, use fast shutter speeds (1/1000s minimum for birds), and practice patience. Some of my best shots came from waiting 30+ minutes in one location.
Cities offer unique outdoor photography opportunities where urban and natural elements intersect. Look for flowers growing through sidewalk cracks, trees framing architecture, or birds navigating skyscrapers.
I love shooting in city parks during different seasons. Cherry blossoms in spring, golden leaves in autumn, and snow-covered benches in winter each tell different urban nature stories.
For street photography with natural elements, use wider lenses (24-35mm) to show context. Capture moments of human interaction with nature—people feeding pigeons, children playing in fountains, or commuters walking through tree-lined streets.
Buildings offer endless outdoor photography possibilities beyond typical tourist shots. Focus on how light interacts with architectural surfaces throughout the day.
I’ve spent weeks photographing just one building, discovering new angles as light conditions changed. Look for shadows creating geometric patterns, reflections in glass facades, or weathered textures on old structures.
Visit your subjects at different times. Modern glass buildings transform at sunrise and sunset, while brick or stone buildings look best during midday when textures are most defined.
Community gardens, botanical gardens, and even small neighborhood plots offer concentrated outdoor photography subjects. These planned environments combine human design with natural growth.
In urban gardens, I look for the contrast between structured elements (paths, beds, trellises) and wild growth. Early morning light is often best, as gardens are typically less crowded and the light is softer.
Don’t ignore seasons. Winter gardens have their own beauty—frost on seed heads, snow-covered benches, or stark tree silhouettes against winter skies.
Rain shouldn’t stop your outdoor photography—it should enhance it. Rain creates reflective surfaces, adds atmosphere, and changes how colors appear.
Protect your gear with a rain sleeve or even a plastic bag with a hole for the lens. Look for puddles creating reflections, raindrops on windows, or people with umbrellas creating color splashes against gray backgrounds.
After rain, seek out “petrichor” shots—scenes where the wet ground creates rich, saturated colors. This is especially effective in forests and gardens.
⚠️ Safety First: Never photograph during thunderstorms. Lightning can strike miles away from the storm center. If you hear thunder, seek shelter immediately.
Fog simplifies busy scenes by obscuring distracting backgrounds. This creates moody, minimalist images that focus attention on your primary subject.
I head out early on foggy days—fog often burns off an hour or two after sunrise. Look for subjects that stand out against the fog: lone trees, streetlights, or architectural elements.
In foggy conditions, your camera’s autofocus may struggle. Switch to manual focus and use live view to magnify your subject for precise focusing.
Snow creates a blank canvas that transforms familiar scenes. However, your camera’s meter will try to make snow look gray, not white.
Compensate by adding +1 to +2 stops of exposure. Check your histogram—it should be pushed toward the right side but not clipped. RAW format gives you the most flexibility for snow photography.
Look for contrast in snow scenes: dark tree trunks against white snow, colorful clothing, or footprints creating patterns. Early morning and late afternoon light adds welcome warmth and shadow definition to snowy landscapes.
The rule of thirds divides your frame into a 3×3 grid. Placing key elements along these lines or at their intersections creates more dynamic compositions than centering subjects.
Most cameras and smartphones can overlay this grid on your screen. Practice placing horizons on the top or bottom third line, not through the middle. Position subjects at intersection points for maximum impact.
Once you’ve mastered this rule, learn when to break it. Centered compositions work well for symmetrical scenes or when you want to create a sense of stability.
Leading lines guide viewers through your image, creating depth and directing attention to your main subject. These lines can be roads, paths, rivers, fences, or even shadows.
I look for diagonal lines rather than horizontal ones—they create more dynamic energy. Start lines from corner areas when possible, as this pulls viewers deeper into the frame.
Curved lines (S-curves) are particularly effective. Rivers, winding roads, or pathways can create graceful flow through your composition.
Natural framing adds depth and context to your outdoor photos. Look for elements that can frame your main subject: tree branches, archways, windows, or even rock formations.
When framing, ensure the frame doesn’t overpower your subject. The frame should guide attention to your main subject, not compete with it.
I use a wide aperture (f/2.8-f/4) to blur the frame element while keeping the subject sharp. This creates layers that add dimension to your images.
Adding foreground elements creates a sense of depth in outdoor photographs, especially landscapes. This technique gives viewers a journey through your image—from near to far.
Look for interesting foreground elements: rocks, flowers, water features, or textured ground. Position yourself low to emphasize the foreground and create a stronger sense of depth.
Use small apertures (f/8-f/16) to keep everything from foreground to background in focus. Focus about one-third into the scene for maximum depth of field.
Light painting uses artificial light sources to illuminate subjects during long exposures. This technique works best during twilight or darkness.
You’ll need a tripod, flashlight, and exposures of 10-30 seconds. “Paint” your subject with light during the exposure—move the light constantly to avoid hot spots.
Colored lights or gels over your flashlight add creative effects. I’ve used this technique to illuminate trees, rock formations, and even old buildings at night.
Intentional camera movement (ICM) creates abstract, painterly images by moving your camera during exposure. This technique turns ordinary scenes into artistic impressions.
Use slow shutter speeds (1/4 to 1 second) and move your camera smoothly during exposure. Vertical motion works well for forests, horizontal for seascapes, and circular motions for abstract effects.
ICM takes practice—expect many failures before you get results you like. I recommend trying this in forests with vertical lines or at the beach with horizontal waves.
Panoramas capture wider scenes than a single frame can contain. Most modern cameras and smartphones have panorama modes, but manual creation gives more control.
For panoramas, use manual exposure settings to maintain consistency across frames. Overlap each shot by 30-50%, and keep your camera level as you pan.
Beyond horizontal landscapes, try vertical panoramas of tall trees or waterfalls, or even 360-degree images for immersive experiences. Some of my favorite panoramas tell stories by including multiple related elements in one wide view.
While you can create great outdoor photos with any camera, certain gear helps. I started with a basic DSLR and kit lens—don’t feel you need expensive equipment.
A versatile zoom lens (24-105mm or 18-135mm) covers most situations. Add a 50mm f/1.8 prime lens for low light and portraits—they’re inexpensive and sharp.
For smartphone photographers, consider clip-on lenses. Wide-angle and macro attachments expand your creative possibilities without buying a dedicated camera.
A stable tripod is essential for sharp images, especially in low light or with long lenses. You don’t need an expensive one—stability matters more than weight or features.
I also carry a small beanbag for stabilizing my camera on rocks, car hoods, or other impromptu surfaces. It weighs almost nothing but provides solid support when a full tripod isn’t practical.
Rain covers protect your gear from unexpected weather. A simple plastic bag with a hole for the lens works in a pinch, but dedicated rain covers offer better protection.
Microfiber cloths are essential for cleaning lenses—especially in humid or rainy conditions. I carry at least two, as one inevitably gets dirty or wet.
Problem: Harsh shadows and blown highlights during midday.
Solution: Find open shade, use a diffuser, or embrace high-contrast black and white conversions.
Problem: Wind causes camera shake and subject movement.
Solution: Increase shutter speed, use your body as a windbreak, or embrace motion blur as a creative element.
Problem: Unwanted lens flare when shooting toward the sun.
Solution: Use a lens hood, adjust your angle slightly, or use your hand to block direct sunlight.
Consistency matters more than intensity in outdoor photography. I recommend committing to 15-30 minutes of outdoor shooting daily, even in your own backyard.
Create projects that motivate you: photograph one tree through all seasons, document a local park monthly, or challenge yourself to find beauty in mundane urban settings.
Share your work for feedback and encouragement. Online photography communities provide valuable insights and motivation. Remember: every professional was once a beginner.
For more specialized techniques, check our night sky photography guide to expand your outdoor photography into astrophotography. If you’re interested in wildlife observation, our guide on using binoculars with glasses will help you spot subjects before photographing them.
At Revell Photography, we believe outdoor photography is about seeing the extraordinary in ordinary places. With these 21 ideas and regular practice, you’ll develop a unique vision that transforms how you see the world around you.
The 3/4 rule is likely a confusion with the Rule of Thirds, which divides your frame into a 3×3 grid. Place important elements along these lines or at their intersections rather than centering them. This creates more dynamic and balanced compositions in outdoor photography.
For outdoor portraits, wear colors that complement your surroundings. Earth tones (olive, brown, burgundy) work in natural settings, while blues and greens pop against autumn foliage. Avoid busy patterns that distract from your face. In winter, jewel tones (ruby red, emerald green) create beautiful contrast against snow.
1. Shoot during golden hour for warm, directional light. 2. Use the Rule of Thirds for dynamic compositions. 3. Include foreground interest to create depth. 4. Move around your subject to find the best angle. 5. Pay attention to background elements. 6. Use a small aperture (f/8-f/11) for landscapes. 7. Add a human element for scale in nature shots.
The 20-60-20 rule suggests composing images with 20% foreground, 60% middle ground, and 20% background. This creates balanced depth in landscape photography. However, rules are meant to be broken—dramatic compositions might use different ratios depending on your creative vision.
The rule of 3 in landscape photography typically refers to the Rule of Thirds or including three key elements in your composition (foreground, middle ground, background). This creates visual harmony and depth. Another interpretation is using groups of three elements, as odd numbers often create more dynamic compositions than even numbers.
Remember, great outdoor photography isn’t about exotic locations or expensive gear—it’s about seeing differently. The best camera is the one you have with you, whether that’s a professional DSLR or your smartphone.
I’ve found that the photographers who improve fastest aren’t those with the best equipment, but those who shoot consistently. Take your camera everywhere, even for mundane errands. You never know when inspiration will strike.
The most rewarding aspect of outdoor photography is how it changes how you see the world. You’ll start noticing light patterns, interesting textures, and fleeting moments that others miss. This heightened awareness enriches not just your photography, but your entire experience of being outdoors.
Start with one or two ideas from this list, practice them until they become second nature, then add more techniques. Before you know it, you’ll have developed a unique style that reflects how you see the world.
Now grab your camera and head outside—the best photograph of your life is waiting to be taken today.