Light Photography Ideas: 15+ Techniques for Stunning Photos
Master the art of light photography with 15+ creative techniques using natural light, simple setups, and dramatic effects. Transform your…
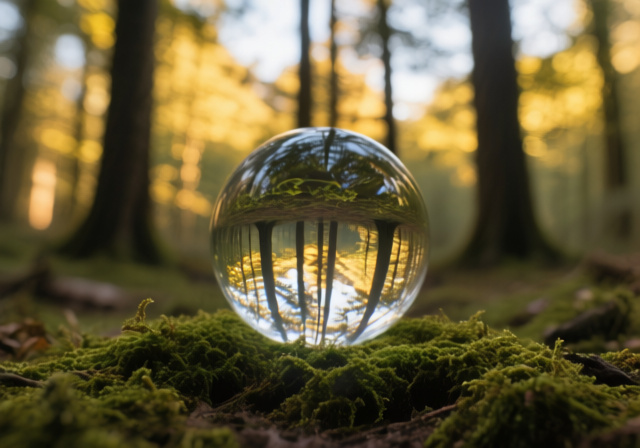
Lensball photography opens up a world of creative possibilities that transform ordinary scenes into extraordinary images. As someone who’s spent countless hours experimenting with this fascinating technique, I’ve discovered that a simple glass sphere can turn a mundane landscape into a captivating piece of art.
What is lensball photography? It’s a creative technique that uses a glass or crystal sphere to capture refracted images, creating a fisheye effect that shows the scene upside down within the ball. This method works through refraction – when light passes through the denser glass sphere, it bends and creates an inverted image of everything behind the ball.
What makes lensball photography so compelling is its ability to capture entire environments in a single frame. The sphere acts as a portable wide-angle lens, compressing 180-degree views into a circular image that offers a completely different perspective on familiar scenes. I’ve seen photographers capture everything from sprawling cityscapes to intimate portraits, all through this magical glass orb.
In this comprehensive guide, I’ll share everything you need to know to master lensball photography. You’ll learn the science behind refraction, essential equipment, fundamental techniques, and 15 creative ideas to spark your imagination. We’ll also troubleshoot common problems and explore both indoor and outdoor possibilities. For more photography tips and guides, be sure to check out our other resources.
The magic behind lensball photography lies in the physics of refraction. When light travels from air into the denser glass of the sphere, it slows down and bends. This bending, combined with the spherical shape, creates an inverted image that appears within the ball.
Think of your lensball as a miniature fish-eye lens. Just like how a straw looks bent in a glass of water, light rays bend when they enter the glass sphere at different angles. The curved surface means each light ray hits at a different angle, creating the characteristic wide-angle, distorted view that makes lensball images so unique.
The inversion effect is natural – your lensball will always show the world upside down. Some photographers prefer to flip the image during post-processing, while others embrace the surreal inverted perspective as part of the artistic effect. I’ve found that keeping the horizon level within the ball creates a more pleasing composition, even though the scene itself is inverted.
The quality of your lensball dramatically affects the final image. High-quality optical glass produces cleaner, sharper refractions with fewer distortions. Cheaper versions might have bubbles, imperfections, or uneven thickness that can create unwanted artifacts in your images. This is why investing in a quality lensball makes a significant difference in your results.
Refraction: The bending of light as it passes from one medium to another with different density, such as from air into glass. This phenomenon is what creates the inverted image effect in lensball photography.
Getting started with lensball photography doesn’t require a massive investment, but having the right equipment makes a significant difference in your results. Here’s what you’ll need to begin your journey:
The Lensball: This is your most important piece of equipment. Lensballs come in various sizes, typically ranging from 60mm to 100mm in diameter. The 80mm size strikes the best balance between portability and impact – it’s large enough to capture detailed scenes but small enough to carry comfortably. I learned this after struggling with a massive 150mm ball that was too heavy for practical use.
Camera: While any camera with manual focus capabilities works, DSLR and mirrorless cameras give you more control over settings. The key requirement is the ability to switch to manual focus, as autofocus rarely works properly when trying to focus on the sphere’s surface. I’ve seen photographers get great results with everything from high-end mirrorless cameras to older DSLRs.
Lens Selection: A macro lens is ideal for lensball photography as it allows you to get close while maintaining sharp focus. If you don’t have a macro lens, any lens with a close focusing distance will work. Prime lenses with wider apertures (f/2.8 or wider) are excellent for creating that beautiful background blur that makes the lensball pop.
| Lensball Size | Best For | Weight | Portability |
|---|---|---|---|
| 60mm | Travel, beginners | ~250g | Excellent |
| 80mm | All-around use | ~500g | Good |
| 100mm | Studio, detailed shots | ~800g | Fair |
| 150mm+ | Professional work | ~1500g+ | Poor |
Support Gear: A sturdy tripod is essential, especially for longer exposures or when you need precise positioning. I also recommend a lensball stand or holder – these prevent the ball from rolling and make positioning much easier. After watching my first lensball roll off a table and shatter, I never shoot without proper support.
Cleaning Supplies: Lensballs attract fingerprints and dust like magnets. Keep a microfiber cloth and lens cleaning solution handy. Even tiny smudges can ruin your shots, so make it a habit to clean your sphere before each session.
⏰ Time Saver: Store your lensball in a padded pouch or case. This prevents scratches and makes it easier to transport safely to shooting locations.
Master these fundamental techniques to create stunning lensball images that stand out from the crowd.
Ready to explore the creative possibilities of lensball photography? Here are fifteen ideas that will inspire your next shoot, organized by difficulty and location.
✅ Pro Tip: Keep a shot list of these ideas and challenge yourself to try one new technique each week. Building variety into your practice accelerates improvement and keeps your creative energy high.
Indoor lensball photography presents unique challenges but offers incredible creative control. After transforming my living room into a makeshift studio during lockdown, I discovered techniques that professional photographers use for stunning indoor results.
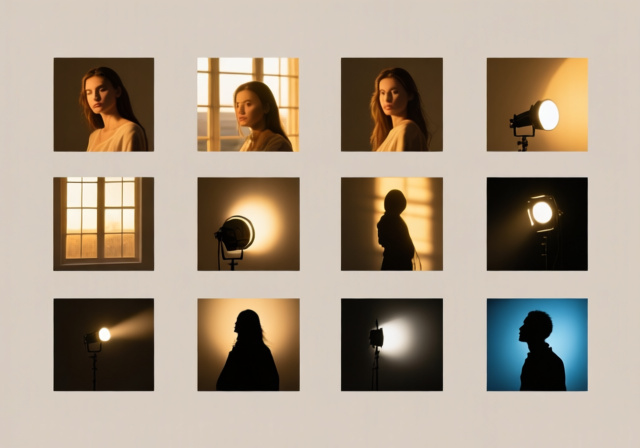
Lighting is everything for indoor lensball photography. Position your main light source at a 45-degree angle to the lensball to avoid direct reflections while illuminating what’s captured inside. A single window can provide beautiful soft light, but don’t be afraid to add artificial lights. I use two inexpensive LED panels – one as key light and another as fill – to create depth and dimension in my indoor shots.
Background selection becomes more critical indoors because you have limited space to work with. Choose backgrounds with interesting textures or patterns that will look compelling when refracted. Bookshelves, textured walls, or even a well-arranged corner of your room can provide excellent subjects for your lensball to capture.
Space management is crucial indoors. You need enough room between your lensball and background subjects to capture them properly. If you’re working in a small space, use wider angles or mirrors to create the illusion of depth. I’ve discovered that shooting into mirrors placed strategically can double the effective distance and create fascinating infinity effects within the sphere.
Control reflections carefully indoors. Unlike outdoor settings where you can move around freely, indoor spaces often have reflective surfaces that complicate shots. Use black cards or fabric to block unwanted reflections from windows, mirrors, or glossy surfaces. I keep a set of 12×12 inch black foam boards specifically for this purpose.
For more advanced indoor techniques, consider incorporating props that interact with the lensball. Transparent objects like colored glass vases or prisms placed near the sphere can create additional refractions and light effects. This approach takes practice but produces truly unique images that stand out from typical lensball photos.
Post-processing can transform good lensball photos into extraordinary ones. After spending years refining my workflow, I’ve developed techniques that enhance the natural magic of lensball photography without making it look artificial.
The first decision you’ll face is whether to flip the inverted image inside the ball. There’s no right answer – it’s an artistic choice. I keep about 70% of my lensball images inverted because the surreal quality adds to the appeal. When I do flip images, I use Photoshop’s Transform tool with precise 180-degree rotation to maintain perfect symmetry.
Contrast adjustments are essential for lensball images. The refraction process often reduces contrast, especially in the ball itself. Apply local contrast adjustments to make the image inside the ball pop while maintaining natural-looking tonal range. I use Lightroom’s Clarity slider conservatively (usually between +10 and +20) to enhance details without overprocessing.
Color correction deserves special attention. Glass can introduce slight color casts, particularly noticeable when comparing the scene inside the ball with the surroundings. Use a reference point – something that appears both inside and outside the sphere – to ensure consistent color. I create separate adjustment layers for the ball and background when necessary to achieve perfect color harmony.
Sharpening requires a delicate touch. Apply more sharpening to the image inside the ball than the surroundings to compensate for the softening effect of refraction. I use Lightroom’s Masking feature to sharpen only the sphere’s contents, leaving the background with more subtle treatment.
Remove distractions carefully. Dust spots on the lensball, unwanted reflections, or support stands can detract from your image. Use Photoshop’s Content-Aware Fill or Clone Stamp tool with a small, soft brush for seamless removal. Be subtle – over-editing can make your image look artificial.
Finally, consider creative enhancements. Subtle vignettes can draw attention to the lensball, while graduated filters can balance exposure between the sphere and its surroundings. I often add a slight warm tone to lensball images shot in cool light to enhance the magical quality of the refraction.
Even experienced photographers encounter challenges with lensball photography. After helping dozens of beginners overcome these issues, I’ve compiled solutions to the most common problems you’ll face.
| Problem | Cause | Solution |
|---|---|---|
| Blurry images inside the ball | Incorrect focus point or shallow depth of field | Use manual focus, set focus point on ball surface, increase aperture to f/5.6-f/8 |
| Camera reflected in the sphere | Shooting angle too direct | Move to 45-degree angle, use longer lens, position behind obstacles |
| Image appears too dark inside ball | Light loss through refraction | Increase exposure compensation (+1 to +2 EV), use brighter lighting |
| Unwanted reflections | Shiny surfaces or direct light sources | Reposition, use polarizing filter, block reflections with black cards |
| Ball keeps rolling away | Uneven surface or wind | Use lensball stand, create depression in surface, add weight beneath |
| Dust and fingerprints on ball | Handling and environmental exposure | Clean with microfiber cloth before each shot, handle with gloves |
| Chromatic aberration in ball | Low-quality glass or bright edges | Use higher quality lensball, stop down aperture, remove in post-processing |
| Distorted horizon lines | Ball not level or camera angle | Use bubble level, position camera at ball height, straighten in post |
Safety considerations deserve special attention. Lensballs can act as magnifying glasses in direct sunlight, creating fire hazards. Never leave your lensball unattended in bright sun, and be especially careful around flammable materials. I once witnessed a lensball start smoldering a wooden table after just 15 minutes in direct sun – a lesson in safety I’ll never forget.
Weather presents its own challenges. Wind is the enemy of lensball photography outdoors – even a gentle breeze can cause movement or knock the ball over. On windy days, I use a weighted base or position the ball in protected areas. Rain can befriend or foe – droplets on the sphere create interesting effects, but heavy rain makes focusing difficult.
Storage and transport problems plague many photographers. Lensballs are heavy and fragile. Invest in a proper padded case, and consider removing the ball from your camera bag when traveling to prevent damage to other equipment. I learned this after a cracked lens filter from an improperly stored sphere.
⚠️ Important: Always check your lensball for cracks or chips before use. Even small imperfections can create sharp edges that pose safety risks and affect image quality.
Start with manual focus on the ball, aperture between f/2.8-f/8, ISO as low as possible, and shutter speed adjusted for proper exposure. Use live view to check focus precisely, and consider using a tripod for stability especially at narrower apertures.
Use a lensball stand or holder designed for this purpose. If you don’t have one, create a small depression in soft surfaces, place the ball on a non-slip mat, or use a small amount of removable putty underneath. For outdoor shooting, look for natural depressions or bring a small weighted base.
Blurry lensball photos usually result from incorrect focus or movement. Switch to manual focus and concentrate on the ball’s surface, use a faster shutter speed or tripod to prevent movement, and ensure your lensball is clean. Also check that you’re not too close – respect the minimum focusing distance of your lens.
The 80mm size offers the best balance of portability and impact for most photographers. 60mm balls are great for travel but may not capture as much detail. 100mm and larger provide impressive results but become heavy and impractical for field use. Consider your typical shooting scenarios when choosing.
While a macro lens is ideal, any lens with manual focus capabilities works. Prime lenses with wide apertures (f/2.8 or wider) are excellent for creating background blur. The key requirement is the ability to focus closely enough to capture detail within the sphere. Extension tubes can help if your lens doesn’t focus close enough naturally.
Position yourself at an angle to the ball rather than straight-on, use a longer lens to increase distance, wear dark clothing to minimize your reflection, and consider using a polarizing filter to reduce glare. Sometimes strategic positioning of the ball near darker backgrounds can also help minimize distracting reflections.
Lensball photography rewards patience and experimentation. When I first started, I was frustrated by blurry images and unwanted reflections. But after practicing these techniques and learning from my mistakes, I now create images that consistently impress viewers and clients alike.
Remember that mastering lensball photography is a journey, not a destination. Each session teaches you something new about light, composition, and creative vision. Don’t be afraid to make mistakes – some of my most successful shots came from happy accidents when something didn’t go according to plan.
For those interested in expanding their night photography techniques, lensball photography offers exciting possibilities under starry skies or city lights. The refraction effect can create magical results with artificial lighting that regular photography simply can’t capture.
The creative possibilities with lensball photography are truly endless. Whether you’re shooting landscapes, portraits, or abstract compositions, the glass sphere opens up new ways of seeing the world. Start with the techniques outlined in this guide, then let your imagination guide you toward creating unique images that reflect your personal vision.